---
description: OneAI Documentation
tags: Case Study, EN
---
[OneAI Documentation](/s/user-guide-en)
# AI Maker Case Study - Pedestrian Attribute Recognition
[TOC]
## 0 Deploy Pedestrian Attribute Recognition Application
This example will use the template **`pedestrian-attribute-recognition`** provided by AI Maker for pedestrian attribute recognition. The template pre-defines the image **`pedestrian-attribute-recognition:v1`**, environment variables, programs and other settings for pedestrian attribute recognition training and inference tasks to help you quickly develop your own pedestrian attribute recognition application.
The main steps are as follows:
* [**Introduction**](#1-Introduction)
Overview of the process and applicable scenarios of pedestrian attribute recognition task, and two sets of pedestrian attribute recognition datasets for academic use.
* [**Prepare the Dataset**](2-Prepare-Dataset-And-Upload)
At this stage, we prepare the image set for the computer to learn and upload to the specified location.
* [**Train the Model**](#3-Training-the-Model)
At this stage, the training job using TensorFlow as the framework will be run, and the trained model will be stored.
* [**Inference Service**](#4-Inference-Service)
At this stage, the stored model will be deployed to the inference service for inference, and we will demonstrate how to use the Python language to send inference requests in [**Jupyter Notebook**](#5-Perform-Image-Recognition).
After completing this example, you will have learned to:
1. Familiarize yourself with AI Maker functions and create jobs for each stage.
2. Use AI Maker's built-in templates to create related jobs.
3. Use the storage service and upload data.
4. Perform object recognition through Jupyter Notebook.
<br>
## 1. Introduction
The purpose of Pedestrian Attribute Recognition is to find out the features of the target person, which is the so-called attributes. For example, if you input a picture of a pedestrian, you can output the attributes of the person, which can be defined by yourself, such as gender and age range, upper body clothing features, lower body pants features and colors, whether wearing hats, backpacks, handbags, and more. Through such recognition, the attributes of the pedestrian can be understood. The following example shows the attribute tags of this pedestrian.

Pedestrian attribute recognition technology can be applied to smart traffic or security, such as searching for pictures of pedestrians that match the features in the image database to assist in locating elderly people with dementia, lost children, or police deploying intersection monitors to track down suspects or specific people.
Currently, there are many academic pedestrian attribute databases, each of which contains many different attributes, some of which are as detailed as hundreds of attributes, such as [**Market-1501 Dataset**](http://zheng-lab.cecs.anu.edu.au/Project/project_reid.html) and [**PETA**](http://mmlab.ie.cuhk.edu.hk/projects/PETA.html), two pedestrian attribute databases for academic research.
## 2. Prepare Dataset And Upload
Before you start, please prepare the dataset you want to train, or download the [**Market-1501 Dataset**](http://zheng-lab.cecs.anu.edu.au/Project/project_reid.html) or [**PETA**](http://mmlab.ie.cuhk.edu.hk/projects/PETA.html) dataset. Unzip it and select the required number of pictures and store them according to the specified directory structure for subsequent development.
:::info
:bulb: **Tips:** The amount of training data will affect the accuracy of the model. Please prepare at least 100 to 500 images. If you want to achieve better accuracy (above 90%), you need to prepare more than 10,000 images.
:::
### 2.1 Dataset Structure And Preparation
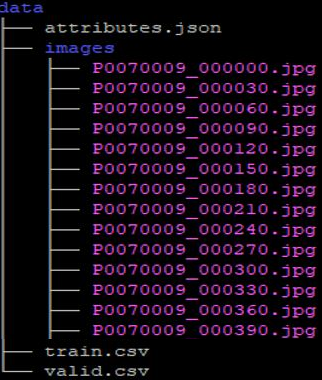
This section uses the following example to introduce the dataset structure. First, you need to prepare three files and a dataset: **attributes.json**, **train.csv**, **valid.csv** and the image dataset **images**. The file structure is shown in the figure below. In the **images** directory folder are all the image files that need to be used.
:::info
:bulb: **Tips:** Please make sure the spelling of the **images** directory is correct, because in the following steps, the **images** folder will be used and the images in this folder will be read for training and validation.
:::
The contents of train.csv and valid.csv contain the image file names of the training and validation datasets and the pedestrian attribute tags. The first line is the titles of the pedestrian attributes. In this example, it is **`images`**, and five attributes. Each line after that is the image file name and pedestrian attributes according to the specific title. **1** for yes, **0** for no, separated by commas.
train.csv data content (example):
```=1
images,adult,female,hat,upperShort,lowerShort
P0070009_000000.jpg,1,0,0,1,1
P0070009_000030.jpg,1,1,0,1,0
P0070009_000060.jpg,1,1,0,1,1
P0070009_000090.jpg,1,1,0,0,1
P0070009_000120.jpg,1,1,0,0,1
...
```
As shown in the above dataset structure images and **train.csv** example, the attributes of **P0070009_000000.jpg** are: adult/male/no hat/long sleeves/long pants. Therefore, the five features **`adult,female,hat,upperShort,lowerShort`** in **train.csv** are **```1,0,0,1,1```** respectively.
After preparing the training dataset **train.csv**, please prepare another validation dataset **valid.csv** according to the same structure.
The content of **attributes.json** is the output of the inference service, and the results of each of the five features are written in the **attributes.json** file. Since there are only two results for each feature, there can also be only two types in the output. For example, the output feature of `adult` is `child` or `adult`, and so on for other features.
Content of **attributes.json** (example):
```json
{
"adult": ["age",["child", "adult"]],
"female": ["gender",["male", "female"]],
"hat" : ["hat",["NO", "YES"]],
"upperShort": ["upperShort",["long", "short"]],
"lowerShort": ["lowerShort",["long", "short"]]
}
```
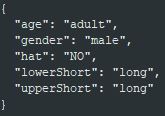
The following figure shows the result after image recognition. You can design the content of **attributes.json** according to this format.
### 2.2 Upload Your Own Dataset
#### 2.2.1 Create A Bucket
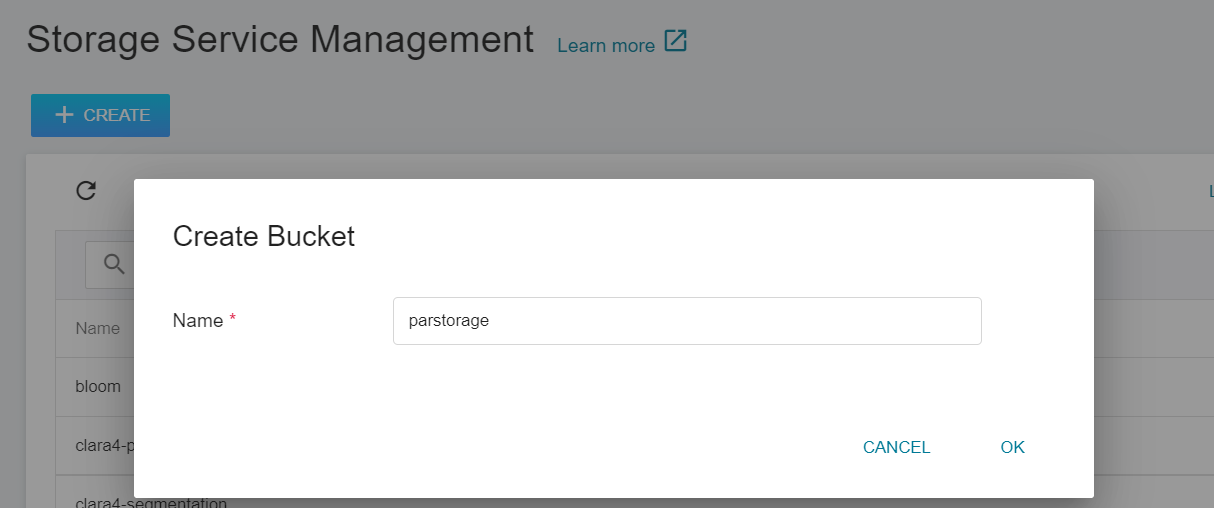
Once the [**Dataset**](#2-prepare-dataset-and-upload) is prepared, select **Storage Service** from the OneAI service list menu, enter the Storage Service Management page, and then click **+CREATE** to add a bucket such as **`parstorage`**. This bucket is used to store our dataset.
#### 2.2.2 View Bucket
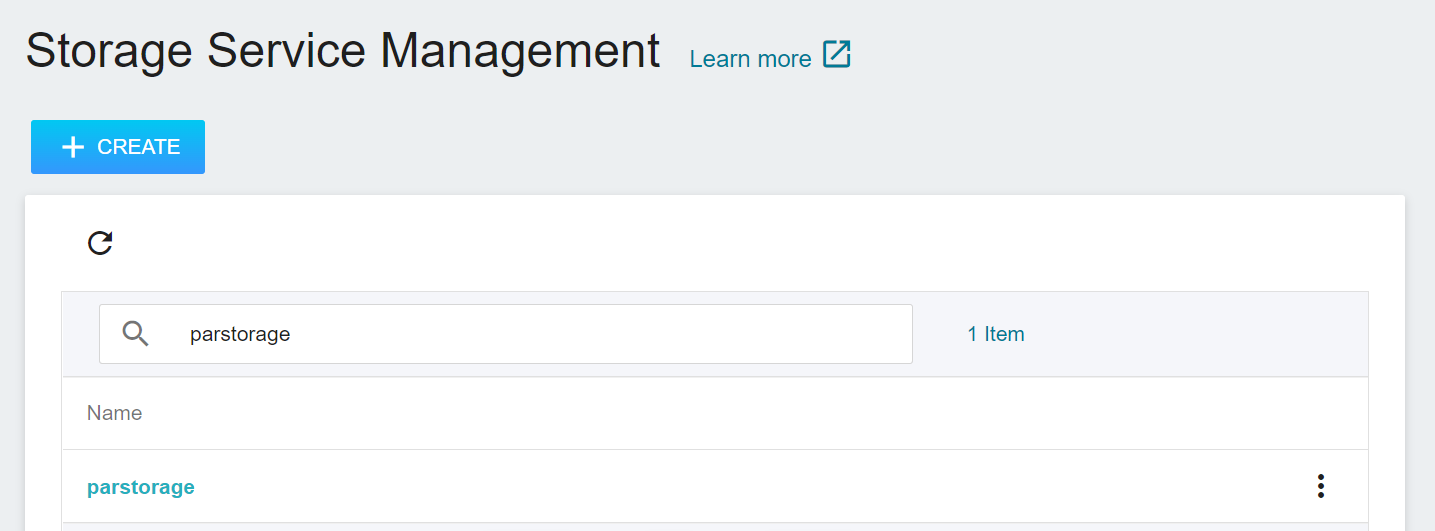
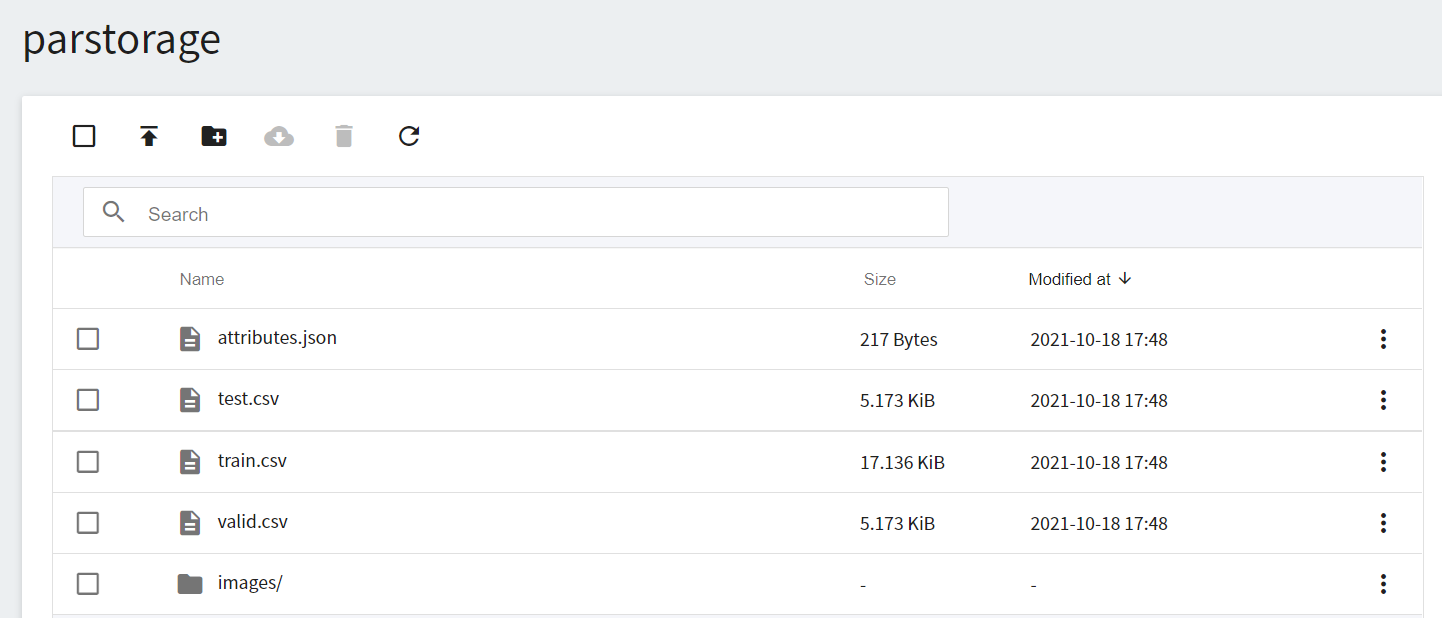
After the bucket is created, go back to the Storage Service Management page, and you will see that the bucket has been created. Click the created bucket **`parstorage`** to start uploading the dataset.
#### 2.2.3. Upload Your Own Dataset
After completing the above steps, we can proceed to store our own dataset in the bucket. If the dataset is not large, you can directly click Upload and drag and drop the dataset to upload. If the dataset is too large, you can upload it folder by folder; or use third-party software such as [**S3 Browser**](http://s3browser.com/) or [**Cyberduck**](https://cyberduck.io/) to upload. Once the upload is complete, the results displayed on the page are as follows:
## 3. Train the Model
After completing [**Prepare Dataset and Upload**](#2-Prepare-Dataset-and-Upload), this section describes how to set up training jobs and save the trained model for future testing.
### 3.1 Create Training Jobs
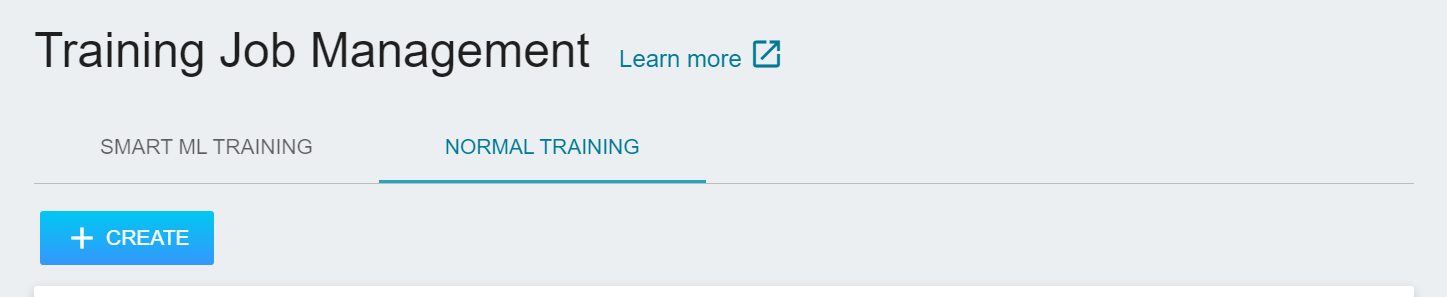
Select **AI Maker** from the OneAI service list, and then click **Training Jobs**. After entering the training job management page, click **+CREATE** to add a training job.
The creation of training jobs involves 5 steps:
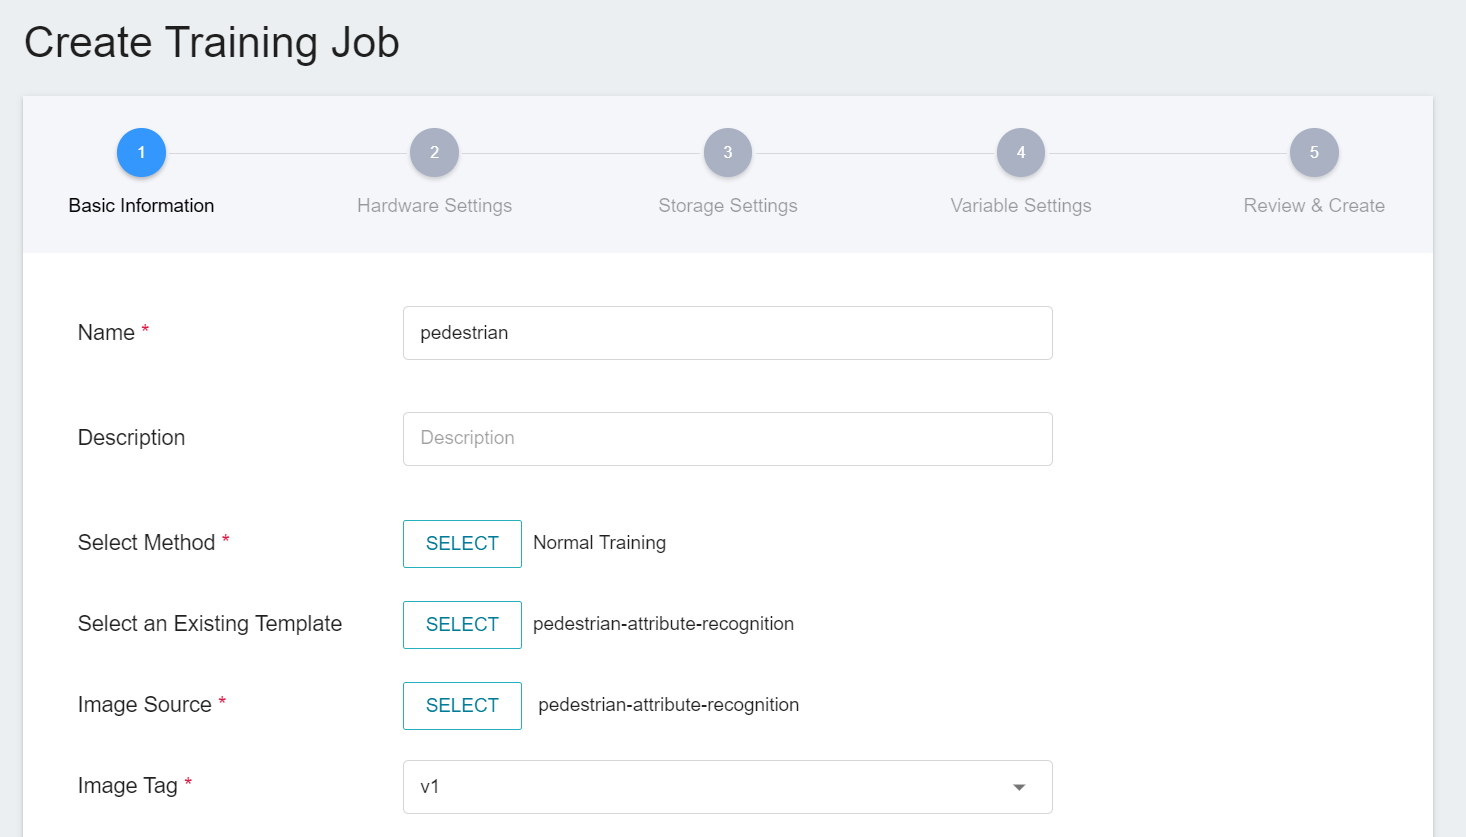
1. **Basic Information**
The first step is to set the basic information, enter the name, description, selection method in sequence, and select the **`pedestrian-attribute-recognition`** template we provide for pedestrian attribute recognition to bring in the image **`pedestrian-attribute-recognition:v1`** and various settings such as environment variables. The actual setting screen is as follows:
2. **Hardware Settings**
Select the appropriate hardware resource from the list with reference to the current available quota and training program requirements. However, it should be noted that the machine learning framework used in the image of this example is tensorflow-gpu, so when selecting hardware, please select the specification that includes GPU.
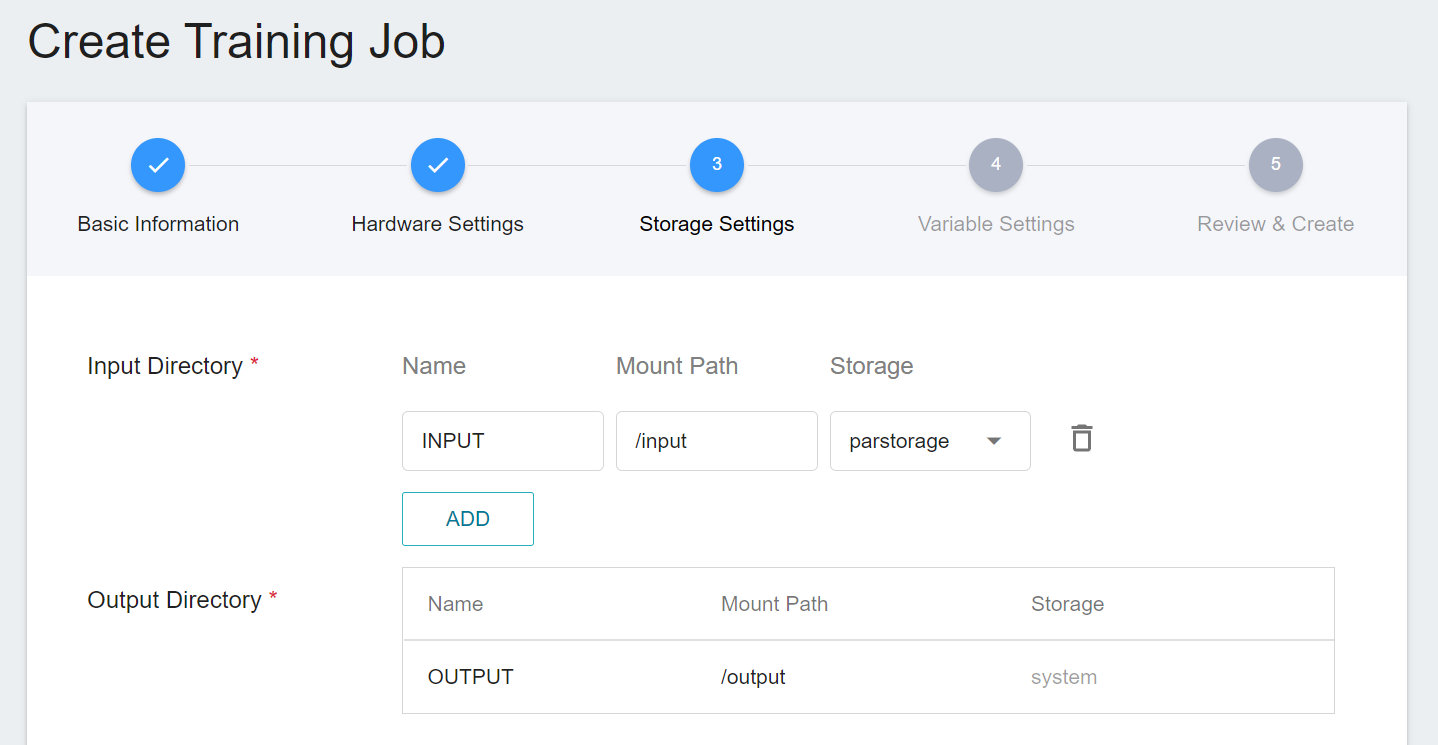
3. **Storage Settings**
This stage is to mount the bucket where our training data is stored into a container. The mount path and environment variables are already set in the template. Here, you only need to select the bucket **`parstorage`** created in the basic information.
4. **Variable Settings**
The next step is to set environment variables and commands. The description of each field is as follows:
| Field name | Description |
| -------- | -------- |
| Environment variable | Enter the name and value of the environment variables. The environment variables here include settings related to the training execution as well as the parameters required for the training network. |
| Target Parameter | After training, a value will be returned as the final result. Here, the name and target direction are set for the returned value. For example, if the returned value is the accuracy rate, you can name it acc (abbreviation for accuracy) and set its target direction to the maximum value; if the returned value is the error rate, you can name it error and set its direction to the minimum value. |
| Command | Enter the command or program name to be executed. For example: `cd /workspace/parpackage; python train.py`.|
However, because we have applied the **`pedestrian-attribute-recognition`** template when filling in the basic information, these commands and parameters will be automatically imported.
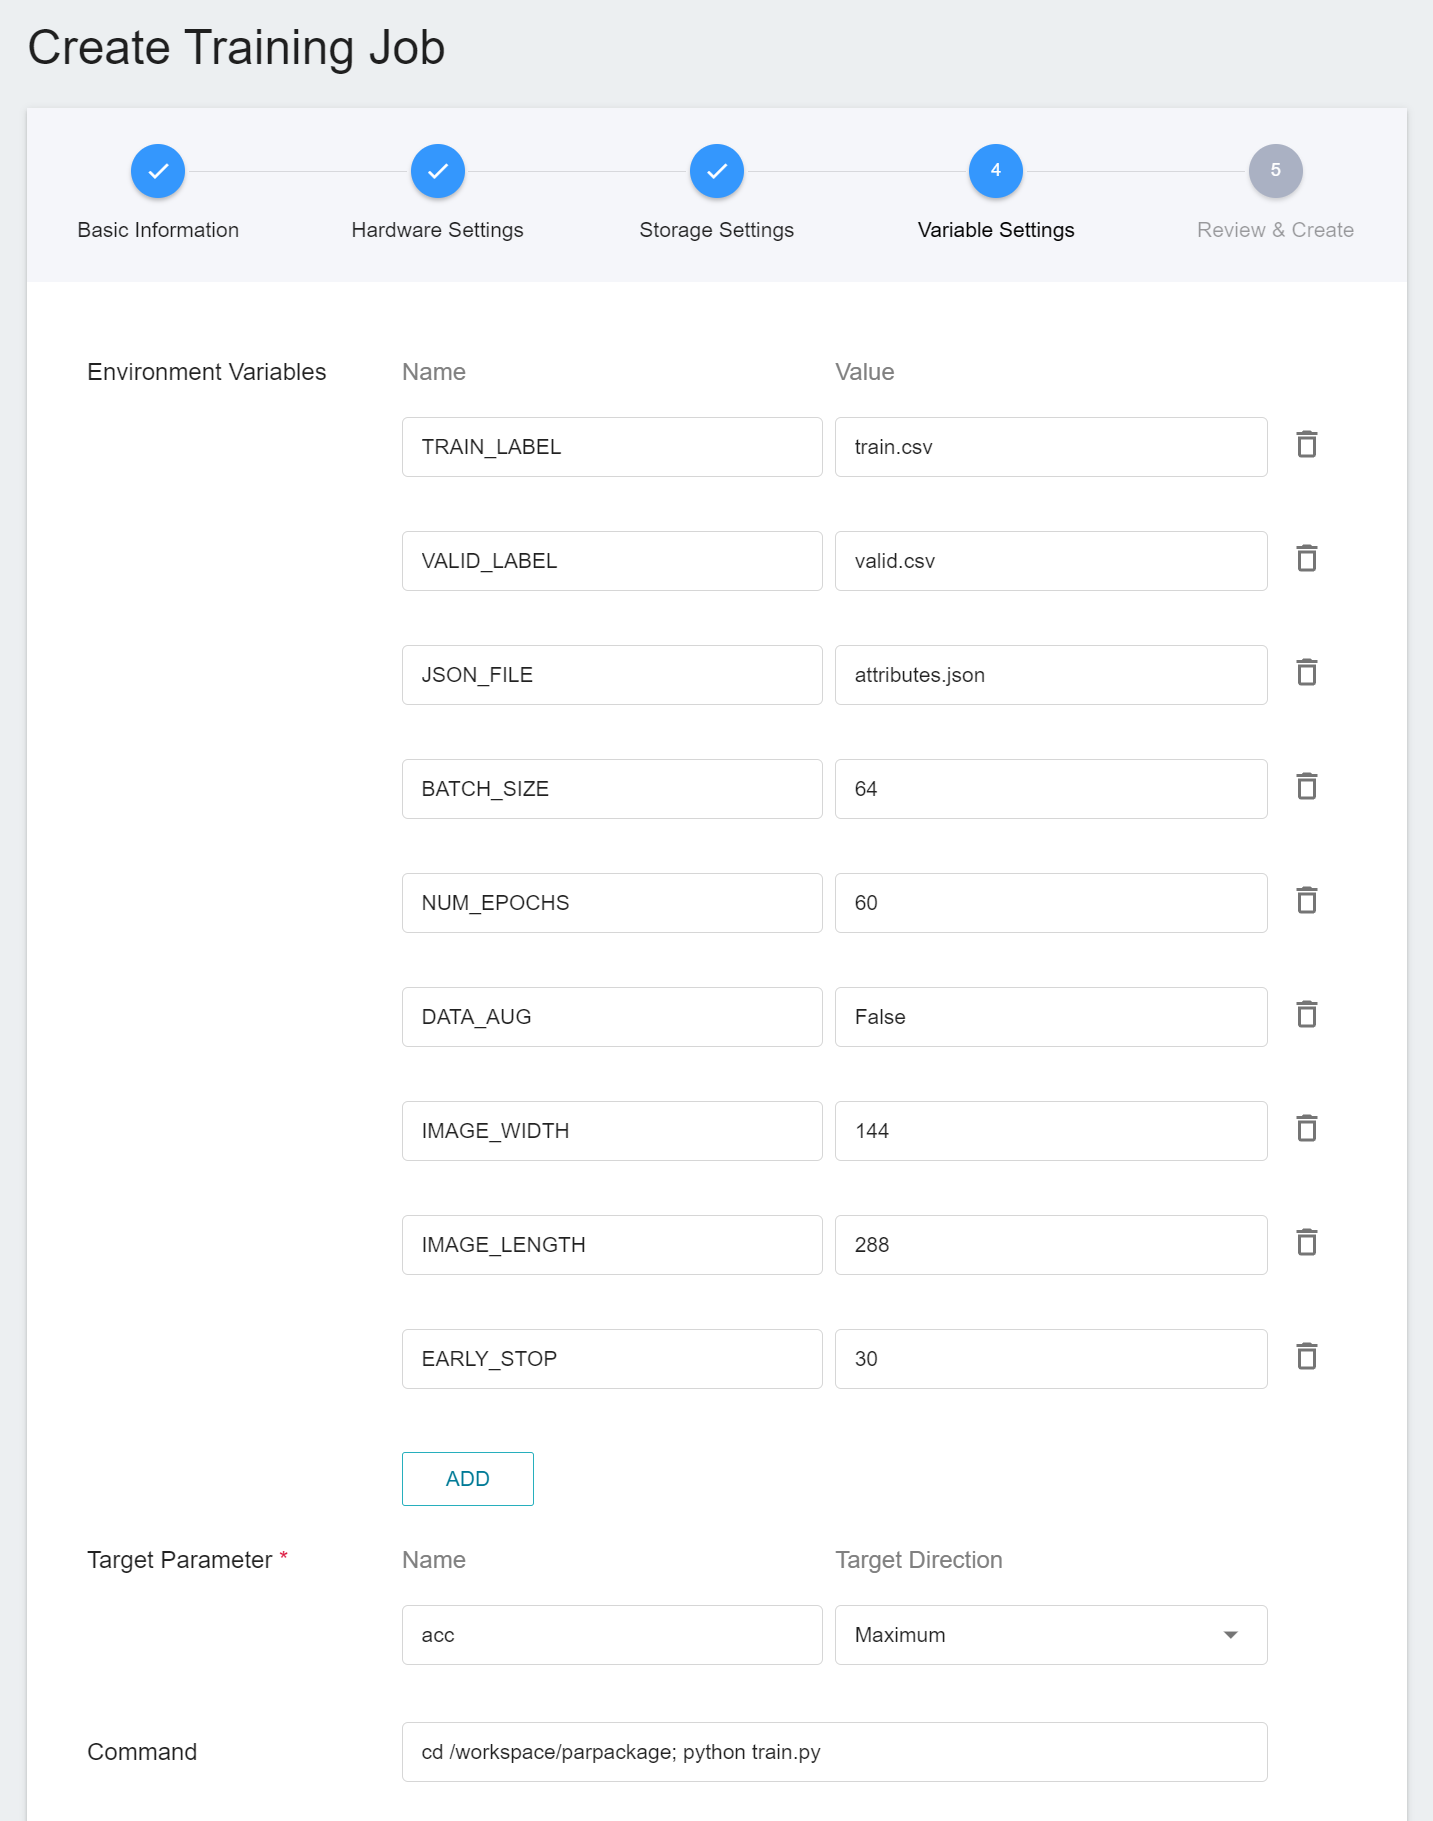
The setting values of environment variables can be adjusted according to your development needs. See the table below.
| Variable | Default | Description |
| -------- | -------- | -------- |
|TRAIN_LABEL|train.csv|The file name corresponding to the training dataset and tag file. The image file name and feature tags are separated by commas in the file content.|
|VALID_LABEL|valid.csv|The file name corresponding to dataset validation and tag file. The image file name and feature tags are separated by commas in the file content.|
|JSON_FILE|attributes.json|Inference result output format file.|
| BATCH_SIZE | 64 | The size of each batch of data, it should be not larger than the total number of images in the dataset. |
| NUM_EPOCHS | 100 | The number of training sessions for all samples in the specified training set.|
|DATA_AUG|False|Data augmentation. The augmentation methods include scaling, rotation, cropping, noise addition, and affine transformation.|
|EARLY_STOP|30|This number means that the training program will be stopped if the validation set accuracy is not increased by several consecutive training sessions and the number of training sessions is less than NUM_EPOCHS.|
|IMAGE_WIDTH|144|Enter the width of the image.|
|IMAGE_LENGTH|288|Enter the length of the image.|
5. **Review & Create**
Finally, confirm the entered information and click CREATE.
### 3.2 Start A Training Job
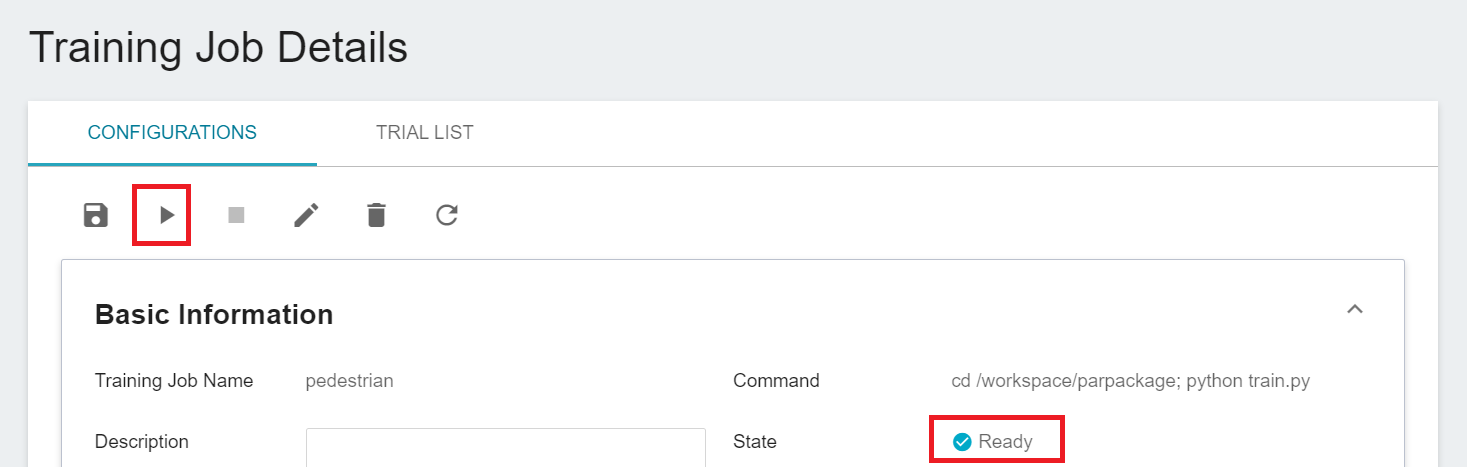
After completing the setting of the training job, go back to the training job management page, and you can see the job you just created. Click the job to view the detailed settings of the training job.
If the job state is displayed as **`Ready`** at this time, you can click **START** execute the training job.
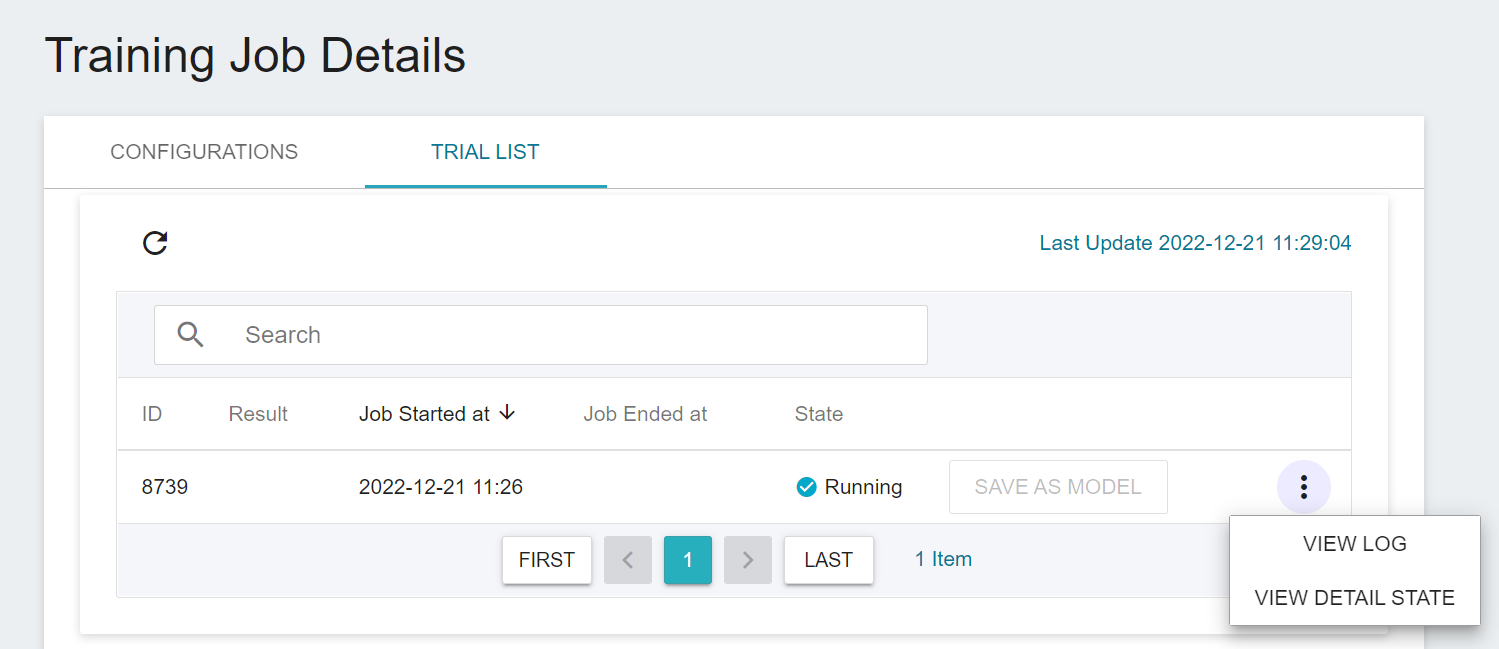
Once started, click the **Trial List** tab above to view the execution status and schedule of the job in the list. During training, you can click **VIEW LOG** or **VIEW DETAIL STATE** in the list on the right of the job to know the details of the current job execution.
### 3.3 View Training Results And Save Model
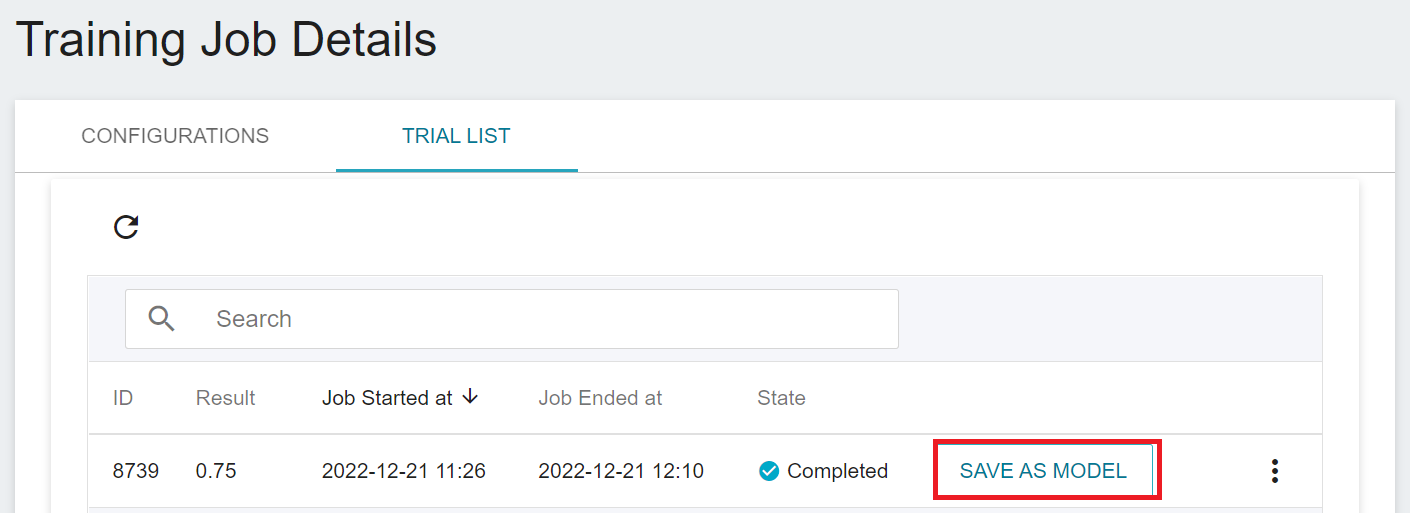
After the training job is completed, the job state in the Trial List page will change to **`Completed`** and the result will be displayed. Observe the scores in the list, pick out the expected results, and store them in the model repository; if there are no expected results, readjust the values or value ranges of environmental variables and hyperparameters.
Below is a description of how to save the expected model to the model repository:
1. **Click SAVE AS MODEL**
Click the **SAVE AS MODEL** button to the right of the training result you want to save.
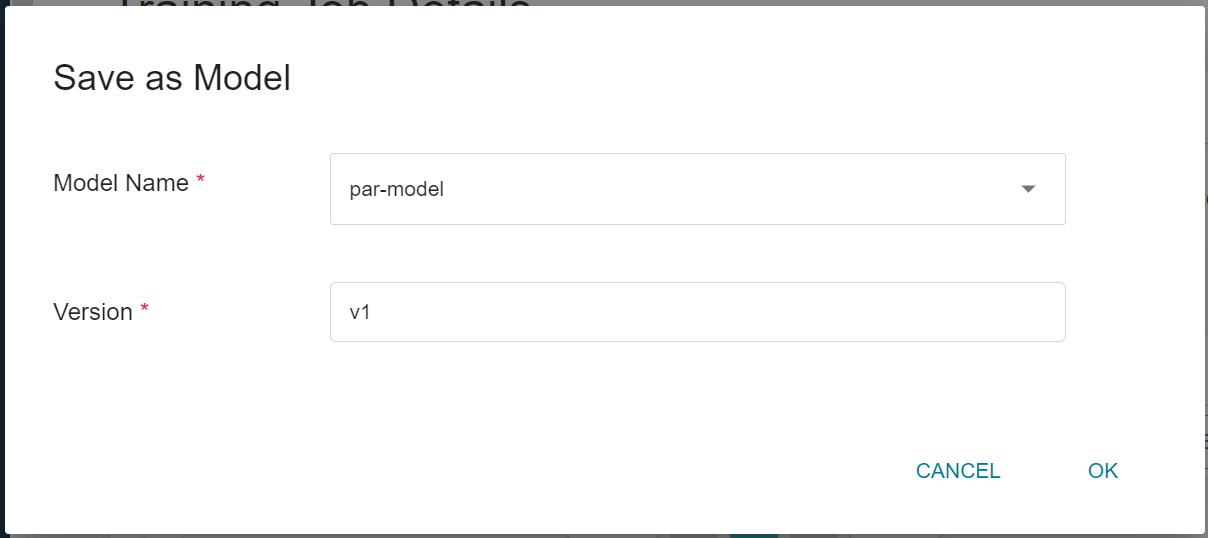
2. **Enter the Model Name And Version Number**
A dialog box will appear, follow the instructions to enter the model name and version, and click OK when finished.
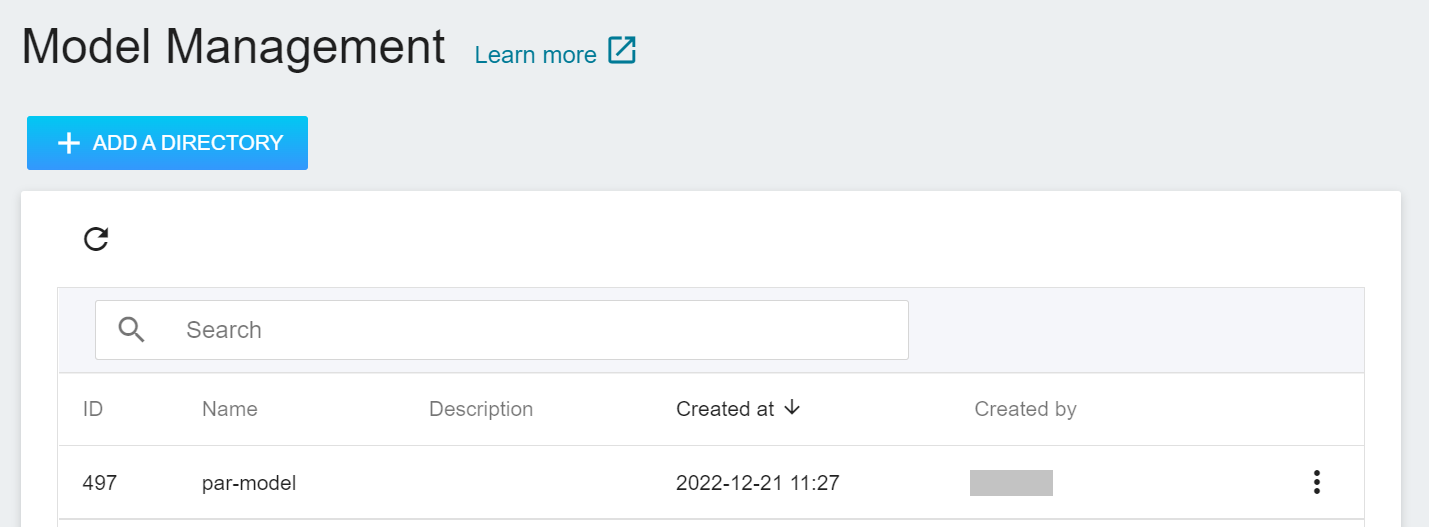
3. **View the Model**
Select **AI Maker** from the OneAI service list, and then click **MODEL**. After entering the model management page, you can find the model in the list.
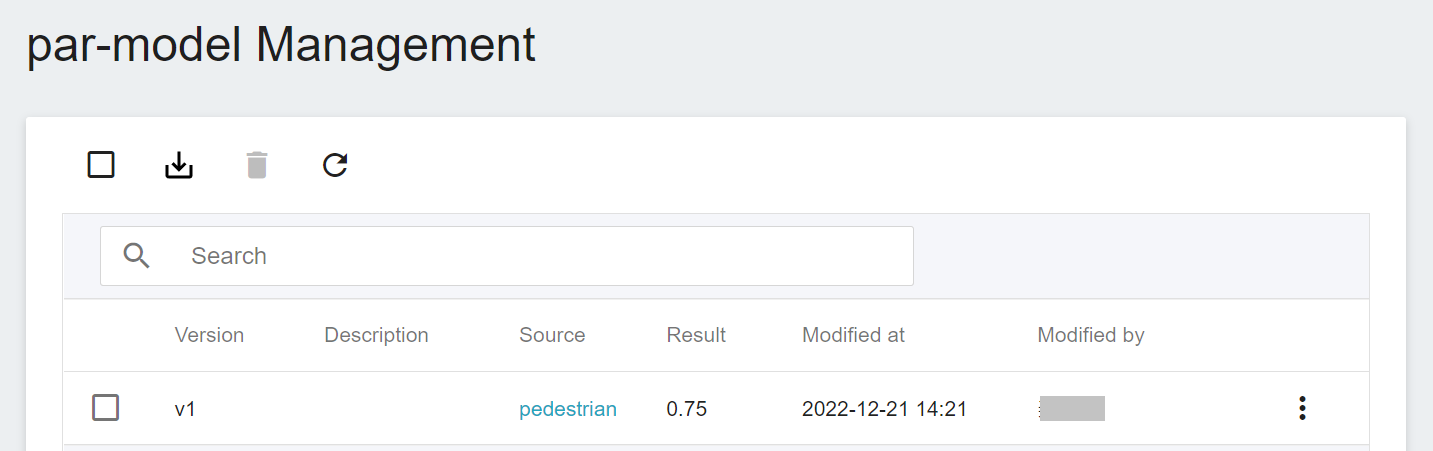
Click the model to enter the version list of the model, where you can see all the version numbers of the stored model, the corresponding training jobs and results... and other information.
## 4. Inference Service
Once you have trained a classification model and stored a suitable model, you can then deploy the model as a web service using the **Inference Feature** for an application or service to perform inference.
### 4.1 Create Inference
Select **AI Maker** from the OneAI service list, then click **Inference** to enter the inference management page, and click **+CREATE** to create an inference service. The steps for creating the inference service are described below:
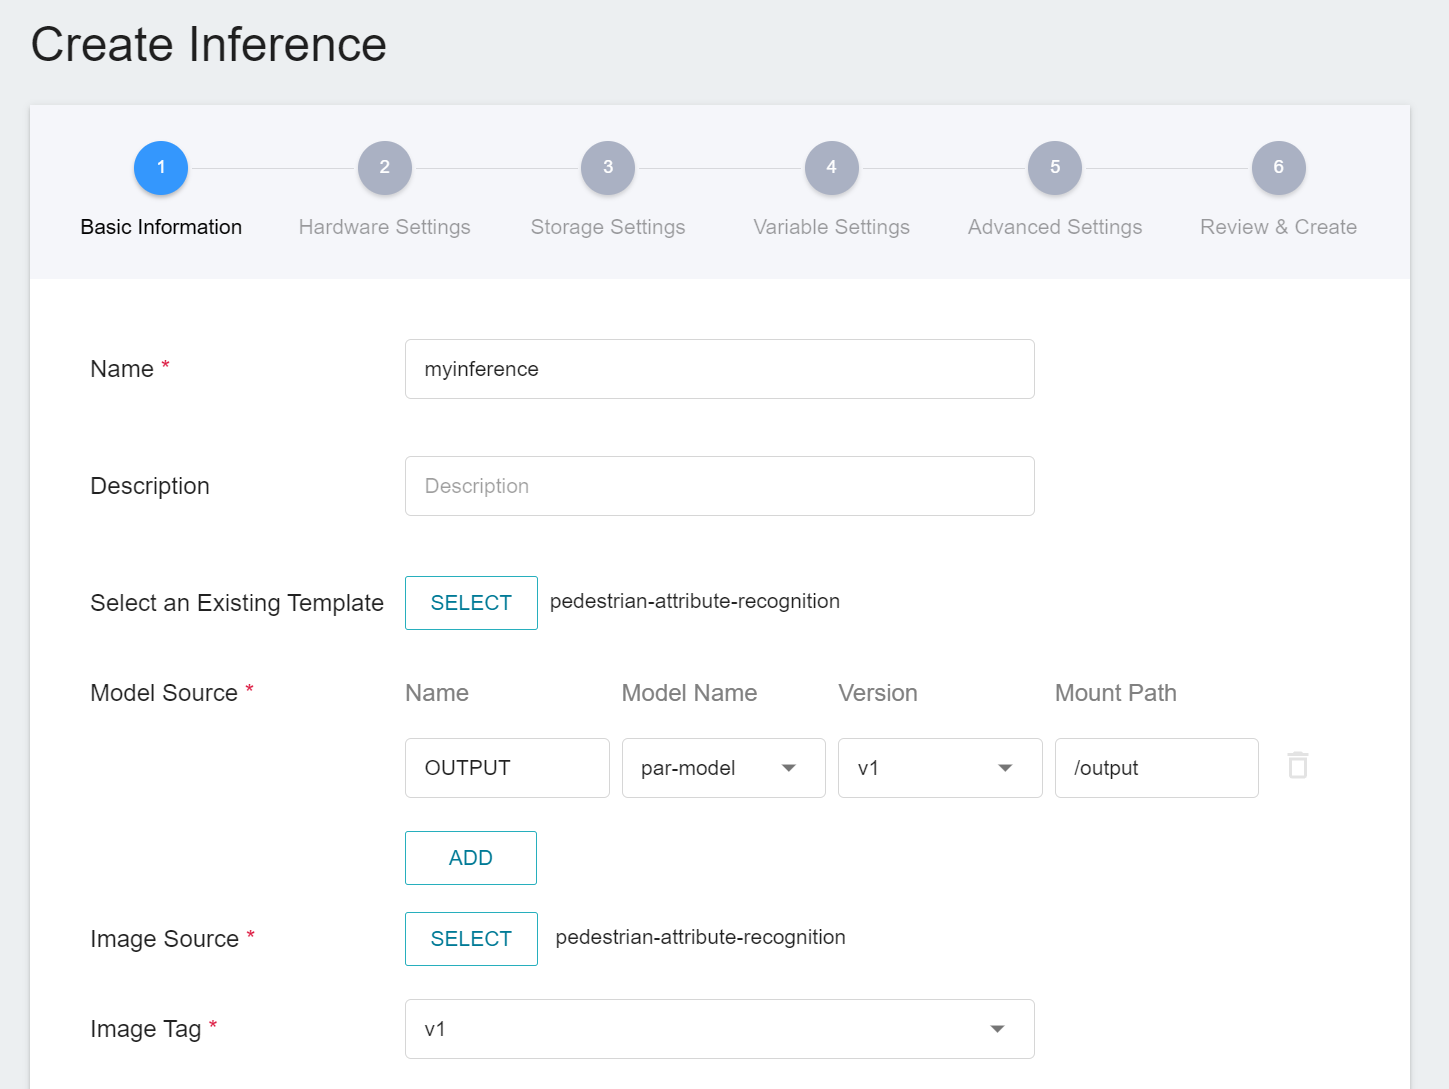
1. **Basic Information**
Similar to the setting of basic information for training jobs, you need to set up the basic information of this service first. We use the **`pedestrian-attribute-recognition`** inference template to facilitate quick setup for developers. However, the model name and version number to be loaded still need to be set manually:
- **Name**
The file name of the loaded model is related to the program's reading, and this value will be brought out by the **`pedestrian-attribute-recognition`** template.
- **Model Name**
The name of the model to be loaded, that is, the model we saved in [**3.3 View Training Results and Save Model**](#33-View-training-results-and-save-model).
- **Version**
The version number of the model to be loaded is also the version number set in [**3.3 View Training Results and Save Model**](#33-View-training-results-and-save-model).
- **Mount Path**
The location of the loaded model is related the program's reading, this value will be brought out by the **`pedestrian-attribute-recognition`** template.
2. **Hardware Settings**
Select the appropriate hardware resource from the list with reference to the current available quota and requirements. However, it should be noted that the machine learning framework used in the image of this example is **tensorflow-gpu**, so when selecting hardware, please select the specification that includes **GPU**.
3. **Storage Settings**
No configuration is required for this step.
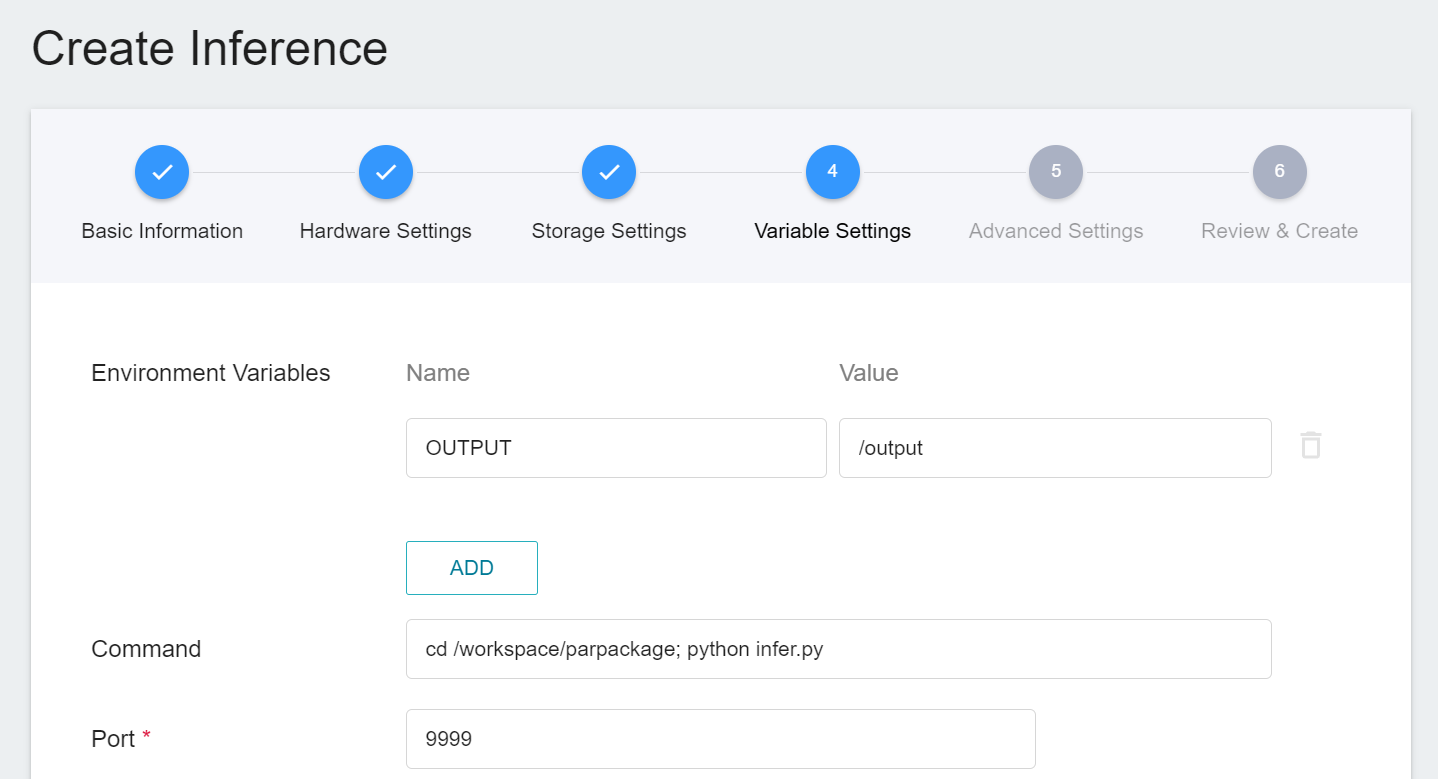
4. **Variable Settings**
On the Variable Settings page, the required commands and parameters are automatically brought in when the template is applied.
5. **Advanced Settings**
No configuration is required for this step.
6. **Review & Create**
Finally, confirm the entered information and click CREATE.
### 4.2 Making Inferences
After completing the settings of the inference service, go back to the inference management page, you can see the tasks you just created, and click the list to view the detailed settings of the service. When the service state shows as **`Ready`**, you can start connecting to the inference service for inference.
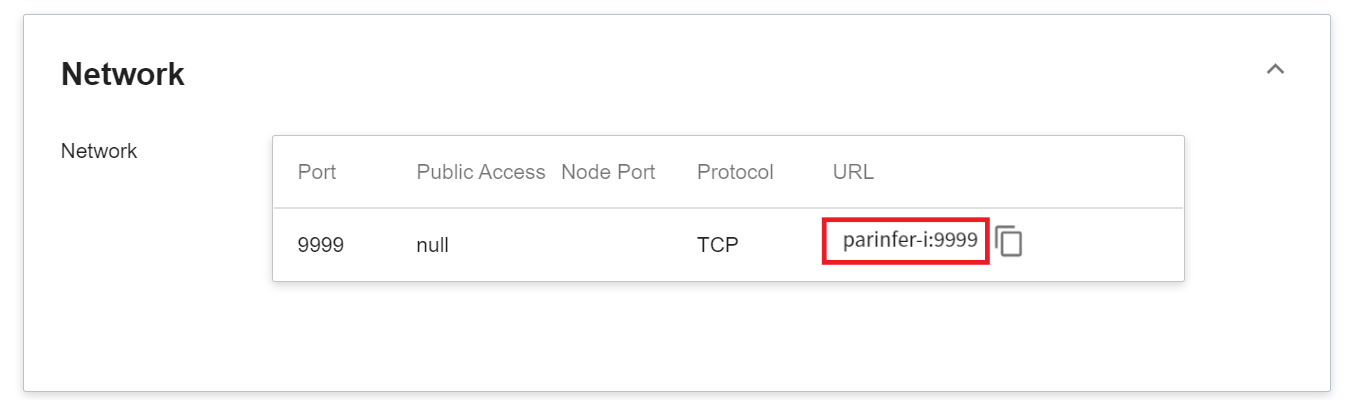
Since the current inference service does not have a public service port for security reasons, we can communicate with the inference service we created through the Container Service. The way to communicate is through the **Network** information displayed at the bottom of the **Inference Details** page.
:::info
:bulb: **Tips: Inference Service URL**
- For security reasons, the **URL** provided by the inference service can only be used in the system's internal network, and cannot be accessed through the external Internet.
- To provide this inference service externally, you need to transfer to the inference service through the [**Container Service**](/s/yGbG4JJyi) for public access.
:::
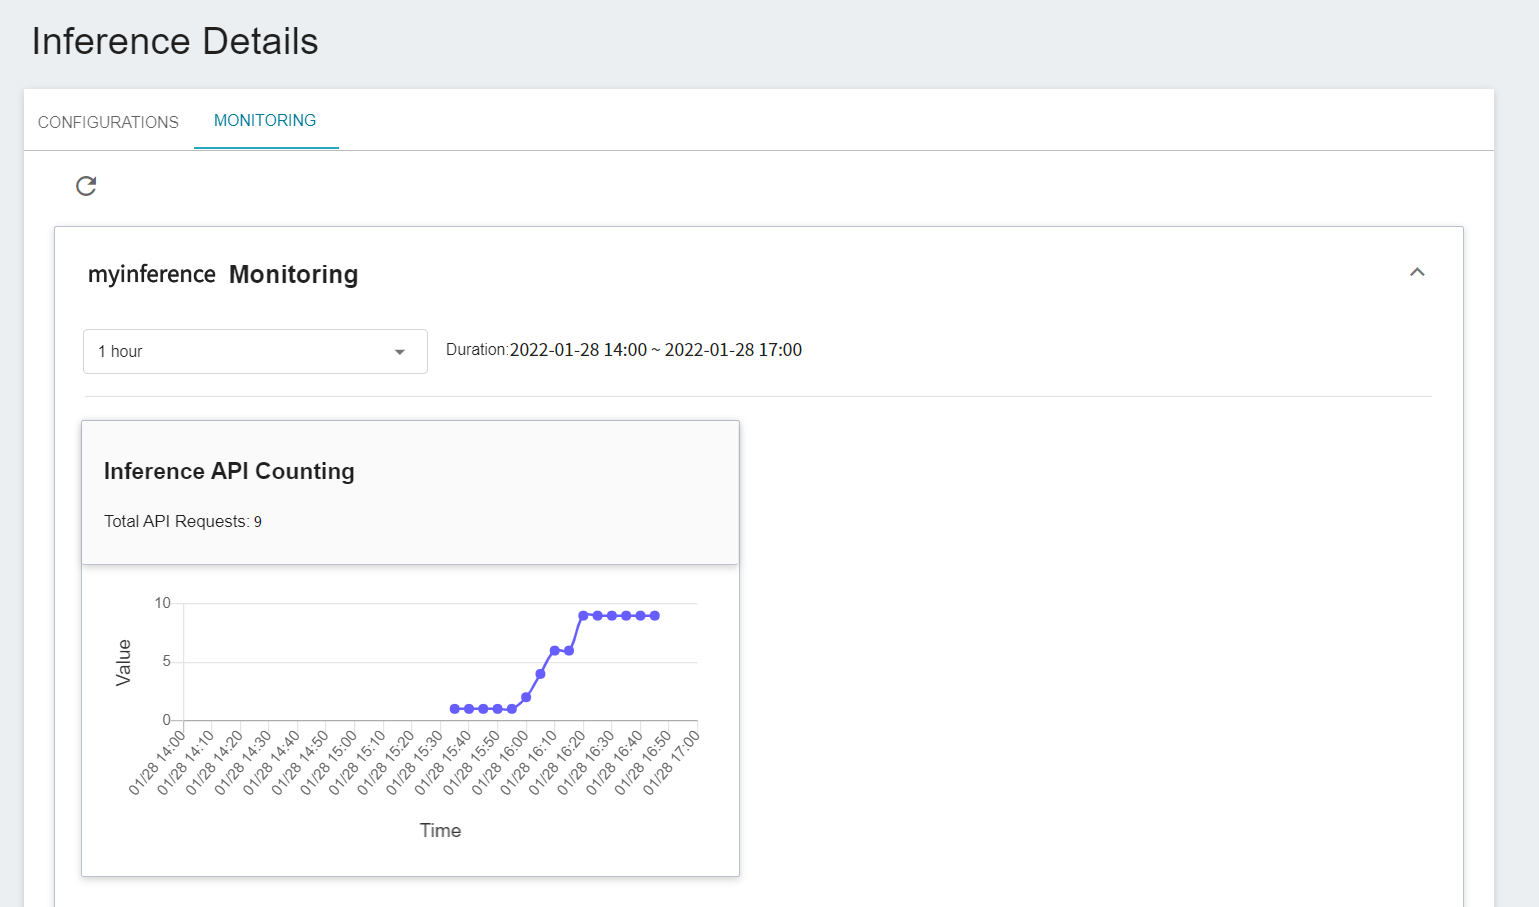
You can click on the **Monitor** tab to see the relevant monitoring information on the monitoring page, and the following figure shows the inference results after a period of time.
## 5. Perform Image Recognition
### 5.1 Start Jupyter Notebook
This section describes how to use **Container Service** to start Jupyter Notebook to invoke inference service.
#### 5.1.1 Create Container Service
Select **Container Service** from the OneAI service list, enter the container service management page, and then click **+CREATE**.
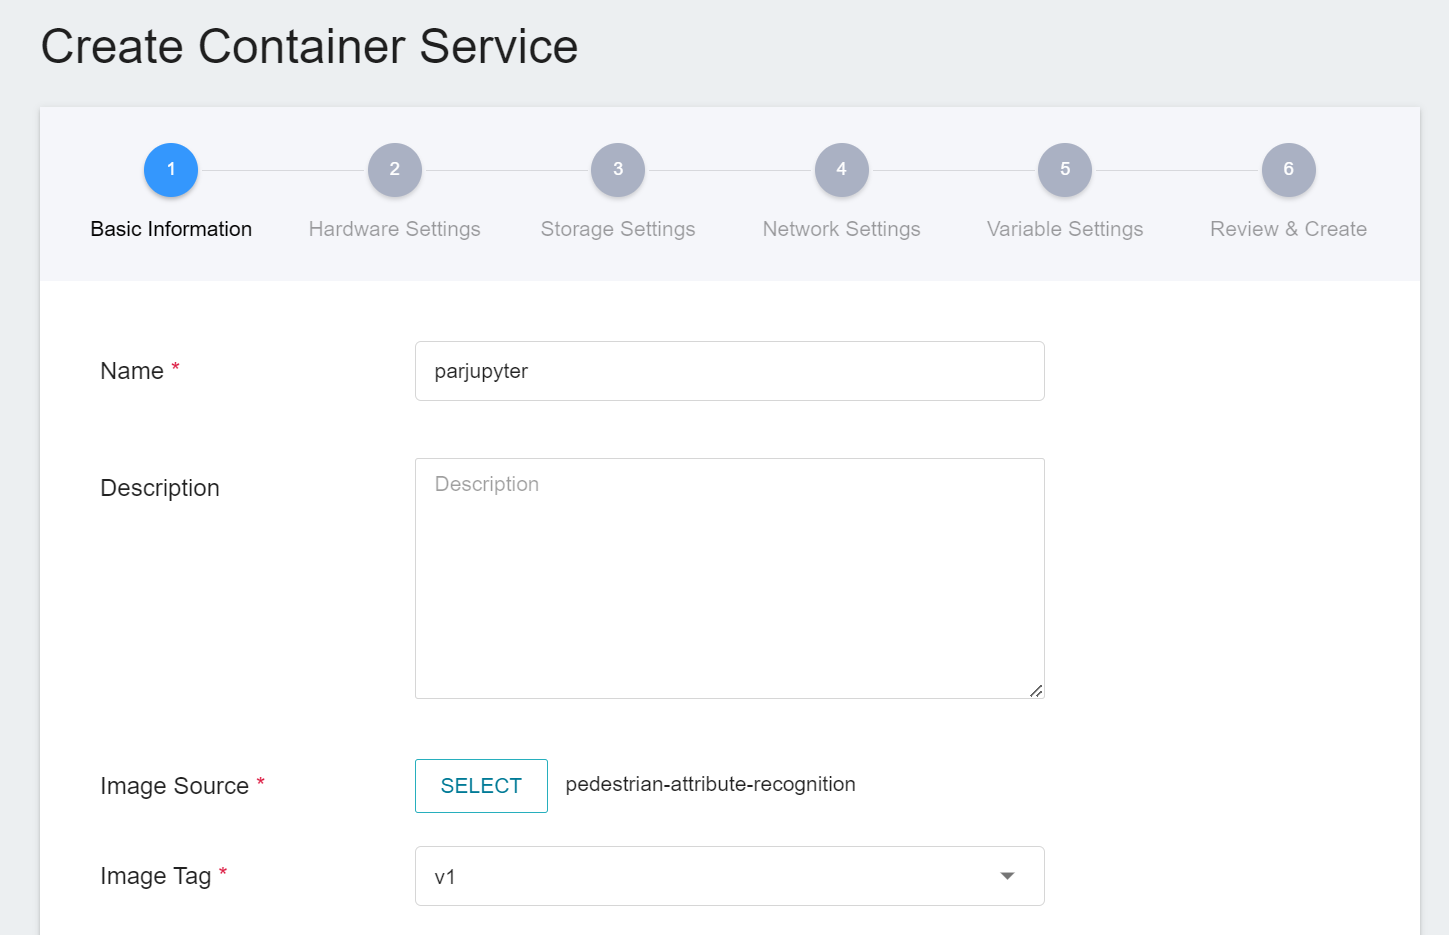
1. **Basic Information**
When creating a container service, you can select the **`pedestrian-attribute-recognition`** image, in which we have provided the relevant environment of Jupyter Notebook.
2. **Hardware Settings**
Select the appropriate hardware resource from the list with reference to the current available quota and training program requirements. However, it should be noted that the machine learning framework used in the image of this example is **tensorflow-gpu**, so when selecting hardware, please select the specification that includes GPU.
3. **Storage Settings**
This step can be skipped.
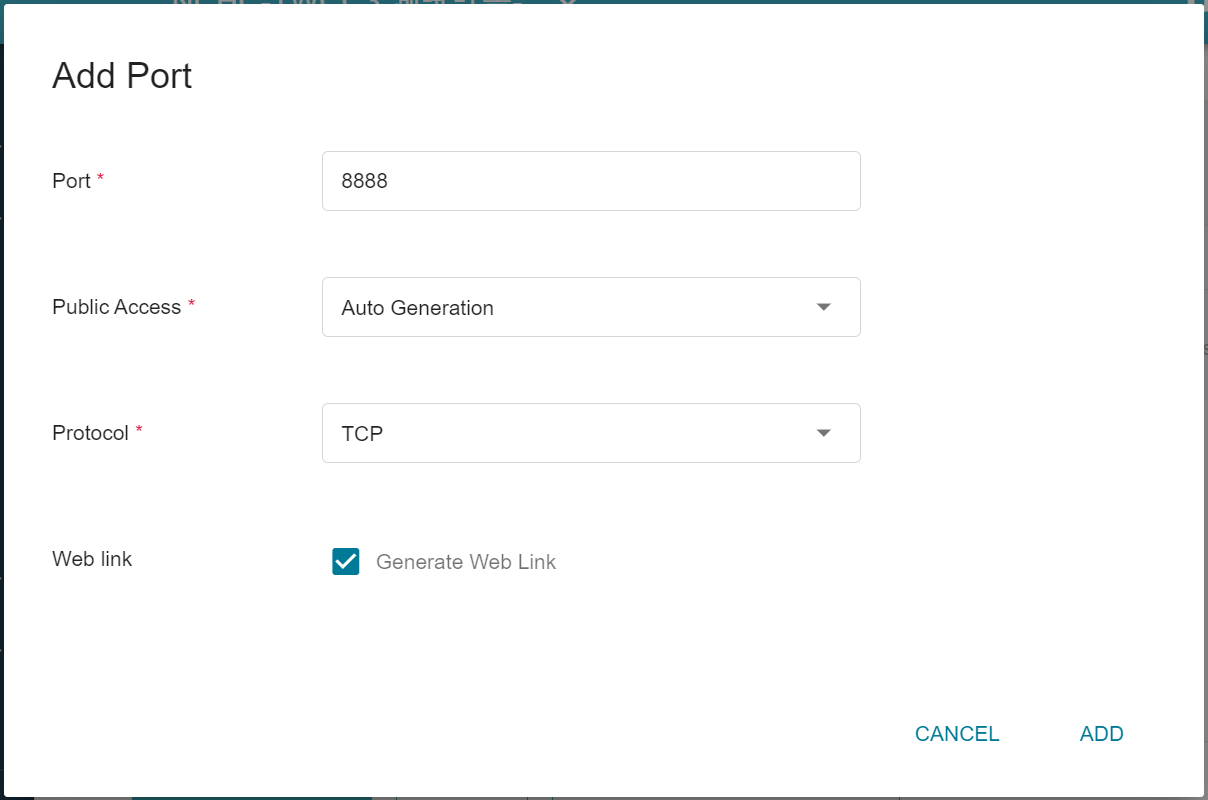
4. **Network Settings**
The Jupyter Notebook service runs on port 8888 by default. In order to access Jupyter Notebook from the outside, you need to set up an external public service port. You can choose to let it automatically generate the Port for public access, by checking Generate Web Link.
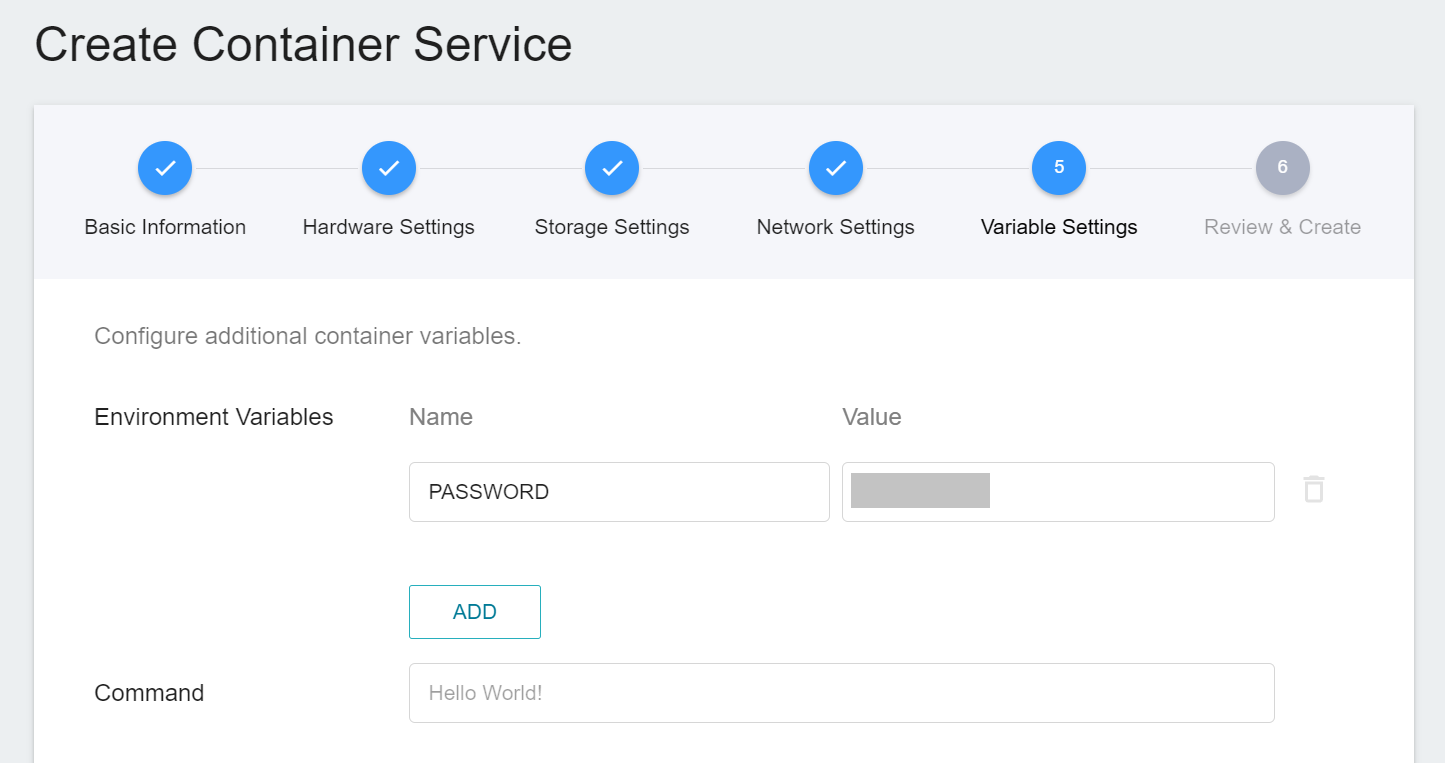
5. **Variable Settings**
When using Jupyter Notebook, a password prompt will pop up asking you to enter token or password. Here, we can use the environment variables for the image to set the password. So please create a variable name of **`PASSWORD`** and enter the password in the value field.
6. **Review & Create**
Finally, confirm the entered information and click CREATE.
#### 5.1.2 Use Jupyter Notebook
After creating the container service, go back to the container service management list page and click on the service to get detailed information.
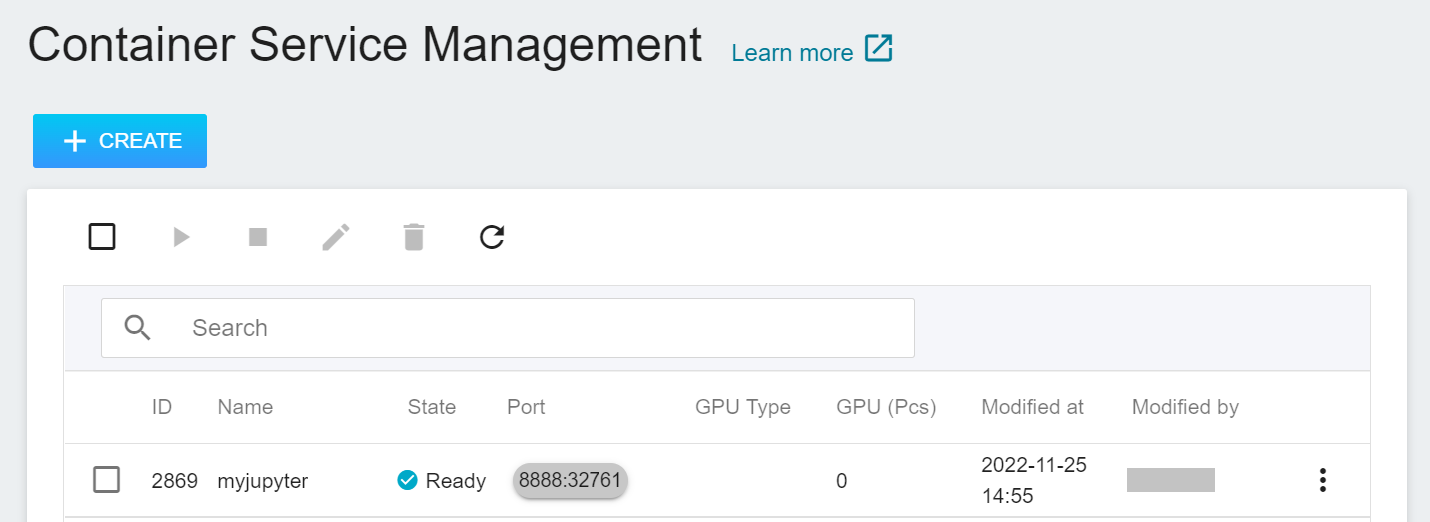
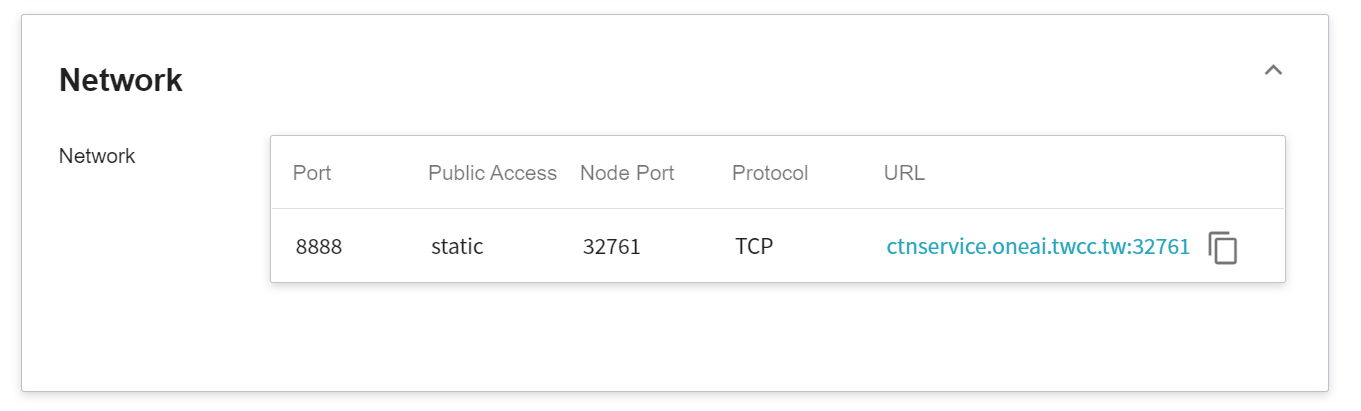
In the details page, you should pay special attention to the **Network** section, where there is an external service port `8888` for Jupyter Notebook, click the right side URL link to open Jupyter Notebook service in your browser.
When connecting to Jupyter Notebook for the first time, you need to enter a password, which is the PASSWORD environment variable set in the details page.

### 5.2 Making Inferences
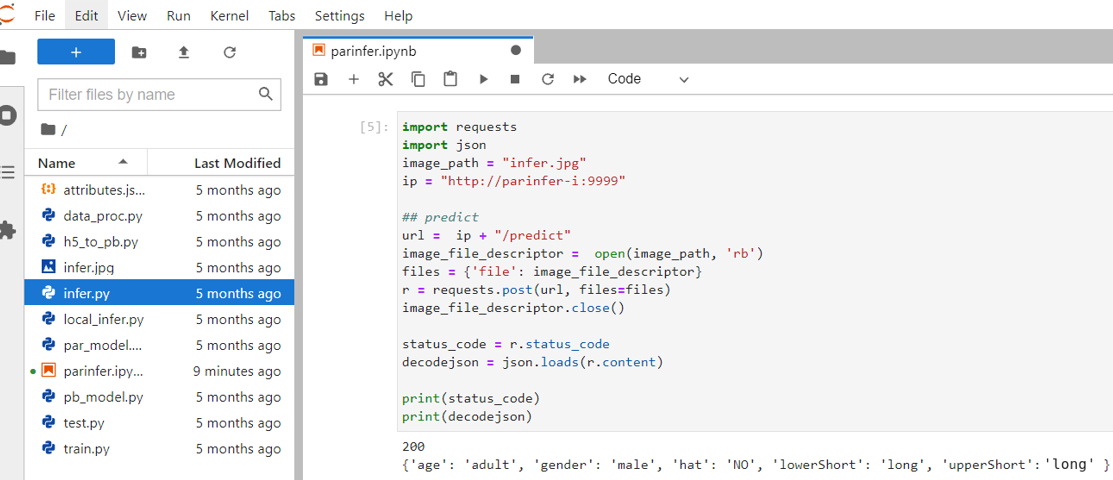
After starting Jupyter Notebook, inference can be performed by creating an ipynb file and copying the [Attached code](#53-attached-code).
In this section, we will introduce the attached code:
1. **Send Request**
Here, the requests module is used to generate an HTTP POST request, and the [image](/uploads/bEEsVm7.jpg) and parameters are passed as a dictionary structure to the Json parameter.
:::info
:bulb: **Tips: Image Format**
The image formats that this inference service example can accept are png, jpg, and jpeg.
:::
2. **Retrieve Results**
When the service completes object detection, it returns **`decodejson`**, as shown in the figure above, this json file contains the result of each object detection.
- **age**: Pedestrian's age: child or adult.
- **gender**: Pedestrian’s gender: female or male.
- **hat**: Whether pedestrian is wearing hat: yes or no.
- **lowerShort**: Pedestrian lower body clothing style: long or short.
- **upperShort**: Pedestrian upper body clothing style: long or short.
### 5.3 Attached Code
:::spoiler **Program Code**
```console
import requests
import json
image_path = "infer.jpg"
ip = "http://parinfer-i:9999"
## predict
url = ip + "/predict"
image_file_descriptor = open(image_path, 'rb')
files = {'file': image_file_descriptor}
r = requests.post(url, files=files)
image_file_descriptor.close()
status_code = r.status_code
decodejson = json.loads(r.content)
print(status_code)
print(decodejson)
```
:::
<style>
mark {
background-color: pink;
color: black;
}
</style>