1699 views
owned this note
---
title: AI Maker (Beta)
description: OneAI Documentation
tags: EN
---
[OneAI Documentation](/s/user-guide-en)
# AI Maker (Beta)
:::info
:bulb:**Tips:**
AI Maker is a set of MLOps solutions for building and managing machine learning life cycle. **AI Maker (Beta)** is launched to enhance the depth and breadth of ML training tasks, and allows more freedom and detail recording during the generation of each model.
**AI Maker (Beta)** is a standalone version which is not interoperable with the original **AI Maker**, but Annotation Tool, Notebook Service, and Template are shared. To use the features of MLflow, it is recommended that you transfer tasks to **AI Maker (Beta)** for execution.
:::
**AI Maker (Beta)** integrates with [**MLflow™**](https://www.mlflow.org/) open source platform for machine learning life cycle management. Using AI Maker and its related services can help machine learning teams enhance collaboration efficiency and streamline the workflow from machine learning development to deployment.
- [**Annotation Tool**](#Annotation-Tool): Use the built-in annotation tool to label your training data.
- [**Notebook Service**](/s/notebook-en): Provides an integrated development environment (IDE) for machine learning to assist in tasks such as data preprocessing, feature engineering, model development, model validation, and model deployment after training.
- [**Template**](#Template): Set templates for machine learning training environments and workflows.
- [**Training Job**](#Training-Job): You can perform model training and parameter tuning and automatically track the training process with MLflow Tracking integration.
- [**MLflow Tracking**](#MLflow-Tracking): Allows for recording and comparing parameters, metrics, and results of the model training process, as well as access to the MLflow UI for viewing more detailed information.
- [**Model**](#Model): Model can be registered and finalized for versioning and lifecycle management, as well as for model training and iteration management.
- [**Inference**](#Inference): Trained model can be used to perform inference, to automatically determine model class, and allows for inference service REST endpoint deployment without the need for additional code.
:::warning
:warning: **Precautions when using AI Maker (Beta):**
* Once you start using **OneAI**, the system will preset a default **mlflow** bucket in **Storage Service** to store the related data generated by AI Maker (Beta) and MLflow. Deleting the **mlflow** bucket may cause MLflow to be unusable.
:::
# Usage Scenario
## Quick Start
AI Maker provides many ready-made **templates** and [**case studies**](/s/user-guide-en#Case-Study) for various AI applications, so you can quickly apply them. First-time users of AI Maker are recommended to start with an interesting [**case study**](/s/user-guide-en#Case-Study) to experience the process of using AI Maker's various services.
## AI Development
AI developers or those who want to run their own machine learning development environment and training and inference programs on AI Maker are recommended to refer to the [**Example Tutorial - Wine Quality Detection**](#Example-Tutorial---Wine-Quality-Detection) to learn how to use AI Maker to accelerate the development of AI applications.
### Data Preparation Stage
Depending on the nature of the data, different tools can be used to prepare the data, so that the data quality can meet the training requirements. Please refer to [**Data Preparation**](#Data-Preparation).
- It is recommended to use [**Storage Service**](/s/storage-en) for data upload. Once the data is uploaded through the UI or software that supports the S3 protocol, it can be easily shared and collaborated with project members, and accessed in various services.
- If you have data pre-processing requirements or scripts for retrieving data, it is recommended to use the [**Notebook Service**](/s/notebook-en) to mount the bucket, and then store the development and processing results into the bucket.
- If you have raw image data that has not yet been annotated, it is recommended to use the [**Annotation Tool**](#Annotation-Tool) to help you quickly annotate training data through a simple interface.
### Machine Learning Development Stage
It is recommended to use [**Notebook Service**](/s/notebook-en) to develop and connect to [**MLflow Tracking**](#MLflow-Track) and use smaller system computing resources to confirm the recorded results. Please refer to [**Example Tutorial > Model Development**](#Model-Development).
### Model Training Stage
Use [**Training Job**](#Training-Job) to connect to [**MLflow Tracking**](#MLflow-Tracking).Training jobs are executed on more powerful system computing resources which allows bigger training scales. Once the jobs are completed, the resources are immediately released so that the system computing resoureces can be used more efficiently. Please refer to [**Example Tutorial > Convert to Training Job and Template**](#Convert-to-Training-Job-and-Template).
### Model Deployment Stage
Use [**Model**](#Model) for model version control and metrics tracking. Then [**Inference**](#Inference) to quickly deploy a model as a REST endpoint for client inferencing. Please refer to [**Example Tutorial - Model Registration and Inference Service**](#Model-Registration-and-Inference-Service).
# Annotation Tool
AI Maker has a built-in CVAT (Computer Vision Annotation Tool) to help you quickly annotate the training data of machine learning, or connect the trained model to CVAT through the inference service for automatic annotation.
## Basic CVAT Operations
* [**Enable CVAT**](#Enable-CVAT)
* [**Add Annotation Task**](#Add-Annotation-Task)
* [**Export Annotation Data**](#Export-Annotation-Data)
* [**Import Annotation Data**](#Import-Annotation-Data)
* [**Disable CVAT**](#Disable-CVAT)
## CVAT Advanced Applications
In addition to the basic operation of the annotation tool, advanced auxiliary mechanisms and applications are also provided for more flexible allocation of manpower and time.
* **CVAT Assisted Annotation**: After annotating data in [**Annotation data format supported by CVAT**](https://opencv.github.io/cvat/docs/manual/advanced/formats/), you can import it into CVAT for further manual annotation correction or retraining to optimize your models. Please refer to [**AI Maker Case Study - YOLOv7 Image Recognition Application > CVAT Assisted Annotation**](/s/casestudy-yolov7-en#6-CVAT-Assisted-Annotation).
* **Implementation of CVAT-assisted inference module**: The trained model is directly linked to CVAT through the inference service for automatic annotation which can greatly save time and labor costs. Please refer to [**AI Maker Case Study - CVAT Assisted Inference Module Implementation**](/s/casestudy-cvat-inference-module-en).
* **CVAT multi-person collaborative annotation**: Manage the assignment and staffing of annotation jobs and authorize annotation jobs to multiple non-project members for collaborative operation, so that external professional annotation manpower can be used under a secure and trustworthy control mechanism to more efficiently complete dataset preparation. Please refer to [**AI Maker Case Study - CVAT Multi-person Collaborative Annotation**](/s/casestudy-cvat-collaboration-en).
## Enable CVAT
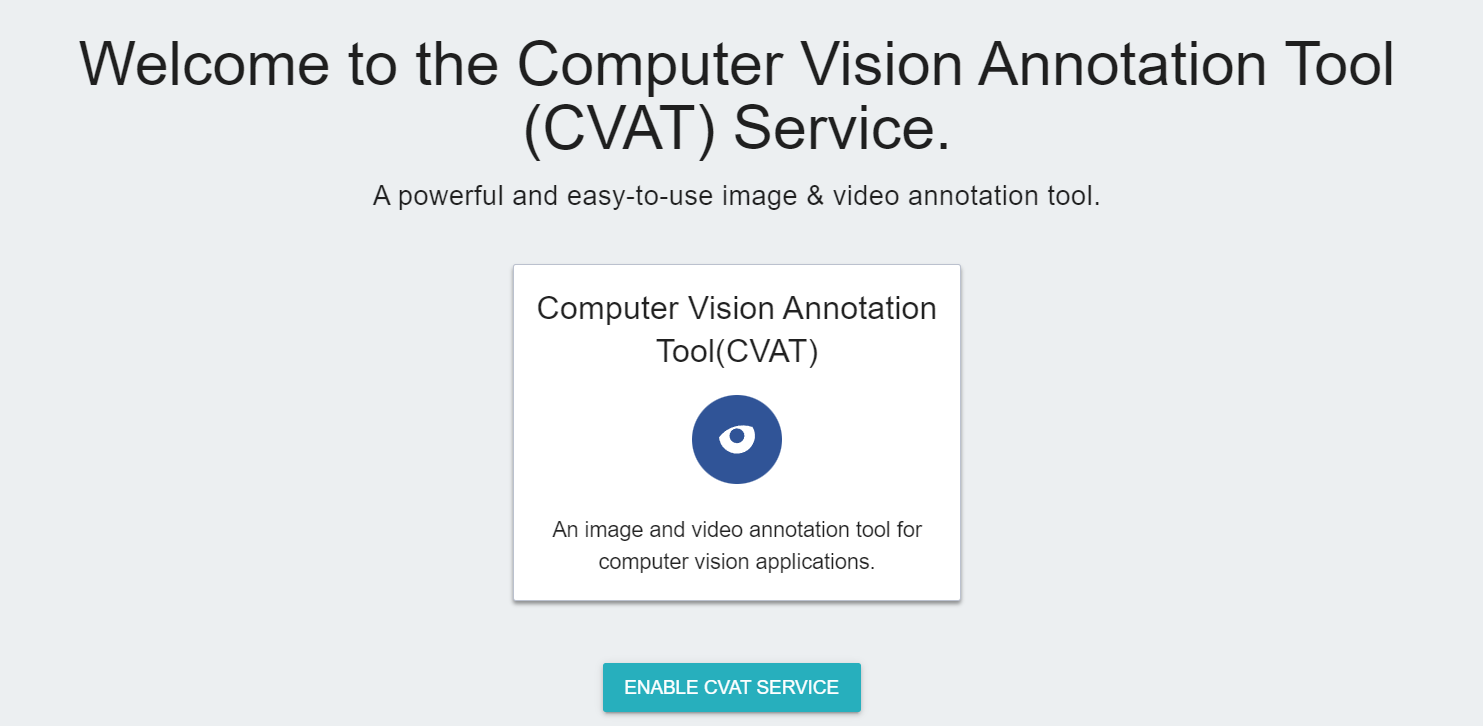
* Click **Annotation Tool** on the left menu bar to enter the CVAT service home page. You need to click **ENABLE CVAT SERVICE** if you are using it for the first time. Only one CVAT service can be enabled for each project.
* After CVAT is successfully enabled, the CVAT service link and account password will appear, and the state will be **`running`**. Click **OPEN** in the basic information to open the login page of the CVAT service in the browser.
:::info
:bulb: **Tips:** When CVAT is enabled for the first time, it is recommended to change the default password. This password has no expiration date and can be used by members of the same project to log in to CVAT service. For security reasons, please change the password regularly.
:::
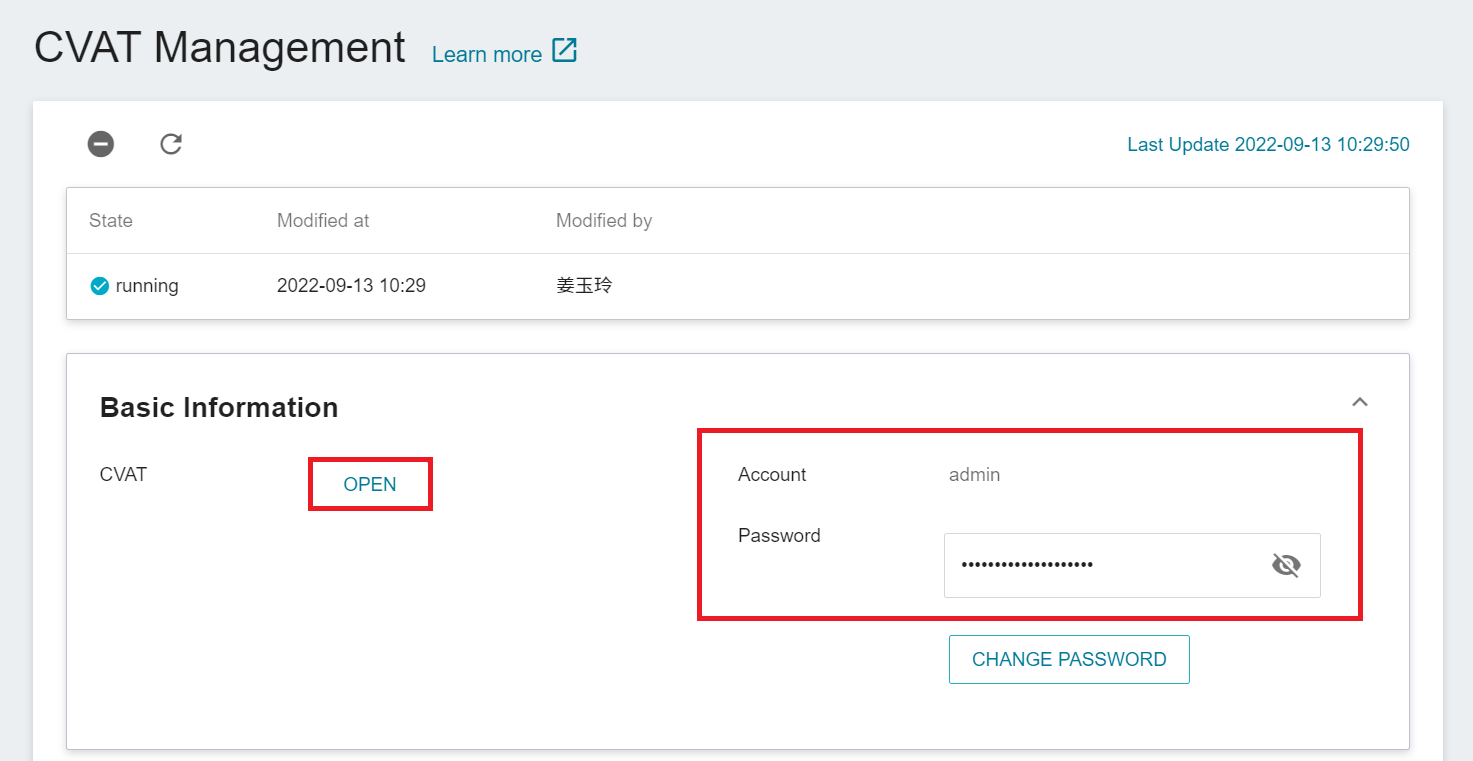
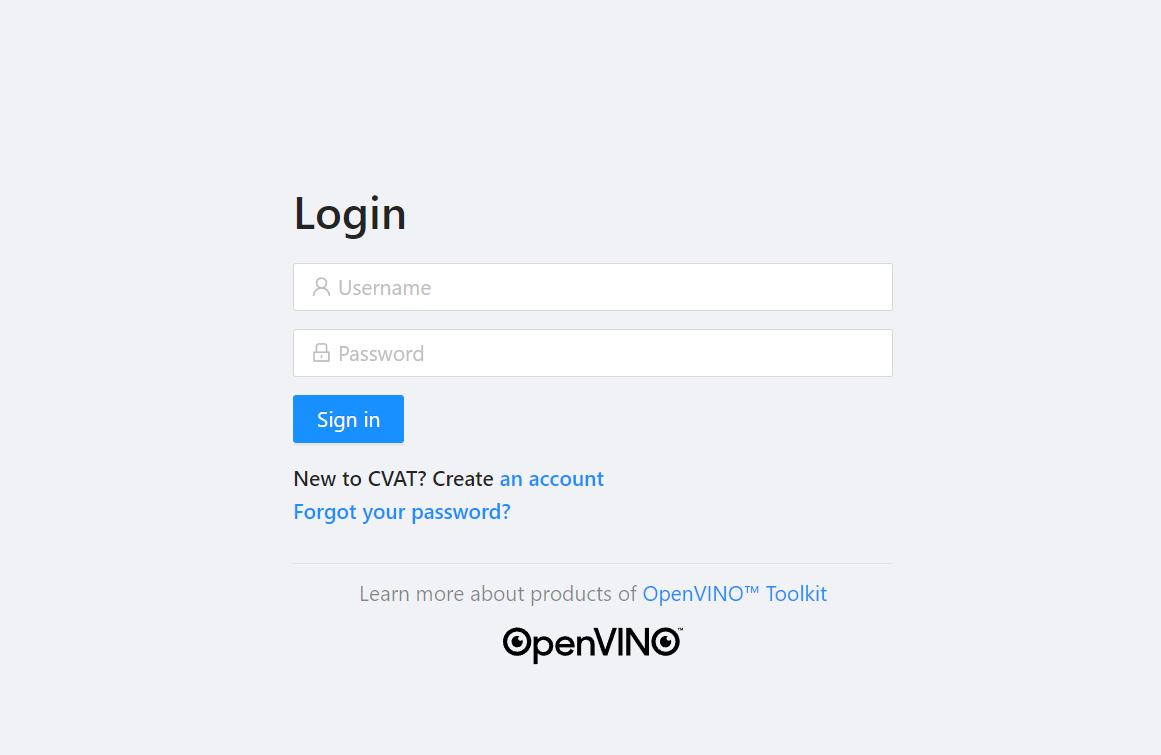
* Enter the account and password provided in the basic information to log in to the CVAT Service page.
:::warning
:warning: **Note:** Please use the Google Chrome browser to log in to CVAT. Using other browsers may cause unpredictable problems.
:::
## Add Annotation Task
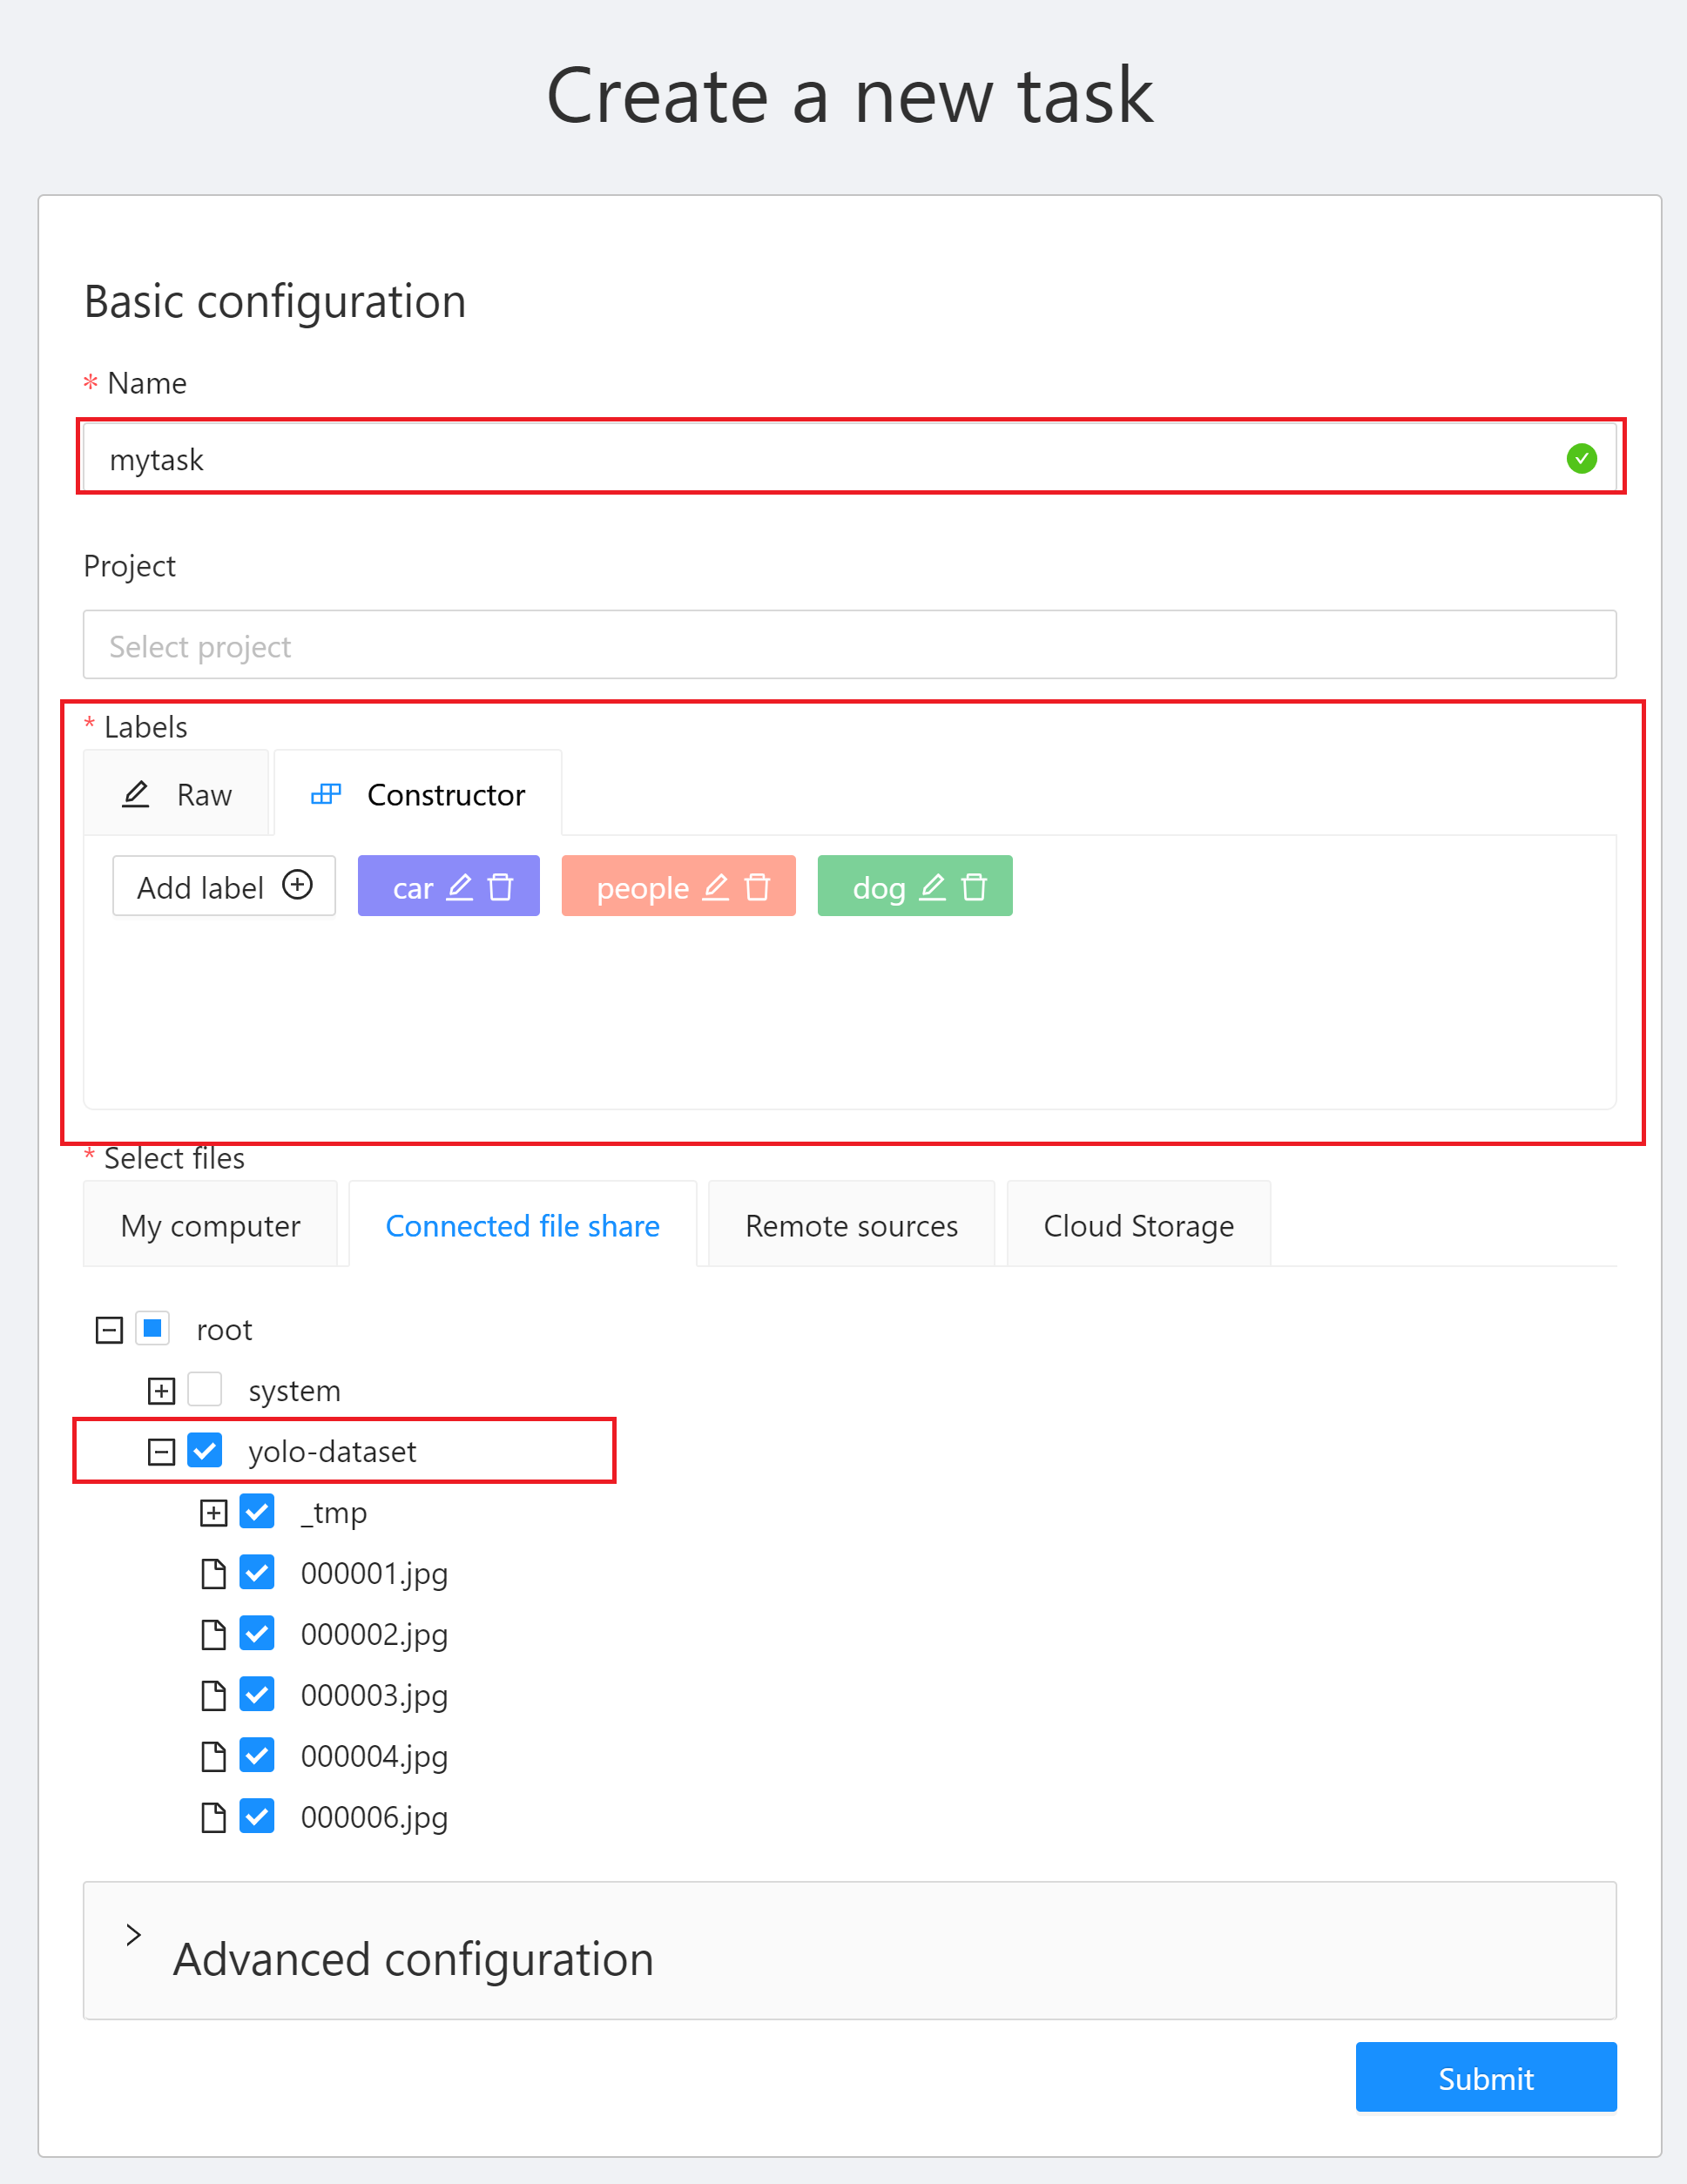
* After successfully logging in to the CVAT service page, click **+** then click **+ Create a new task** to create an annotation task.

* Next, set the task name, label and select the file to be annotated. It is recommended to upload the data to the storage service first, and then select the bucket in the CVAT service. After the setting is complete, click **Submit**.
:::warning
:warning: **Note: CVAT file size limit**
In the CVAT service, it is recommended that you use the bucket of the storage service as data source. If the data is uploaded locally, the CVAT service limits the file size of each TASK to 1 GB.
:::
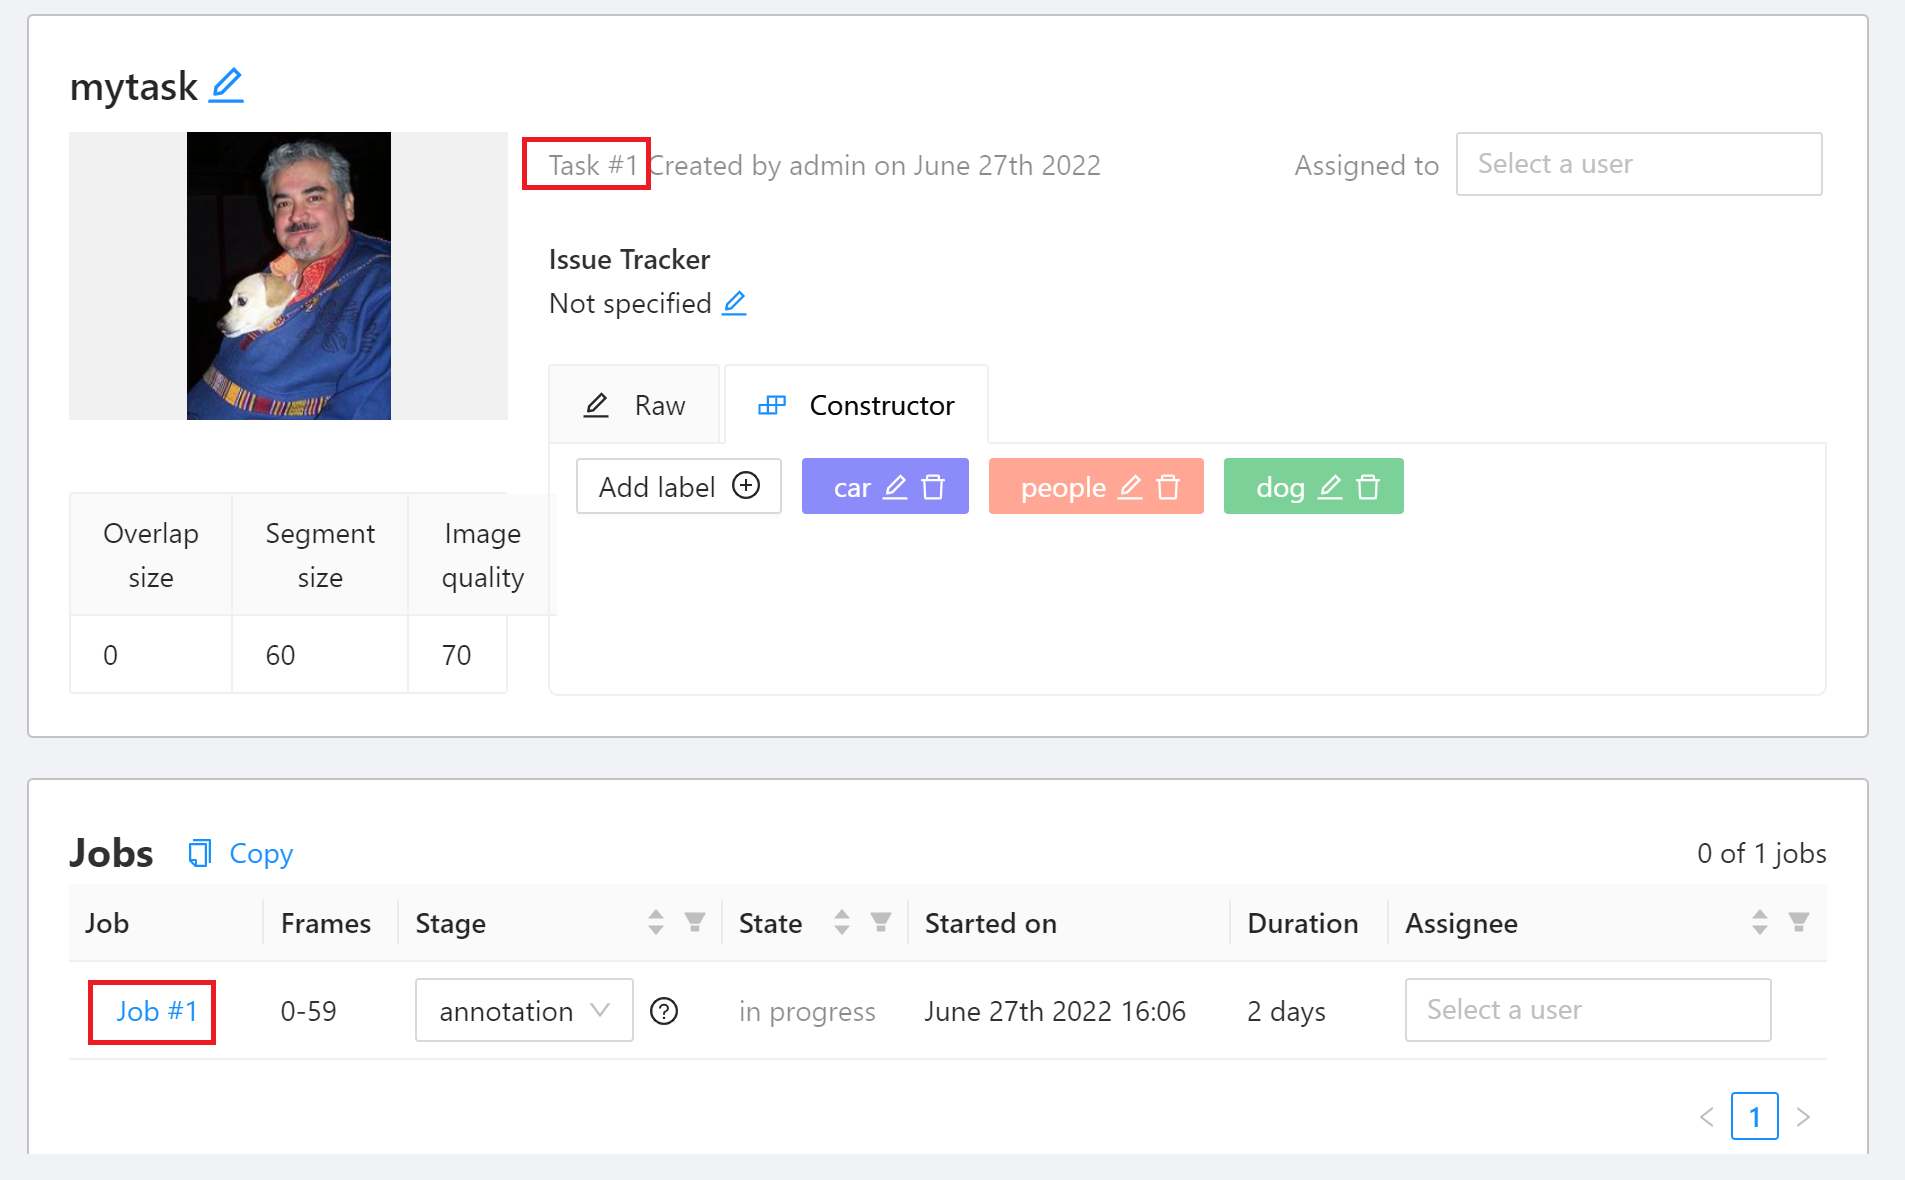
* After the annotation task is created, it will appear at the top of the **Tasks** list. Click **Open** to enter the task details page.

* Click Job #id to enter the data annotation screen and start annotating.
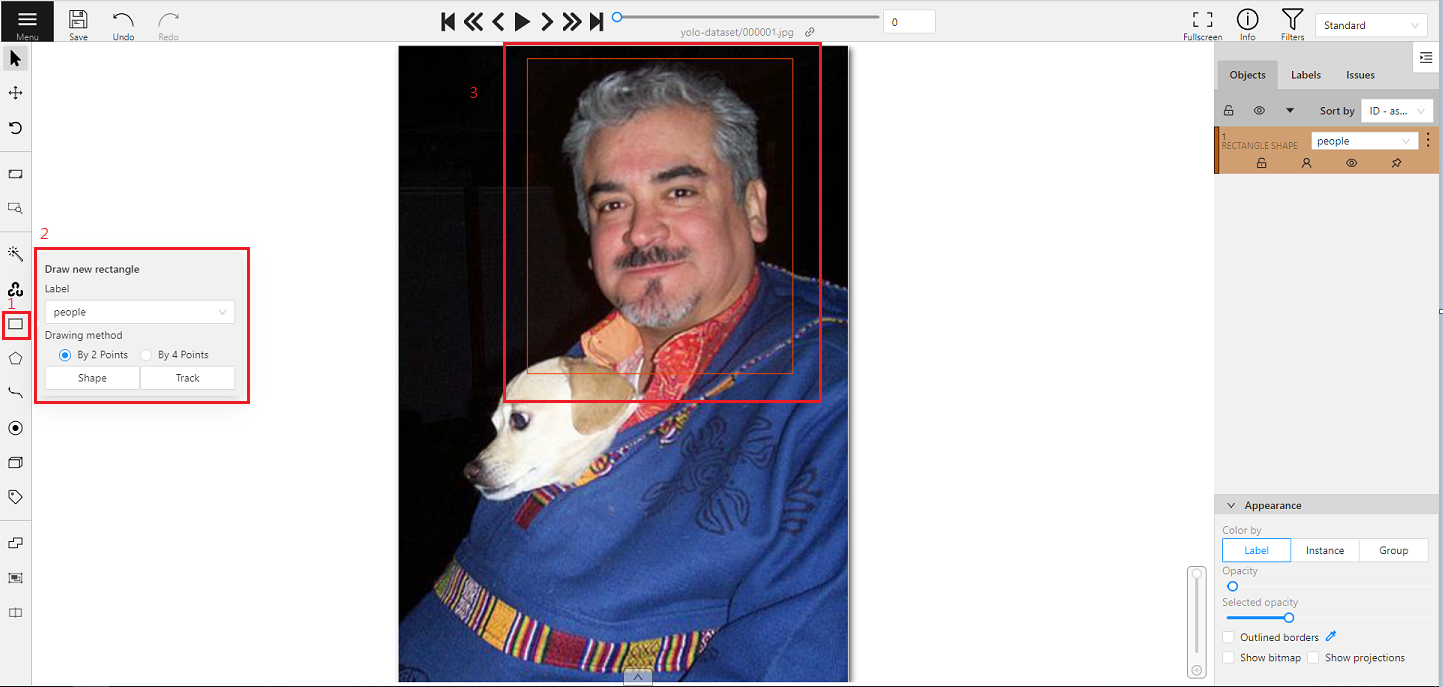
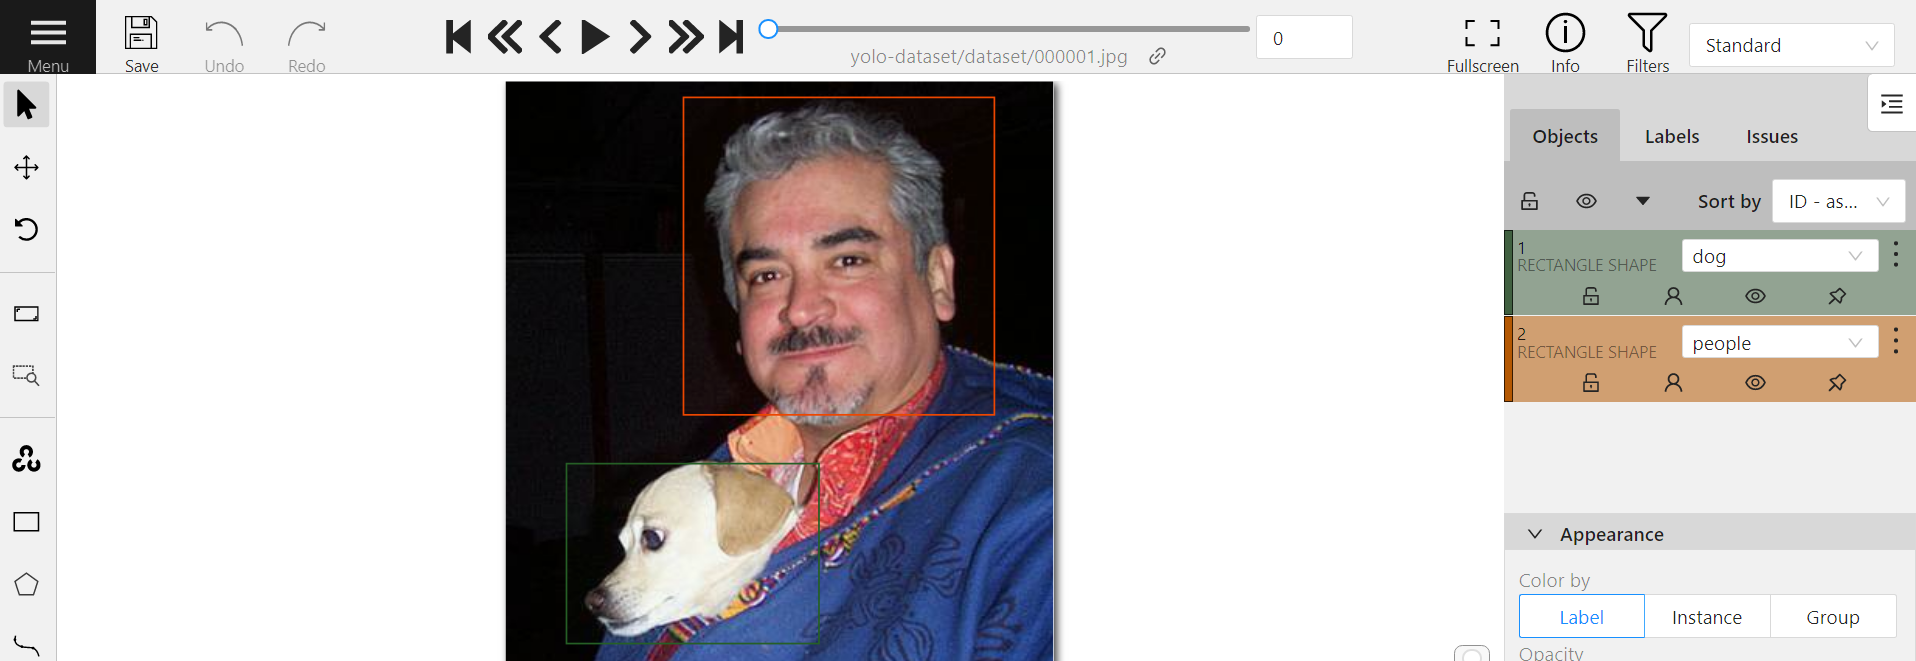
* Move the mouse to the rectangle annotation tool **Draw new rectangle** on the left toolbar, select the label of the **Label** menu, and then click **Shape**, and then frame the target object on the picture.
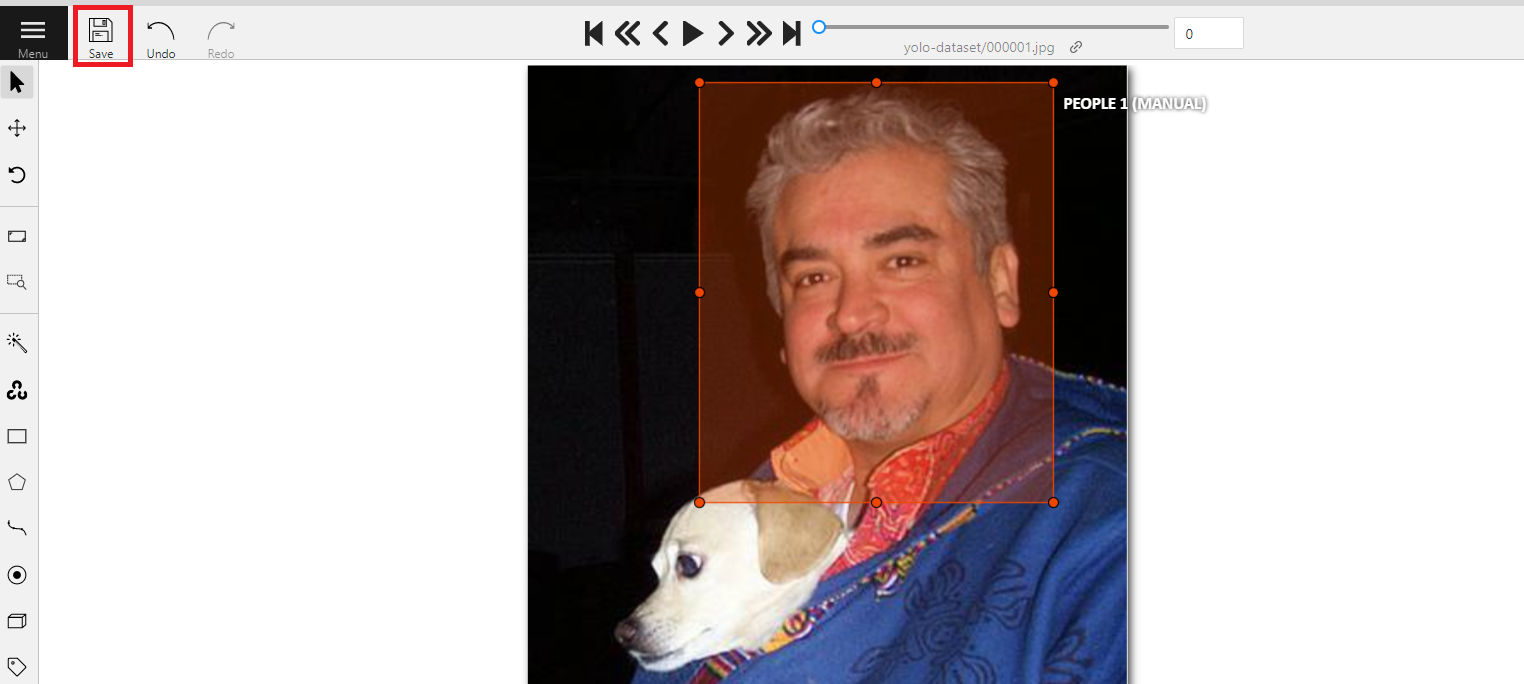
* After the annotation is completed, click **Save** above to save the annotation results.
:::warning
:warning: **Note:** Make it a habit to save at any time during the annotation process, so as not to lose your work due to unavoidable incidents.
:::
:::info
:bulb: **Tips:**
* For more information about CVAT, please refer to **https://github.com/opencv/cvat**.
* For CVAT User Guide, please refer to **https://opencv.github.io/cvat/docs/manual/**.
:::
## Export Annotation Data
* After the annotation task is completed, the annotated data can be exported to the storage service, and then used in training machine learning model in AI Maker.
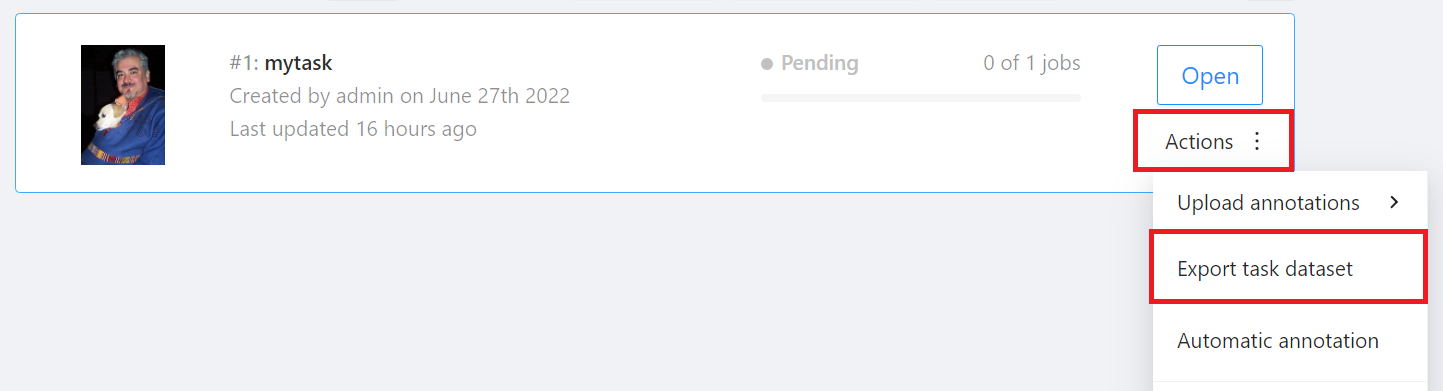
* Go back to the **Tasks** page, click **Actions** on the right side of the task you want to download, and then click **Export task dataset**.
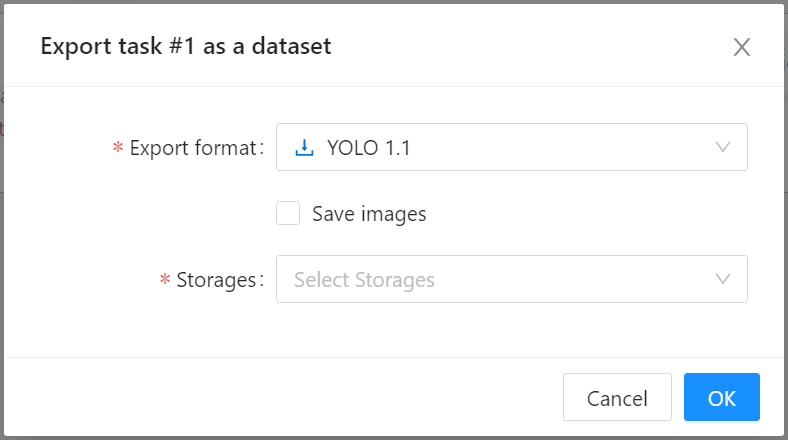
* When the **Export task as a dataset** window appears, select the format of the annotation data to be exported and the bucket, then click **OK**.
## Import Annotation Data
* If you already have annotated data, you can refer to the [**Annotation data format supported by CVAT**](https://opencv.github.io/cvat/docs/manual/advanced/formats/) to prepare the annotation data file to be imported.
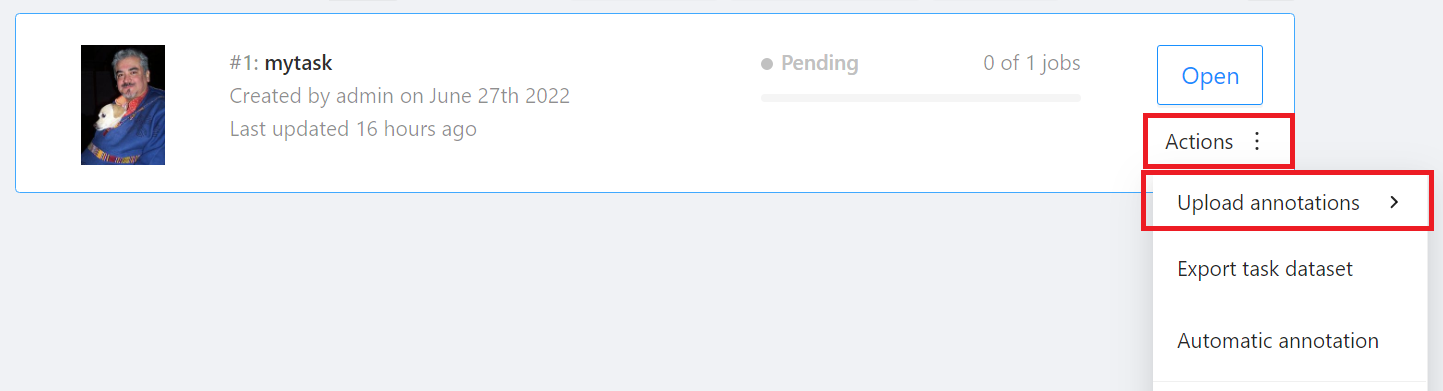
* On the annotation task page, move the mouse to the **Actions** menu in the upper right, then click **Upload annotations**, and then select the format of the annotation data.
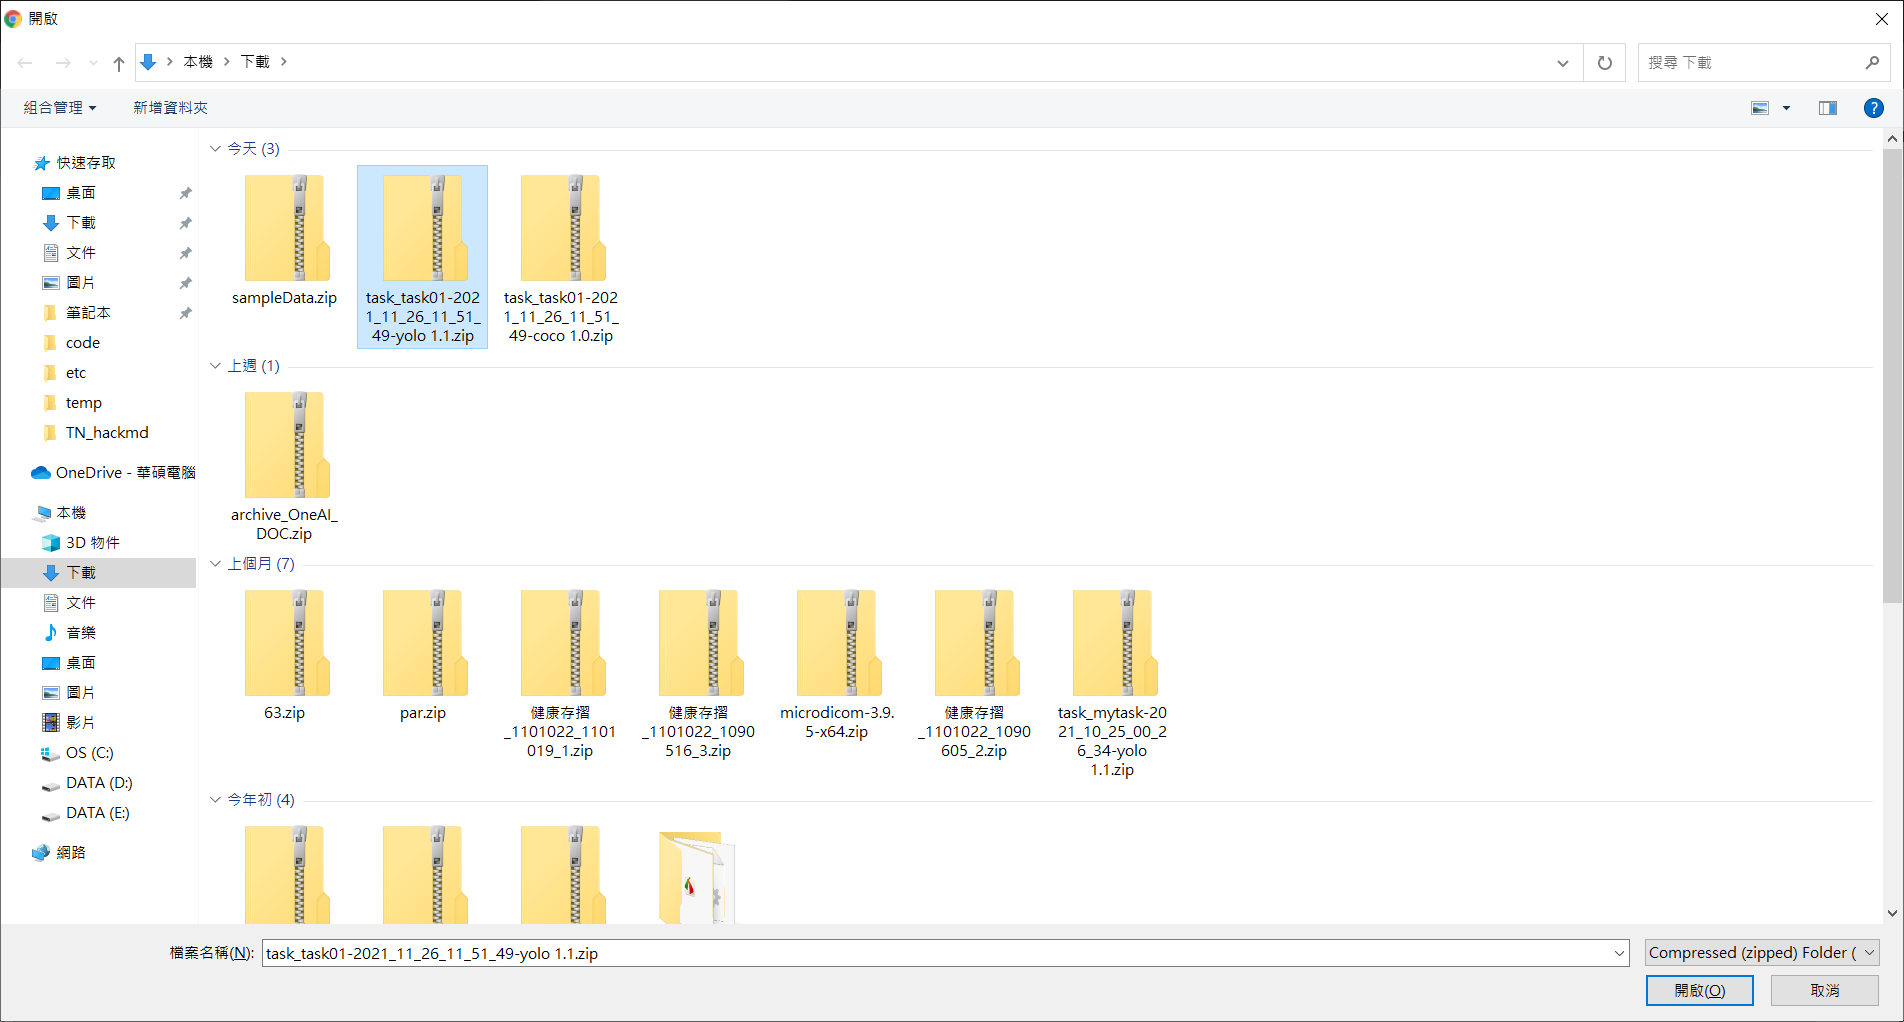
* Then select the annotation data file to be imported.
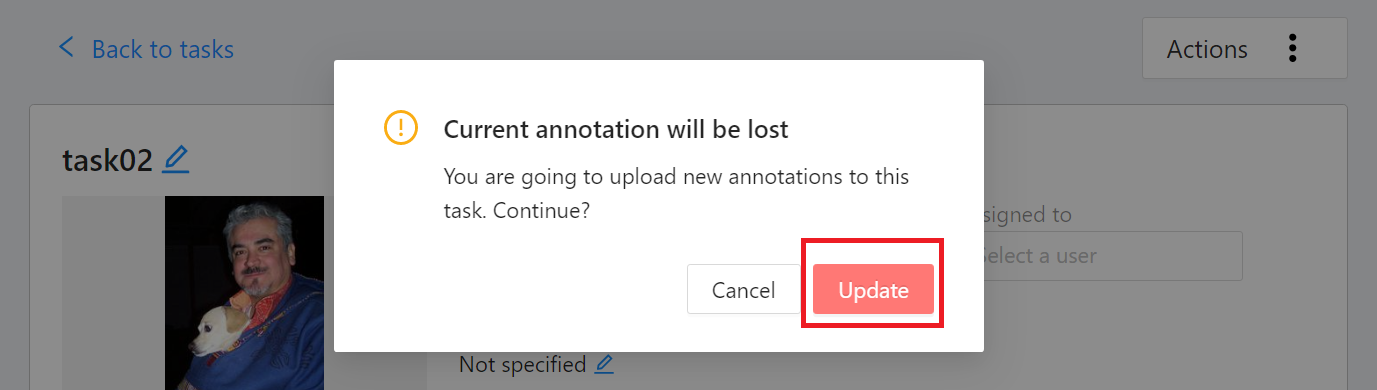
* The imported annotation data will overwrite the current annotation results, click **Update** after confirmation.
* Once the import is complete, click Job to enter the data annotation screen to view the imported annotation results.
:::info
:bulb: **Tips:** Please refer to the [**Official CVAT documentation**](https://opencv.github.io/cvat/docs/manual/advanced/formats/) for the description of the annotation data format supported by CVAT.
:::
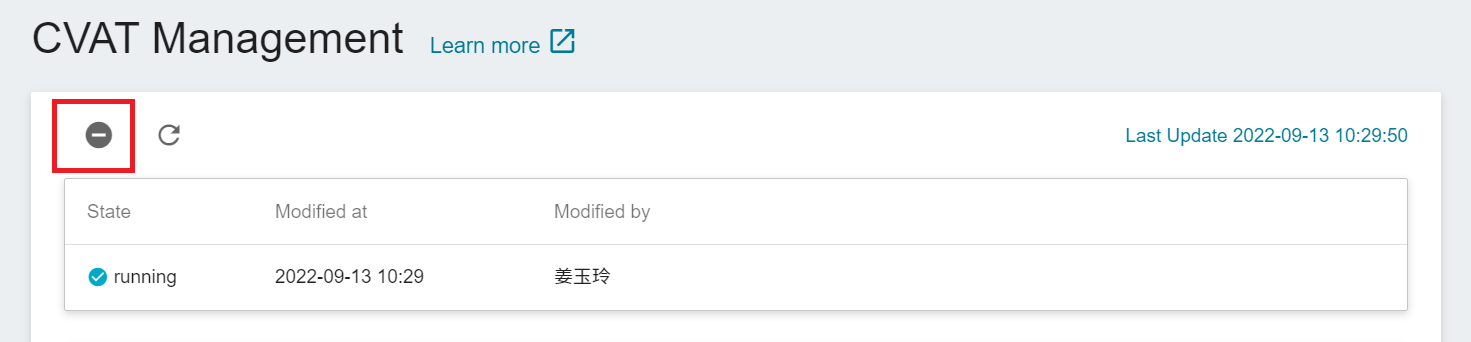
## Disable CVAT Service
* Click the disable icon above, then click **OK** to disable the CVAT service.
:::info
:bulb: **Tips:** Disabling the CVAT service will not delete the data in CVAT.
:::
# Notebook Service
Notebook Service integrates popular development environments including JupyterLab IDE and deep learning frameworks (TensorFlow, PyTorch, MXNet) and packages, and supports data science languages (Julia, R) and data analysis engines (Spark). It offers you a secure development environment for deep learning or data science to develop, test, execute, and debug programs, or share and collaborate with team members.
## Basic Operations of Notebook Service
* [**Create a Notebook Service**](/s/notebook-en#Create-a-Notebook-Service)
* [**Notebook Service Management**](/s/notebook-en#Notebook-Service-Management)
* [**Modify Notebook Service Settings**](/s/notebook-en#Modify-Notebook-Service-Settings)
* [**Install Other Python Packages**](/s/notebook-en#Install-Other-Python-Packages)
# Template
The AI Maker template function allows you to save the parameters or settings required for each task in the machine learning development process as templates for quick application to save development time in the future.
## Public and Private Templates
There are two types of templates: public templates and private templates:
* **Public templates**:
- System built-in: The system has multiple built-in machine learning templates, which are availalbe in all projects. You only need to prepare the corresponding data and formats and put them in the OneAI Storage Service to train the model with **low-code**. This helps users in different fields to get started quickly and dramatically reduces model delivery time. The public training templates will automatically record the Parameters, Metrics, Tags and Artifacts during the training process in MLflow and synchronously display them in the AI Maker interface. For detailed usage of public templates, please refer to [**AI Maker Case Study**](/s/user-guide-en#Case-Study).
* **Private templates**: User-created templates that can only be shared with team members within the project.
## Create a Template
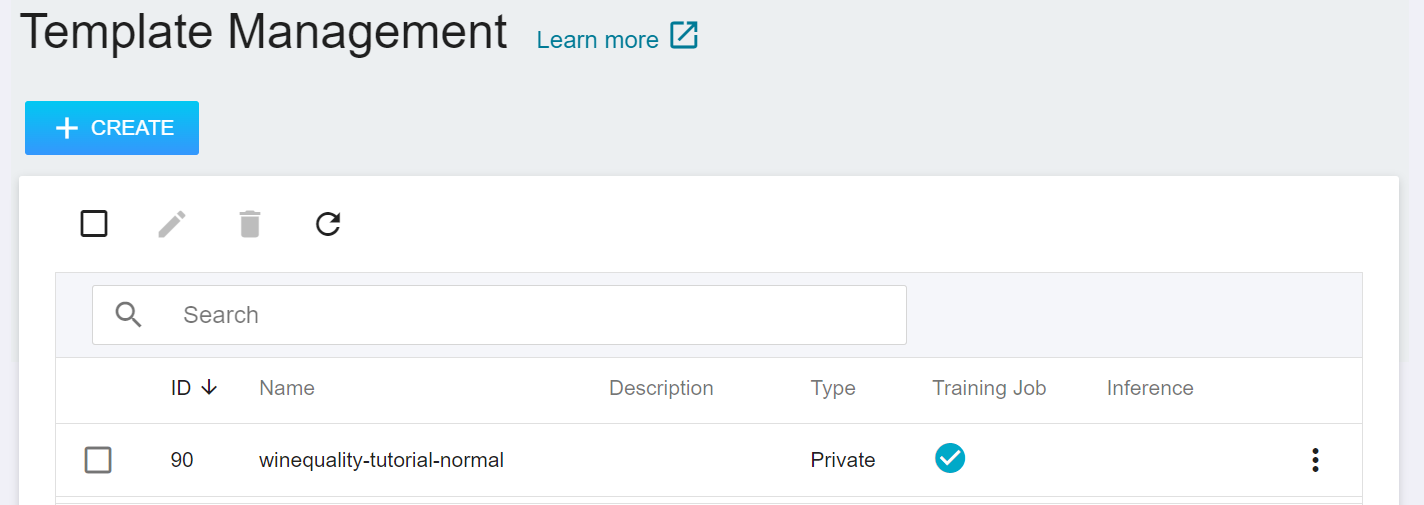
Click **Template** on the left to enter the **Template Management** page, and click **+CREATE**. If you are just starting to use AI Maker, you can skip the step of creating a template and create a **Training Job** directly.
* Enter the template name and description, select the template type, and click **NEXT: TRAINING JOB>**.
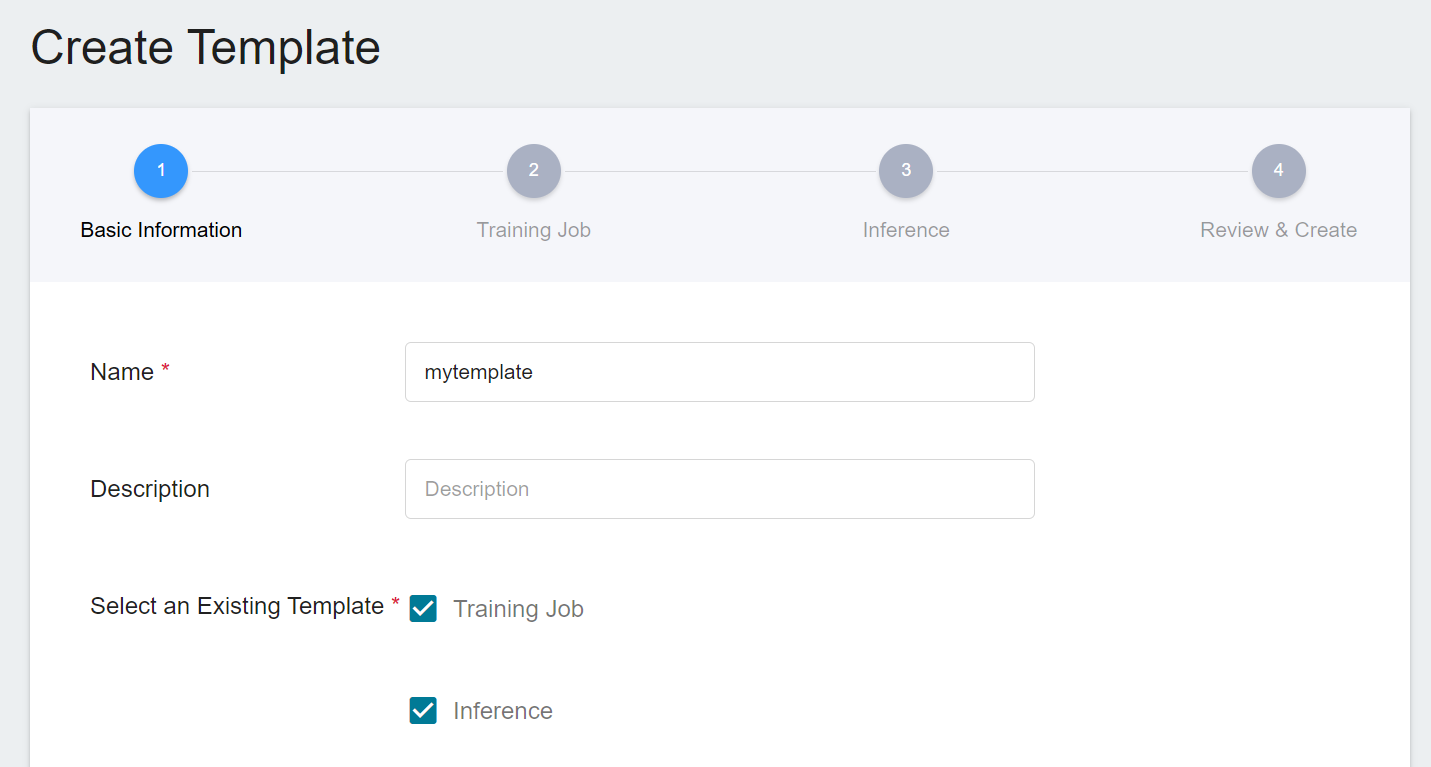
* Follow the steps below to complete the template settings. You can choose to set only one template or multiple templates.
### Set Up a Training Job Template
* Select an Existing Template: Click **SELECT** to select a public or private template. The system will show the settings of the selected template, which can be directly applied or modified. You can also set it yourself if you prefer not to choose any.
:::info
:bulb: **Tips:** It is recommended to refer to the public template settings for the first use.
:::
* Image Source: Click **SELECT** to select a public or private image.
* Image Tag: Select the image tag.
* Environment Variables: Enter the name and value of the environment variables.
* Hyperparameter: When **Smart ML Training Job** is selected as the training job method, you need to set the hyperparameters required by the machine learning algorithm, including the name, type, and value (or value range) of the parameter. After selecting the type (integer, decimal, and array), please follow the prompts to enter the values in corresponding numeric format.
* Target Parameter: When **Smart ML Training Job** is selected as the training method and **Bayesian** and **TPE** are selected as the algorithm, the name and target direction of a set of target parameters can be set, and by using the target parameter results returned after each run, the next run's hyperparameters are automatically adjusted. If the returned value is the accuracy rate, you can name it accuracy and set its target direction to the maximum value; if the returned value is the error rate, you can name it error and set its direction to the minimum value.
* Input Directory: Specify the storage location of the training data.
* Output Directory: The storage location and mounting path of the model after training. The default output directory is `OUTPUT`, and the mounting path is `/output`.
When done, click **REVIEW & CREATE** or **NEXT: INFERENCE>**.
### Set Up a Inference Template
* Model Source: Enter the name and mount path of the model source. If you need multiple models for inference, you can click **ADD** to add other model sources.
* Select an Existing Template: Click **SELECT** to select a public or private template. The system will show the settings of the selected template, which can be directly applied or modified. You can also set it yourself if you prefer not to choose any.
* Image source: Click **SELECT** to select a public or private image.
* Image Tag: Select the image tag.
* Environment Variables: Enter the name and value of the environment variables.
* Command: Enter the command or program name to be executed. For example: `python $INPUT/app.py`.
* Monitor data: Click **ADD**, then enter the name and category of the monitor data, and the monitoring results will be displayed in the monitoring page of the inference task as a graph.
:::info
:bulb: **Tips:** The monitor data settings here is related to your inference program. For related instructions, please refer to [**Inference > Creation Method - Custom > Advanced Settings**](#5-Advanced-Settings).
:::
Click **NEXT: REVIEW & CREATE>** when finished, review the template settings, and click **CREATE** after confirming.
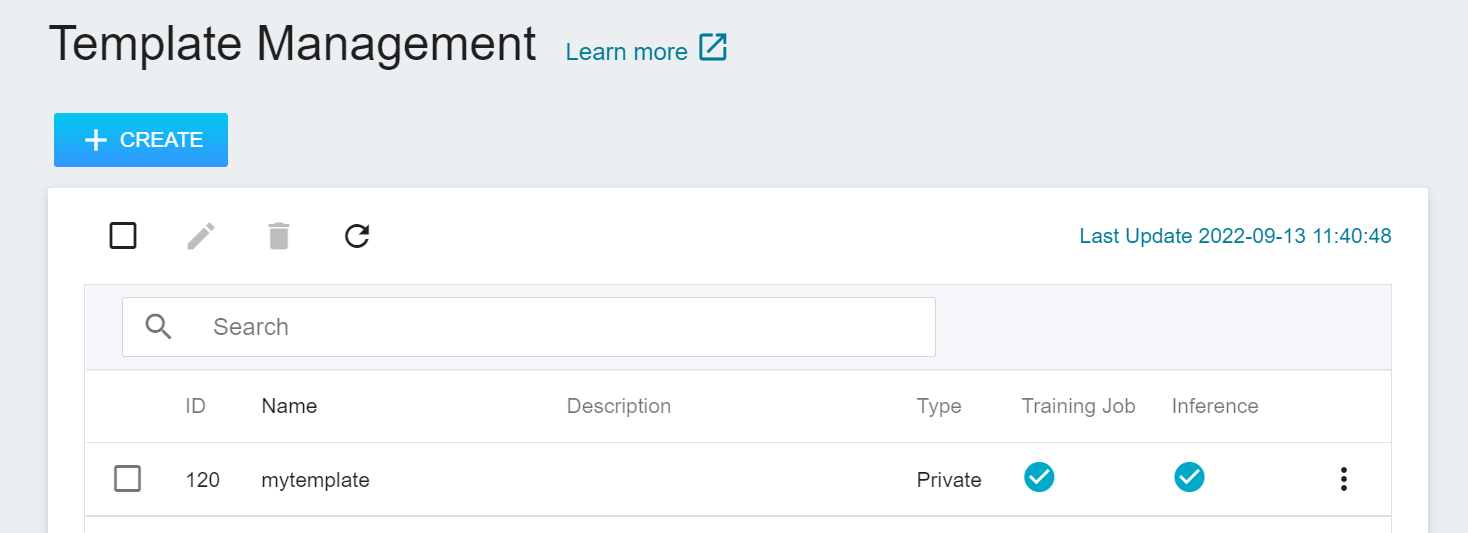
## Manage Template
* After the template is created, it will appear in the template management list. A checked icon will appear on the successfully created template item. Click on the template list to enter the **Template Details** page to view the template settings.
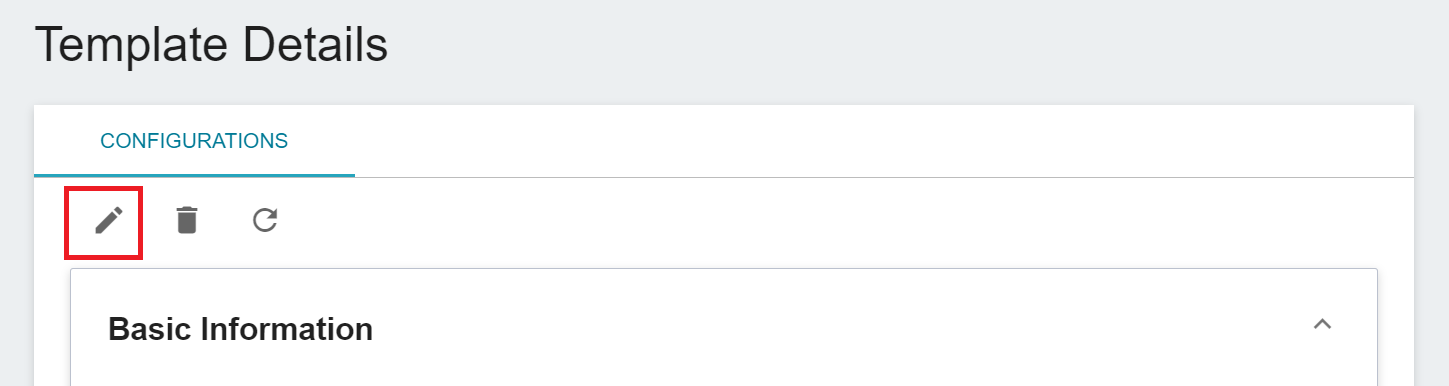
### Edit Template
* Go to the template details page, click the pencil icon in the command bar to edit the template settings, and click **SAVE** when finished.
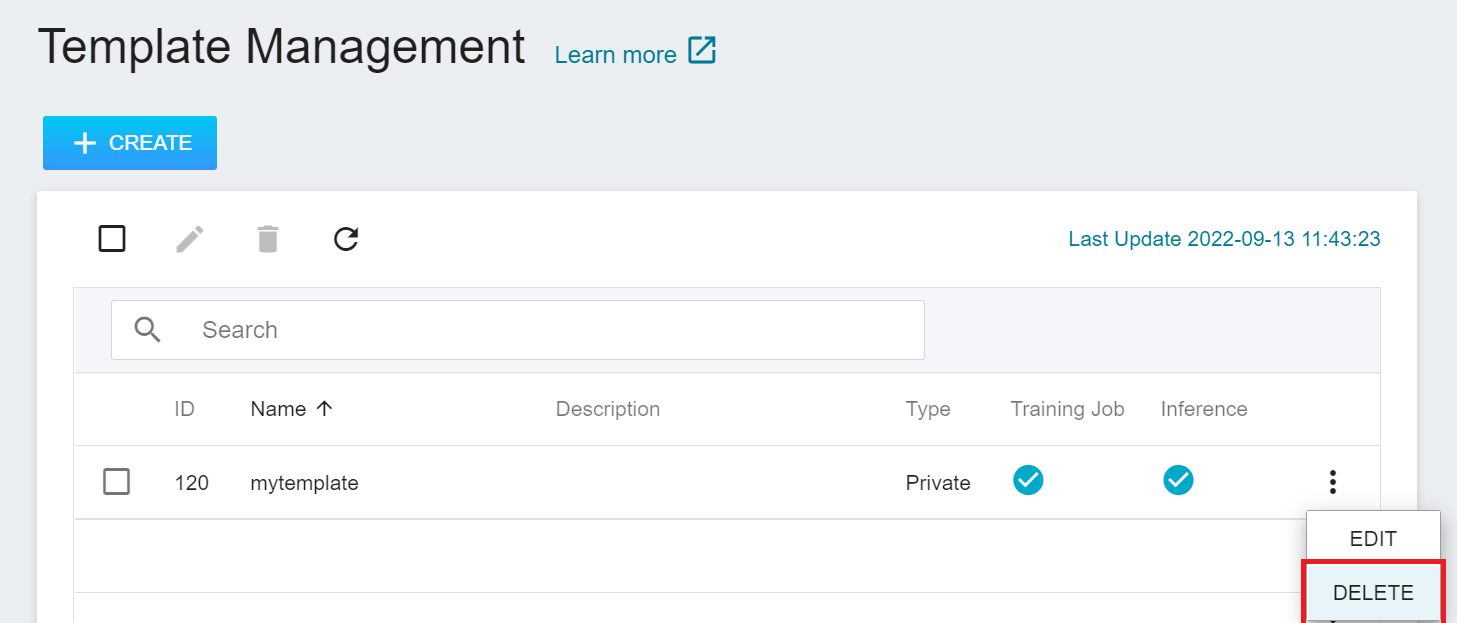
### Delete Template
* In the template management list, move the mouse to the more options icon on the right, then click **DELETE**.
# Training Job
After model development, you can use **Training Job** for subsequent fine-tuning, such as using larger datasets, trying different datasets, trying multiple algorithms and repeatedly performing training operations to obtain the most suitable model.
You can use V100 GPU computing resources in **Training Jobs** to help schedule and execute large scale training operations, which not only greatly shortens the computing time, but also releases resources after computing, so that the system computing power and budget can be used more efficiently. Depending on the requirements, the training environment can be either [**public image (mainstream algorithmic framework)**](/s/public-image-en)or [**private image (user-defined)**](/s/container-image-en).
:::info
:bulb: **Tips:** If you use a private image as the environment setting for training operations, it is recommended to use the container image from [**NVIDIA NGC™**](https://catalog.ngc.nvidia.com/containers) as the base image, or install the `nvidia-smi` related packages in the private image to ensure successful GPU usage with V100 GPU computing resources.
:::
## Model Training Methods
There are two ways to train models when using Training Job:
* **Template**
- **Public Template**: The system has multiple built-in machine learning templates. You only need to prepare the corresponding data and formats and put them in OneAI [**Storage Service**](/s/storage-en) to train the model with **low-code**. This helps users in different fields to get started quickly and greatly reduces model delivery time.
- The public training templates listed below will automatically record the Parameters, Metrics, Tags and Artifacts during the training process in MLflow, and synchronously display them in the AI Maker (Beta) interface. For detailed usage of public templates, please refer to [**AI Maker - Case Study**](/s/user-guide-en#Case-Study).
- **Private Template**: Users can create their own templates and share them with team members in the same project.
* **Image**
- You can also choose a [**public image**](/s/public-image-en) or a [**private image**](/s/container-image-en) and use custom training code to perform model training according to usage scenario.
- Suggested preparation work:
- Save the training dataset to [**Storage Service**](/s/storage-en).
- Modify the custom training code accordingly and save it to [**Storage Service**](/s/storage-en).
- Use [**MLflow Record Training Data**](#5-Record-Training-Data) in code.
- Prepare a list of required packages.
## Using Training Job
Training Job could be either a **Normal Training Job** or a **Smart ML Training Job**.
* **Normal Training Job**: One-time training according to the user's settings.
* **Smart ML Training Job**: Smart ML training jobs can automatically adjust hyperparameters, effectively use computing resources for multiple model training, and save users time and cost in analyzing and adjusting model training parameters.
### Create Training Job
* Select **AI Maker (Beta)** from the OneAI service list, and then click **Training Job**.
* Go to the **Training Job Management** page, click to switch between **Normal Training Job** or **SMART ML Training Job** from the upper tab, and click **+CREATE**.
#### 1. Basic Information
* MLflow Experiment: Click **SELECT** to select an existing MLflow Experiment to bind.
:::info
:bulb:**Tips:** If the Experiment has not been created yet, you can create one in the MLflow Tracking UI. If you do not choose an MLflow Experiment to bind, the system will automatically generate an Experiment Name for binding which begins with the training job's name and adds a string behind.
:::
* Name: Enter a name for the training job.
* Description: Enter a description for the training job.
* Algorithm: For Smart ML Training Jobs, you can select the algorithm provided by the system.
* **Bayesian**: Efficiently perform multiple training jobs to find better parameter combinations, depending on environmental variables, the range of hyperparameter settings, and the number of training sessions.
* **TPE**: Tree-structured Parzen Estimator, similar to the Bayesian algorithm, can optimize the training jobs of high-dimensional hyperparameters.
* **Grid**: Experienced machine learning users can specify multiple values of hyperparameters, and the system will perform multiple training jobs based on the combination of the hyperparameter lists and obtain the calculated results.
* **Random**: Randomly select hyperparameters for the training job within the specified range.
* Select Method: Click **SELECT** to select a training method. Different training methods will switch to different settings page.
* Select an Existing Template: Click **SELECT** to select a public or private template. The system will show the settings of the selected template, which can be directly applied or modified. You can also set it yourself if you prefer not to choose any.
* Image Source: Click **SELECT** to select a public or private image.
* Image Tag: Select the image tag.
Then click **NEXT: HARDWARE SETTINGS>**.
#### 2. Hardware Settings
* Select the appropriate hardware configuration according to your computing requirements. You can also click **View Available Quota** to view the current resource quota and usage of your project, and then click **NEXT: STORAGE SETTINGS >**.
#### 3. Storage Settings
* Input directory: Specify the storage bucket name where the training data is located, or create a new bucket.
* Output Directory: The storage location and mounting path of the training results. The system defaults to the dedicated mlflow bucket for each project.
Then click **NEXT: VARIABLE SETTINGS >**.
#### 4. Variable Settings
* Environment variables: Enter the name and value of the environment variables. Environment variables include not only relevant settings for training execution but also parameter settings required for training the network.
* Hyperparameters: When selecting the **Smart ML Training Job** as the training method, it is necessary to set the hyperparameters required by the machine learning algorithm. These parameters indicate what values should be tried for the training job. Each parameter must have a name, type, and value (or range of values) when it is set. After selecting the type (integer, float, and array), enter the corresponding value format when prompted.
* Target Parameter: When **Smart ML Training Job** is selected as the training method and **Bayesian** and **TPE** are selected as the algorithm, the name and target direction of a set of target parameters can be set, and by using the target parameter results returned after each run, the next run's hyperparameters are automatically adjusted. If the returned value is the accuracy rate, you can name it accuracy and set its target direction to the maximum value; if the returned value is the error rate, you can name it error and set its direction to the minimum value.
* Command: Enter the command or program name to be executed. For example: python $INPUT/app.py.
* Trial Times: When **Smart ML Training Job** is selected as the training method, you can set the number of training sessions and let the training job execute multiple times to find a better parameter combination.
Then click **NEXT: REVIEW & CREATE>**.
:::info
:bulb: **Tips: Custom Code**
#### Environment Variables and Hyperparameters
* If you want to change the dataset without modifying the code through the input source in **Training Job > Storage Settings** or change the training parameters through adjustment of environment variables or hyperparameters in **Training Job > Variable Settings**, you can use **`os.environ.get(ENV, DEFAULT)`** to access environment variables and set default values.
```python=1
import os
DATA_PATH = os.environ.get('INPUT', '/input')
OUTPUT_PATH = os.environ.get('OUTPUT', '/output')
BATCH_SIZE = int(os.environ.get('BATCH_SIZE', 8))
LEARNING_RATE = float(os.environ.get('LEARNING_RATE', 0.00001))
```
* **Environment Variables** and **Hyperparameters** can be moved to each other. If you want to fix a parameter, you can remove it from the hyperparameters section and add it to the environment variables section and assign a fixed value to it. Conversely, if you want the parameter to be freely adjustable, you can remove it from the environment variables and add it to the hyperparameters section.
#### Target Parameter
* If you want to automatically adjust the hyperparameters used in the next run based on the hyperparameter results returned after each run, you will need to make use of the additional Python package **`AIMaker`**. This approach is applicable only to the **Bayesian** and **TPE** algorithms in the Smart ML Training Job.
```python=1
import AIMaker as ai
ai.sendUpdateRequest({result})
```
* {result} is the training results to be sent back to AI Maker, such as error_rate, accuracy. AI Maker only accepts one set of return values.
* {result} type must be int or float (int, float of Numpy type are not acceptable).
:::
#### 5. Review & Create
* Check the creation information of the **Training Job**, and then click **CREATE**.
### Manage Training Job
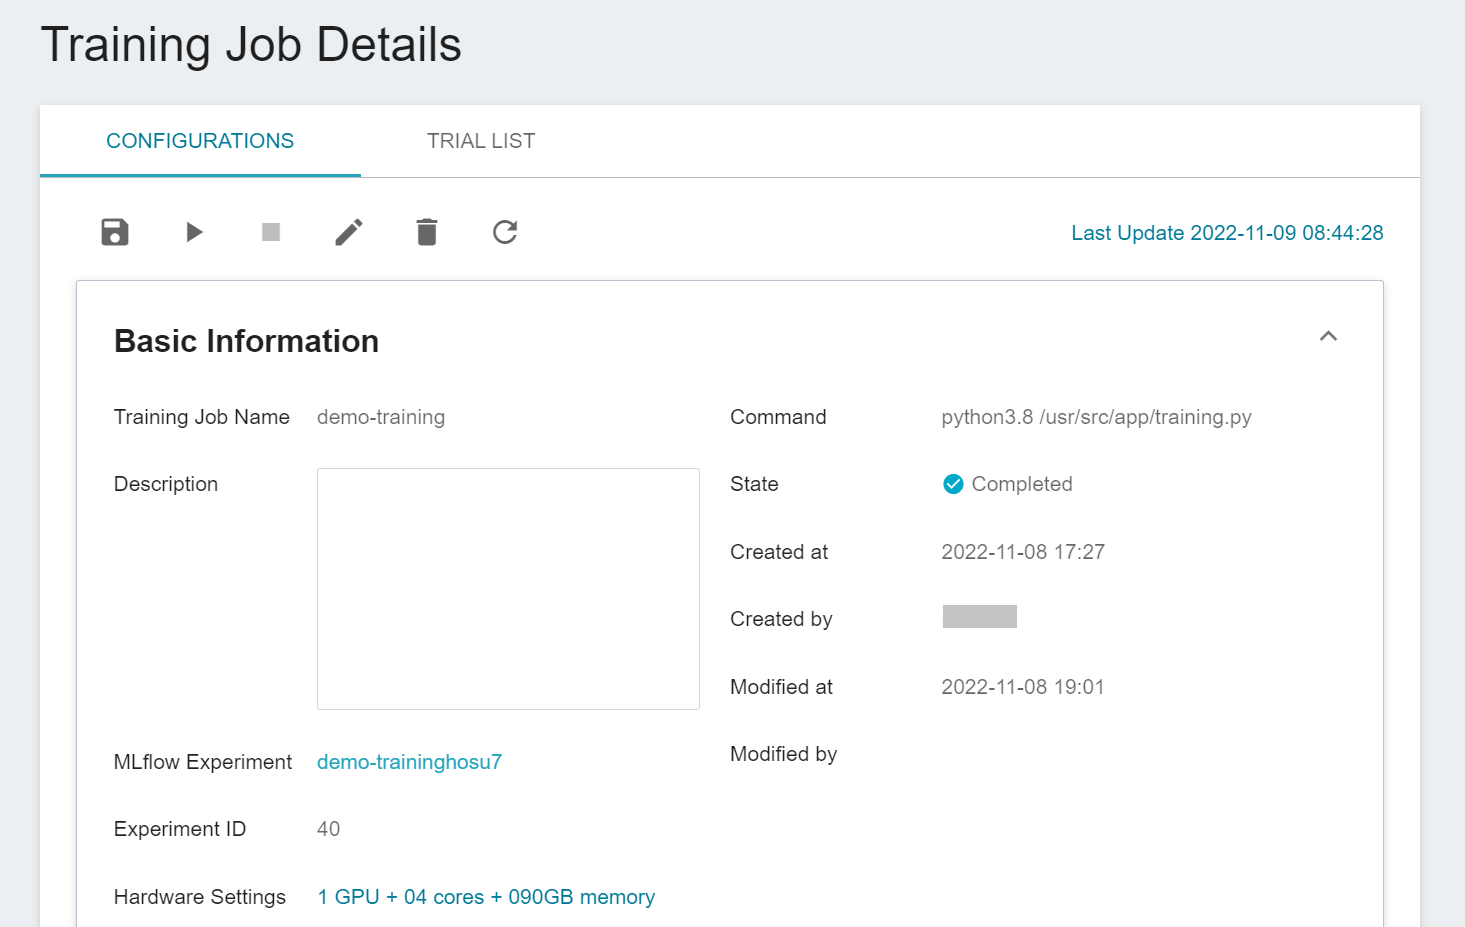
* After the training job is created, it will appear at the top of the list. Click the list to enter the training job details page.
* Enter the Training Job Details page to view the settings information of the training job. Click the icon in the command bar to perform actions such as **Save (save as template)**, **Start**, **Stop**, **Edit**, **Delete** and **Refresh**.
:::info
:bulb: **Tips:** Please refer to [**Service State Description**](/s/service-state-en#AI-Maker-Training-Job). If the service creation failed, it is recommended to use the **Notebook Service** or **Container Service** to confirm the environment setting and that the program can be executed successfully.
:::
### Start a Training Job
* Go to the Training Job Details page to confirm the content of the settings. If the state of the training job is displayed as **```Ready```**, you can click the **Start** icon above to run the training job, and bring the training job information into MLflow.
:::info
:bulb: **Tips:** After the training job of AI Maker (Beta) is bound to the MLflow Experiment, the experiment and related information will be created and updated synchronously on the UI of both sides. Operations such as Add and Modify should be performed in the training job of AI Maker (Beta), and the related actions will be updated to the MLflow UI synchronously, otherwise, they will not be updated synchronously.
:::
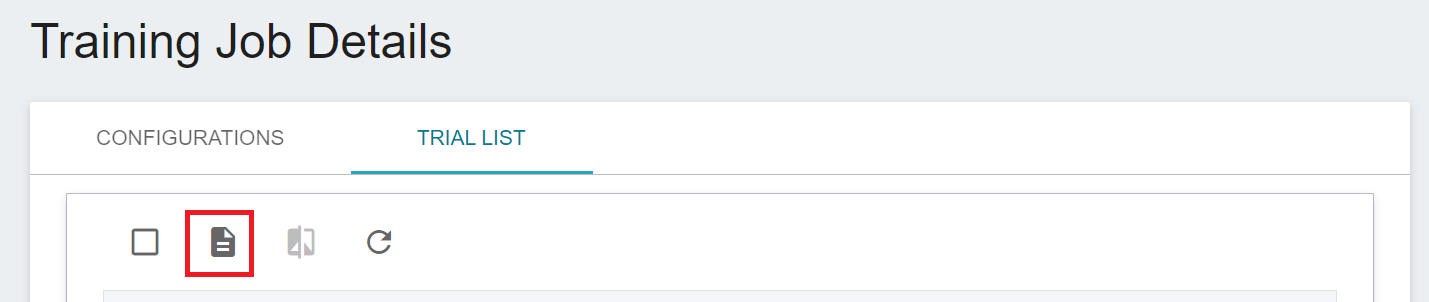
* Click the **TRIAL LIST** above to enter the Trial List Page. After a few minutes, the state of the Training Job will be displayed in the list.
* Move the mouse to the More Options icon at the end of the Trial List, and select **View Artifacts**, **View Hyperparameters**, **View Logs** or **View Detail State**. The menu items will be different depending on the training method and state.

### View Training Results
* Go to the **TRIAL LIST** page in **Training Job Details** to view all the Metrics recorded through MLflow.
* Enter a specific keyword (numerical value) in the search box to search for matching Metrics. Click the Metrics filter menu at the top right to filter the Metrics to be displayed.

* Click **DOWNLOAD RESULTS** icon at the command bar above to export all the results as a csv file.
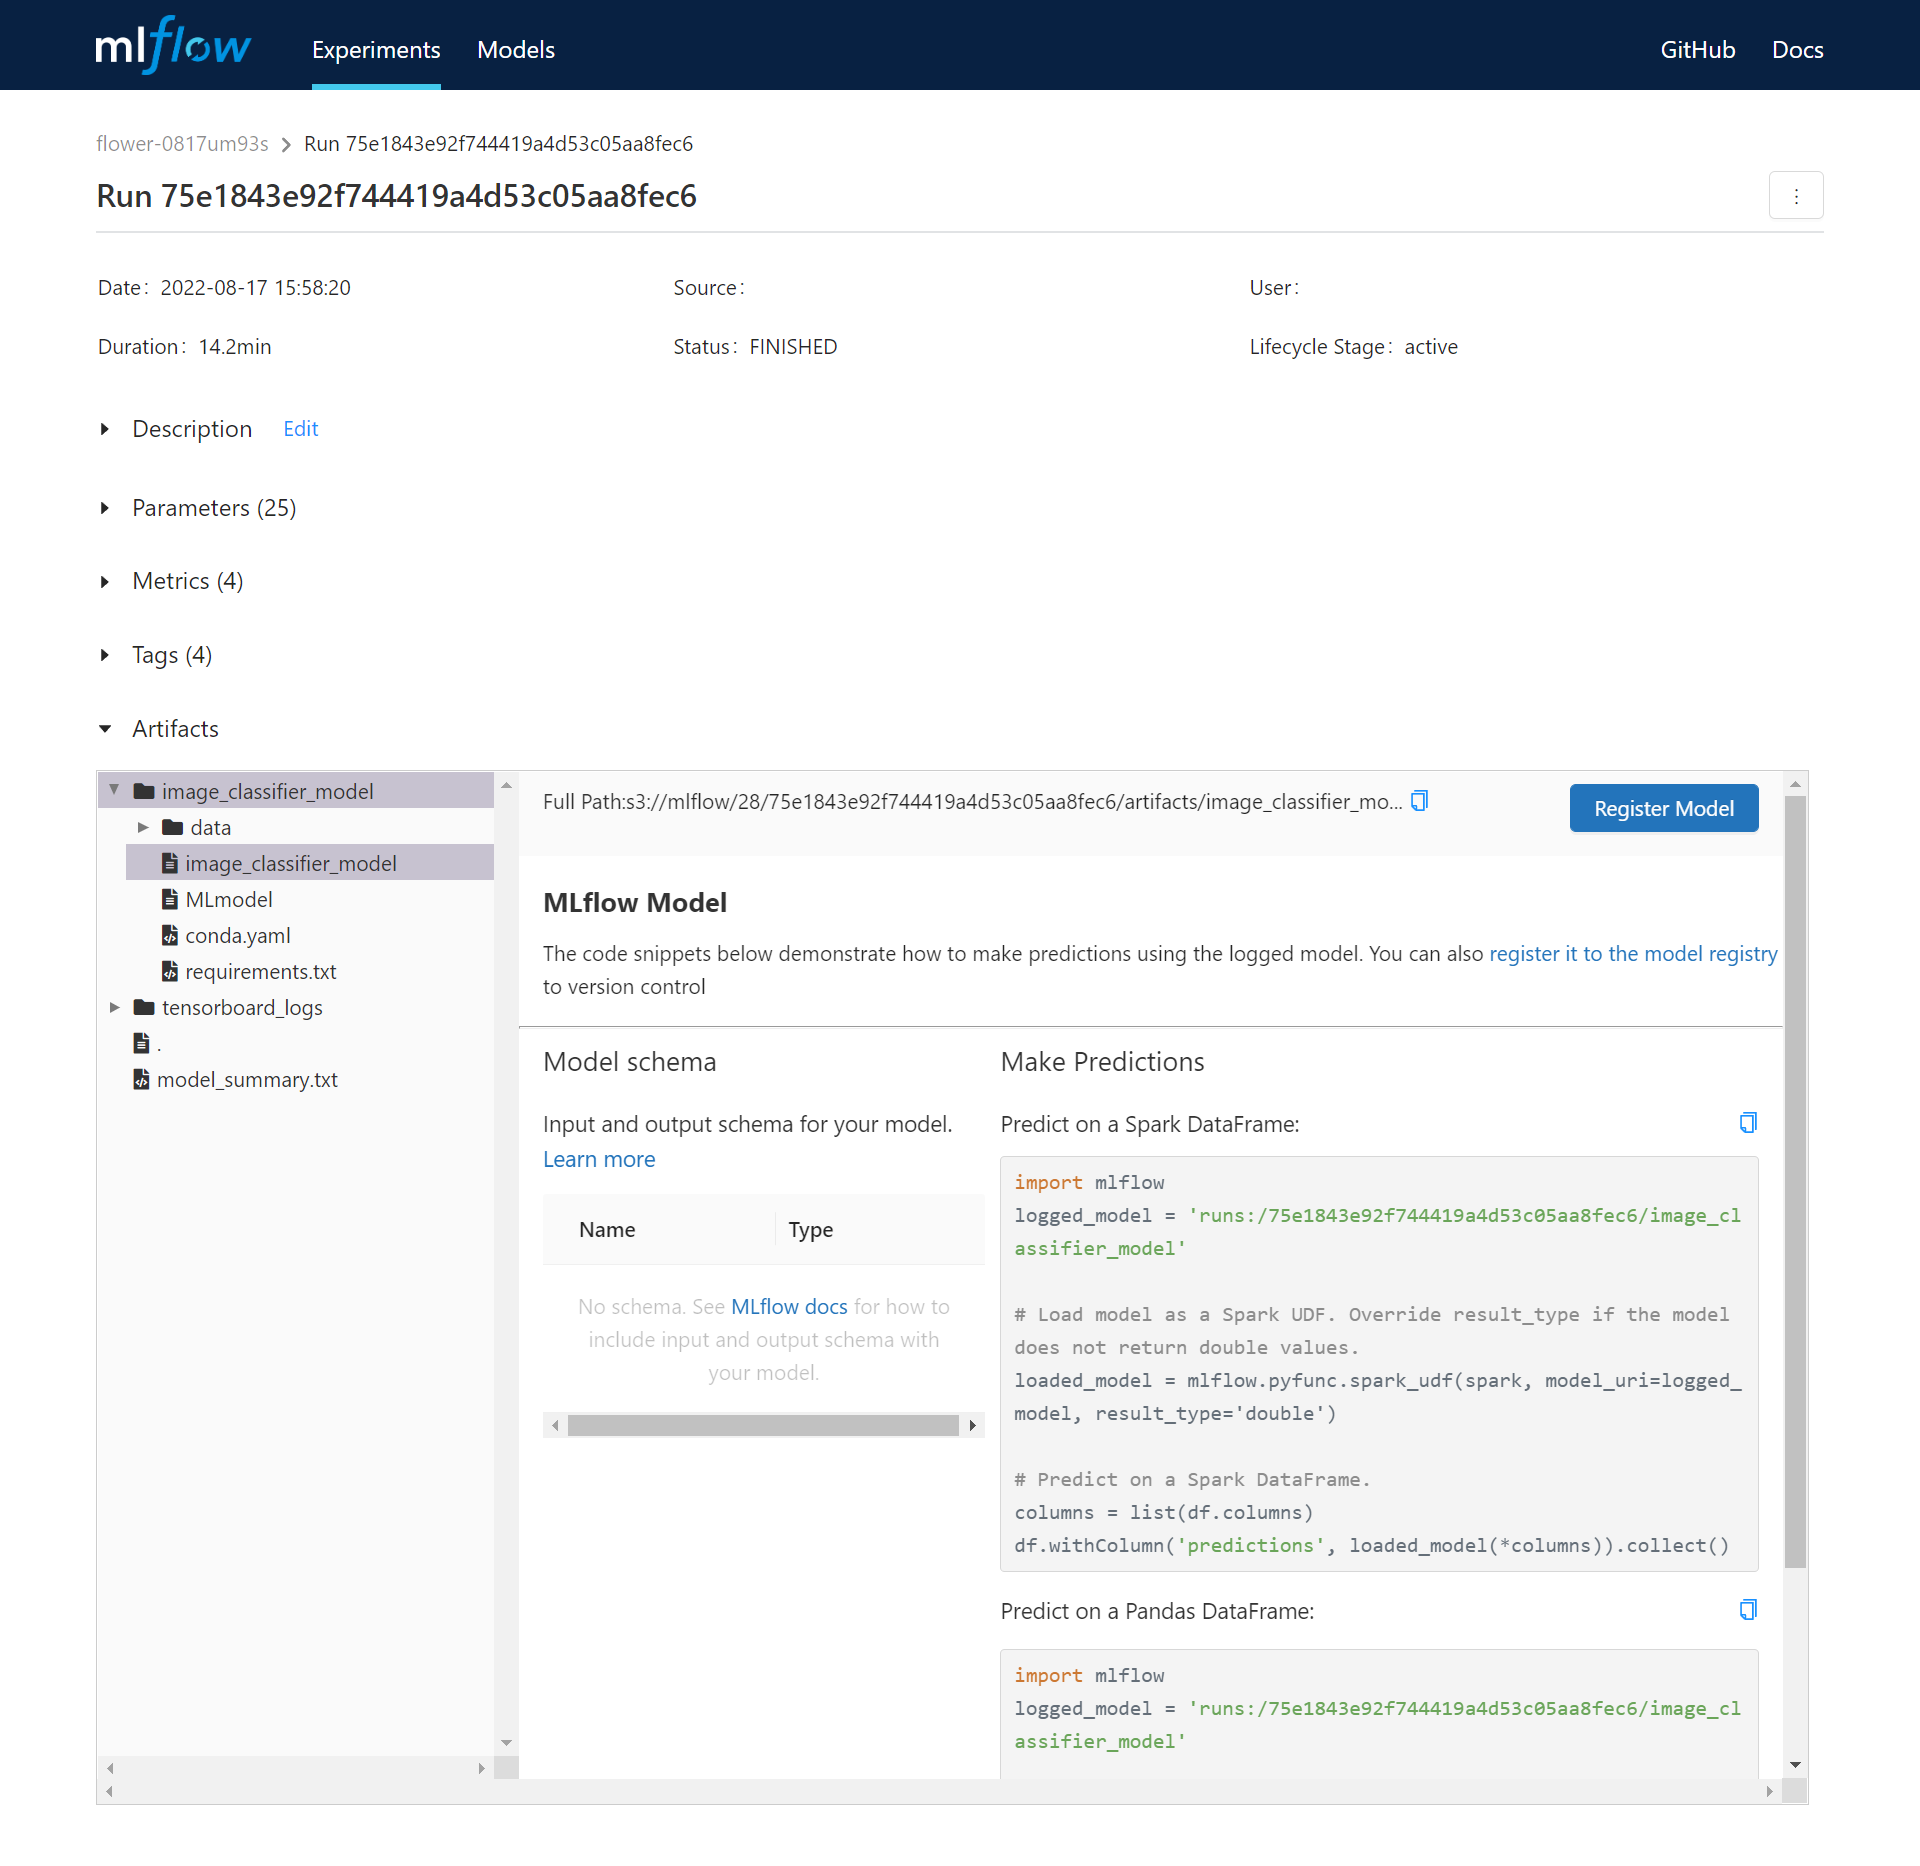
* Click any list to open the corresponding Run in MLflow to view more Parameters, Metrics, Tags, and Artifacts.
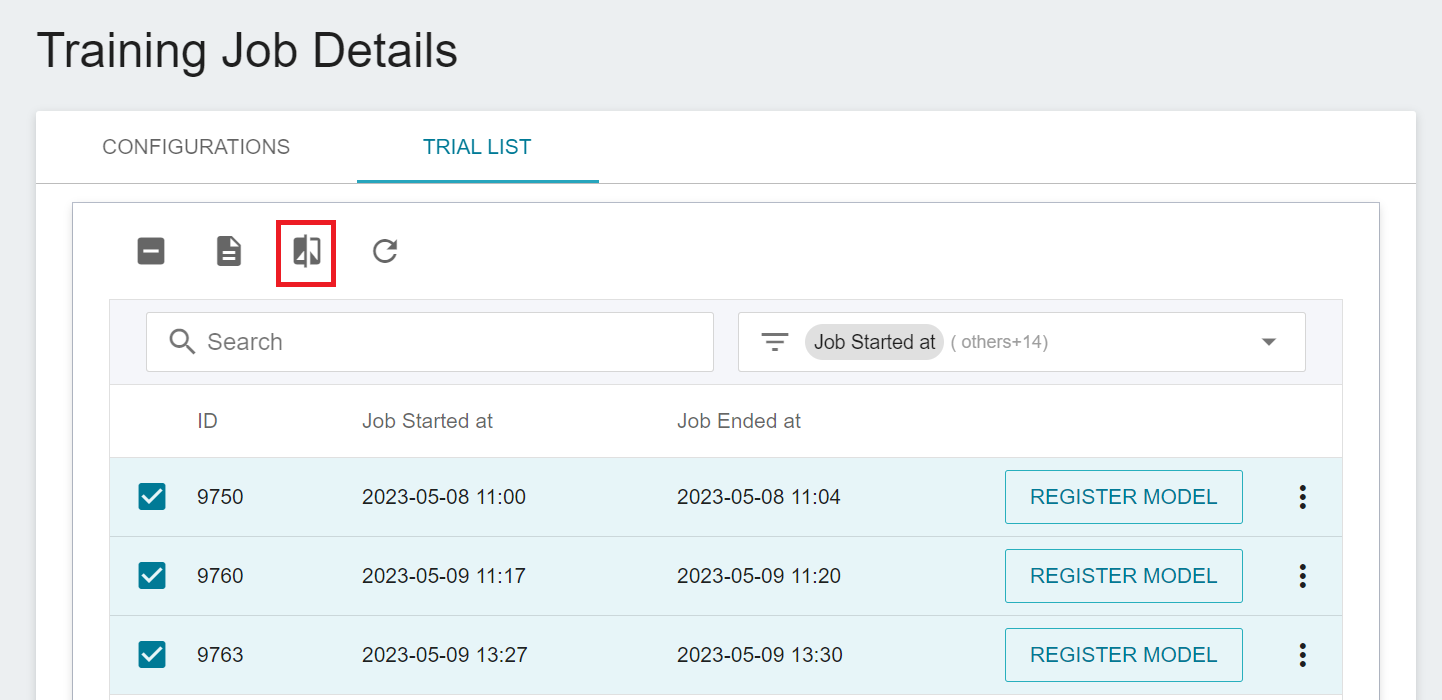
* Tick the checkboxes of the Runs you want to compare and click **COMPARE** icon at the command bar above. This will compare model training parameters and results with a visual chart in MLflow.

### Delete a Training Job
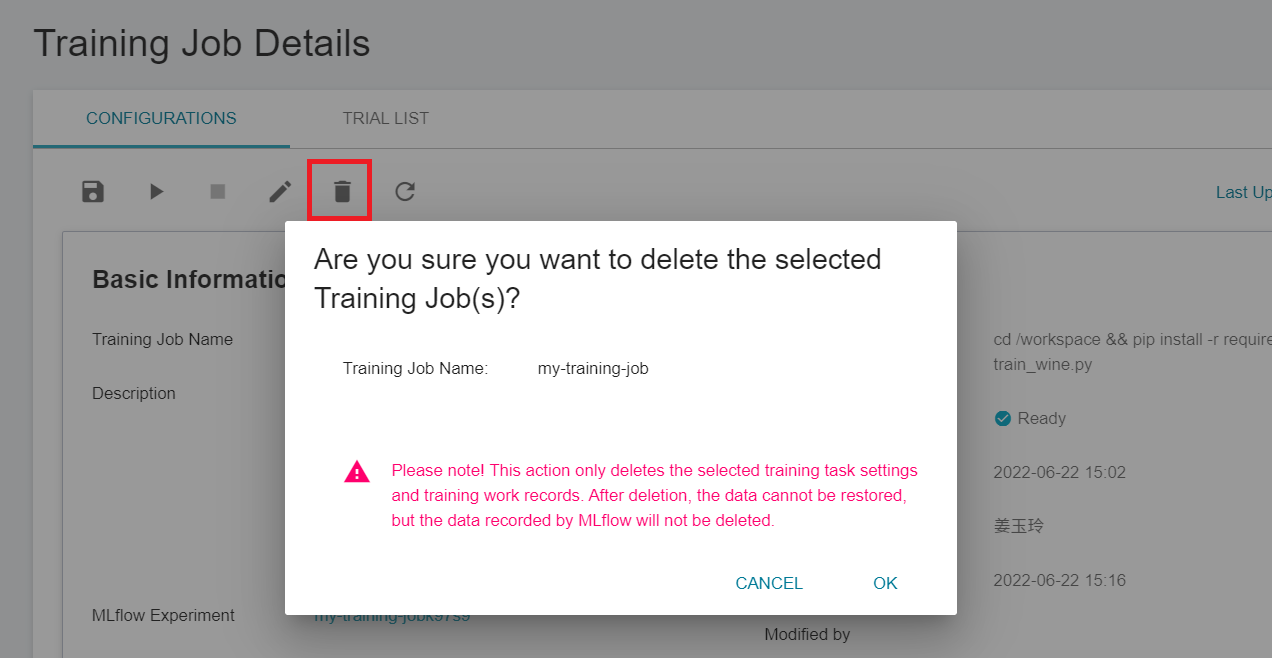
* Go to the **Training Job Details** page and click the **Delete** icon in the command bar. This action will only delete the AI Maker training job settings and running records, the bound MLflow Experiment record data will not be deleted.
# MLflow Tracking
MLflow Tracking makes it possible to trace and reproduce ML models, and tracks the association and effectiveness of model training designs. For MLflow related settings and interface operations, please refer to the following.
* [AI Maker (Beta) - MLflow Tracking](#AI-Maker-Beta---MLflow-Tracking)
* [Code Integrating MLflow](#Code-Integrating-MLflow)
* [MLflow UI](#MLflow-UI)
## AI Maker (Beta) - MLflow Tracking
* Select **AI Maker(Beta)** from the OneAI service list, and then click **MLflow Tracking**.
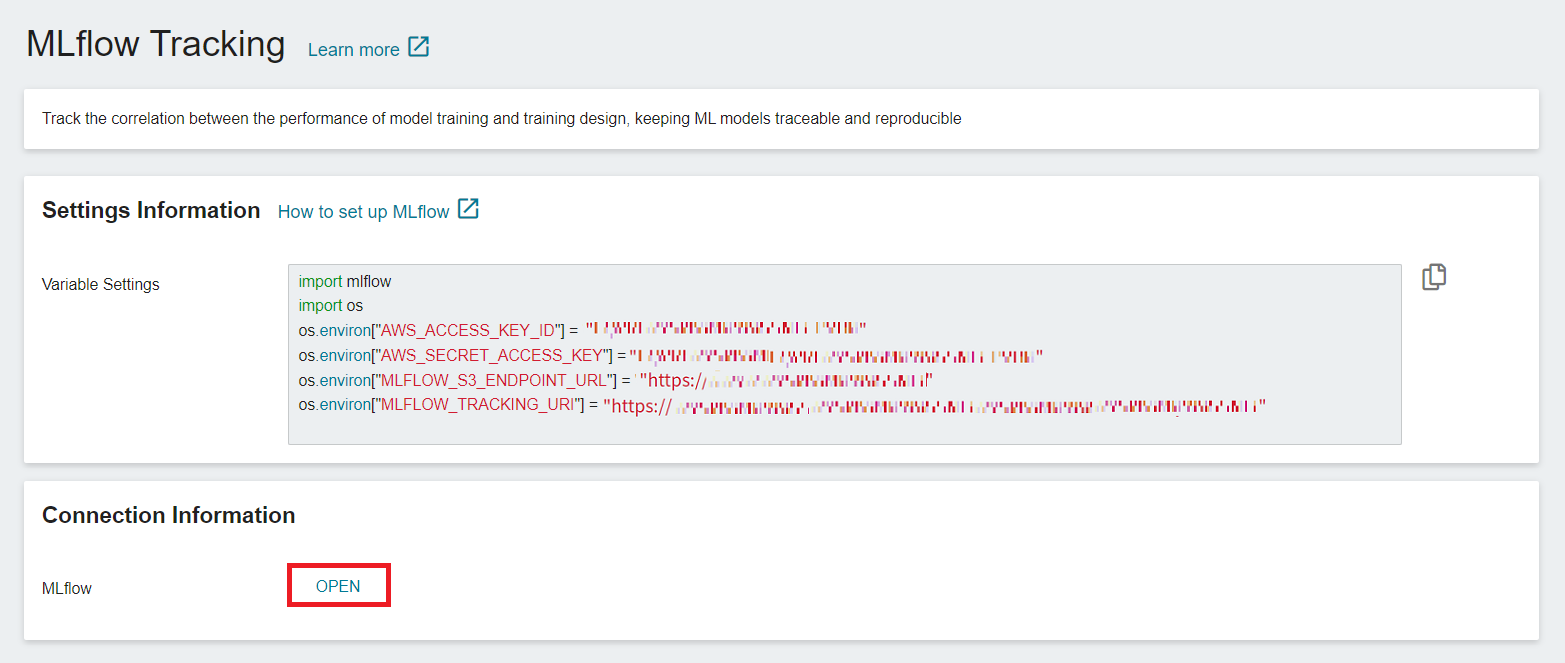
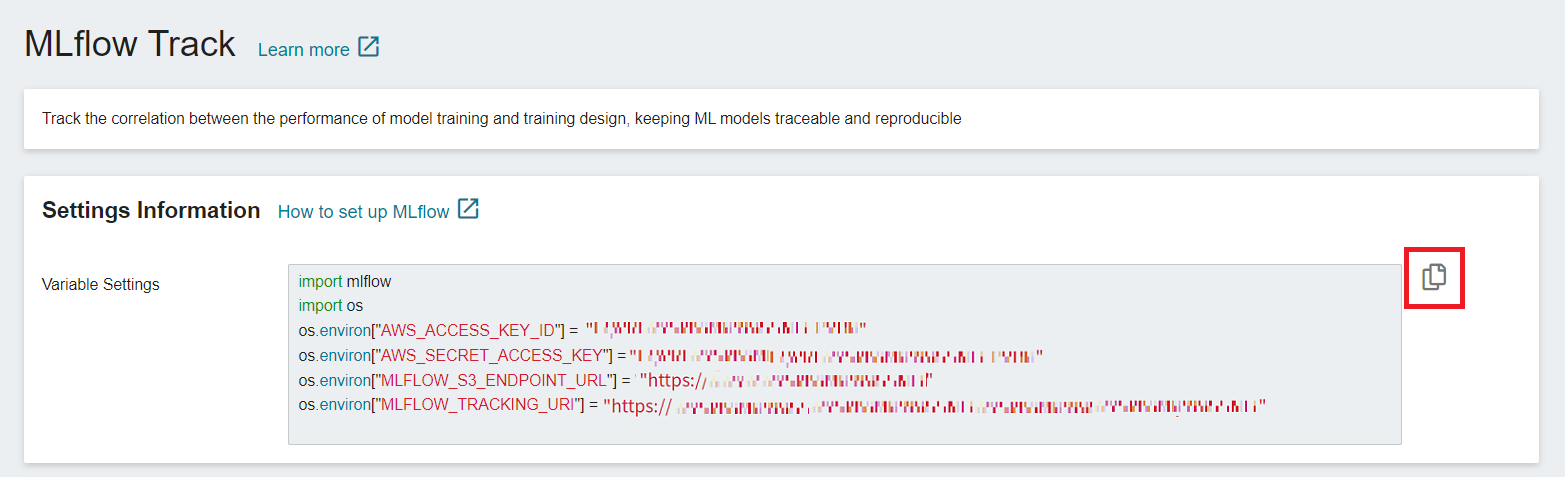
* **Settings Information**: This information is necessary to connect to MLflow, includeing: MLflow SDK, S3 connection information and MLflow Tracking endpoint.
* **Connection Information**: Click the **OPEN** button to view the MLflow UI in a separate tab.
## Code Integrating MLflow
The following describes how to edit the code in JupyterLab through [**Notebook Service**](/s/notebook-en) during the development stage, and obtain the necessary information for integrating MLflow through [**AI Maker (Beta)** > **MLflow Tracking**](#AI-Maker-Beta---MLflow-Tracking) to track the progress of the development stage.
#### 1. Get **MLflow** Settings Information
* Select **AI Maker (Beta)** from the OneAI Services Menu, and then click **MLflow Tracking**.
* In the **MLflow Tracking** page, you can see the settings information required for connecting to **MLflow**, including MLflow SDK, S3 access info and MLflow Tracking endpoint.
* Click the **Copy** icon on the right to copy the contents of the **Variable Settings** field and add it to your training program.
#### 2. Install the MLflow Package
Before using MLflow, you need to install the MLflow package to your training program first. To avoid unpredictable results caused by version conflicts, it is recommended to install **MLflow 1.24** You can also add the MLflow package into **requirements.txt**. For more information, please refer to [**Notebook Service > Install Other Python Packages**](/s/notebook-en#Install-Other-Python-Packages) documentation.
```python=
!pip install --upgrade mlflow==1.24
```
#### 3. Add MLflow Settings Information
Add the **MLflow Settings Information** to the training program, including the package imports, S3 access info, and MLflow Tracking Server URI.

#### 4. Set Experiment Name
Set the Experiment Name. If the Experiment Name does not exist, it will be created automatically.
```python=
os.environ["MLFLOW_EXPERIMENT_NAME"] = "Your Experiment"
mlflow.set_experiment(os.environ["MLFLOW_EXPERIMENT_NAME"])
```
#### 5. Record Training Data
Use the Tracking API provided by MLflow to record important information about each training session, such as hyperparameters, indicators, or code version. See [**MLflow Logging functions**](https://mlflow.org/docs/latest/tracking.html#logging-functions) for details. The trained model of the training job can also be logged to MLflow through API, please refer to the log_model() description of the [**support framework**](https://mlflow.org/docs/latest/python_api/index.html) used.
```python=
...
# Log parameter, metrics, and model to MLflow
mlflow.log_param("learning_rate", learning_rate)
mlflow.log_metric("accuracy", accuracy)
mlflow.set_tag("method_type", method_type)
mlflow.sklearn.log_model(lr, "model")
...
```
When you use popular machine learning frameworks, you can also automatically log metrics, parameters, and models through the **`mlflow.autolog()`** API provided by MLflow. For more information, see [**MLflow Automatic Logging**](https://www.mlflow.org/docs/latest/tracking.html#automatic-logging).
```python=1
...
mlflow.autolog()
...
```
## MLflow UI
#### MLflow Experiments
**Experiments** page allows you to quickly grasp the differences between each machine learning training run and to compare the visualization results of multiple training tasks to select the best-performing model. For individual model training, you can further view the tracked information, including Parameters, Metrics, Tags (such as code version, dataset name or others), and Artifacts (such as model information).

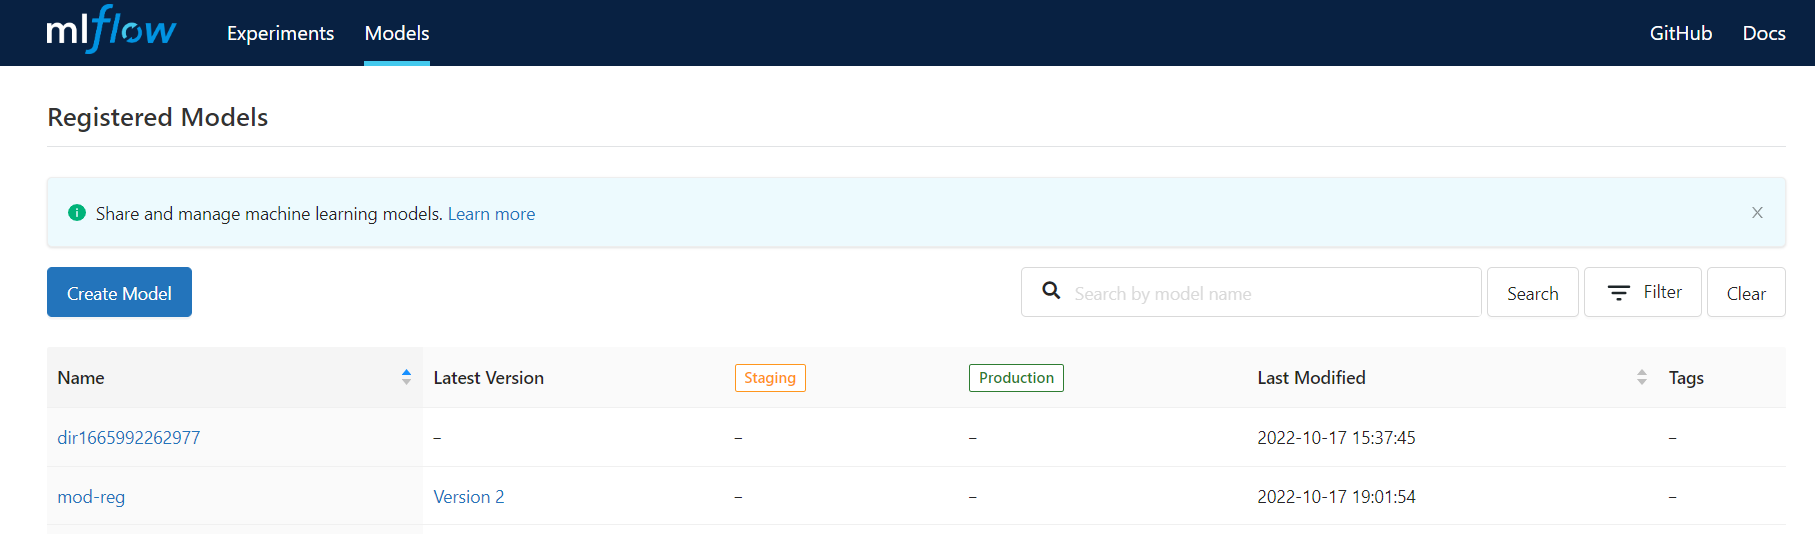
#### MLflow Models
**Models** allows you to view information such as registered model directories and latest versions, and define different stages of the model, such as `Staging`, `Production`, and `Archived`, to more easily manage the model lifecycle.
# Model
The Model features help developers manage the lifecycle of models and accelerate the ML development process by managing registered models, selecting models for inference, or removing underperforming models.
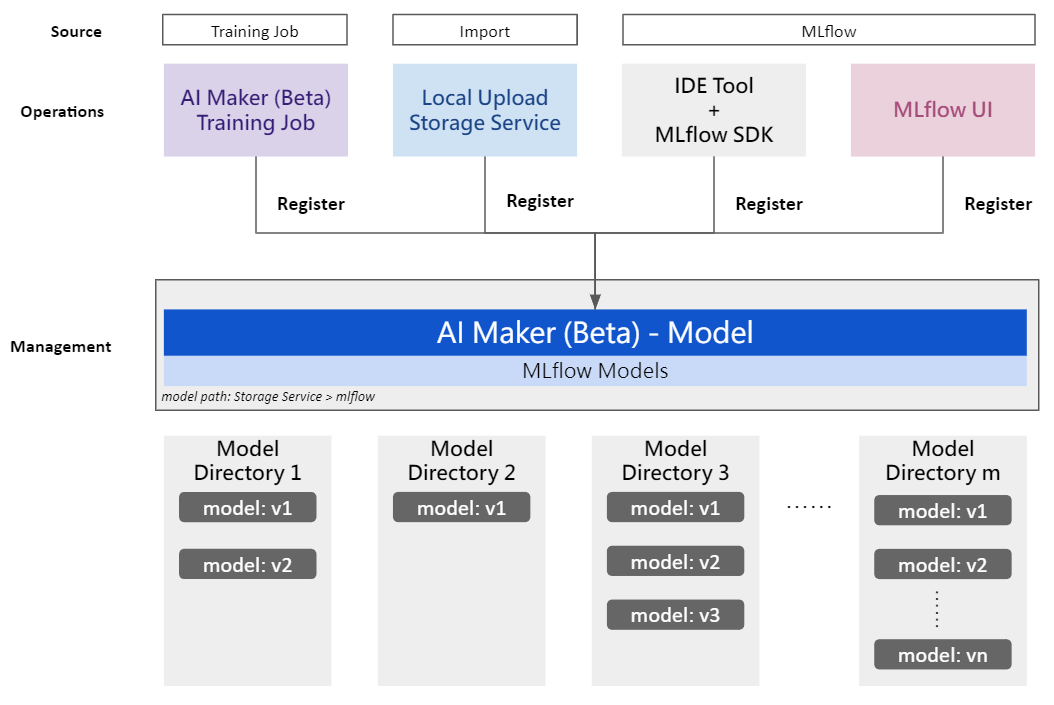
## Model Registration
Model management is combined with the MLflow Model Registry functionality. You can register models from AI Maker training jobs or import existing models. You can also register models through the MLflow user interface or API. The registered models can be centrally managed.
#### 1. Registering Model from AI Maker Training Job
* Select **AI Maker (Beta)** from the OneAI service list, and then click **Training Job** to enter the Training Job Management page.
* Click a Training Job to enter the **TRIAL LIST** page of **Training Job Details**.
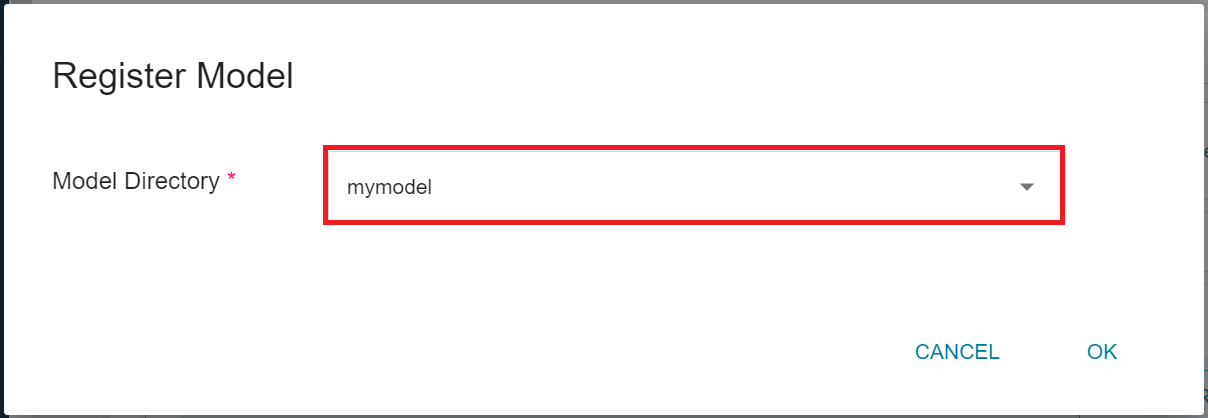
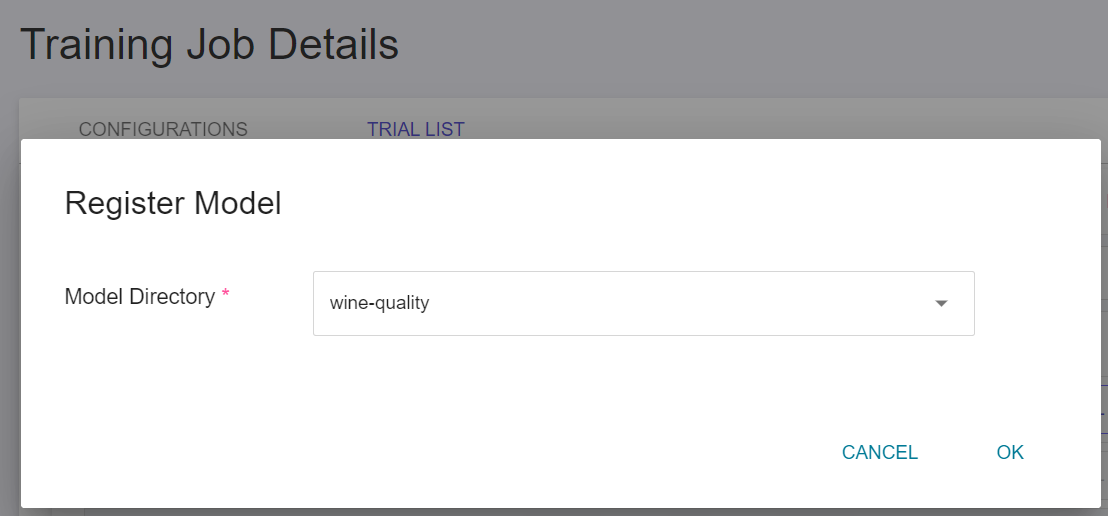
* Click the **REGISTER MODEL** button on the right of the trial list of the model to be registered.

* In the Register Model window, click the right-hand side menu of **Model Directory**, enter a name to create a new model directory or select an existing model directory.
#### 2. Import Existing Model from AI Maker
* If you already have a trained model, you can upload the model to the bucket of the **Storage Service**, and then import it into the model management service of AI Maker to facilitate centralized management or subsequent inference tasks. For instructions on uploading files, please refer to the [**Storage Service Documentation**](/s/storage-en).
:::info
:bulb: **Tips:** Please upload the model files to the **Storage Service** according to the original framework output, without compressing it into a zip file, for example: scikit-learn > `.pkl`, Pytorch > `.pt`, Tensorflow > `.h5`.
:::
* Select **AI Maker** from the Services, and then click **Model** to enter the Model Management page, and then click the model in the list to enter the Model Version Management page.
* Click the directory of the desired model in the Model Directory List to enter the Model Version Management page for that directory.
* Click the **Import** icon above to import the existing model.

#### 3. Register Model from MLflow UI
* Click the **REGISTER MODEL** button on the MLflow UI. Please refer to [**Model UI Workflow**](https://www.mlflow.org/docs/latest/model-registry.html#ui-workflow) for related operations.

#### 4. Register Model Through MLflow API
* Execute commands related to model registration through the MLflow API. For related operations, please refer to the [**MLflow Model Registry**](https://www.mlflow.org/docs/latest/model-registry.html#mlflow-model-registry) instructions.
:::info
:bulb: **Tips:** When performing management actions such as creating, editing, or deleting model directories and versions, the system will synchronize and update the information on both the **AI Maker > Model Management** page and the **MLflow Models** page. The previously generated model files and related documents are not affected.
:::
## Manage Model
* Select **AI Maker (Beta)** from the Services, and then click **Model** to enter the Model Management page.
* You can manage **Model Directory** and **Model Version** in model management:
- **Model Directory**: Several model directories can be created for different scenarios or business purposes, and multiple versions can be managed under individual directories.
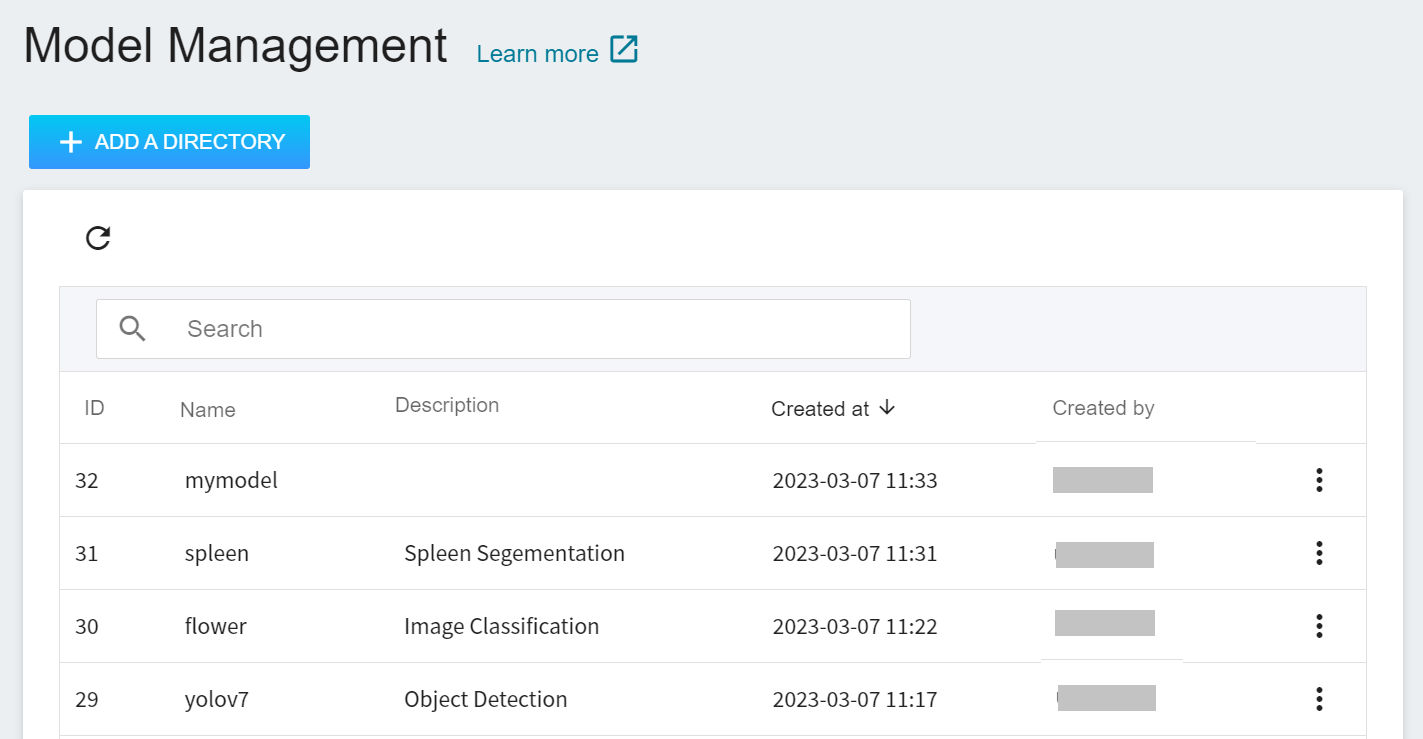
- **Model Version**: The version number registered for model management will be named starting from v1 and will be incremented with each model registration, and each version will have related model files and model documents.
### Manage Model Directory
* **Create model directory**: Click **+Add a Directory** on the Model Management page, enter the name and description of the model directory, and then click **OK**.
* **Edit model directory description**: Click **Edit Description** in the More Options icon on the right side of the model directory list, and then click **OK** after completion.
* **Delete model directory**: Click **Delete** in the More Options icon on the right side of the model directory list, and then click **OK**.
:::info
:bulb: **Tips:** Please note that this action will delete the registration record of the model directory. You can still view the related files of the model in the Storage Service. If necessary, please go to Storage Service to manually delete them to save storage space.
:::
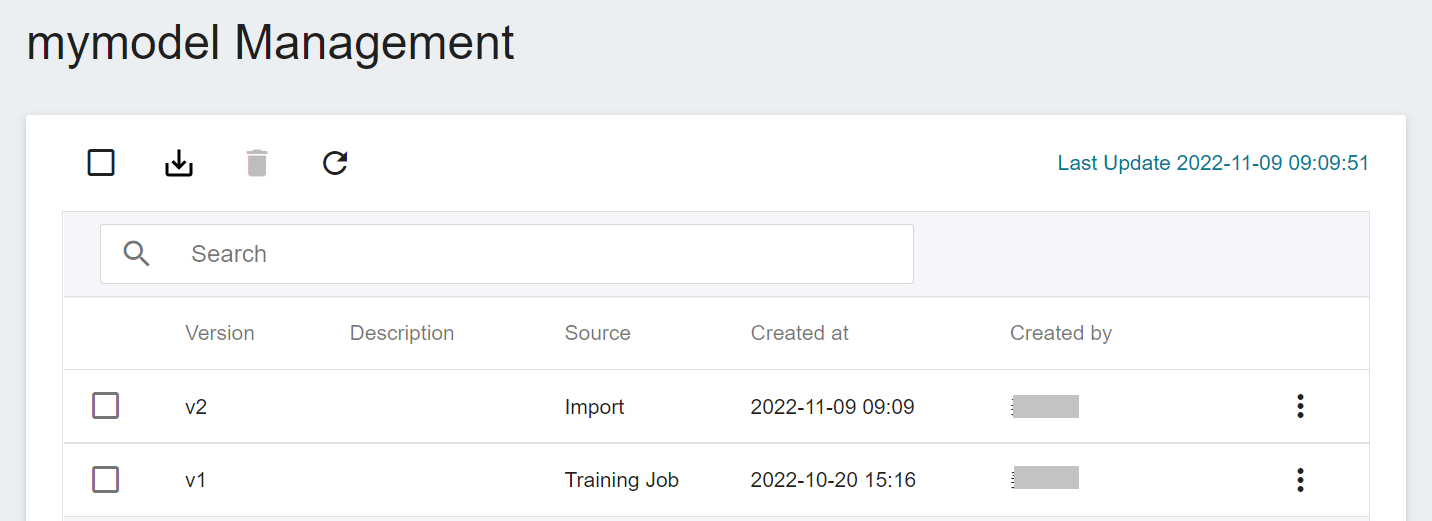
### Manage Model Version
* Click any Model Directory list to enter the Model Version Management page, the list will display model version, [**type**](#model-type), description, [**source**](#model-source), creation time and creator and other information, click any model version to enter **Model Details** page.
* View model details: Click on any model version to go to the **Model Details** page.
* **Edit model version description**: Click **Edit Description** in the More Options icon on the right side of the model directory list, and then click **OK** after completion.
* **Delete model version**: Click **Delete** in the More Options icon on the right side of the model directory list, and then click **OK**.
:::info
:bulb: **Tips:** Please note that this action will delete the registration record of the model version. You can still view the related files of the model in the Storage Service. If necessary, please go to Storage Service to manually delete them to save storage space.
:::
#### Model Type
* [**Register Model**](#Model-Registration) When registering a model, the system automatically detects the **model framework** and displays it in the **Type** column.
* Model frameworks are divided into two types, **MLflow default support framework** and **Others**.
- **MLflow default support framework**
* If the model is recorded through MLflow SDK log_model or register_model and belongs to [**MLflow Built-In Model Flavors (MLflow version 1.24)**](https://mlflow.org/docs/1.24.0/models.html#built-in-model-flavors), the system will automatically determine and display the framework type.
- **Others**: The system will display the operation of [**pyfunc**](https://www.mlflow.org/docs/latest/models.html#python-function-python-function) as follows.
* The model is recorded through the MLflow SDK log_model or register_model but does not belong to the MLflow default support framework
* The model is not recorded through the MLflow SDK log_model or register_model
#### Model Source
* The **Source** field indicates the source from which the model is registered in the model management. Currently, there are three different supported model sources. For the operation methods of different sources, please refer to [**Model Registration**](#Model-Registration).
| Model Registration Method | Source |
| ------------------------ | -------- |
|Registering model from AI Maker training job | Training Jobs |
|Import existing model from AI Maker | Import |
|Register model from MLflow UI | MLflow |
|Register model through MLflow API | MLflow |
# Inference
**Inference Management** can automatically identify registered model types, deploy them as REST endpoints without code, and provide client-side calls for inference.
## Create Inference Service
Select **AI Maker** from the Services, then click **Inference** to enter the Inference Management page, then click **+CREATE**. There are two ways to create inference:
* [**Auto Detection (Default)**](#Create-Method---Auto-Detection): This method can automatically determine the model type and deploy an inference REST endpoint without the need for code.
* [**Customize**](#Create-Method---Customize): You can choose the public template to apply the default settings, or set it yourself, and deploy the model as an inference REST endpoint.
### Create Method - Auto Detection
#### 1. Basic Information
* **Name**: Set the name of the inference service.
* **Description**: Set a description for the inference service.
* **Create Method**: Select **Auto Detection**, this option is the default.
* **Source Model**: Select the name and version of the source model, and then click **DETECT** to enable the function of automatically detecting the model type and display the detection results below. Click [**Support Type List**](#Model-Type-Support-List) to view the supported model frameworks.
* **Model Type**: Display the name of the automatically detected model type, for example: tensorflow, pytorch, sklearn...; if the automatic detection result is not a supported model type, it will display **Unsupported**.
* **Inference Server**: The system will automatically detect the model type and display the inference server, for example: MLflow Serve, TensorFlow Serving, TorchServe...; if the automatic detection result is not a supported model type, it will display **Unsupported**.
Then click **NEXT: HARDWARE SETTINGS>**.
#### List of Supported Model Types
* The current support list of **model types** and **inference servers** is as follows:
| Model Type | Inference Server |Reference Code Example|
| ---| --- | --- |
| [**Types supported by MLFlow (version 1.24)**](https://mlflow.org/docs/1.24.0/models.html#built-in-model-flavors) <br>and registered with the MLflow SDK:<br> tensorflow <br> keras <br> pytorch <br> sklearn <br> spark <br> xgboost <br> ... |MLflow Serve | [MLFlow (version 1.24)](https://mlflow.org/docs/1.24.0/tutorials-and-examples/tutorial.html#serving-the-model) |
| tensorflow <br> keras |TensorFlow Serving | [GitHub](https://github.com/tensorflow/serving/tree/master/tensorflow_serving/example) |
| pytorch |TorchServe | [GitHub](https://github.com/pytorch/serve/tree/master/examples) |
| sklearn | SKLearn Server | [GitHub](https://github.com/SeldonIO/seldon-core/blob/master/servers/sklearnserver/test/sklearn_iris.ipynb) |
| xgboost |XGBoost Server | [GitHub](https://github.com/SeldonIO/seldon-core/blob/master/servers/xgboostserver/test/xgboost_iris.ipynb) |
| onnx <br> openvino |Triton Inference Server | [GitHub](https://github.com/triton-inference-server/client) |
| huggingface |HuggingFace Server | [HuggingFace Case Study](/s/user-guide-en#Case-Study) |
#### 2. Hardware Settings
* Select the appropriate hardware configuration according to your computing needs. You can also click **VIEW RESOURCE USAGE/AVAILABLE QUOTA** to view the current resource quota and usage of your project, and then click **NEXT: REVIEW & CREATE**.
#### 3. Review & Create
* View the Inference creation settings, and click **CREATE** after confirming.
### Create Method - Customize
#### 1. Basic Information
* **Name**: Set the name of the inference task.
* **Description**: Set a description for the inference task.
* **Create Method**: Select **Customize**.
* **Select an Existing Template**: Click **SELECT** to select a public or private template. The system will show the settings of the selected template, which can be directly applied or modified. You can also set it yourself if you prefer not to choose any.
* **Model Source**: Enter the model source name, model name, version and mount path. If you need multiple models for inference, click **ADD** to add other model sources.
* **Image Source**: Click **SELECT** to select a public or private image.
* **Image Tag**: Select the image tag.
Then click **NEXT: HARDWARE SETTINGS>**.
#### 2. Hardware Settings
* Select the appropriate hardware configuration according to your computing needs. You can also click **VIEW RESOURCE USAGE/AVAILABLE QUOTA** to view the current resource quota and usage of your project, and then click **NEXT: STORAGE SETTINGS>**.
#### 3. Storage Settings
* **Input Directory**: Click **ADD** to set the storage name, mount location and path where the inference data is located
* **External Storage**: If you need to use the **External Storage** service, please click **ADD** external storage first, and then set the mount path and external storage name.
* You can be skip it if not used, then click **NEXT: VARIABLE SETTINGS >**.
#### 4. Variable Settings
* Environment variables: Enter the name and value of the environment variables.
* Command: Enter the command or program name to be executed. For example: python $INPUT/app.py.
* Port: Set the port number of the inference service. The system default is 9999.
Click **NEXT: ADVANCED SETTINGS>** when finished.
#### 5. Advanced Settings
* Monitor data: Click **ADD** to set the name and data type of the data to be monitored. You can skip it if you like, and click **NEXT: REVIEW & CREATE**.
:::info
:bulb: **Tips:** The setting of monitoring data is a relatively advanced custom feature that requires additional configuration within the inference program. The [**AIMakerMonitor**](https://pypi.org/project/AIMakerMonitor/) package provided by AI Maker allows you to send inference results back to AI Maker and present the number of model calls and results in a visual graph in the AI Maker Inference Services.
::: spoiler **Click to expand the usage of the AIMakerMonitor package**
1. **Record the Number of Times the API Is Called**
- **monitor.api_count_inc()**, each time this function is called, the number of API calls will be incremented by 1 in the statistics table.
```=
import AIMakerMonitor as monitor
// your code
monitor.api_count_inc()
```
2. **Data with Data Type Tag**
- **monitor.counter_inc(name of monitored data, tag name)**, this function can be used for statistical classification, and the number of occurrences of each tag can be counted to better understand data distribution. For example, statistics on the number of times a car is recognized in an image classification application.<br>
- **Name of monitored data**: the table name of the record, the type is string.
- **Tag name**: the appeared tag name, the type is string. <br>
The following example indicates that in the table `object_detect`, the number of occurrences of the tag `car` is increased by 1.
```=
import AIMakerMonitor as monitor
// your code
monitor.counter_inc("object_detect", "car")
```
3. **Statistical Data**
- **monitor.gauge_set(name of monitored data, tag name, value)**, this function can be used for statistical values, such as the confidence index of each recognition.
- **Name of monitored data**: the table name of the record, the type is string.
- **Tag name**: the appeared tag name, the type is string.
- **Value**: the value, as an int or float.<br>
The following example shows the confidence level when identifying the tag `car` in the `confidence` table.
```=
import AIMakerMonitor as monitor
// your code
monitor.gauge_set("confidence", "car", 90)
```
**Note**: The above code examples are written for Python language, if you are not developing in Python, please adjust accordingly.
:::
#### 6. Review & Create
* Review the created inference task settings, and click **CREATE** after confirming.
:::info
:bulb: **Tips:** **AI Maker Case Study**
To learn how to create an inference service through the **Public Template** in **Creation Method - Custom**, please refer to the [**AI Maker Case Study**](/s/user-guide-en#Case-Study).
:::
## Manage Inference
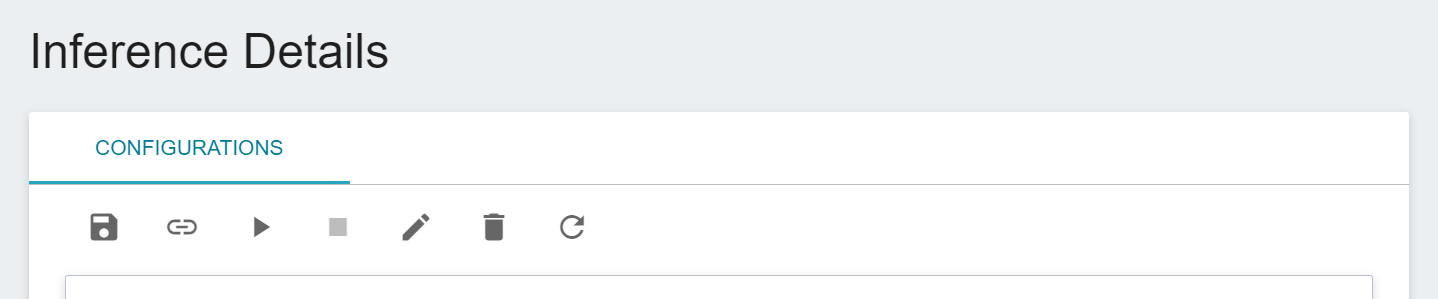
* After the inference service is created, it will appear at the top of the list. Click the list to enter the Inference Details page.
* On the Inference Details page, you can view the detailed settings of the inference task. Click the icon in the command bar to perform actions such as **Save**, **Connect to/Disconnect CVAT**, **Start**, **Stop**, **Edit**, **Delete** and **Refresh**.
:::info
:bulb: **Tips:** Please refer to the [**Service State Description**](/s/service-state-en#AI-Maker-Inference-Service). If the service is not successfully created or cannot be executed smoothly, it is recommended to click **VIEW LOG** to determine possible problems based on the log information, such as: hardware resources do not meet requirements, image file or program execution errors. If the issue still can't be solved, please contact **system administrator**.
:::
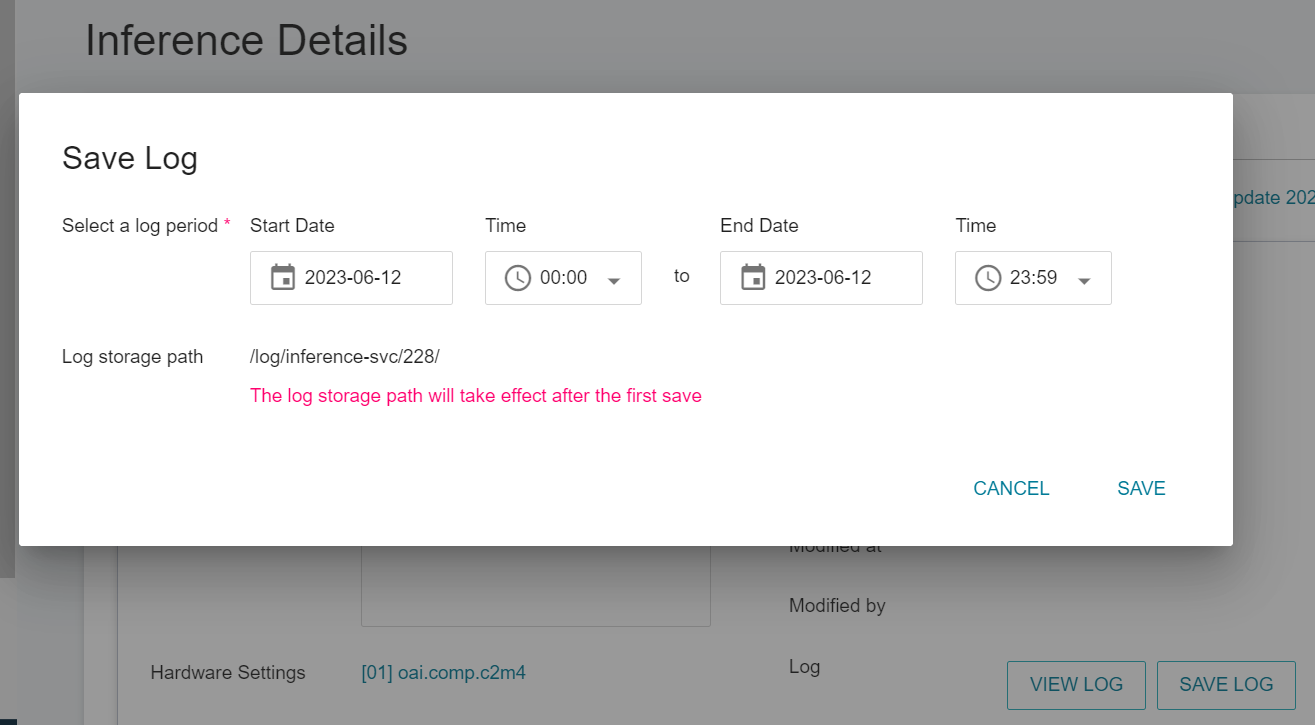
* Click **VIEW LOG** to view the running log of the inference service.
* Click **Save Log** to select the start and end period of the log to be saved. After clicking Save, the log file will be automatically saved to the location corresponding to the **log** bucket in the **Storage Service**, and the log file location can be automatically directed to the log file location through the **Log storage path** hyperlink.
## Making Inference
* When the state is displayed as **`Ready`**, you can connect to the inference service to perform inference, and the connection information will be displayed in the **URL** column of the variable network block.
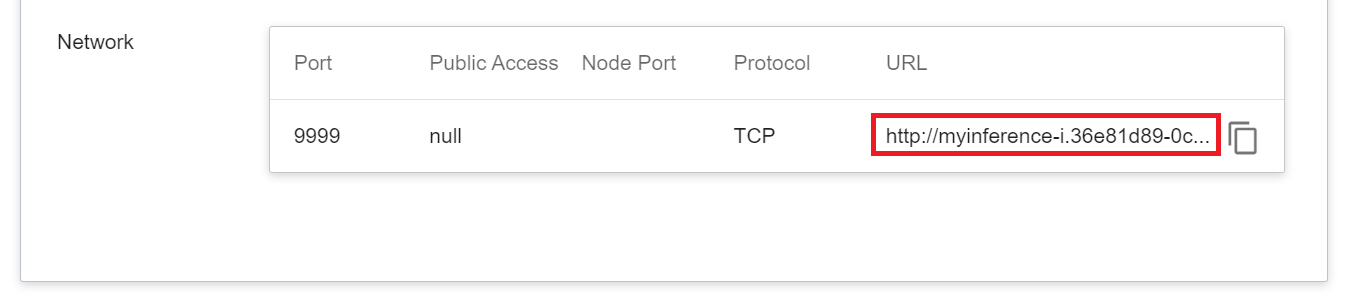
* The inference service itself is not open to external ports. If you need to quickly verify the inference service:
- Please create **Container Service** or **Notebook Service** as Client in the same project.
- Inference verification is performed through the **URL** information in the above inference service.
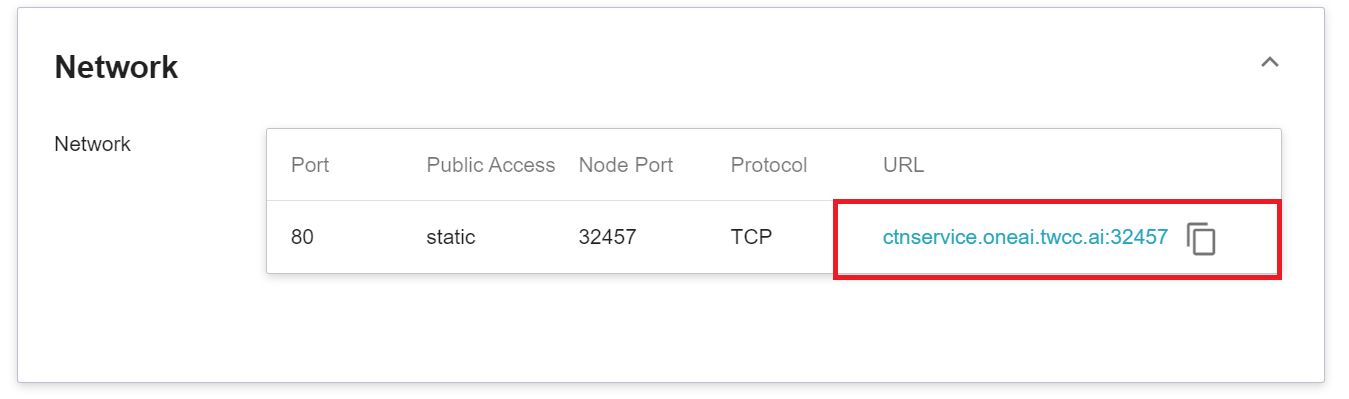
* If required **External service provision:**
- Please first copy the **URL** information from the inference service above.
- In the same project, create **Container Service** that can serve externally as a proxy. Please select **`generic-nginx`** for the image file.

- Fill in the previously copied Inference Service URL into the value field of the environment variable `INF_URL` on the **Variable Settings** page.

- Then link to the inference service through the **URL** in the **Network** section of the container service details.
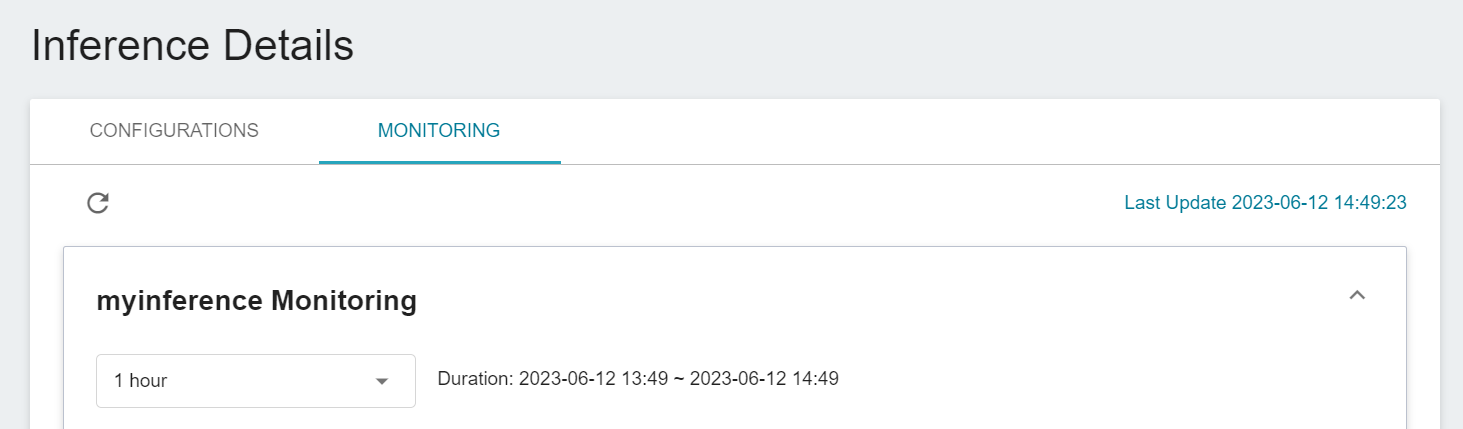
## Inference Monitoring (Create Method: Customize Only)
* Click **Monitor** above to view the monitoring information of the inference service and the inference API count.
:::info
:bulb: **Tips:** For the display setting description of the monitoring chart here, please refer to [**Create Method - Customize > Advanced Settings**](#5-Advanced-Settings).
:::
## Connect Inference to Annotation Tool (CVAT)
If the inference service you created supports connecting to CVAT, you can connect to the inference service, and automatically annotate the results of calling the inference service in CVAT to save labor and time.
:::info
:bulb: **Tips:** Please refer to [**AI Maker Case Study - YOLOv7 Image Recognition Application > CVAT Assisted Annotation**](/s/casestudy-yolov7-en#6-CVAT-Assisted-Annotation)
:::
### Connect to CVAT
There are three places for AI Maker inference service to connect to the CVAT:
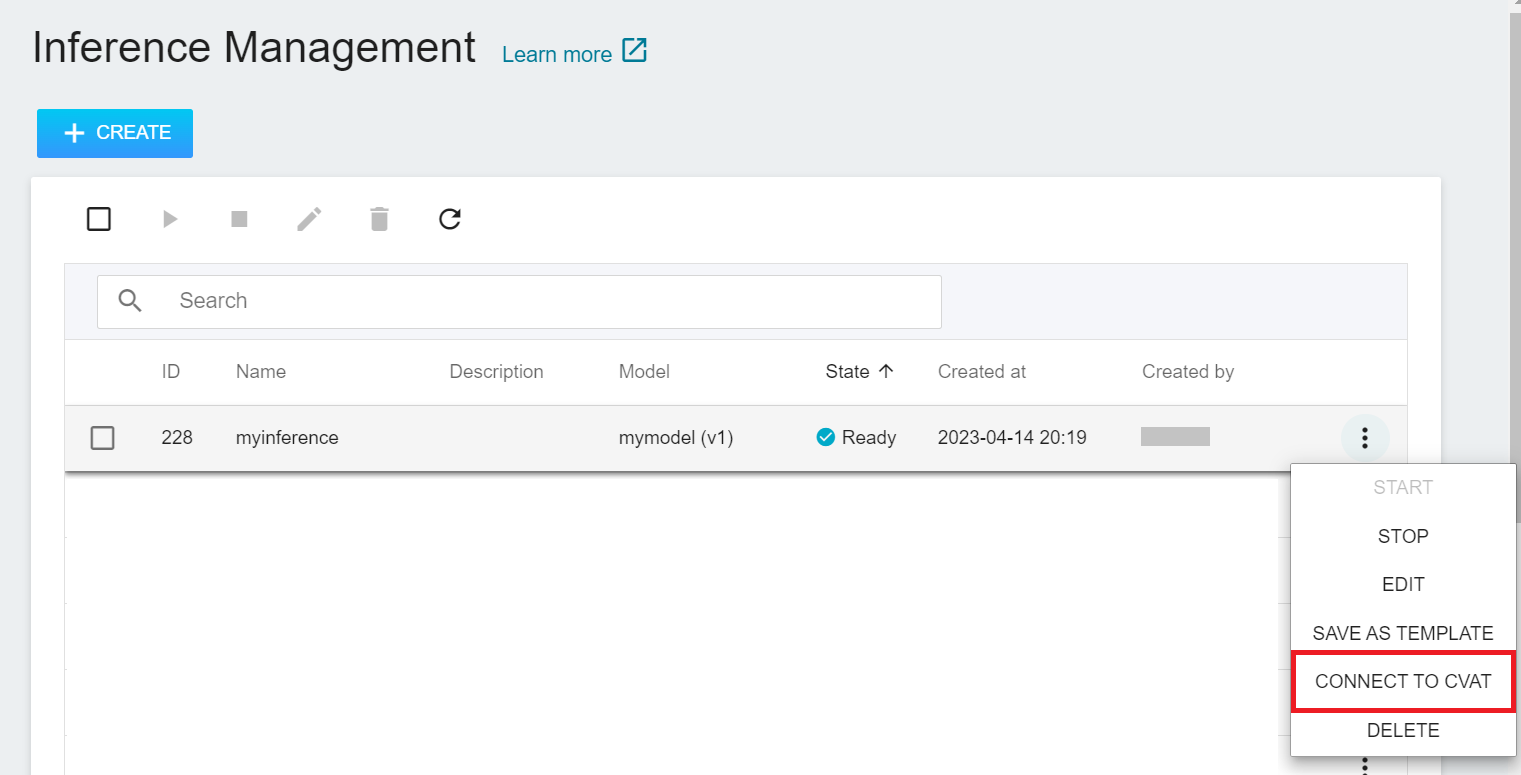
1. **Inference Management Page**
* Select **AI Maker** from the Services, and then click **Inference**. In the inference management list, move the mouse to the More Options icon on the right side of the inference service list to be connected to CVAT, and then click **CONNECT to CVAT**.
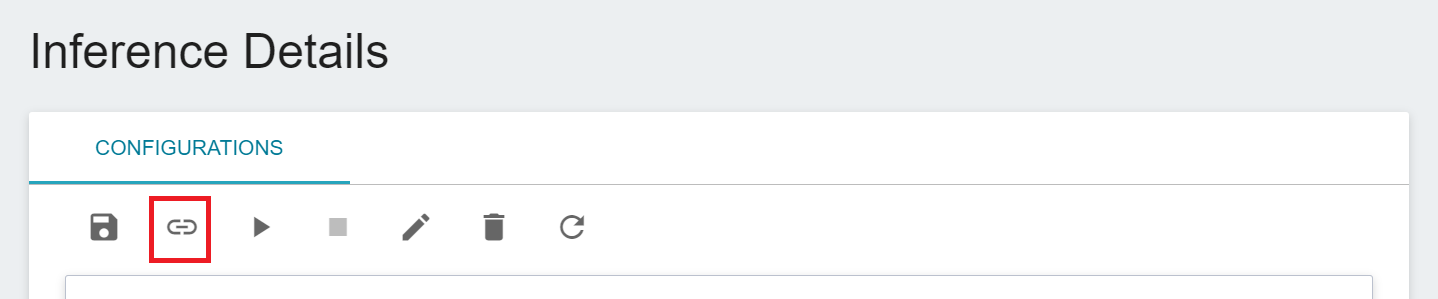
2. **Inference Details Page**
* Select **AI Maker** from the Services, and then click **Inference**, click the inference service to be connected to CVAT in the inference management list, enter the Inference Details page, and then click the **Connect to CVAT** icon above.
3. **Annotation Tools (CVAT) Page**
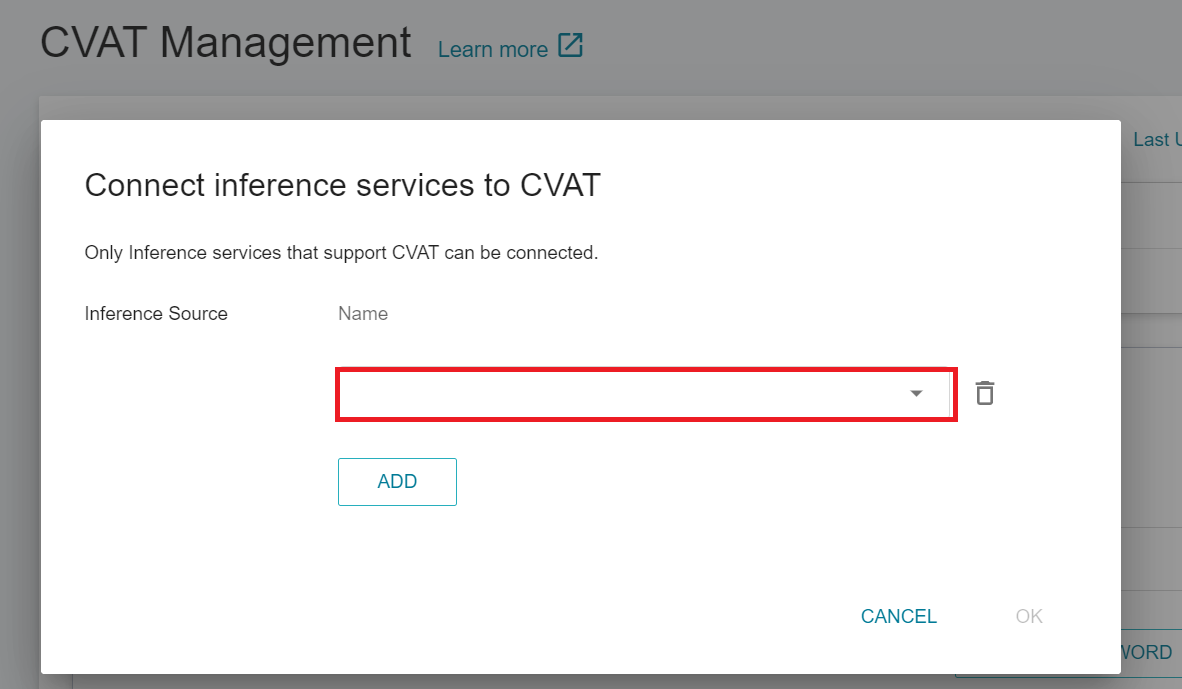
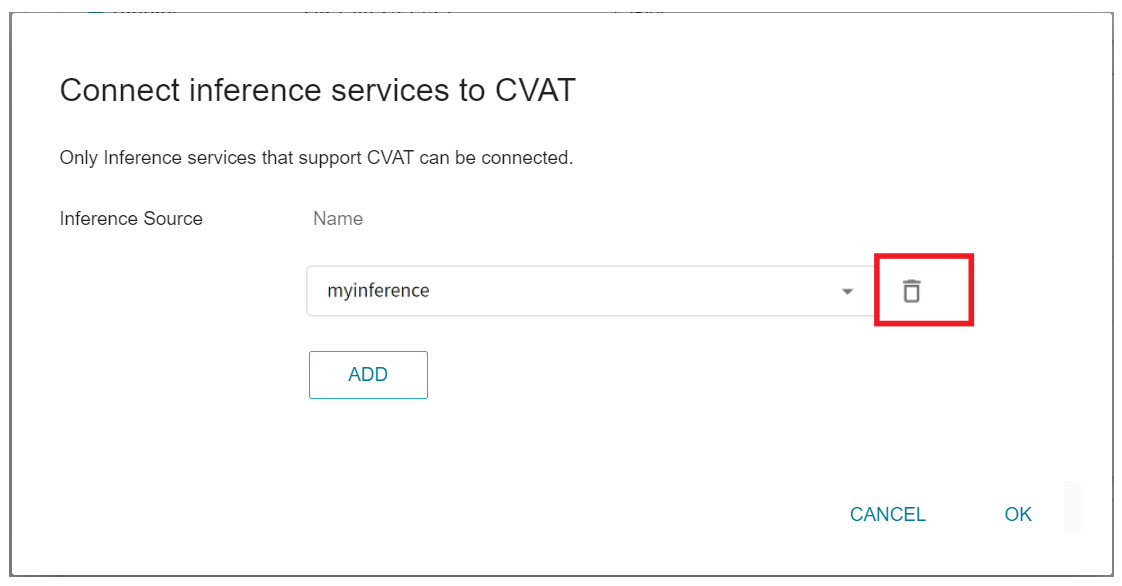
* After entering the CVAT Management page, move down to the **Connect Inference Service to CVAT** section.
* If there is no connected inference service yet, click the **ADD** button, select the name of the inference service that supports CVAT from the drop-down menu, and then click **OK**.
* If an inference service is already connected to the CVAT, this button will change to **EDIT**.
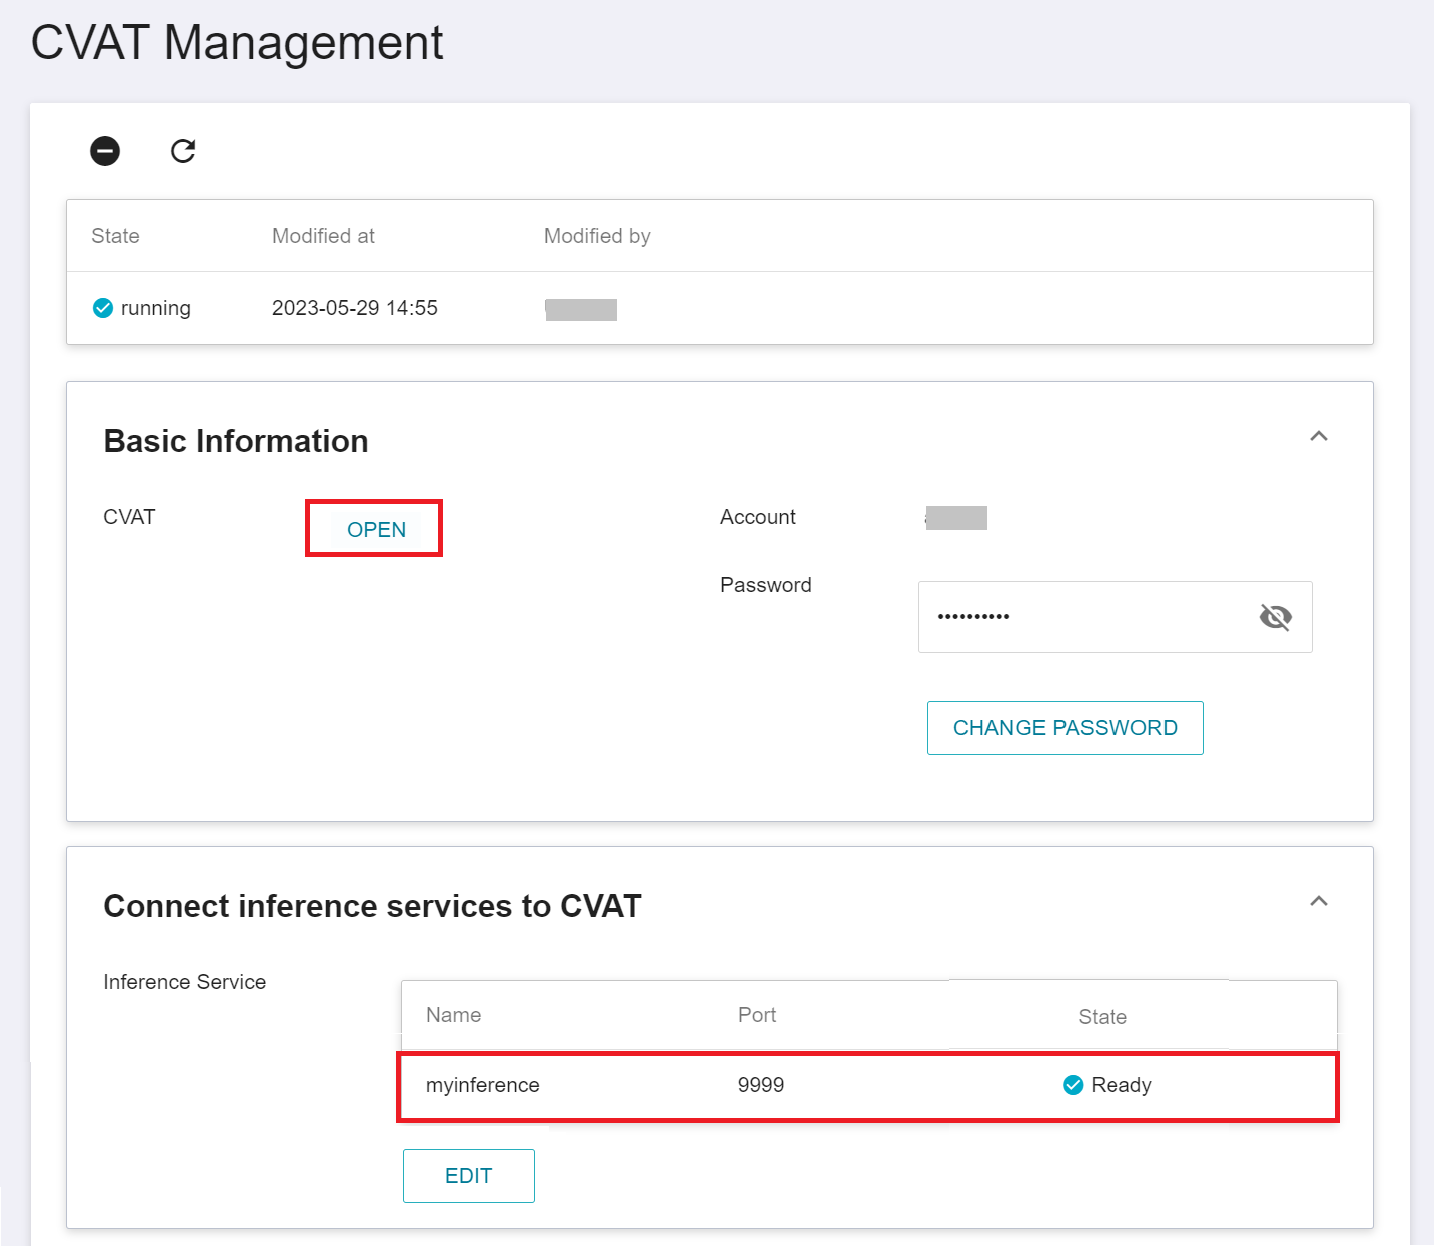
Once successfully connected to CVAT, click **Annotation Tool** on the left menu bar to enter the CVAT service. The connected inference services will be listed at the bottom of the page. Click **OPEN** and log in to the CVAT service.
### CVAT Automatic Annotation
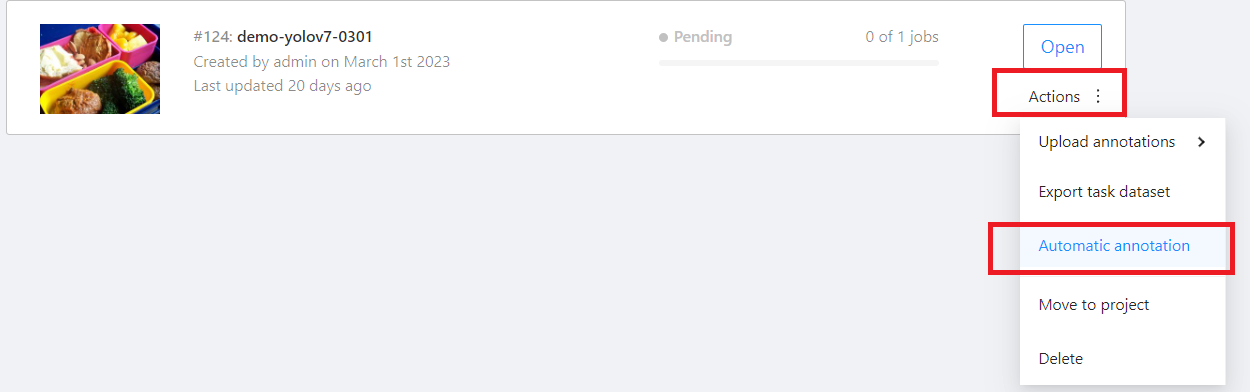
* Go to the **Tasks** page of CVAT Service and move the mouse over the More Options icon in **Actions** to the right of the task you want to annotate automatically, and then click **AUTOMATIC ANNOTATION**.
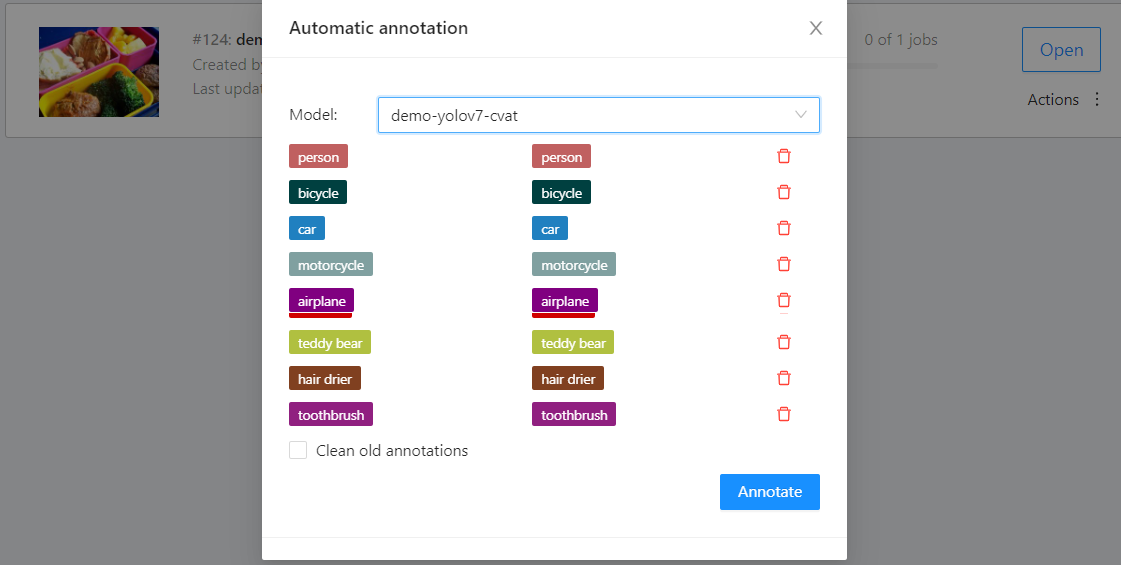
* On the **Automatic annotation** window that appears, click the **Model** drop-down menu and select the connected inference task model.
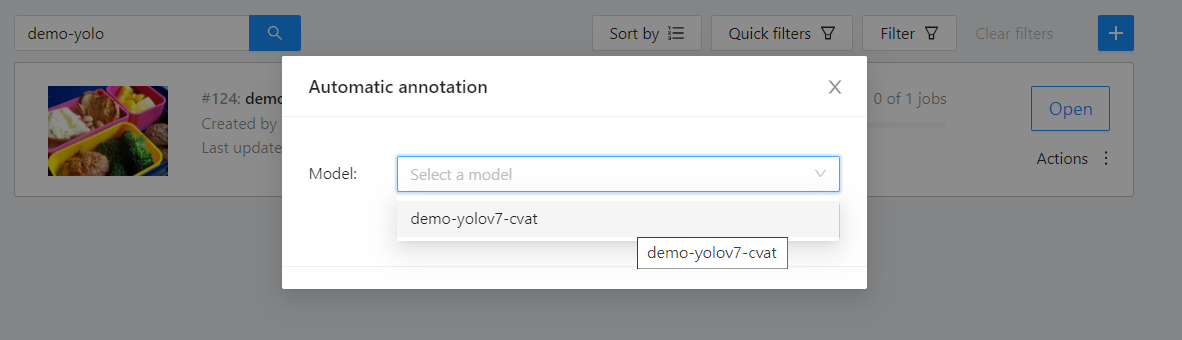
* Then set the model to correspond to the task Label, and finally click **ANNOTATE** to perform automatic annotation.
* After completion, a message will appear on the screen indicating that the annotation is completed.

* After the annotation is completed, enter the CVAT Annotation Tools page to view the automatic annotation result. If you are not satisfied with the result, you can perform manual annotation correction or retrain and optimize the model.

### Disconnect Inference Services from CVAT
Similar to connecting to CVAT, there are three places to disconnect an inference service from a CVAT:
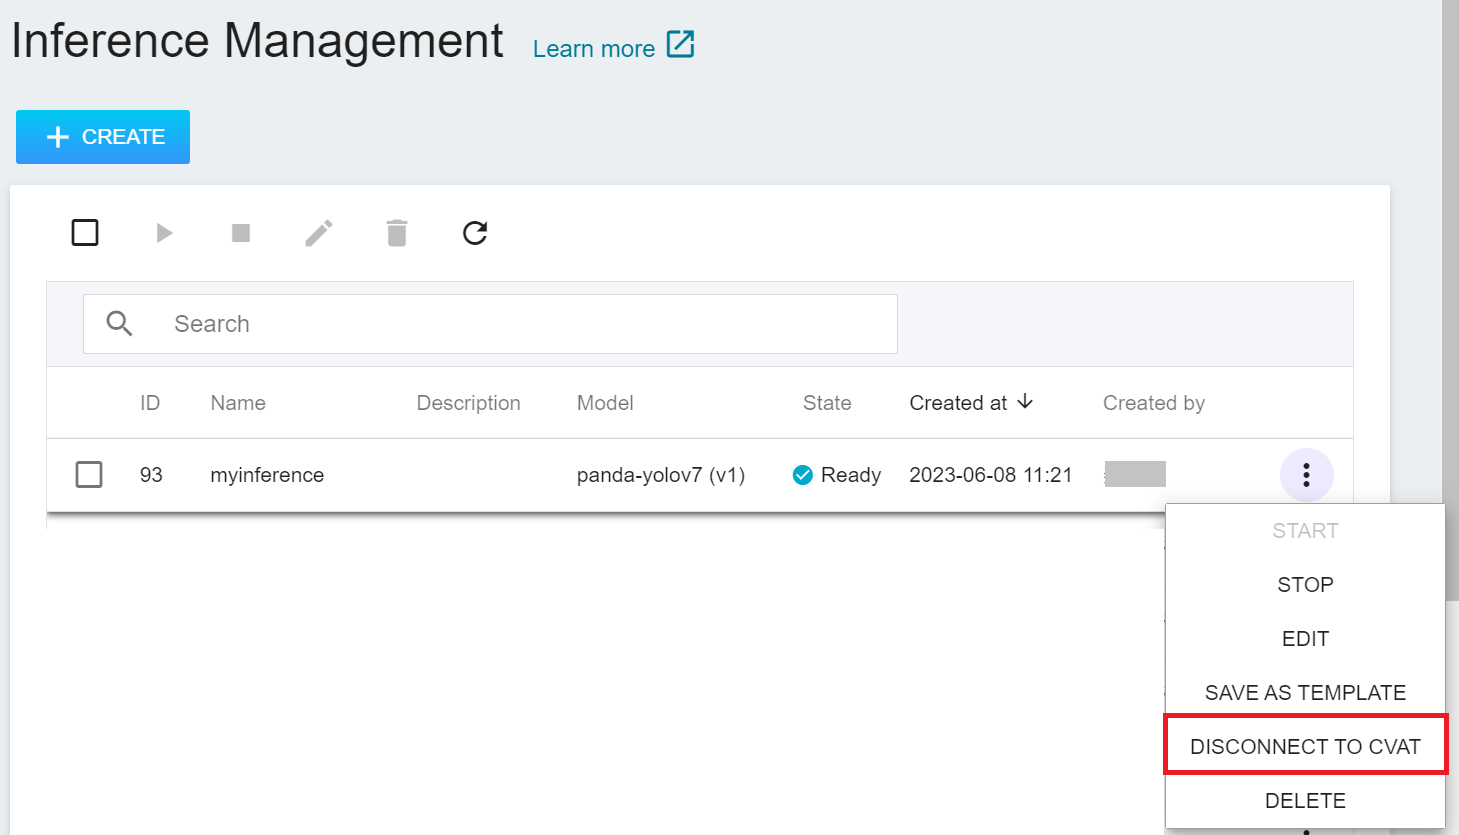
1. **Inference Management Page**
* Select **AI Maker** from the Services, and then click **Inference**. In the inference management list, move the mouse to the More Options icon on the right side of the inference service list to be disconnected to CVAT, and then click **DISCONNECT TO CVAT**.
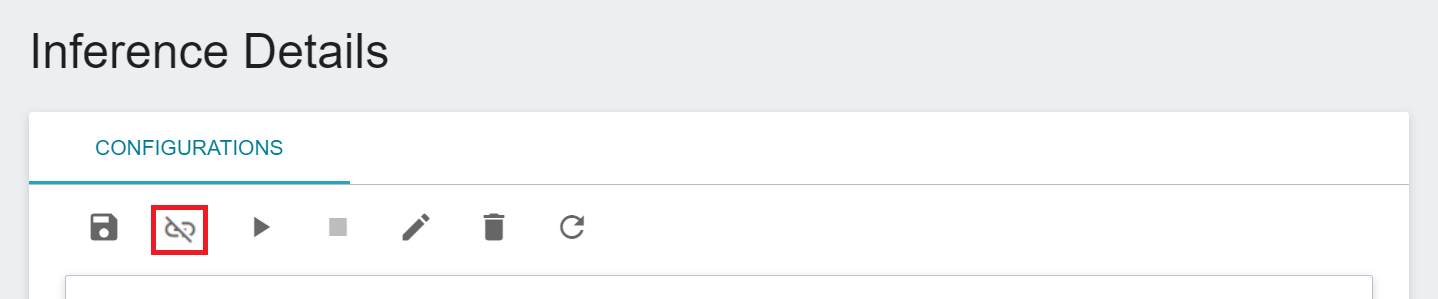
2. **Inference Details Page**
* Select **AI Maker** from the Services, and then click **Inference**, click the inference service to be connected to CVAT in the inference management list, enter the **Inference Details** page, and then click the **Disconnect to CVAT** icon above.
3. **Annotation Tools (CVAT) Page**
* After entering the CVAT Management page, move down to the **Connect Inference Service to CVAT** section.
* After clicking the **EDIT** button, click the delete icon on the right side of the inference service.
## Inference Service Resource Monitor
Please refer to the [**Resource Monitor**](/s/resource-monitor-en) documentation.
# Example Tutorial - Wine Quality Detection
This section uses the [**MLflow Example: SKlearn ElasticNet Wine**](https://github.com/mlflow/mlflow/blob/master/examples/sklearn_elasticnet_wine/train.ipynb) sample program to demonstrate how to use AI Maker's functional service for simple wine quality detection.
## Data Preparation
* Select **Storage Service** from the Services and create two buckets
* **`code`** is used as a workspace for notebook services to edit code
* No need to upload data
* **`data`** is used to store the dataset of the example
* Please download the wine dataset used in this example tutorial [**wine-quality.csv**](https://github.com/mlflow/mlflow/blob/master/examples/sklearn_elasticnet_wine/wine-quality.csv)
* Please refer to [**Storage Service - File Management**](/s/storage-en#File-Management) to upload dataset to **`data`** bucket.
## Model Development
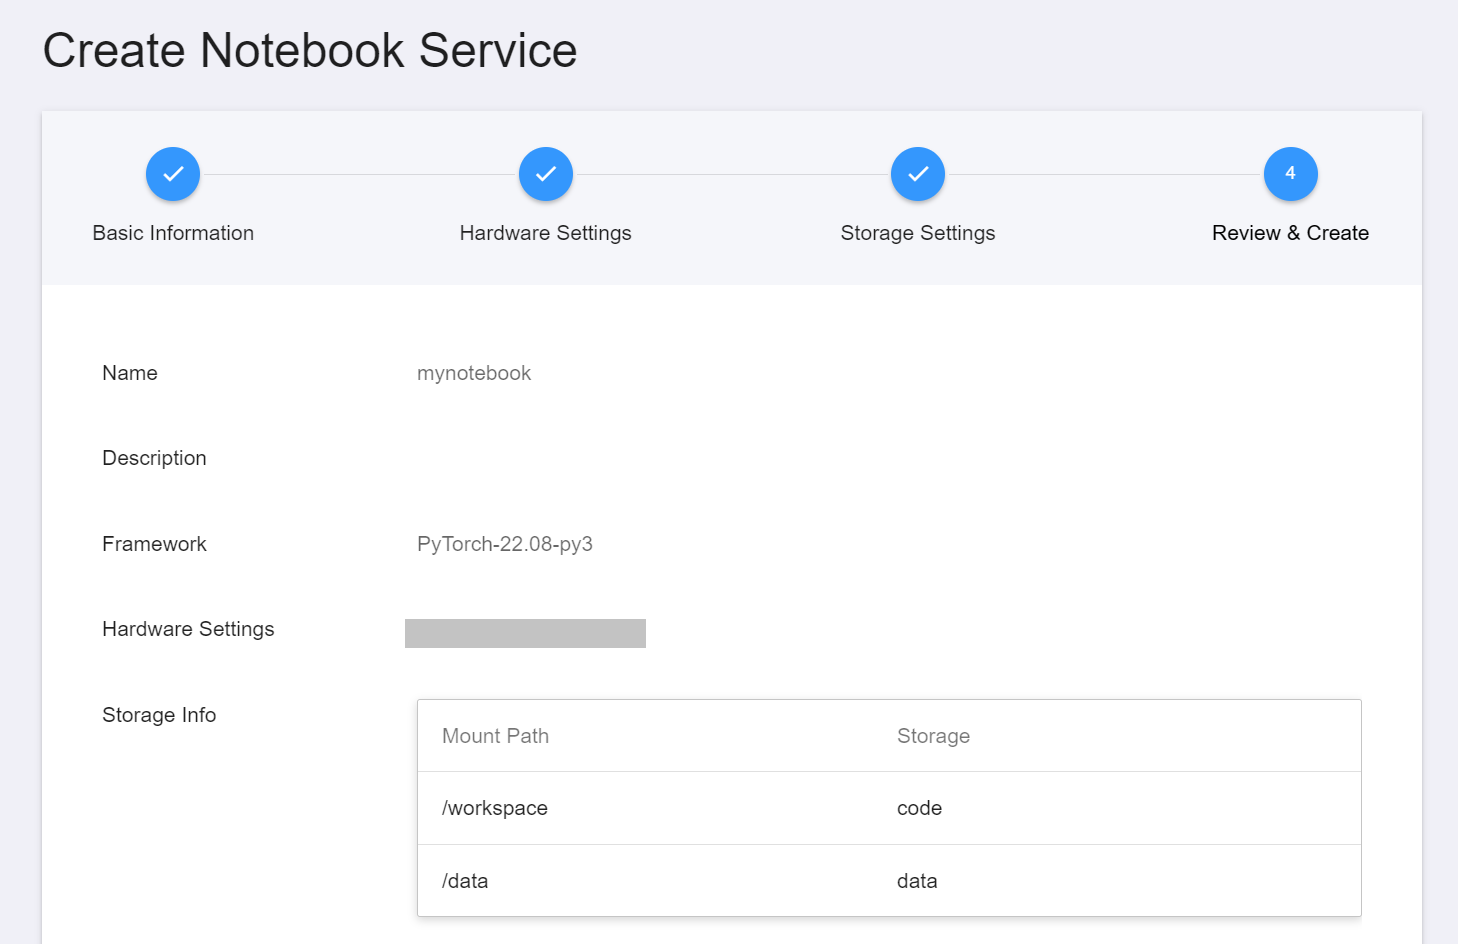
### 1. Create Notebook Service
* Select **AI Maker** from the Services, then click **Notebook Service**. Please refer to the [**Notebook Service**](/s/notebook-en) documentation to create a service, mount storage, and start JupyterLab.
* **Basic Information**: Please select **`PyTorch-22.08-py3`** as development framework
* **Storage Settings**:
* Name: mount path: **`/workspace`**, storage: **`code`**
* Name: mount path: **`/data`**, storage: **`data`**
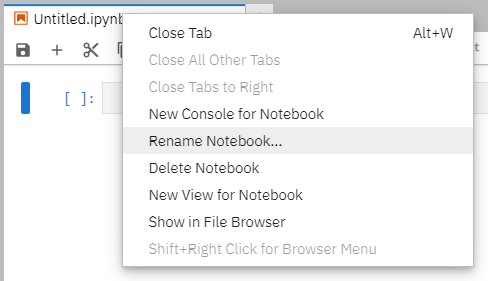
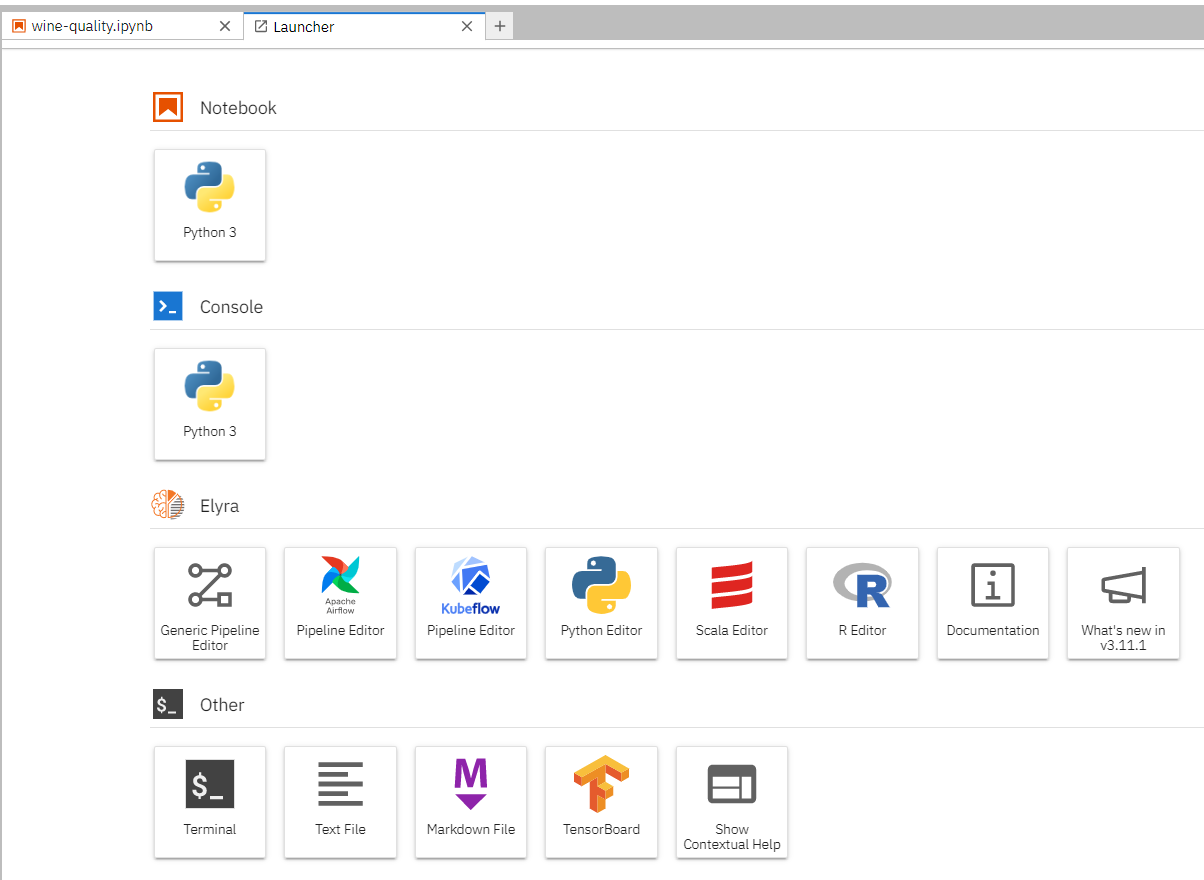
* After JupyterLab starts, click **`Python 3`** from the launcher on the start page to create a new file in the code editor. Please right click and rename the file to **`wine-quality.ipynb`**.
### 2. Edit Sample Code
* Please copy and paste the following sample code into **`wine-quality.ipynb`**.
* ---Set the execution environment---
* Additional packages and versions required for training program.
* ---Import required information---
* Please refer to [**Code Integrating MLflow**](#Code-Integrating-MLflow) and copy the necessary information from the UI to be integrated with MLflow.
* ---Integrating MLflow Experiment Tracking---
* You can customize the experiment name during the development stage.
* ---Parameter Settings---
* You can define parameters that need to be tuned and tested during the development stage.
* Subsequent sections will explain how to quickly adjust parameters through the environment variables of the **Training Job**, and save them as **template** that can be quickly applied in the project.
* ---Write recorded information to MLflow Tracking---
* Please refer to [**Record Training Data**](#5-Record-Training-Data) and write the required tracking record information, or use `mlflow.autolog()` to automatically record.
```python=1
'''---Set the execution environment---'''
!pip install mlflow==1.24
!pip install numpy==1.23
!pip install scikit-learn
!pip install pandas
'''---Import required packages---'''
import os
import warnings
import sys
import pandas as pd
import numpy as np
from sklearn.metrics import mean_squared_error, mean_absolute_error, r2_score
from sklearn.model_selection import train_test_split
from sklearn.linear_model import ElasticNet
import mlflow
import mlflow.sklearn
import logging
logging.basicConfig(level=logging.WARN)
logger = logging.getLogger(__name__)
warnings.filterwarnings("ignore")
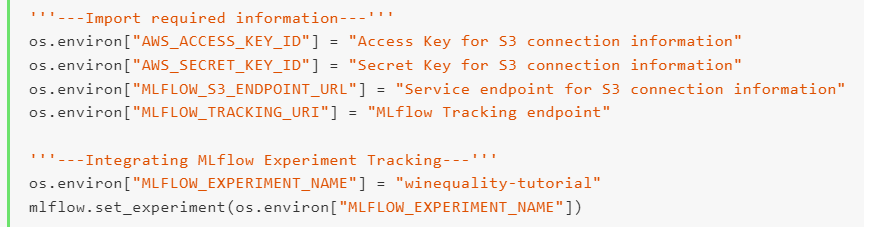
'''---Import required information---'''
os.environ["AWS_ACCESS_KEY_ID"] = "Access Key for S3 connection information"
os.environ["AWS_SECRET_KEY_ID"] = "Secret Key for S3 connection information"
os.environ["MLFLOW_S3_ENDPOINT_URL"] = "Service endpoint for S3 connection information"
os.environ["MLFLOW_TRACKING_URI"] = "MLflow Tracking endpoint"
'''---Integrating MLflow Experiment Tracking---'''
os.environ["MLFLOW_EXPERIMENT_NAME"] = "winequality-tutorial"
mlflow.set_experiment(os.environ["MLFLOW_EXPERIMENT_NAME"])
'''---Parameter Settings---'''
DATA_PATH = "/data/wine-quality.csv"
ALPHA = 0.1
L1_RATIO = 0.3
'''---Define training code---'''
# Wine Quality Sample
def train():
def eval_metrics(actual, pred):
rmse = np.sqrt(mean_squared_error(actual, pred))
mae = mean_absolute_error(actual, pred)
r2 = r2_score(actual, pred)
return rmse, mae, r2
warnings.filterwarnings("ignore")
np.random.seed(40)
# Read the wine-quality csv file
data = pd.read_csv(DATA_PATH)
# Split the data into training and test sets. (0.75, 0.25) split.
train, test = train_test_split(data)
# The predicted column is "quality" which is a scalar from [3, 9]
train_x = train.drop(["quality"], axis=1)
test_x = test.drop(["quality"], axis=1)
train_y = train[["quality"]]
test_y = test[["quality"]]
# Useful for multiple runs (only doing one run in this sample notebook-en)
with mlflow.start_run():
# Execute ElasticNet
lr = ElasticNet(alpha=ALPHA, l1_ratio=L1_RATIO, random_state=42)
lr.fit(train_x, train_y)
# Evaluate Metrics
predicted_qualities = lr.predict(test_x)
(rmse, mae, r2) = eval_metrics(test_y, predicted_qualities)
# Print out metrics
print("Elasticnet model (ALPHA=%f, L1_RATIO=%f):" % (ALPHA, L1_RATIO))
print(" RMSE: %s" % rmse)
print(" MAE: %s" % mae)
print(" R2: %s" % r2)
'''---Write log information to MLflow Tracking---'''
# Log parameter, metrics, and model to MLflow
mlflow.log_param("alpha", ALPHA)
mlflow.log_param("l1_ratio", L1_RATIO)
mlflow.log_metric("rmse", rmse)
mlflow.log_metric("r2", r2)
mlflow.log_metric("mae", mae)
mlflow.set_tag("model_type", "ElasticNet")
mlflow.sklearn.log_model(lr, "model")
'''---Execute---'''
train()
```
### 3. Get **Mlflow** Settings Information
* Select **AI Maker** from the Services, and then click **MLflow Tracking**.
* After entering the **MLflow Tracking** page, you can see the setting information of MLflow, this information is necessary to connect to **MLflow**, including: MLflow SDK, S3 connection information and MLflow Tracking endpoint.
* Click the **Copy** icon on the right to copy the contents of the **Variable Settings**.

* Then go back to the notebook service you created earlier, and add to the **'''---Import Required Information---'''** section in **`wine-quality.ipynb`**.

:::info
:bulb: **Tips:** After copying the information in the variable settings, you can delete the commands of the first line `import mlflow` and the second line `import os`, because the sample program already contains the commands for installing related packages.
:::
### 4. Run the Code
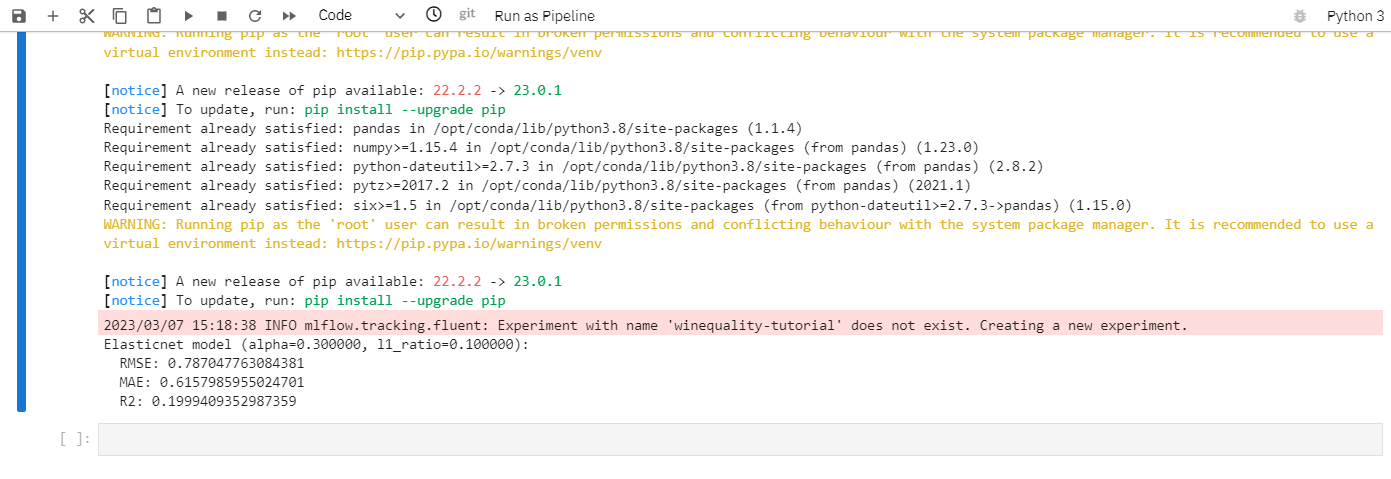
* When the information is complete, you can start to execute the code in **`wine-quality.ipynb`**.
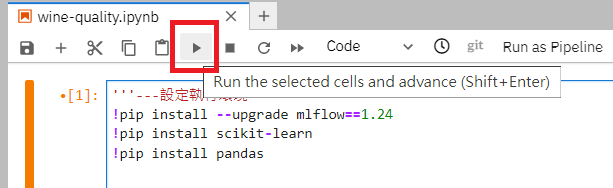
* After execution, you can see the result of train().
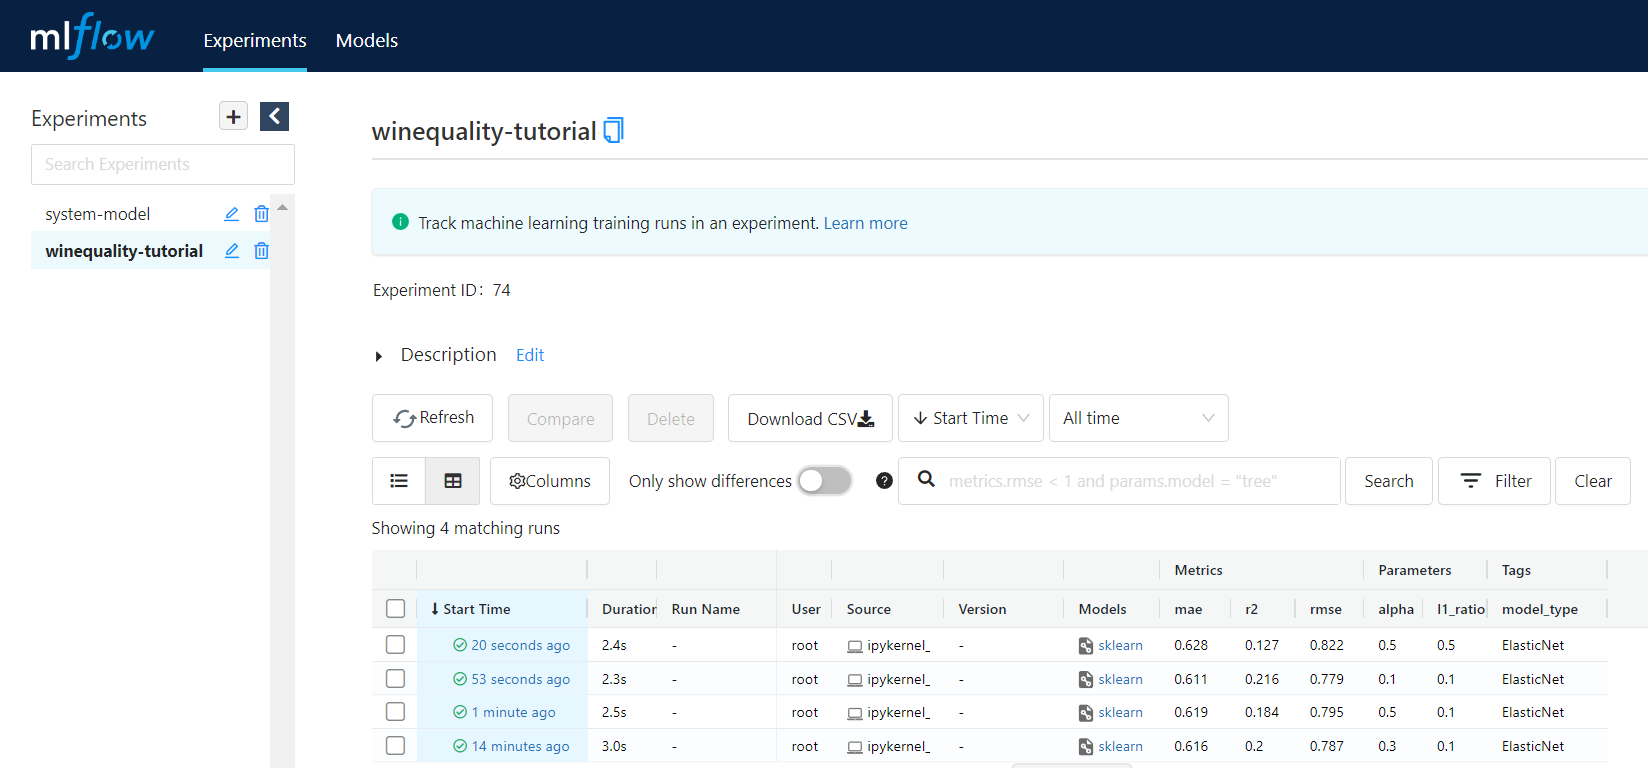
### 5. View MLflow Tracking Results
* Please refer to [**MLflow Tracking - Connection Information**](#AI-Maker---MLflow-Track), click the **OPEN** button to open another tab to view the MLflow user interface.
* Enter the **Experiments** page, look for the Experiment name set in the code on the left (the sample program uses **`winequality-tutorial`**), you can view relevant information, and you can also sort or filter specific Parameters or Metrics to quickly compare the results of model training.
## Convert to Training Job and Template
Once you are satisfied with the code modifications and results, you can package the Python dependencies and code into the required format for future training jobs.
### 1. Organize Python Packages into Requirements.txt
* Click requirements.txt on the left side of Notebook Services.
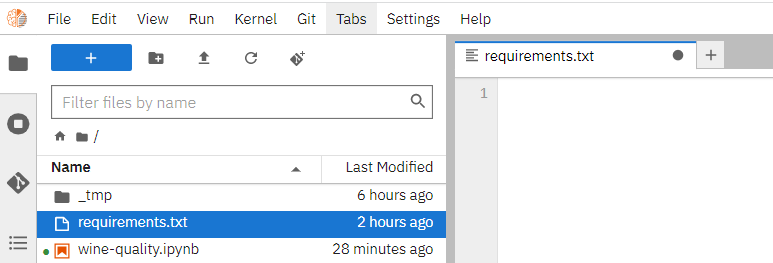
* Please copy and paste the following packages before saving the file.
```=
mlflow==1.24
numpy==1.23
scikit-learn
pandas
```
* Please refer to [**Notebook Service - Install Other Python Packages**](/s/notebook-en#Install-Other-Python-Packages) for instructions and usage of requirements.txt.
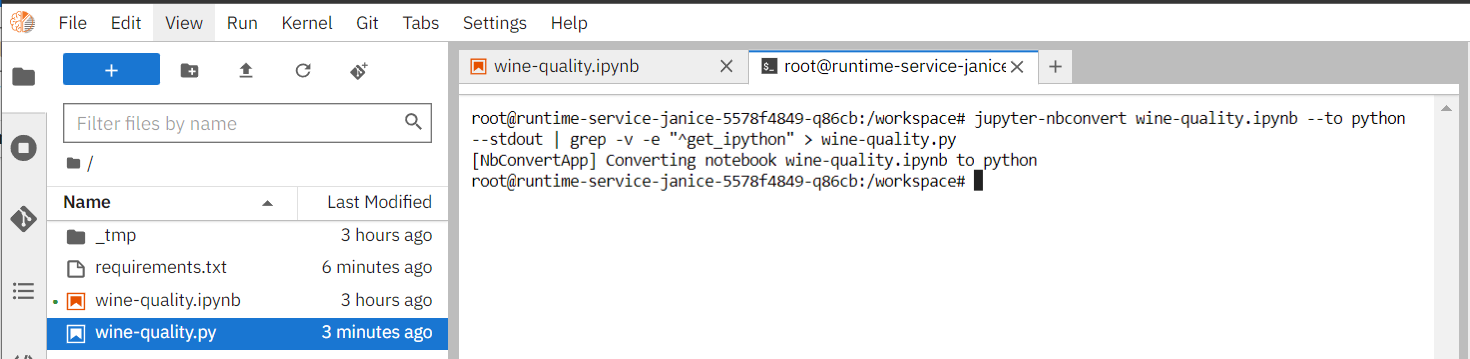
### 2. Convert iPython Files to Python Executables
* Use the following steps to convert the development file (.ipynb) in JupyterLab into a python executable (.py).
* Open a tab in JupyterLab and select Terminal.
* Use the `jupyter-nbconvert` package to convert the ipython file into a python executable. Please execute the following command in the terminal. After successful execution, the converted **`wine-quality.py`** will appear in the left workspace.
```=
jupyter-nbconvert wine-quality.ipynb --to python --stdout | grep -v -e "^get_ipython" > wine-quality.py
```
### 3. Processing Python Executable Files
* (Required) Please click on the converted **`wine-quality.py`** and **remove** the following sections from the code. This action is due to the AI Maker training job having the capability to automatically or manually bind MLflow experiments, and these few sections of self-made code cause overlapping in functionality and affect subsequent execution.
* Please remove **'''---import required information---'''** section
* Please remove **'''---integrate MLflow Experiment Tracking---'''** section
* (Optional) If you want to modify the training parameters without changing the code, you can use code that accesses environment variables and freely adjust them through the environment variables or hyperparameters of the **Training Job**.
* Please replace **'''---Parameter Settings---'''** section
* (Optional) If you want to use the Bayesian or TPE algorithm in the **Smart ML Training Job** to automatically adjust the hyperparameters for the next run based on the hyperparameter results returned from each run, you can achieve this by using the SDK calls in the code. Please refer to the documentation on [**Training Job - Variable Settings**](#4-Variable-Settings) for more information. In addition to the aforementioned **Parameter Settings** replacement, please also perform the following steps.
* Please add another Python package to requirements.txt
* `AIMaker`
* Please also add an additional package to the **'''---import required packages---'''** section.
* `import AIMaker as ai`
* Please add an additional code snippet to the **'''---write record information to MLflow Tracking---'''** section.
* `ai.sendUpdateRequest(float(mae))`
* Please remember to **save** the **`wine-quality.py`** file after editing.
* Complete sample code after processing (including the above three steps)
:::spoiler Unfold to view
* **`requirements.txt`**
```=
mlflow==1.24
numpy==1.23
scikit-learn
pandas
AIMaker
```
* **`wine-quality.py`**
```python=1
'''---Import required packages---'''
import os
import warnings
import sys
import AIMaker as ai
import pandas as pd
import numpy as np
from sklearn.metrics import mean_squared_error, mean_absolute_error, r2_score
from sklearn.model_selection import train_test_split
from sklearn.linear_model import ElasticNet
import mlflow
import mlflow.sklearn
import logging
logging.basicConfig(level=logging.WARN)
logger = logging.getLogger(__name__)
warnings.filterwarnings("ignore")
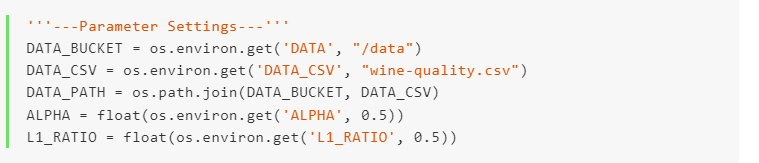
'''---Parameter Settings---'''
DATA_BUCKET = os.environ.get('DATA', "/data")
DATA_CSV = os.environ.get('DATA_CSV', "wine-quality.csv")
DATA_PATH = os.path.join(DATA_BUCKET, DATA_CSV)
ALPHA = float(os.environ.get('ALPHA', 0.5))
L1_RATIO = float(os.environ.get('L1_RATIO', 0.5))
'''---Define training code---'''
# Wine Quality Sample
def train():
def eval_metrics(actual, pred):
rmse = np.sqrt(mean_squared_error(actual, pred))
mae = mean_absolute_error(actual, pred)
r2 = r2_score(actual, pred)
return rmse, mae, r2
warnings.filterwarnings("ignore")
np.random.seed(40)
# Read the wine-quality csv file
data = pd.read_csv(DATA_PATH)
# Split the data into training and test sets. (0.75, 0.25) split.
train, test = train_test_split(data)
# The predicted column is "quality" which is a scalar from [3, 9]
train_x = train.drop(["quality"], axis=1)
test_x = test.drop(["quality"], axis=1)
train_y = train[["quality"]]
test_y = test[["quality"]]
# Useful for multiple runs (only doing one run in this sample notebook-en)
with mlflow.start_run():
# Execute ElasticNet
lr = ElasticNet(alpha=ALPHA, l1_ratio=L1_RATIO, random_state=42)
lr.fit(train_x, train_y)
# Evaluate Metrics
predicted_qualities = lr.predict(test_x)
(rmse, mae, r2) = eval_metrics(test_y, predicted_qualities)
# Print out metrics
print("Elasticnet model (ALPHA=%f, L1_RATIO=%f):" % (ALPHA, L1_RATIO))
print(" RMSE: %s" % rmse)
print(" MAE: %s" % mae)
print(" R2: %s" % r2)
'''---Write log information to MLflow Tracking---'''
# Log parameter, metrics, and model to MLflow
mlflow.log_param("alpha", ALPHA)
mlflow.log_param("l1_ratio", L1_RATIO)
mlflow.log_metric("rmse", rmse)
mlflow.log_metric("r2", r2)
mlflow.log_metric("mae", mae)
mlflow.set_tag("model_type", "ElasticNet")
mlflow.sklearn.log_model(lr, "model")
ai.sendUpdateRequest(float(mae))
'''---Execute---'''
train()
```
:::
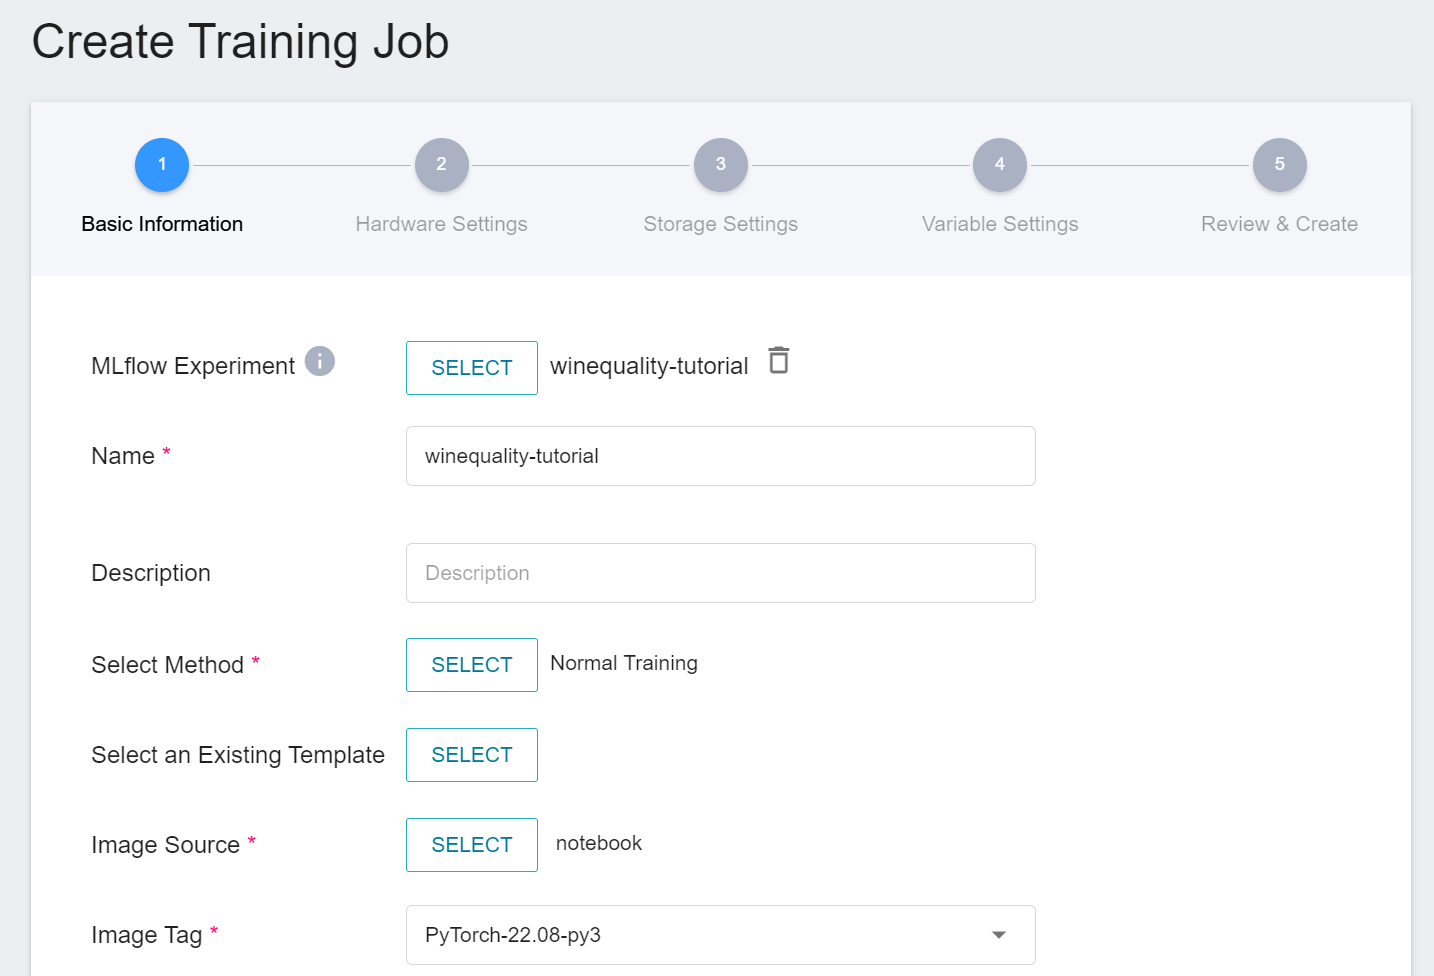
### 4. Execute the Python Executable Through Training Job
* Please refer to [**Using Training Job**](#Using-Training-Job) to create a training job.
* **Basic Information**
* MLflow Experiment You can choose either to use the `winequality-tutorial` experiment for the development stage, or not(if you don't, the system will automatically generate a new experiment run for tracking).
* For image source, please select `notebook`.
* For image tag, please select `PyTorch-22.08-py3`.
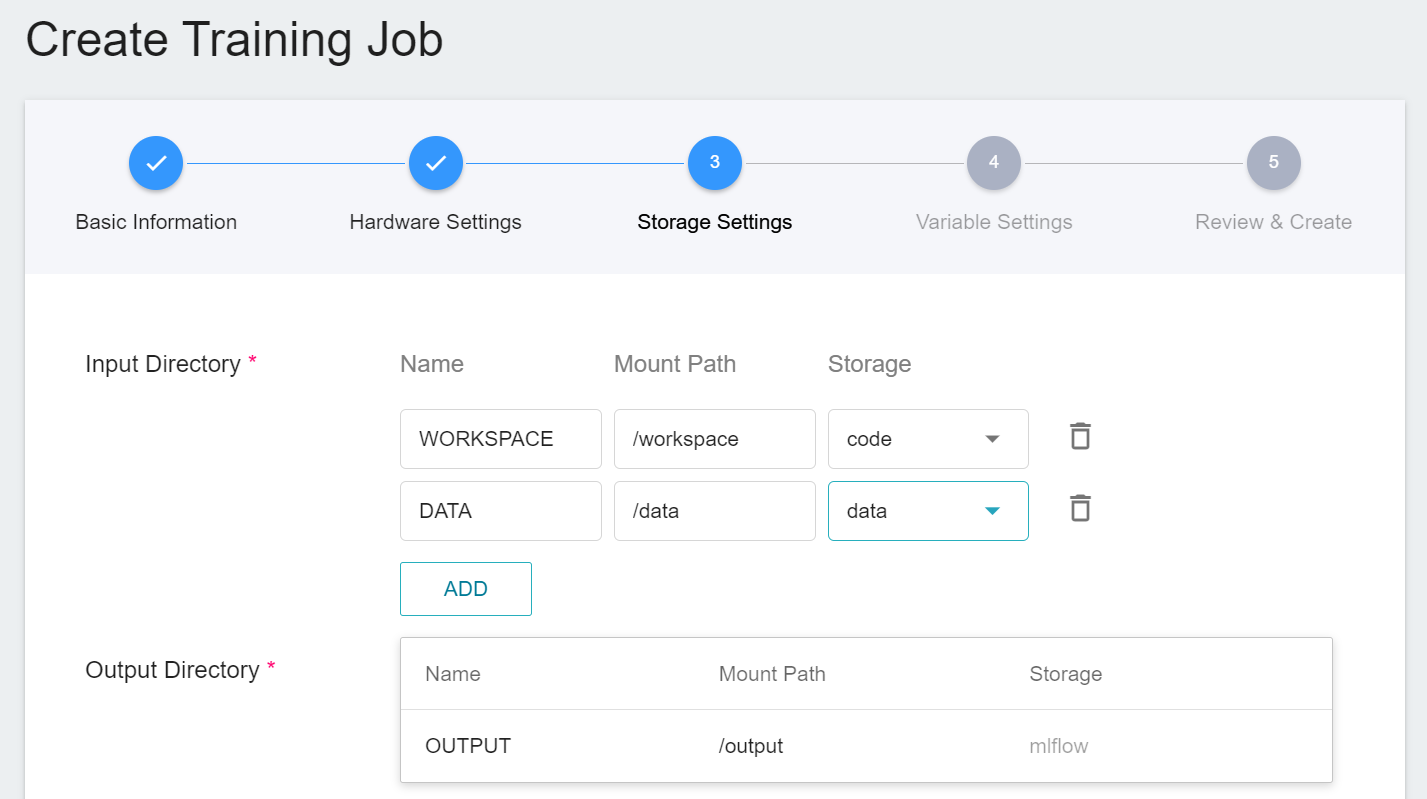
* **Storage Settings**: Set up two buckets according to the mounting method of the example in the notebook service.
* Name: WORKSPACE, mount path: /workspace, bucket: code
* Name: Data, mount path: /data, bucket: data
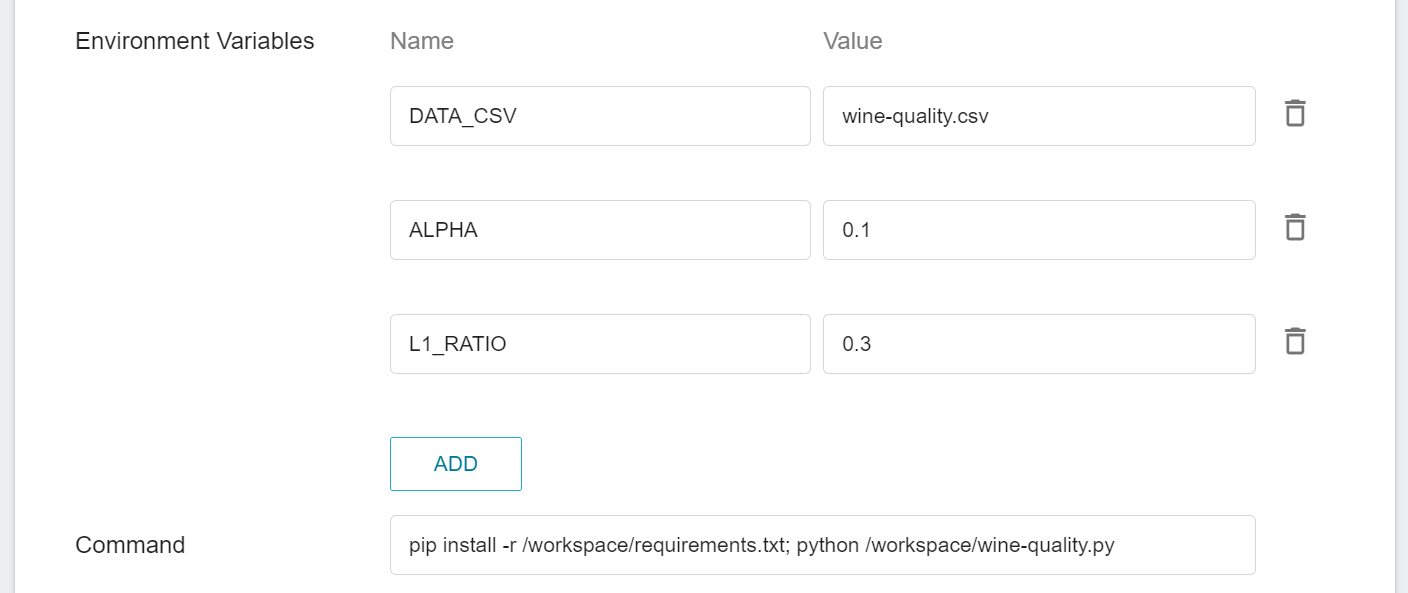
* **Variable Settings (Normal Training Jobs)**
* Environment Variables
| Variable | Value(Custom) | Default | Description |
| --- | --- | --- | --- |
| DATA_CSV | wine-quality.csv | wine-quality.csv | Can be replaced with other datasets in the same format, but must be uploaded to the first layer in the `data` bucket |
| ALPHA | 0.1 | 0.5 | `ALPHA` used in the example program |
| L1_RATIO | 0.3 | 0.5 | `L1_RATIO` used in the example program |
* Target parameters: enter the name **`mae`**, and select the target direction **`minimum value`**.
* Command: enter **`pip install -r /workspace/requirements.txt; python /workspace/wine-quality.py`**
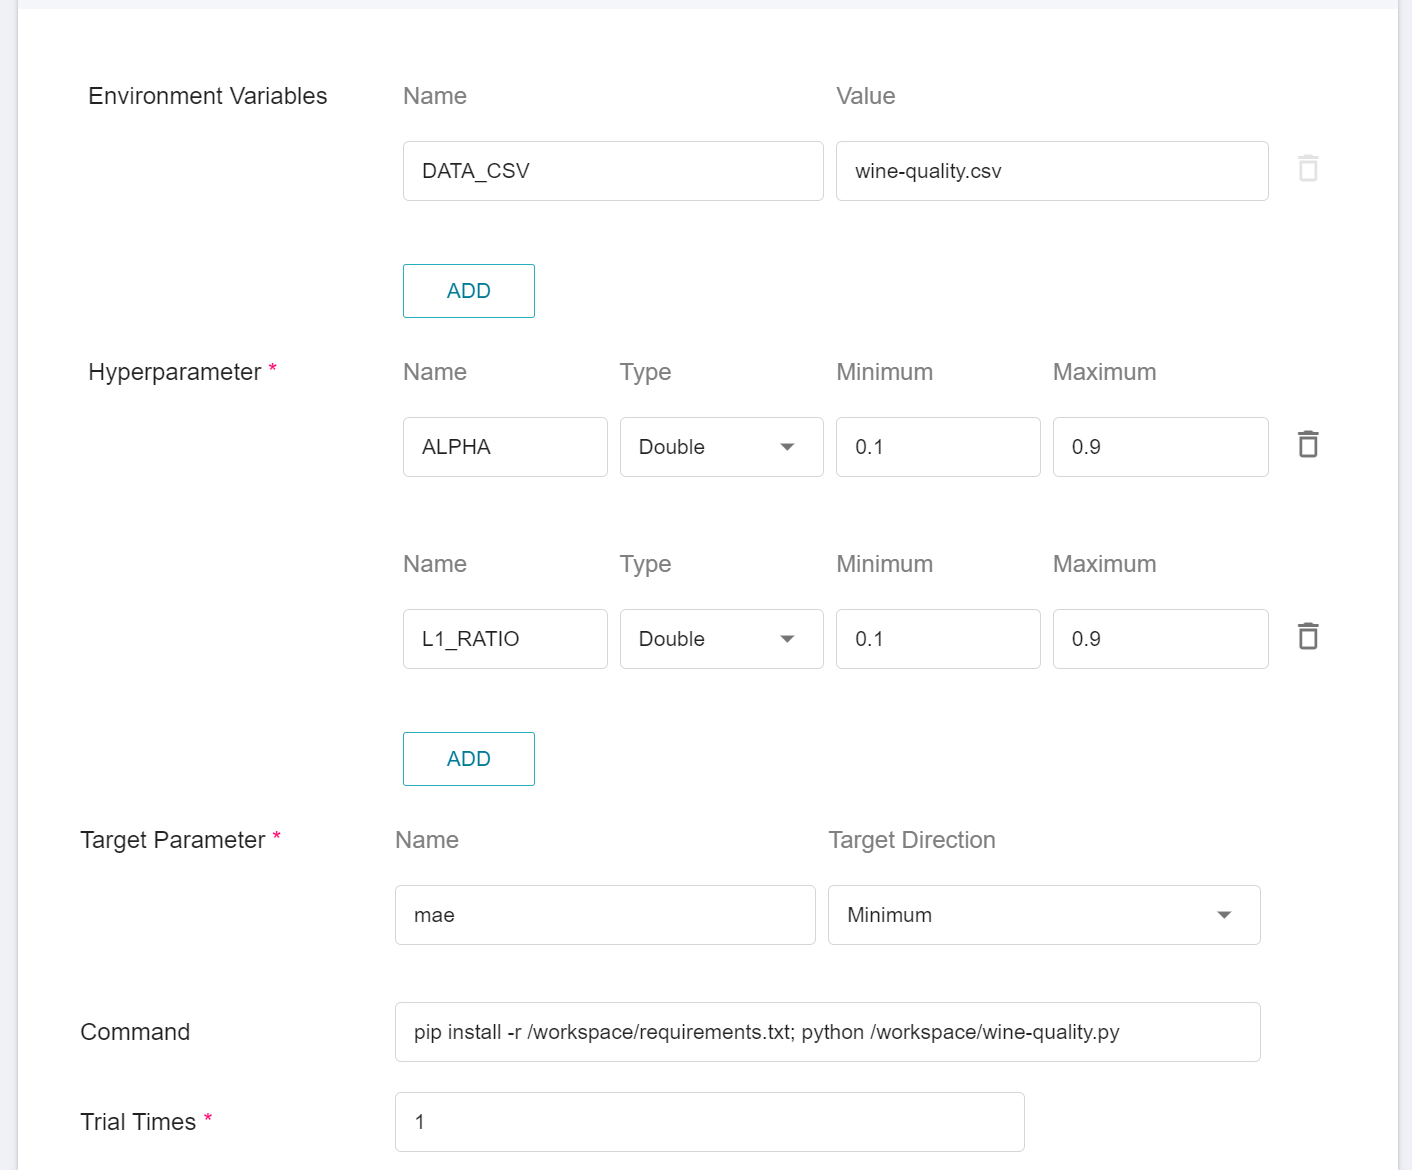
* **Variable Settings (SmartML Training Jobs)**
* Environment Variables
| Variable | Value(Custom) | Default | Description |
| --- | --- | --- | --- |
| DATA_CSV | wine-quality.csv | wine-quality.csv | Can be replaced with other datasets in the same format, but must be uploaded to the first layer in the `data` bucket |
* Hyperparameters:
| Variable | Type | Minimum(Custom) | Maximum(Custom) | Default | Description |
| --- | --- | --- | --- | --- | --- |
| ALPHA | Double | 0.1 | 0.9 | 0.5 | `ALPHA` used in the example program |
| L1_RATIO | Double | 0.1 | 0.9 | 0.5 | `L1_RATIO` used in the example program |
* Target parameters: enter the name **`mae`**, and select the target direction **`minimum value`**.
* Command: enter **`pip install -r /workspace/requirements.txt; python /workspace/wine-quality.py`**
* Trial Times: different running times can be set according to the selected algorithm.
* After creating the training job, please refer to [**Training Job Management**](#Training-Job-Management) to start the newly created training job and wait for it to complete.
* Please refer to [**View Training Results**](#View-Training-Results) to view training results.
### 5. Save Training Job as Template
You can refer to the [**Template**](#Template) to record the setting information of the training job as a shared template within the project, so that other project members can easily apply and freely adjust the dataset or parameter settings.
* In the upper left corner of the created Training Job Details page, click the **Save** icon.
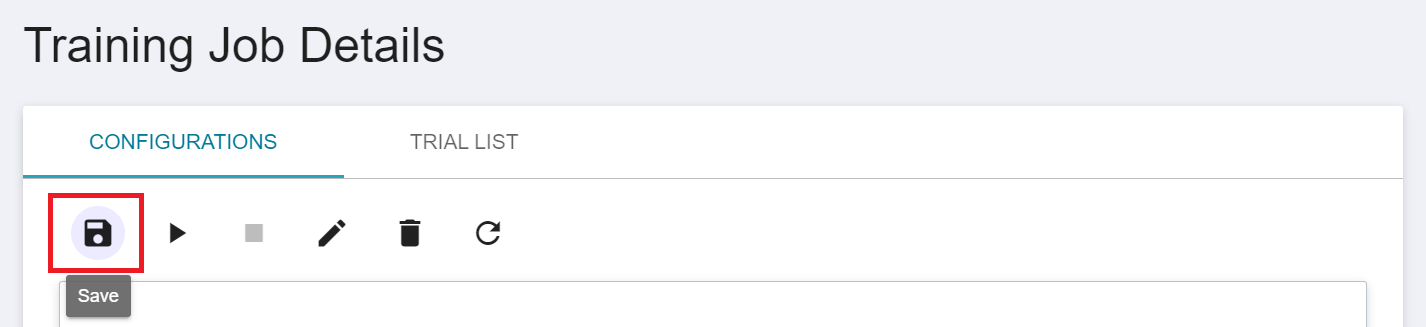
* After filling in the name of the template, click OK to save it as a template of the training job.
## Model Registration and Inference Service
Following the previous example tutorial, the training job has been completed and the corresponding model has been generated. You can continue to register the model for version control, or deploy the model as an inference service.
### 1. Register Model
* Please refer to the **Registering Model from AI Maker Training Job** step in [**Model Registration**](#Model-Registration) to register the model, and manage each version of the model through [**Manage Model Directory**](#Manage-Model-Directory).
* In this example, you can see that three versions of the model from the training job have been registered.
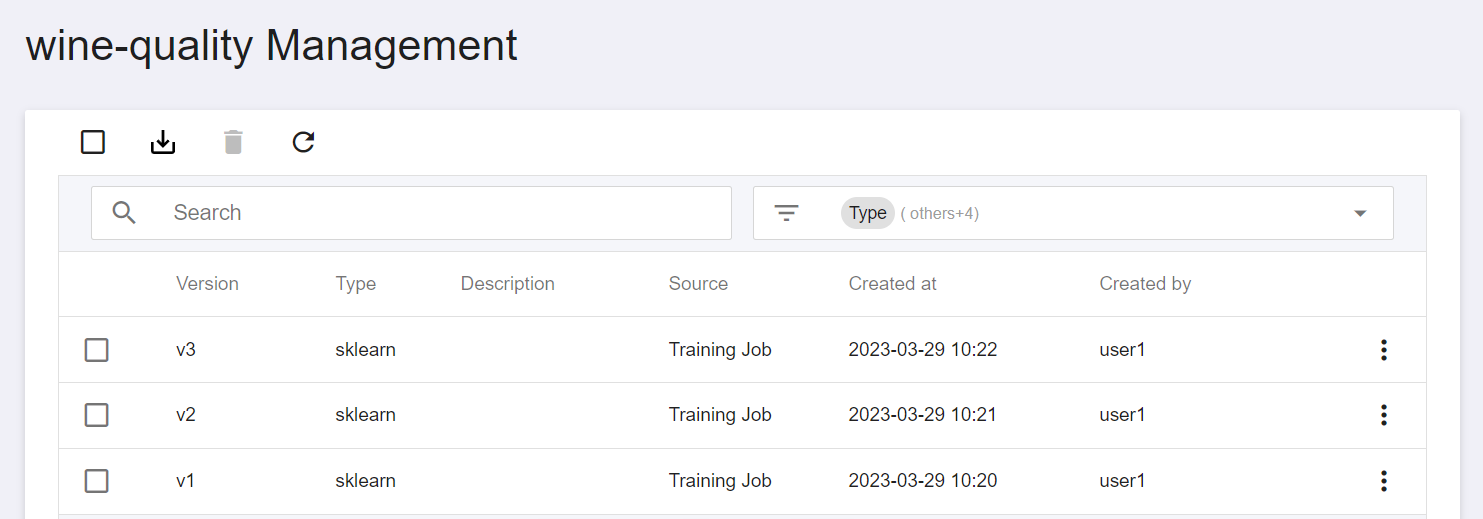
* Click on Model Version List to go to the Model Details page to view more details.

### 2. Create Inference Service
* Please refer to [**Create Method - Auto Detection**](#Create-Method-Auto-Detection) to select the registered model name and version, and then click the **DETECT** button. After auto detection, the model type and inference server will be displayed on the page, and then continue to finish setting up the inference service.

### 3. Making Inference
* Please refer to [**Making Inference**](#Making-Inference) to obtain the **URL** of the inference service.

* The client part can use the [**Notebook Service**](#1-Create-a-notebook-service) created in the previous model development stage to start JupyterLab. This example uses `wine-quality`.
#### 3.1 Use Curl Command to Validate
* Remember to replace `http://{host}/invocations` with the **URL** of the inference service.
* After execution, you can see the inference result `{"predictions": [6.594901392856684]}`
```bash
curl -X POST -H "Content-Type:application/json" --data '{"dataframe_split": {"columns":["fixed acidity", "volatile acidity", "citric acid", "residual sugar", "chlorides", "free sulfur dioxide", "total sulfur dioxide", "density", "pH", "sulphates", "alcohol"],"data":[[6.2, 0.66, 0.48, 1.2, 0.029, 29, 75, 0.98, 3.33, 0.39, 12.8]]}}' http://{host}/invocations
```
#### 3.2 Use Python Code to Validate
You can create a new Python3 Notebook in JupyterLab, and copy and paste the following sample code into the newly created Python3 Notebook.
* Remember to replace `http://{host}/invocations` with the **URL** of the inference service.
* After execution, you can see the inference result `{'predictions': [5.638783963790194]}`
``` python=1
import requests
inference_request = {
"dataframe_split": {
"columns": [
"alcohol",
"chlorides",
"citric acid",
"density",
"fixed acidity",
"free sulfur dioxide",
"pH",
"residual sugar",
"sulphates",
"total sulfur dioxide",
"volatile acidity",
],
"data": [[7.4,0.7,0,1.9,0.076,11,34,0.9978,3.51,0.56,9.4]]
}
}
endpoint = "http://{host}/invocations"
response = requests.post(endpoint, json=inference_request)
response.json()
```