---
title: AI Maker Case Study - Implement Assisted Inference Module to CVAT
description: OneAI Documentation
tags: Case Study, CVAT, Yolov7, EN
---
[OneAI Documentation](/s/user-guide-en)
# AI Maker Case Study - Implement Assisted Inference Module to CVAT
[TOC]
## 1. Introduction
AI Maker has a integrated with CVAT (Computer Vision Annotation Tool) to help you quickly annotate the training data of machine learning, or connect the trained model to CVAT through the inference service for automatic annotation.
In the [**AI Maker Case Study - YOLOv7 Image Recognition Application**](/s/casestudy-yolov7-en) example, we learned to train our own deep learning model using AI Maker, and use the trained model to provide **`YOLOv7-cvat`** inference templates through AI Maker to perform image data annotation inference service in combination with CVAT's automatic annotation function. This is an advanced tutorial with two API implementation examples to illustrate how to connect the CVAT assisted/automated annotation API with YOLOv7 and SiamMask models.
Before learning this example, please familiarize yourself with the basic operations of AI Maker and CVAT (Computer Vision Annotation Tool), or read the following documents:
* [**Container Image**](/s/container-image-en)
* [**AI Maker > Inference Service**](/s/ai-maker-en#Inference)
* [**AI Maker Case Study - YOLOv7 Image Recognition Application > CVAT Assisted Annotation**](/s/casestudy-yolov7-en#6-CVAT-Assisted-Annotation)
* [**CVAT Documentation**](https://opencv.github.io/cvat/docs/)
* [**CVAT GitHub**](https://github.com/opencv/cvat)
## 2. CVAT-Assisted Annotation Inference Service
CVAT's native model deployment functionality is built on the [**Nuclio**](https://nuclio.io/) platform and implemented as its counterpart Serverless Functions. However, it is very tedious to [**Set Up Nuclio Environment**](https://github.com/nuclio/nuclio/blob/development/docs/setup/k8s/getting-started-k8s.md) and [**Deploy Relevant Functions**](https://github.com/nuclio/nuclio/blob/development/docs/tasks/deploying-functions.md). The CVAT annotation tool integrated by AI Maker makes CVAT-assisted annotation in model inference deployment less tedious, you can quickly deploy CVAT-assisted annotation inference service through AI Maker by implementing the API of CVAT-assisted annotation inference service.
### 2.1 Architecture Description
The architecture of CVAT assisted annotation service is shown below. The yellow squares represent the functions that users need to build and deploy by themselves. The upper part of the diagram is the native CVAT and Nuclio platforms. Users need to set up the Nuclio platform and deploy the relevant Functions ; The lower part of the diagram shows the integration of CVAT's assisted annotation and model inference deployment functions through AI Maker. Users only need to deploy the relevant inference service to connect with CVAT's assisted annotation service.
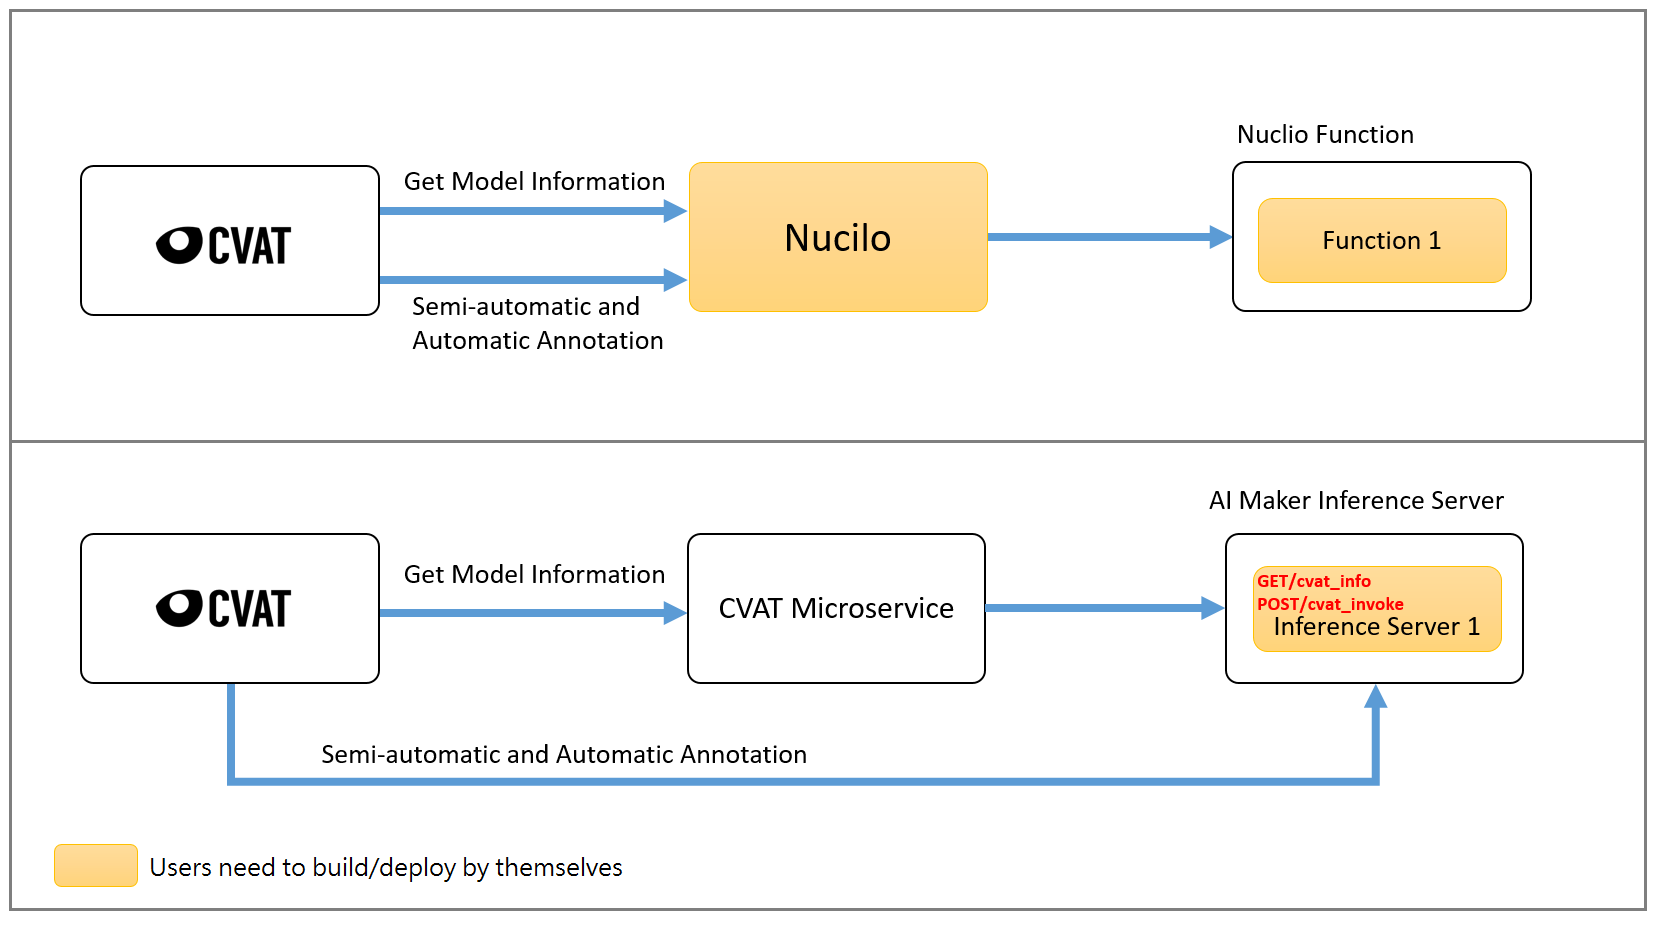
:::info
:bulb: **Tips: CVAT Microservice** is a built-in microservice in AI Maker. Its function is to bridge CVAT and inference service, so that AI Maker's built-in CVAT can query model information and allow AI Maker's inference service to connect with CVAT's assisted/automatic annotation function.
:::
### 2.2 API Description
From the above diagram, we can see that there are two APIs that users need to implement to connect CVAT assisted annotation and AI Maker inference service: **`cvat_info`** and **`cvat_invoke`**. The implementation of these two APIs is described below.
| API Name | Description |
|-----|------------|
| **cvat_info** |To define the model information, you need to fill in the framework, type, description and spec information. CVAT will call this API when querying the model information, as shown in the figure. <br> <br> |
| **cvat_invoke** | The result of inference implementation, CVAT will call this API when performing **Assisted and Automatic Annotation**. CVAT will send a Base64-encoded image through HTTP POST Method. We need to implement and return the inference result to CVAT. The type of data returned will be different according to the type filled in the information of the definition model. Detailed information will be presented in the following sections.|
The following information about **cvat_info** is required to implement the model.
| Name | Description |
|-----|------------|
|framework |The model framework.
|type |There are four types of identification tasks that define the model. For details, please refer to the links in parentheses.<br>**detector**- used for automatic annotation (CVAT [detectors](https://opencv.github.io/cvat/docs/manual/advanced/ai-tools/#detectors) and [automatic annotation](https://opencv.github.io/cvat/docs/manual/advanced/automatic-annotation/))<br>**interactor** - for assisted annotation of frame (CVAT [interactors](https://opencv.github.io/cvat/docs/manual/advanced/ai-tools/#interactors)) <br>**tracker** - for tracking assisted annotation (CVAT [trackers](https://opencv.github.io/cvat/docs/manual/advanced/ai-tools/#trackers))<br>**reid** - automatic annotation for pedestrian re-identification (CVAT [automatic annotation](https://opencv.github.io/cvat/docs/manual/advanced/automatic-annotation/))
|description | A description of the model.
|spec | Lists the supported tags (only required when the model type is detector, if not, please enter None for this field).
The table below shows the corresponding types of commonly used models in CVAT. For more information, please refer to [**CVAT GitHub**](https://github.com/opencv/cvat#deep-learning-serverless-functions-for-automatic-labeling).
| Name | Type|
|-----|------------|
|Deep Extreme Cut|interactor
|Faster RCNN | detector
|Mask RCNN| detector
|YOLO v3/v4| detector
|Object reidentification|reid
|Semantic segmentation for ADAS|detector
|Text detection v4|detector
|SiamMask|tracker
|f-BRS|interactor
|HRNet|interactor
|Inside-Outside Guidance|interactor
|RetinaNet|detector
## 3. Example 1: Detector API
Example 1 will use the Yolov7 model to implement the Detector API connected with CVAT automatic annotation. Before starting, it is recommended that you read [**AI Maker Case Study - YOLOv7 Image Recognition Application > CVAT Assisted Annotation**](/s/casestudy-yolov7-en#6-CVAT-assisted-annotation).
<center>Automatic Annotation Schema</center>
### 3.1 API Example
Blow is an example of the Yolov7 model implementation Detector API, showing the input data and the data structure to be returned by the cvat_info and cvat_invoke APIs.
**Request**
* URL: GET /cvat_info
**Response**
* Body:
```json=
HTTP/1.1 200 OK
{
"framework":"yolov7",
"spec":[
{ "id": 0, "name": "people" },
{ "id": 1, "name": "cat"}
],
"type": "detector",
"description":"Object detection via Yolov7"
}
```
**Request**
* URL: POST /cvat_invoke
* Body:
```json=
{
"image":"base64_encode_image"
}
```
**Response**
* Body:
```json=
HTTP/1.1 200 OK
[
{
"label": "people",
"points": [
286,
751,
432,
903
],
"type": "rectangle"
},
{
"label": "cat",
"points": [
69,
1112,
331,
1175
],
"type": "rectangle"
}
]
```
### 3.2 API Sample Code
This section provides a sample Detector program to demonstrate how to implement the two APIs cvat_info and cvat_invoke using the lightweight **Python Flask** web framework.
This example uses [**YOLOv7**](https://github.com/WongKinYiu/yolov7) to implement the Detector API, as described below:
:::spoiler **Example code: `main.py`**
```python=
# -*- coding: utf-8 -*-
import base64
from flask import Flask, request, jsonify
import logging
import json
from model_handler import ModelHandler
from PIL import Image
import io
app = Flask(__name__)
logger = logging.getLogger('flask.app')
model_handler = ModelHandler()
model_handler.init()
@app.route('/cvat_info', methods=['GET'])
def cvat_info():
specs = []
index = 0
names = model_handler.label()
for name in names:
specs.append({"id":index, "name":name})
index += 1
resp = {
"framework": "yolov7",
"type": "detector",
"spec": specs,
"description": "Object detection via Yolov7"
}
return resp
@app.route('/cvat_invoke', methods=['POST'])
def cvat_invoke():
data = request.get_json()
buf = io.BytesIO(base64.b64decode(data["image"]))
threshold = float(data.get("threshold", 0.5))
image = Image.open(buf)
results = model_handler.detect(image,threshold)
return results
if __name__ == "__main__":
app.run(host="0.0.0.0", debug=True, port=9999)
```
:::
* Line 10~11: Model initialization.
* Line 13 ~ 22: Implement the cvat_info API, define model information and return the information in JSON format.
* Line 24 ~ 41: Implement the cvat_invoke API, which mainly receives Base64-encoded images, decodes them and inputs them into the YOLOv7 Model for identification, and returns the identified data in JSON format.
:::spoiler **Example code: `model_handler.py`**
```python=
import os
import hubconf
import json
import yaml
import logging
MLFLOW_TRACKING_URI = os.environ.get('MLFLOW_TRACKING_URI', 'none')
class ModelHandler:
def __init__(self):
self.logger = logging.getLogger('ModelHandler')
self.logger.setLevel(logging.INFO)
default_weights = ""
default_data_yaml = ""
if(MLFLOW_TRACKING_URI == 'none'):
print("Using Infv3")
default_weights = "/model/yolov7/weights/best.pt"
default_data_yaml = "/model/yolov7/data.yaml"
else:
print("Using Infv4")
default_weights = "/model/data/yolov7/weights/best.pt"
default_data_yaml = "/model/data/yolov7/data.yaml"
self.weights = os.environ.get('WEIGHTS', default_weights)
self.data_yaml = os.environ.get('DATA_YAML',default_data_yaml)
self.logger.info("WEIGHT:%s",str(self.weights))
self.logger.info("DATA_YAML:%s",str(self.data_yaml))
def init(self):
self.logger.info("===model initialized====")
self.__model = hubconf.custom(path_or_model=self.weights)
def label(self):
with open(self.data_yaml, 'r') as stream:
try:
loaded = yaml.load(stream,Loader=yaml.SafeLoader)
except yaml.YAMLError as exc:
print(exc)
return loaded['names']
def detect(self,data,thresh):
self.__model.conf = thresh
yolo_results_json = self.__model(data).pandas().xyxy[0].to_dict(orient='records')
encoded_results = []
for result in yolo_results_json:
encoded_results.append({
'confidence': result['confidence'],
'label': result['name'],
'points': [
result['xmin'],
result['ymin'],
result['xmax'],
result['ymax']
],
'type': 'rectangle'
})
return json.dumps(encoded_results)
```
:::
* It is mainly responsible for model loading and model inference.
### 3.3 Create and Upload Container Image
In the previous section, we introduced a sample program for implementing CVAT-assisted annotation in model inference deployment, followed by packaging the program into a **Container Image** for deployment to AI Maker's inference service.
Below is the Dockerfile for creating the Detector API container image. Please put the corresponding sample programs (`main.py` and `model_handler.py`) and the Dockerfile in the same folder, and then use the **`docker build`** command to build the container image and upload the created container image. For details, please refer to the [**Container Image Documentation**](/s/container-image-en).
:::spoiler **Detector Dockerfile**
```dockerfile=
From nvcr.io/nvidia/pytorch:21.08-py3
RUN apt-get update
RUN python -m pip install --upgrade pip
RUN pip install \
flask \
matplotlib==3.2.2 \
numpy==1.18.5 \
opencv-python==4.5.5.64 \
Pillow==7.1.2 \
PyYAML==5.3.1 \
requests==2.23.0 \
scipy==1.4.1 \
tqdm==4.41.0 \
protobuf==4.21.1 \
pandas==1.1.4 \
seaborn==0.11.0
RUN apt-get install -y \
libsm6 \
libxext6 \
libxrender-dev \
libgl1-mesa-glx
Run git clone https://github.com/WongKinYiu/yolov7.git
COPY main.py /workspace/yolov7
COPY model_handler.py /workspace/yolov7
```
:::
### 3.4 Model Preparation
If you use the model trained by the yolov7 template, please skip this step; if you use your own YOLOv7 model or a model obtained from other sources (for example: :[**YOLOv7 github**](https://github.com/WongKinYiu/yolov7/releases/)), please follow these steps to prepare the model using the YOLOv7 COCO pre-trained model as an example.
1. Download the files related to the model
* [**Click here to download yolov7.pt**](https://github.com/WongKinYiu/yolov7/releases/download/v0.1/yolov7.pt)
* [**Click here to download coco.yaml**](https://raw.githubusercontent.com/WongKinYiu/yolov7/main/data/coco.yaml)
2. Modify the file name
* Please rename coco.yaml to data.yaml
* Please rename yolov7.pt to best.pt
3. Upload model
* Add a new folder named yolov7
* Put the above two files into the yolov7 folder. The folder structure is as follows:
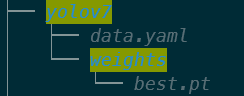
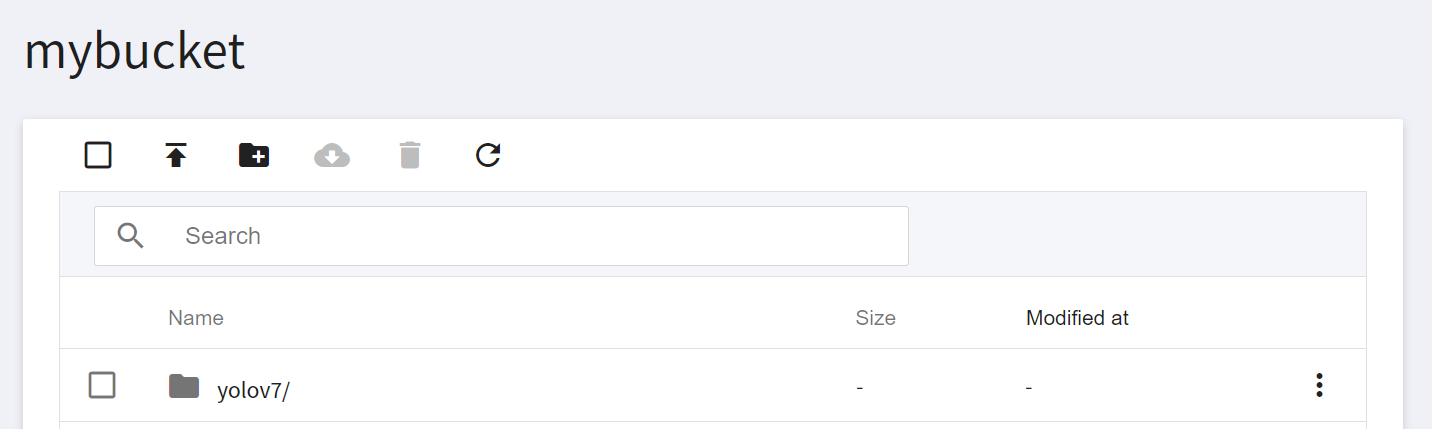
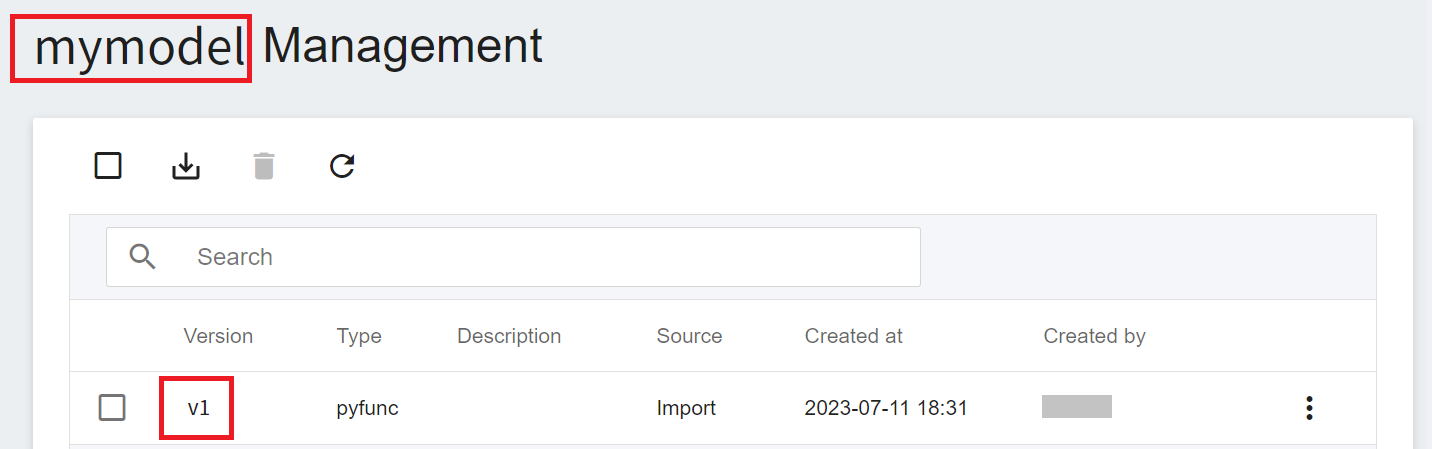
* Then upload this folder to OneAI's **Storage Service**, and then go to AI Maker's model management to import this model. For detailed steps, please refer to the [**AI Maker Import Model Instructions**](/s/ai-maker-en#Import-Model).
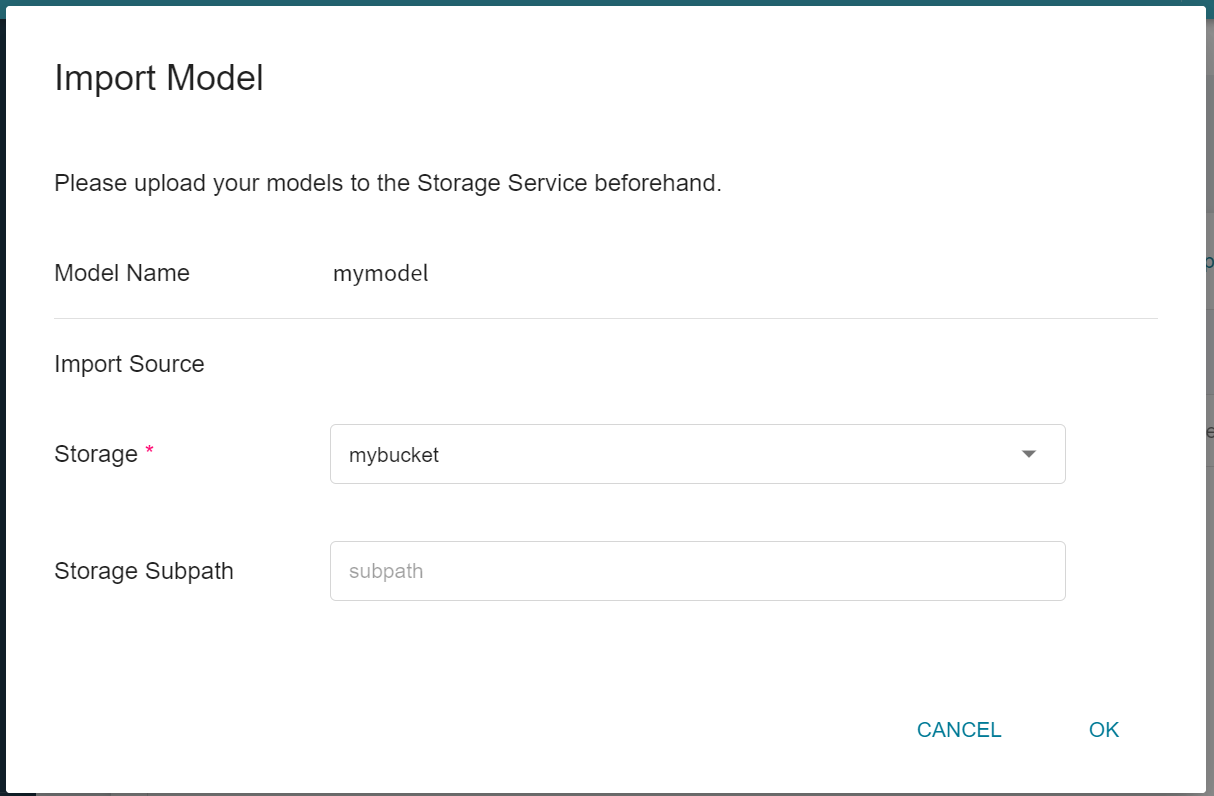
* Please remember the model name and version after the model is imported, the inference service will be deployed with this model next.
### 3.5 Deploy Inference Service
After preparing the inference image and model, you can then deploy the inference service to AI Maker. When creating an inference service, you need to select your model and this image. We only describe some important settings. For other steps, please refer to the [**Create Inference Task instructions**](/s/ai-maker-en#Create-Inference-Tasks).
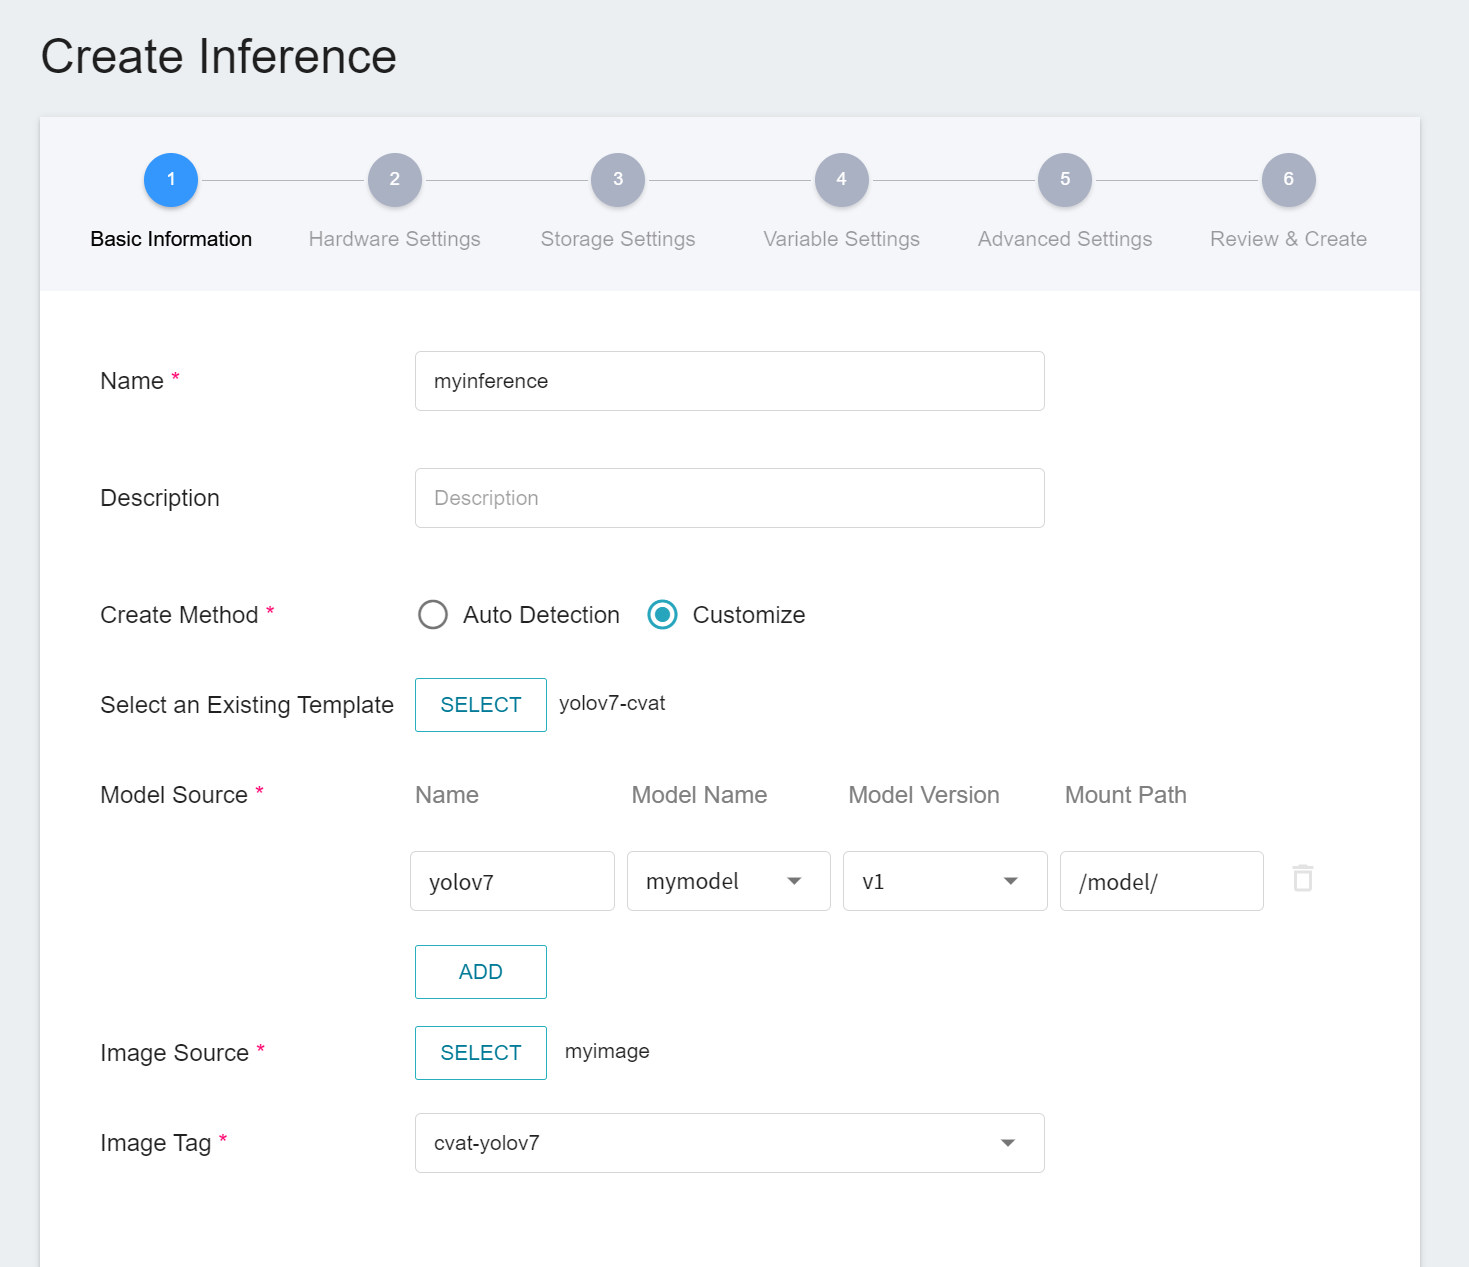
1. **Basic Settings**
* **Create Method**: Please select **Customize**.
* **Source Model**
- Name: Please enter **`yolov7`**.
- Model Name: Please select the model name you want to load.
- Version: Please select the model version you want to load.
- Mount Path: Please enter **`/models/`**.
* **Image Source**: Please select the image and tag you just uploaded.
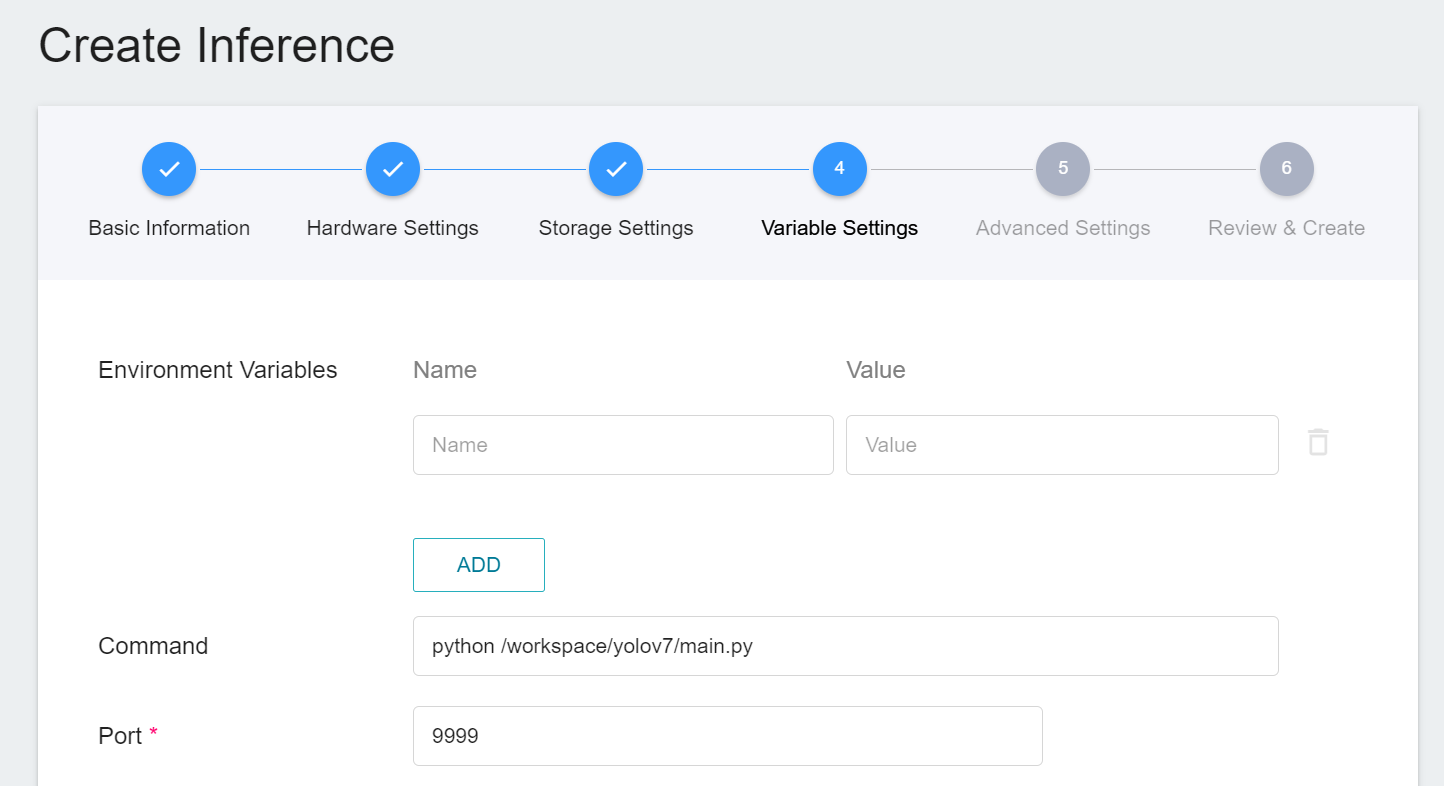
2. **Variable Settings**:
* Command: python /workspace/yolov7/main.py
* Port: should be set to **`9999`**.
### 3.6 Connect to CVAT
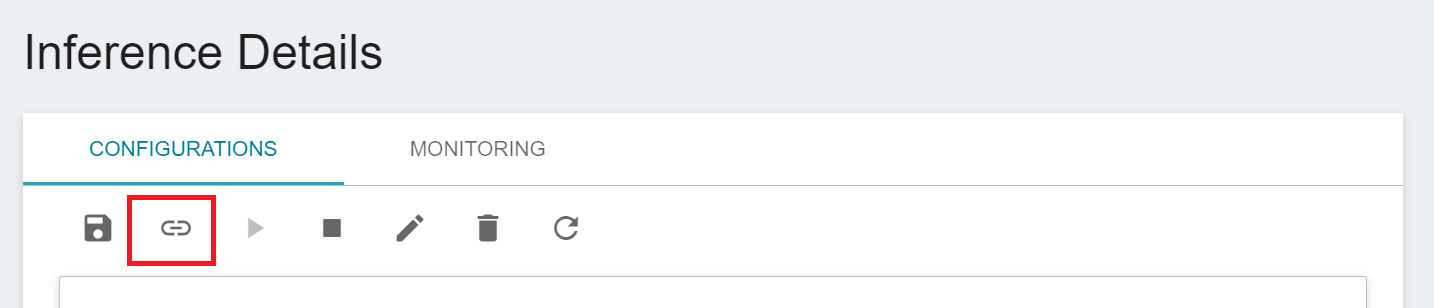
When the status of the inference service is **`Ready`**, we need to do the last step, click the **CONNECT TO CVAT** icon above to connect to CVAT for assisted annotation.
After connecting to CVAT, enter the CVAT service to see the inference service model connected to CVAT on the **Models** page of CVAT.
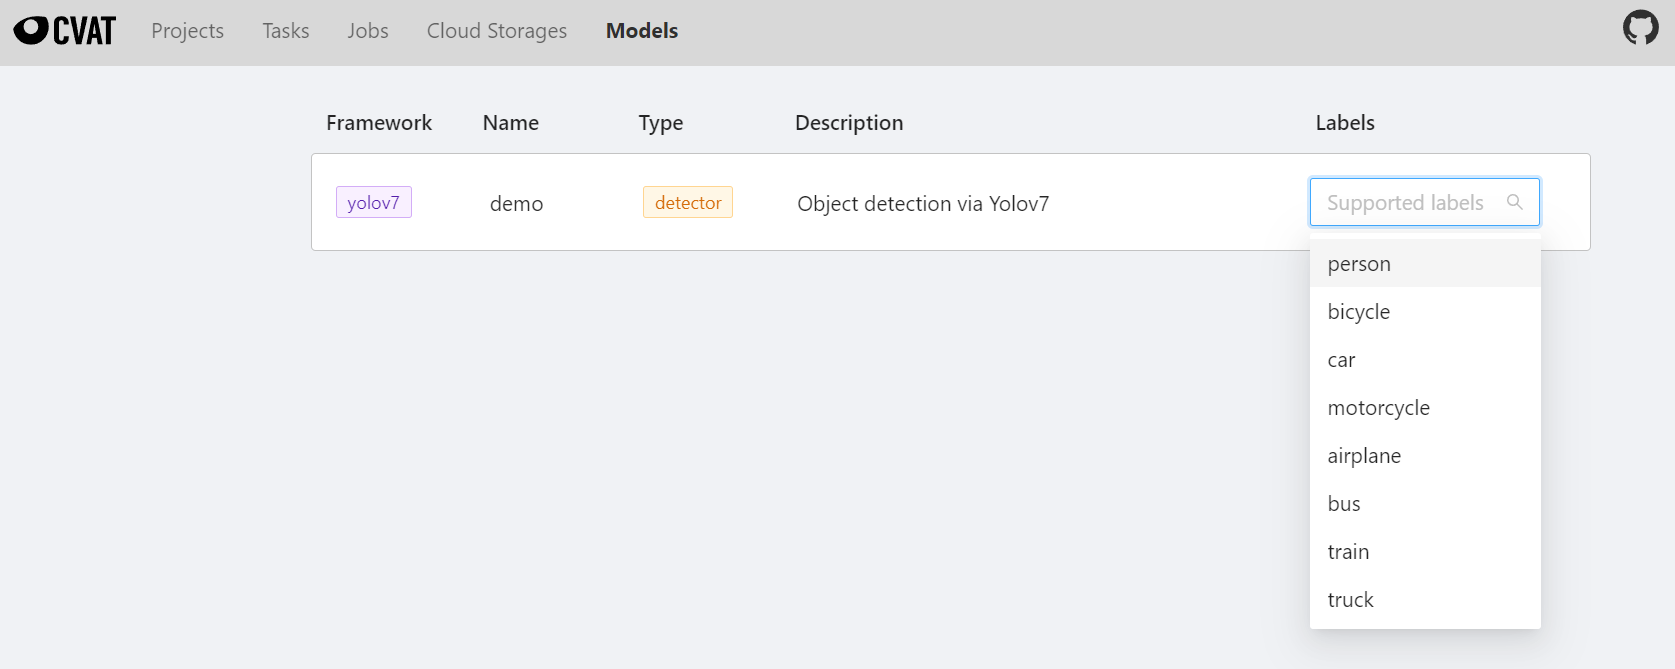
Congratulations, you can start using the CVAT assisted annotation/automatic annotation function now.
### 3.7 Use CVAT Assisted Annotation/Automatic Annotation
There are two ways to use the CVAT assisted annotation/automatic annotation function:
1. Assisted Annotation/Automatic Annotation of All Pictures for the Eentire Task
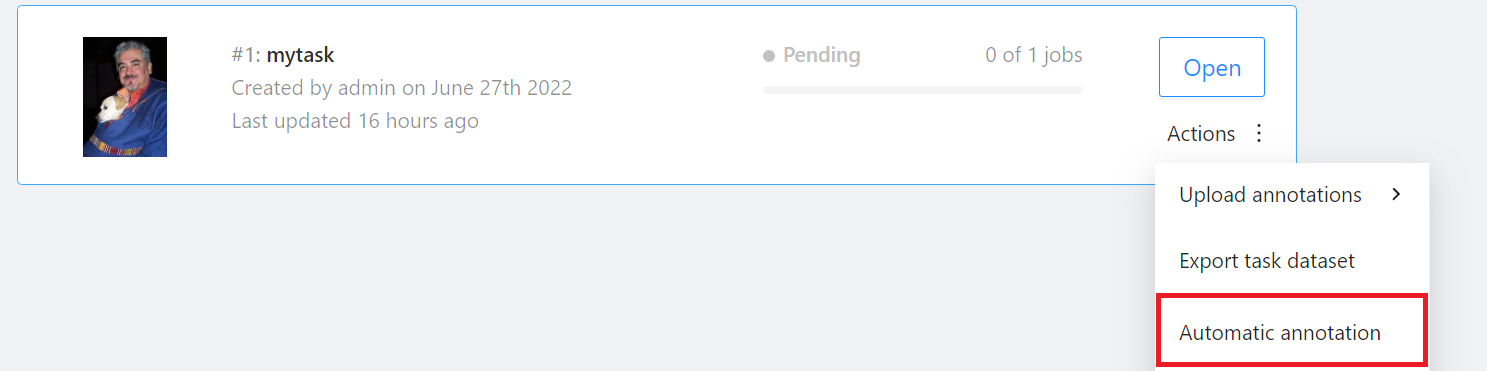
Go to the **Tasks** page and find the Task you want to annotate, then move the mouse over the More options icon in **Actions** to the right of the Task you want to annotate automatically, and then click **AUTOMATIC ANNOTATION**.
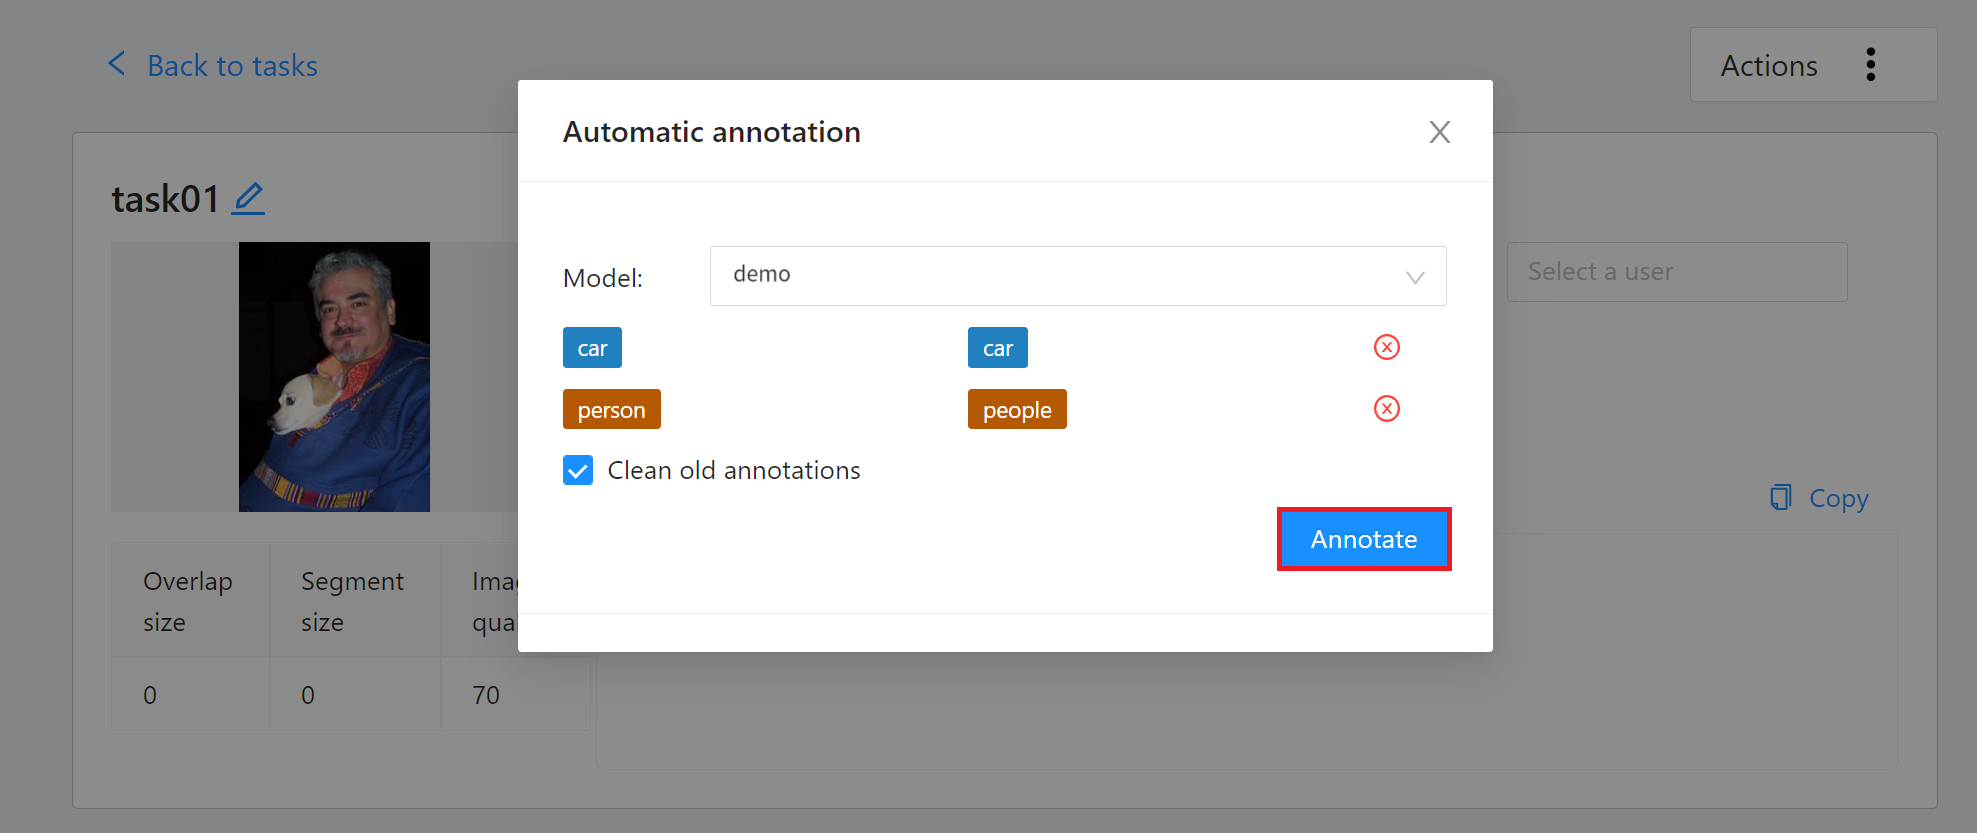
On the **Automatic annotation** window that appears, click the **Model** drop-down menu and select the connected inference task. Then set the model to correspond to the task Label, and finally click **ANNOTATE** to perform automatic annotation.

After the annotation is completed, enter the CVAT Annotation Tools page to view the automatic annotation result. If you are not satisfied with the result, you can perform manual annotation correction.
2. Assisted Annotation /Automatic Annotation of a Single Picture
Select the picture you want to annotate after entering the annotation page. If there is a target object in the picture, you can annotate it according to the following steps.
* Click the Magic Wand (AI Tools) on the left toolbar.
* Select **Detectors**.
* Select the Model you just connected.

## 4. Example 2: Tracker API
In Example 2, we will use the siamMask model to implement the Tracker API that connects to CVAT automatic annotation. It is recommended that you review the [**CVAT Tracker Mode Usage Instructions**](https://opencv.github.io/cvat/docs/manual/advanced/ai-tools/#trackers) first.
### 4.1 Tracker API Example
**Request**
* URL: GET /cvat_info
**Response**
* Body:
```json=
HTTP/1.1 200 OK
{
"framework":"pytorch",
"spec": None,
"type": "tracker",
"description": "Fast Online Object Tracking and Segmentation"
}
```
**Request**
* URL: POST /cvat_invoke
* Body:
```json=
{
"image":"base64_encode_image",
"state":"tracker_state",
"shape":"[303.61328125, 112.201171875, 469.88011169433594, 380.6956787109375]"
}
```
**Response**
* Body:
```json=
HTTP/1.1 200 OK
{
"state":"tracker_state",
"shape":"[303.61328125, 112.201171875, 469.88011169433594, 380.6956787109375]"
}
```
### 4.2 API Sample Code
This section provides a sample Tracker program using [**SiamMask**](https://github.com/foolwood/SiamMask) as an example to demonstrate how to implement the two APIs cvat_info and cvat_invoke using the lightweight **Python Flask** web framework.
:::spoiler **Example code: `main.py`**
```python=
# -*- coding: utf-8 -*-
import json
import base64
from PIL import Image
import io
from flask import Flask, request
from model_handler import ModelHandler
app = Flask(__name__)
model = ModelHandler()
@app.route('/cvat_info', methods=['GET'])
def cvat_info():
resp = {
"framework":"pytorch",
"spec": None,
"type": "tracker",
"description": "Fast Online Object Tracking and Segmentation"
}
return resp
@app.route('/cvat_invoke', methods=['POST'])
def cvat_invoke():
data = request.get_json()
buf = io.BytesIO(base64.b64decode(data["image"]))
shapes = data.get("shapes")
states = data.get("states")
image = Image.open(buf)
results = {
'shapes': [],
'states': []
}
for i, shape in enumerate(shapes):
shape, state = model.infer(image, shape, states[i] if i < len(states) else None)
results['shapes'].append(shape)
results['states'].append(state)
return json.dumps(results)
if __name__ == "__main__":
app.run(host="0.0.0.0", debug=True, port=9999)
```
:::
* Line 9: Model initialization.
* Line 10 ~ 18: Implement the cvat_info API, define model information and return the information in JSON format.
* Line 20 ~ 28: Implement the cvat_invoke API, which mainly receives Base64-encoded images, decodes them and inputs them into the SiamMask Model for identification, and returns the identified data in JSON format.
:::spoiler **Example code: `model_handler.py`**
```python=
# Copyright (C) 2020 Intel Corporation
#
# SPDX-License-Identifier: MIT
from tools.test import *
import os
from copy import copy
import jsonpickle
import numpy as np
MLFLOW_TRACKING_URI = os.environ.get('MLFLOW_TRACKING_URI', 'none')
class ModelHandler:
def __init__(self):
# Setup device
self.device = torch.device('cuda' if torch.cuda.is_available() else 'cpu')
torch.backends.cudnn.benchmark = True
if(MLFLOW_TRACKING_URI == 'none'):
print("Using Infv3")
model_path = os.environ.get("MODEL_PATH")
else:
print("Using Infv4")
model_path = os.path.join(os.environ.get("MODEL_PATH"),'data')
base_dir = os.path.abspath(model_path)
class configPath:
config = os.path.join(base_dir, "config_davis.json")
self.config = load_config(configPath)
from custom import Custom
siammask = Custom(anchors=self.config['anchors'])
self.siammask = load_pretrain(siammask, os.path.join(base_dir, "SiamMask_DAVIS.pth"))
self.siammask.eval().to(self.device)
def encode_state(self, state):
state['net.zf'] = state['net'].zf
state.pop('net', None)
state.pop('mask', None)
for k,v in state.items():
state[k] = jsonpickle.encode(v)
return state
def decode_state(self, state):
for k,v in state.items():
state[k] = jsonpickle.decode(v)
state['net'] = copy(self.siammask)
state['net'].zf = state['net.zf']
del state['net.zf']
return state
def infer(self, image, shape, state):
image = np.array(image)
if state is None: # init tracking
xtl, ytl, xbr, ybr = shape
target_pos = np.array([(xtl + xbr) / 2, (ytl + ybr) / 2])
target_sz = np.array([xbr - xtl, ybr - ytl])
siammask = copy(self.siammask) # don't modify self.siammask
state = siamese_init(image, target_pos, target_sz, siammask,
self.config['hp'], device=self.device)
state = self.encode_state(state)
else: # track
state = self.decode_state(state)
state = siamese_track(state, image, mask_enable=True,
refine_enable=True, device=self.device)
shape = state['ploygon'].flatten().tolist()
state = self.encode_state(state)
return shape, state
```
:::
* It is mainly responsible for model loading and model inference.
### 4.3 Create and Upload Container Image
In the previous section, we introduced a sample program for implementing CVAT-assisted annotation in model inference deployment, followed by packaging the program into a **Container Image** for deployment to AI Maker's inference service.
The following provides the Dockerfile for creating the Tracker API container image. Please put the corresponding sample programs (`main.py` and `model_handler.py`) and the Dockerfile in the same folder, and then use the **`docker build`** command to build the container image and upload the created container image. For details, please refer to the [**Container Image Documentation**](/s/container-image-en).
:::spoiler **Tracker Dockerfile**
```dockerfile=
From nvidia/cuda:11.0.3-cudnn8-devel-ubuntu18.04
ENV PYTHONPATH "/workdir/SiamMask:/workdir/SiamMask/experiments/siammask_sharp"
ENV PATH "/root/miniconda3/bin:${PATH}"
RUN apt update \
&& apt install -y --no-install-recommends \
wget \
git \
ca-certificates \
libglib2.0-0 \
libsm6 \
libxrender1 \
libxext6 \
&& rm -rf /var/lib/apt/lists/*
RUN wget https://repo.continuum.io/miniconda/Miniconda3-latest-Linux-x86_64.sh \
&& chmod +x Miniconda3-latest-Linux-x86_64.sh && ./Miniconda3-latest-Linux-x86_64.sh -b \
&& rm -f Miniconda3-latest-Linux-x86_64.sh
RUN mkdir -p /workdir
WORKDIR /workdir
RUN conda create -y -n siammask python=3.6
# Override default shell and use bash
SHELL ["conda", "run", "-n", "siammask", "/bin/bash", "-c"]
RUN pip install torch==1.8.0 \
jsonpickle \
flask \
Cython \
colorama \
numpy \
requests \
fire \
matplotlib \
numba \
scipy \
h5py \
pandas \
tqdm \
tensorboardX \
opencv_python==3.4.8.29 \
torchvision==0.9.0 \
&& conda install -y gcc_linux-64
RUN git clone https://github.com/foolwood/SiamMask.git
RUN cd /workdir/SiamMask && bash make.sh
RUN wget -P /workdir/SiamMask/experiments/siammask_sharp http://www.robots.ox.ac.uk/~qwang/SiamMask_DAVIS.pth
COPY main.py /workdir/
COPY model_handler.py /workdir/
ENTRYPOINT ["conda", "run","--no-capture-output", "-n", "siammask", "python", "-u","/workdir/main.py"]
```
:::
### 4.4 Model Preparation
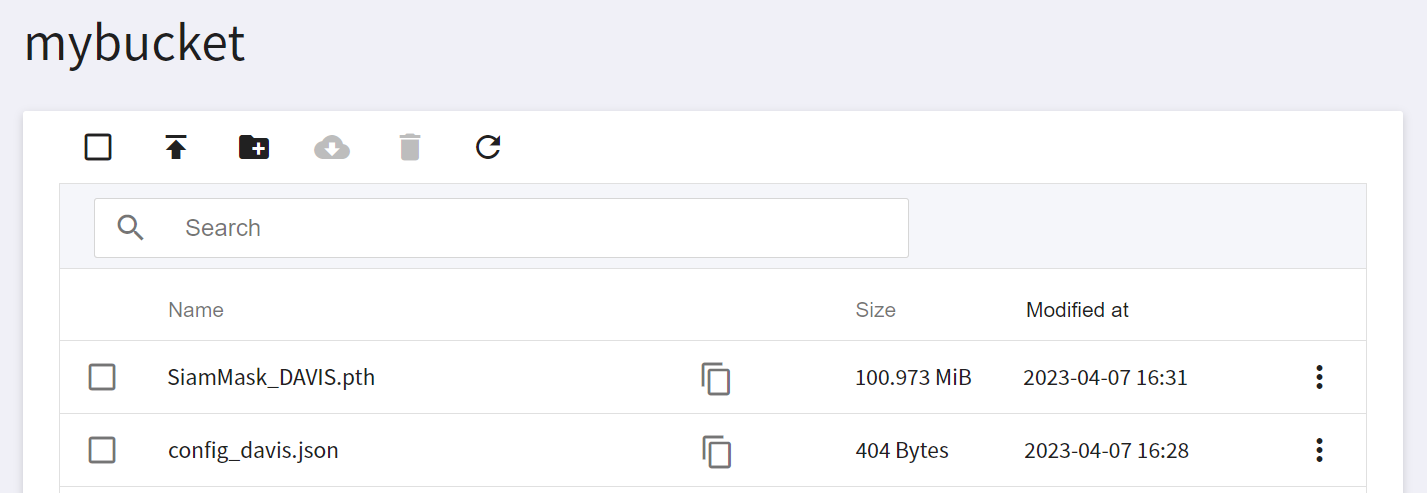
You can use your own model or download the public SiamMask model from https://github.com/foolwood/SiamMask to the local side, the commands are as follows:
```shell=
wget http://www.robots.ox.ac.uk/~qwang/SiamMask_DAVIS.pth
wget https://raw.githubusercontent.com/foolwood/SiamMask/master/experiments/siammask_sharp/config_davis.json
```
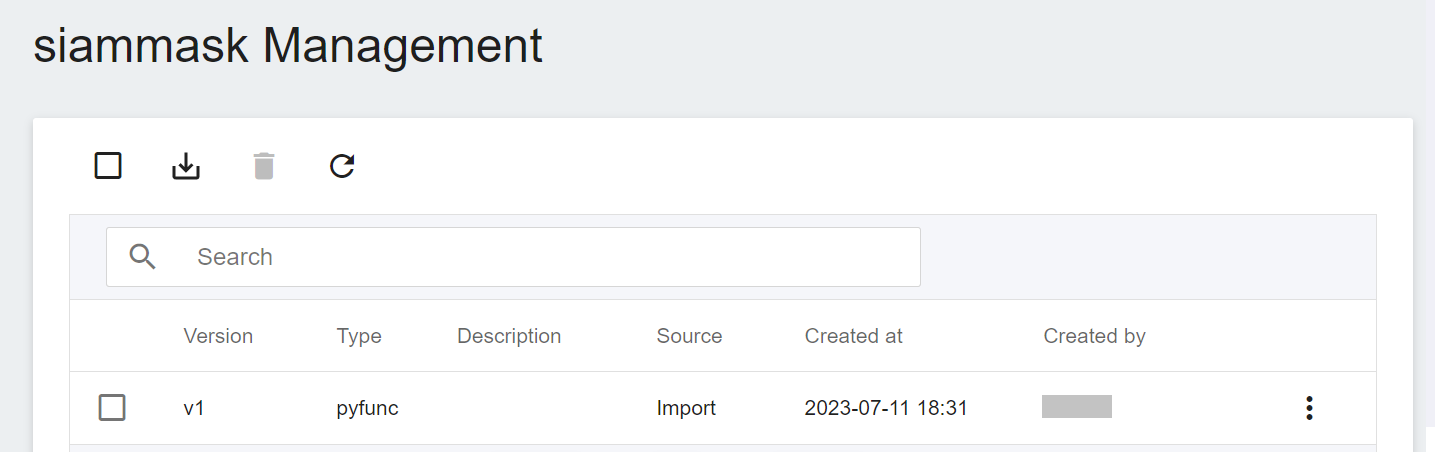
After downloading, please upload this model file to OneAI's **Storage Service**, and then go to AI Maker's model management to import this model. Please refer to the [**AI Maker Import Model Instructions**](/s/ai-maker-en#Import-Model).
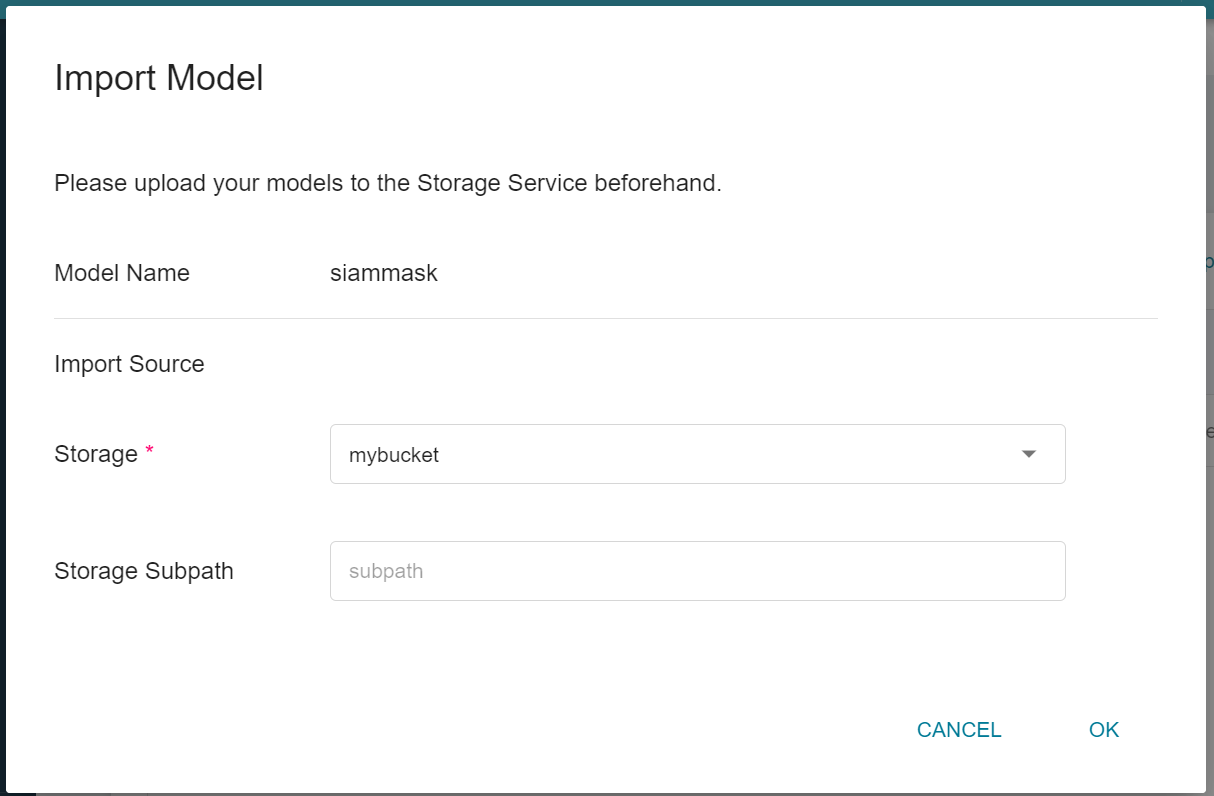
Please remember the model name and version after the model is imported, the inference service will be deployed with this model next.
### 4.5 Deploy Inference Service
After preparing the inference image and model, you can then deploy the inference service to AI Maker. When creating an inference service, you need to select your model and this image. We only describe some important settings. For other steps, please refer to the [**Create Inference Task instructions**](/s/ai-maker-en#Create-Inference-Tasks).
Please follow the settings below to create the inference service:
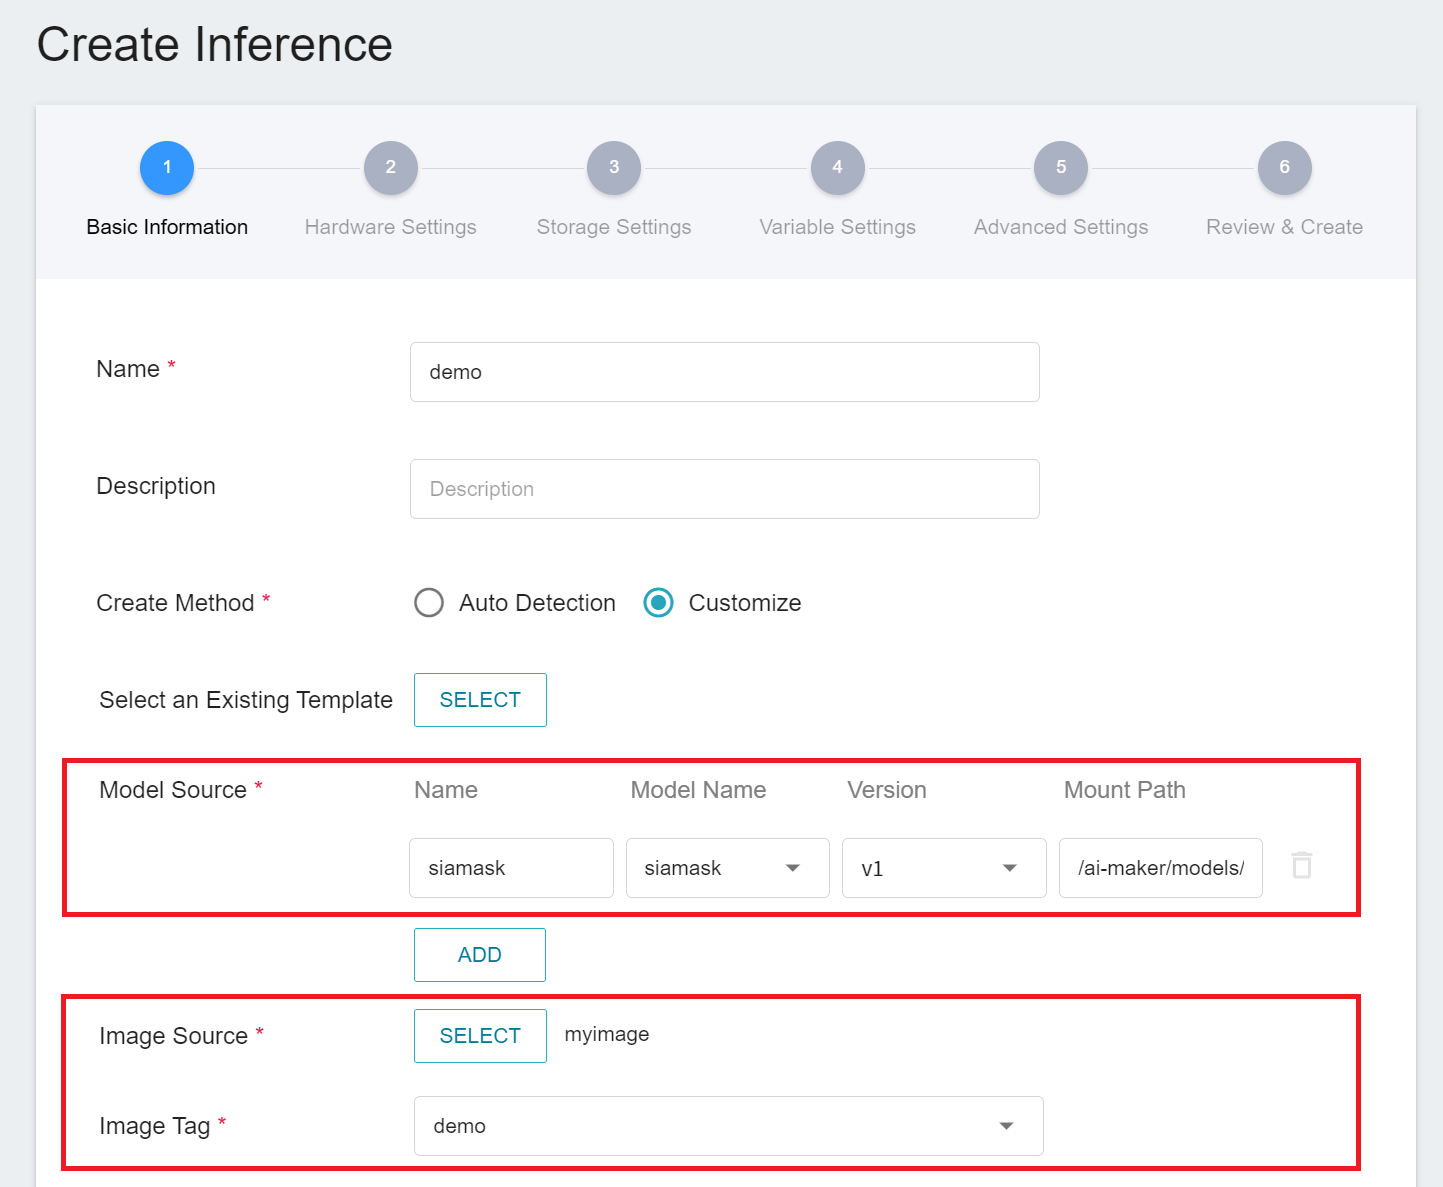
1. **Basic Settings**
* **Create methods**: Please select **Customize**.
* **Source Model**
- Name: Please enter **`siammask`**.
- Model Name: Please select the model name you want to load.
- Version: Please select the model version you want to load.
- Mount Path: Please enter **`/ai-maker/models/`**.
* **Image Source**: Please select the image and tag you just uploaded.
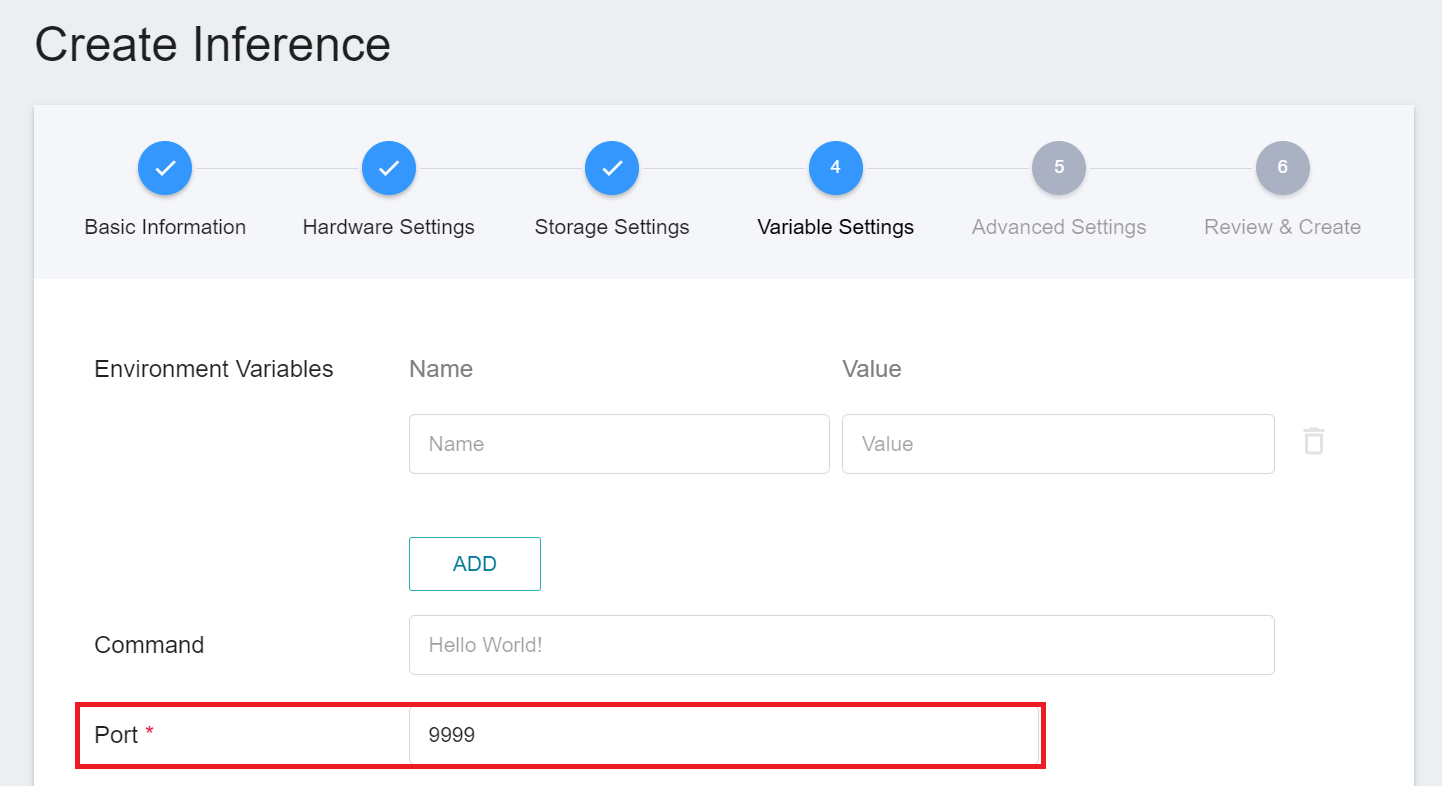
2. **Variable Settings**: Port should be set to **`9999`**.
### 4.6 Connect to CVAT
When the status of the inference service is **`Ready`**, we need to do the last step, click the **Connect to CVAT** icon above to connect to CVAT for assisted annotation.

After connecting to CVAT, enter the CVAT service to see the inference service model connected to CVAT on the **Models** page of CVAT.

Congratulations, you can start using the CVAT assisted annotation/automatic annotation function now.

After learning how to use YOLOv7 and SiamMask models to connect with CVAT's assisted/automated annotation API, you can use the [**CVAT GitHub**](https://github.com/opencv/cvat) as a reference to practice using your own deep learning models to connect with CVAT's assisted/automated annotation API.
:::warning
:warning: **Note:** The CVAT version integrated by AI Maker is [**V2.1.0**](https://github.com/opencv/cvat/tree/v2.1.0). Please refer to this version for related functions and reference documents.
:::