---
description: OneAI Documentation
tags: Case Study, Clara, Federated Learning, EN
---
[OneAI Documentation](/s/user-guide-en)
# Case Study - Deploy NVIDIA Clara Federated Learning
[TOC]
## Introduction
Federated Learning (FL) allows multiple participants to jointly build a general and powerful machine learning model without sharing data, thus solving the problems of data privacy, security, regulation, and locality, and replacing data sharing with model sharing to obtain the best AI model by using a large amount of data from different sources and decentralized training. Federated learning techniques have been applied in many fields, including healthcare, telecommunications, IoT, and pharmaceuticals.
NVIDIA Clara™ Train is an application development framework for medical imaging research and AI development. The Clara Train SDK supports technologies such as pre-trained models, transfer learning, federated learning, and AutoML. The federated learning technology provides a set of distributed training methods of Client-Server master-slave architecture for multi-organization collaboration. Each Client is responsible for training its own model independently and does not share data with each other. The Server is responsible for integrating multiple models, and can also adjust the contribution weights of different Clients to find the best model, and protect data privacy and security through encryption technology.
<center><img src="/uploads/upload_ff8364b1bafdc0bf82c3e129f6790a5d.png" alt="NVIDIA Clara Train federated learning diagram "></center>
<center>NVIDIA Clara Train federated learning diagram </center>
<center><a href="https://github.com/NVIDIA/clara-train-examples/blob/master/PyTorch/NoteBooks/FL/FederatedLearning.ipynb">(Image credit: NVIDIA)</a></center>
<br><br>
## 0. Get Started
TWCC OneAI provides GPU computing resource management and a variety of tools, and is pre-loaded with NVIDIA Clara Train SDK. As long as you follow the instructions of this case study, you can quickly complete the deployment and connection, and easily use Clara Train SDK for federated learning and rapid development of AI models.
This tutorial will use OneAI's **Container Service** and **Storage Service** to deploy Clara Train Federated Learning environment. In the example, the person in charge of FL Server rents a project to deploy FL Server in TWCC OneAI; other hospitals or institutions rent their own projects to deploy FL Client in OneAI to join Federated Learning training, where three FL Clients, org1-a and org1-b of org1 and org2 will be deployed; the FL Admin can be the Chief Data Scientist in the federation, and another project is rented on OneAI to deploy the FL Admin. Different projects are independent and do not share data with each other. For ease of experience, this example can be run in the same OneAI project.
<center><img src="/uploads/upload_517854d3e8c63141ff29f26437468776.png" alt="NVIDIA Clara Train Federated Learning Deployment Architecture"></center>
<center>Federated Learning Deployment Architecture</center>
<br><br>
The main steps are as follows:
1. [**Provision**](#1-Provision)
At this stage, the project manager plans the roles and permissions of the participants and creates the installation package.
2. [**Deploy FL Server**](#2-Deploy-FL-Server)
At this stage, we will deploy FL Server, which coordinates federated learning training and is the main hub for FL Client and FL Admin connections.
3. [**Deploy FL Client**](#3-Deploy-FL-Client)
At this stage, we will deploy 3 FL Clients, org1-a, org1-b and org2, and prepare the training dataset for each FL Client.
4. [**Deploy FL Admin**](#4-Deploy-FL-Admin)
At this stage, we will deploy FL Admin and connect to FL Server and FL Client through the FL Admin tool for federated learning operations.
5. [**Perform federated learning training**](#5-Perform-federated-learning-training)
At this stage, we will perform federated learning training and obtain the training results of each FL Client and the best model.
:::warning
:warning: **Note:**
1. Please have a basic understanding of [**NVIDIA Clara Train SDK**](https://docs.nvidia.com/clara/clara-train-sdk/index.html) before starting this example.
2. This example is based on the [**NVIDIA Clara Train SDK Container Image V4.0**](https://catalog.ngc.nvidia.com/orgs/nvidia/containers/clara-train-sdk) and [**Clara Train Examples**](https://github.com/NVIDIA/clara-train-examples) sample programs, datasets and models. Please read NVIDIA's license terms before use.
:::
<br>
## 1. Provision
The Provision stage is where the project manager plans the roles and permissions of the participants and creates the installation package. This chapter will use the built-in project.yml of Clara to generate the installation package of each site through the Provision tool. Please follow the steps below.
### 1.1 Pre-built FL Server Container
Because we need to set the service ports of fed_learn_port and admin_port for FL Server at the Provision stage, we will pre-build an FL Server container to set the two external service ports of FL Server before starting the Provisioning.
Select **Container Service** from the OneAI service list, enter the container service management page, and click **+ CREATE** to add a new container service.
1. **Basic Information**
Please enter in sequence the **name**, for example: **`federated-learning-server`**, **description**, for **image**, please select `clara:v4.0`.

2. **Hardware Settings**
Select the hardware specification, there is no need to configure GPU.
3. **Storage Settings**
This step does not need to be set for now.
4. **Network Settings**
In this step, we will pre-create two external service ports required by FL Server. Please add two container ports as shown in the following diagram.
* **fed_learn_port**
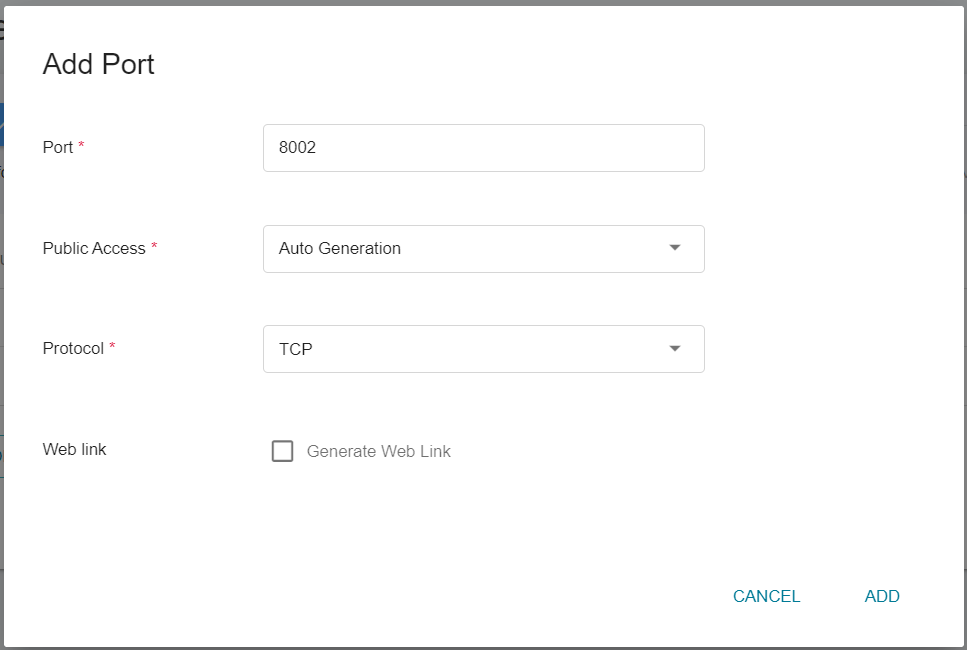
* **admin_port**
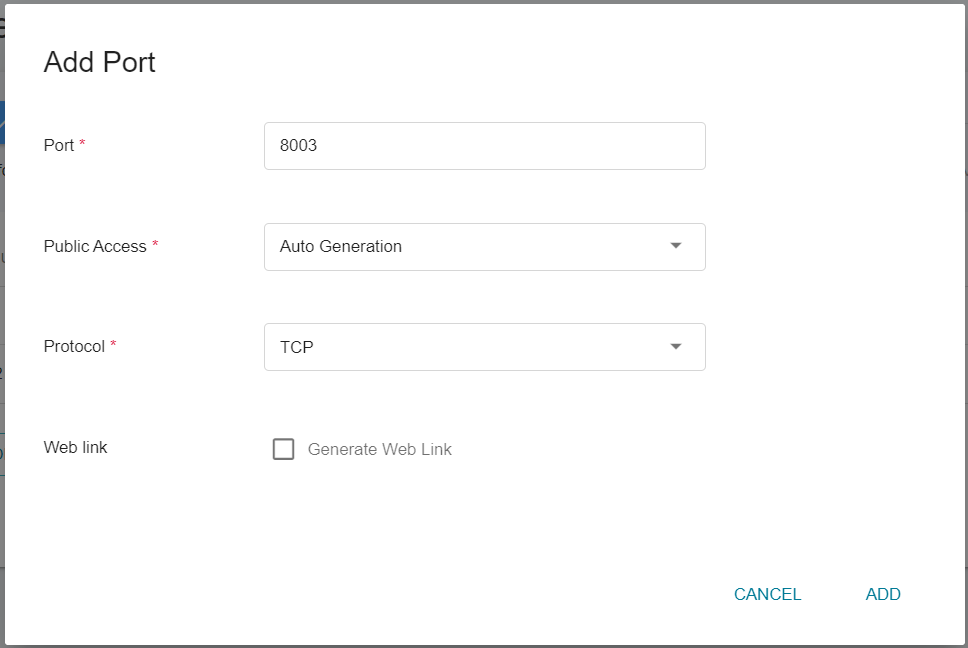
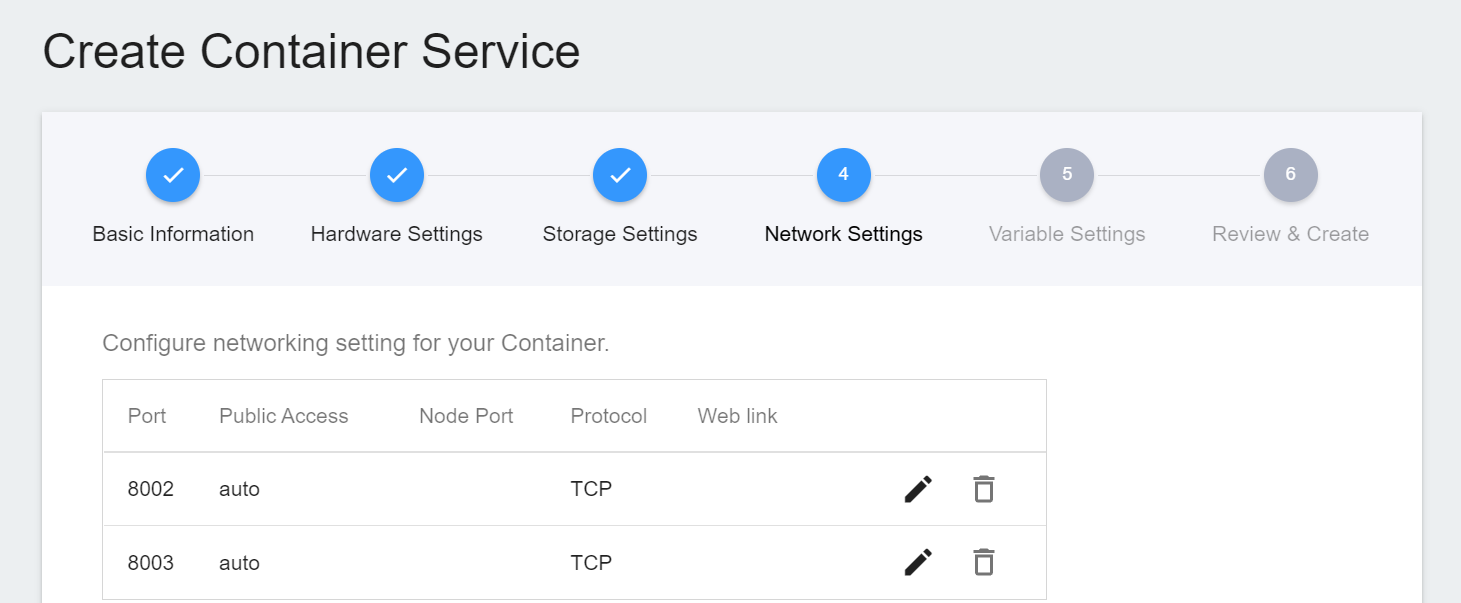
* The setting screen after the port is added is as follows.
5. **Variable Settings**
This step does not need to be set for now.
6. **Review & Create**
Finally, confirm the entered information and click **CREATE**.
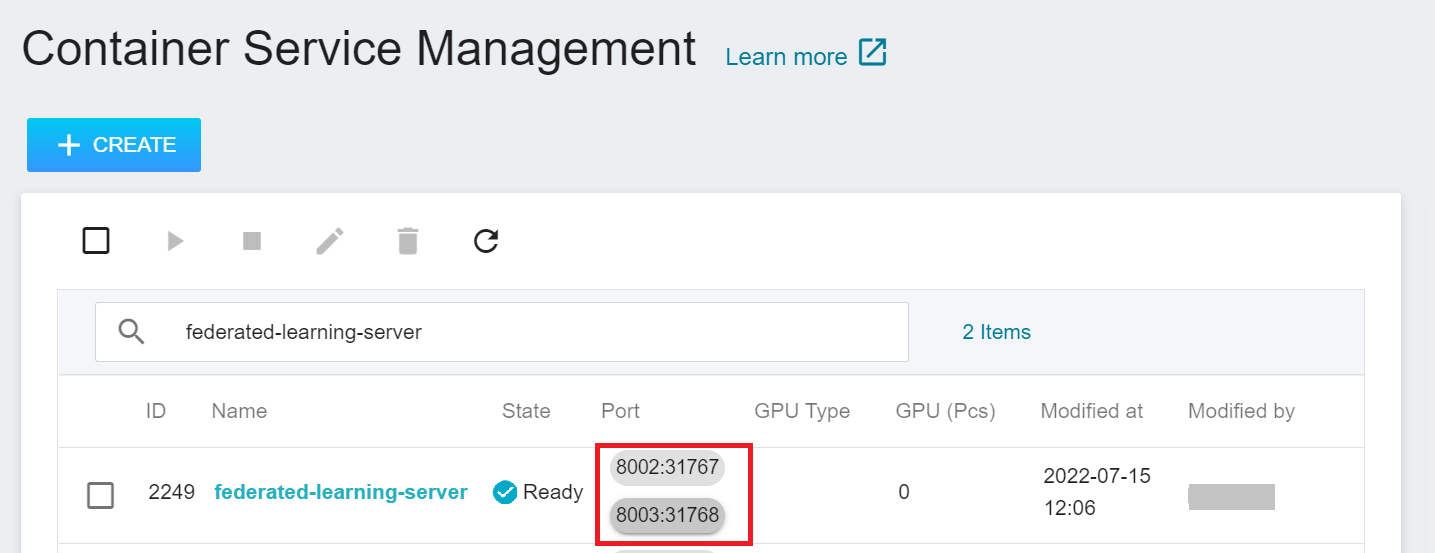
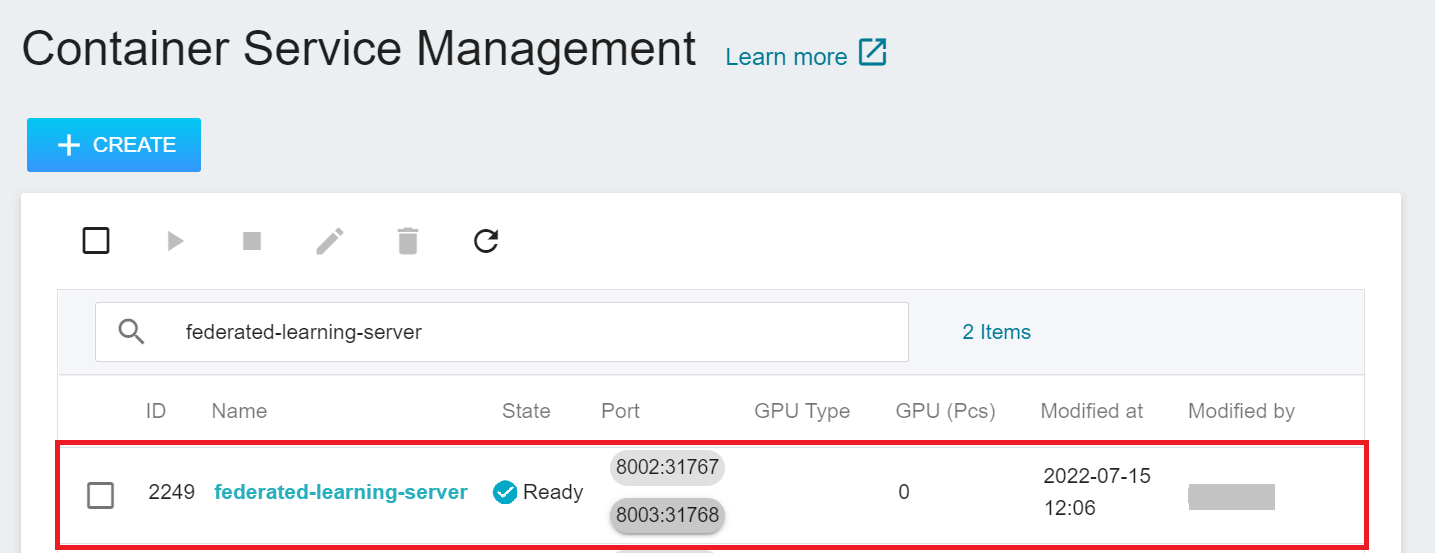
After the **FL Server** container is created, it will appear in the list of container services. When the status of the container service changes to **`Ready`**, you can see the ports and the automatically generated node ports **`8002:31767`** and **`8003:31768`**. The two node ports will be used in subsequent steps.
### 1.2 Create Installation Package Storage Space
This step will create a space to store the installation package.
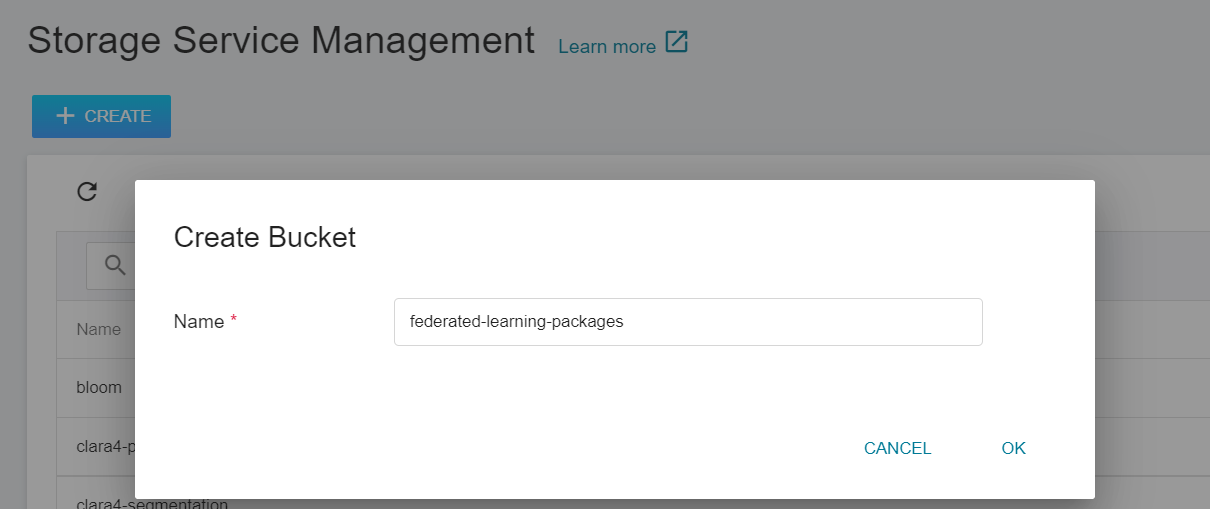
1. **Create a Bucket**
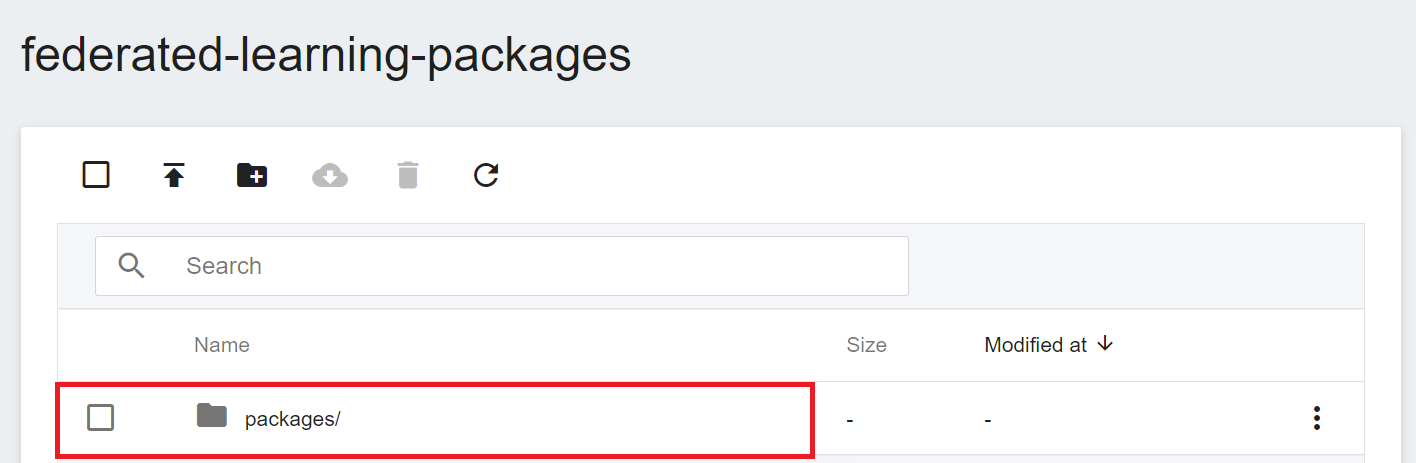
Select **Storage Service** from the OneAI service list, enter the storage service management page, and then click **+ CREATE** to add a bucket named **`federated-learning-packages`**.
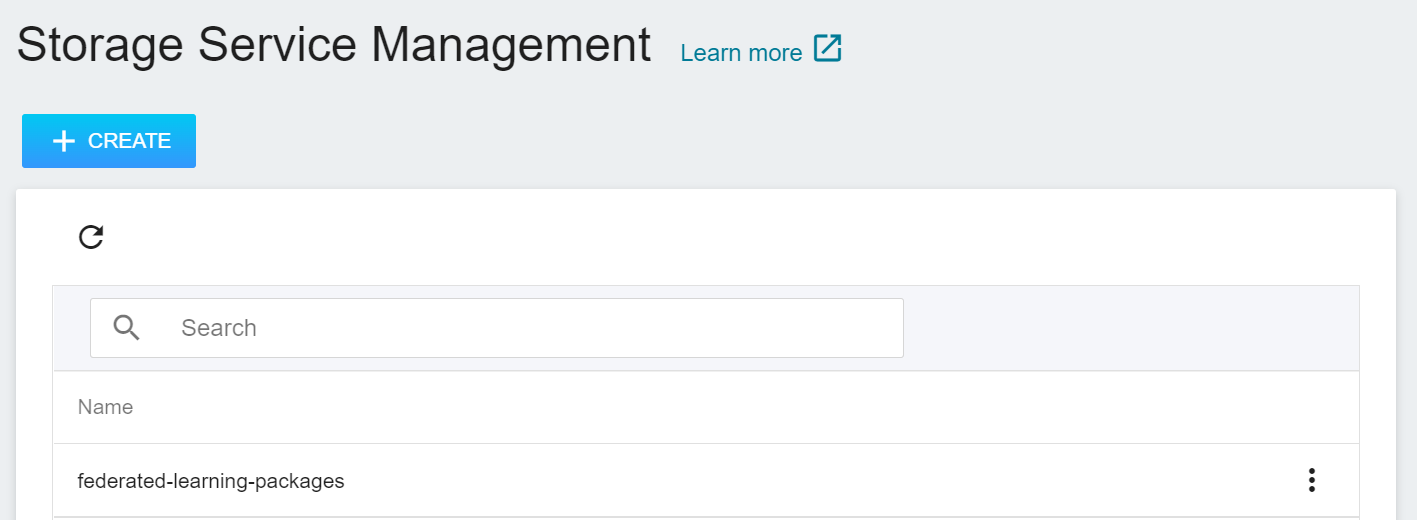
2. **View Bucket**
After the bucket is created, go back to the Storage Service Management page, and you will see that the bucket has been created.
### 1.3 Create Provision Container
Select **Container Service** from the OneAI service list, enter the container service management page, and click **+ CREATE** to add a new container service.
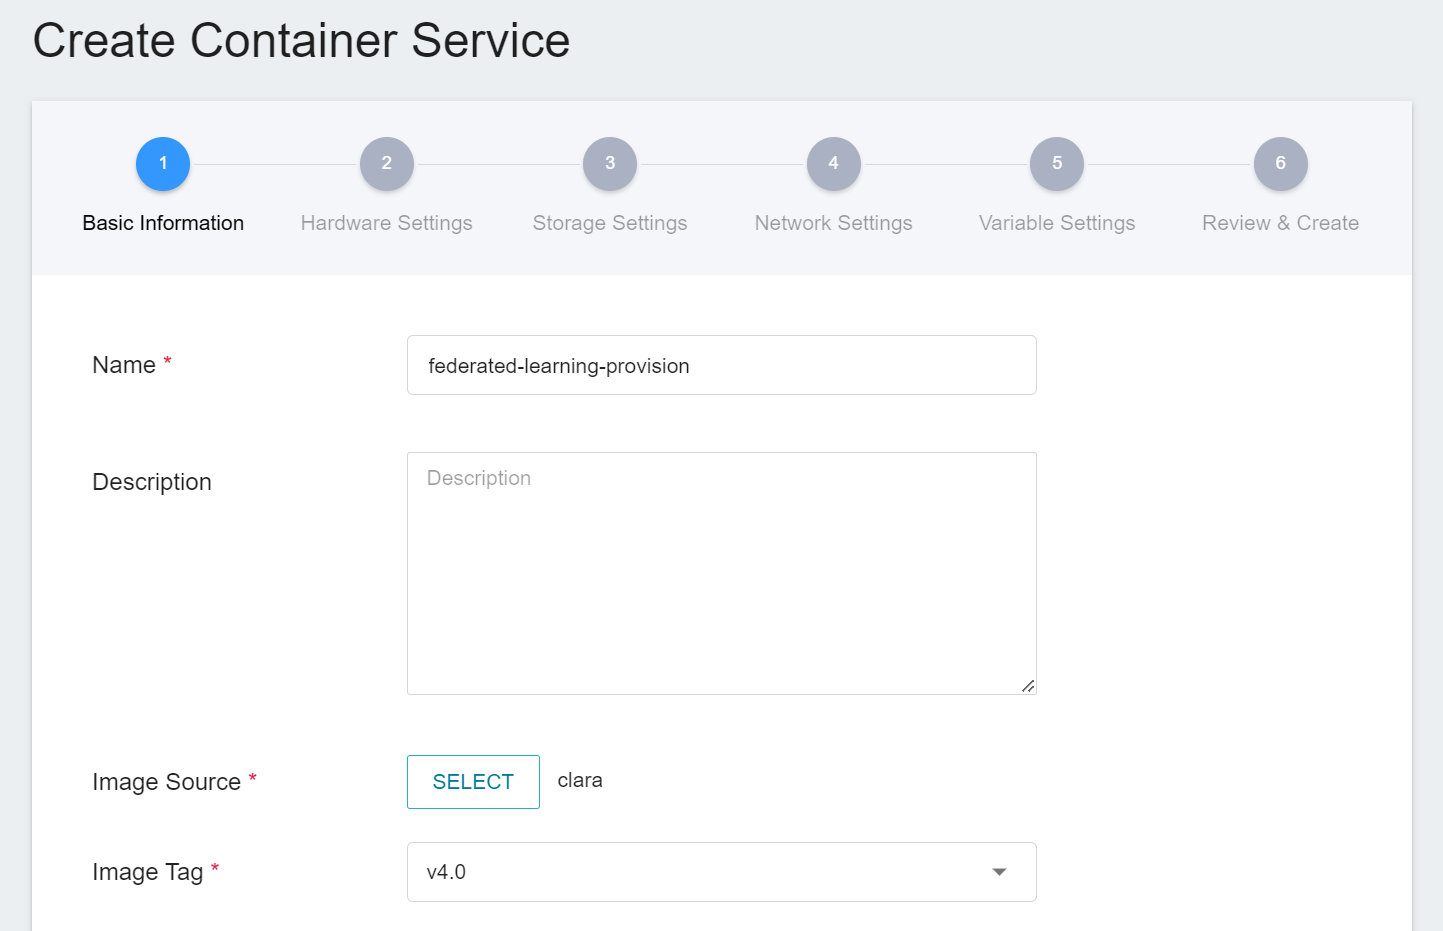
1. **Basic Information**
Please enter in sequence the **name**, for example: **`federated-learning-provision`**, **description**, for **image**, please select `clara:v4.0`.
2. **Hardware Settings**
Select the hardware specification, there is no need to configure GPU.
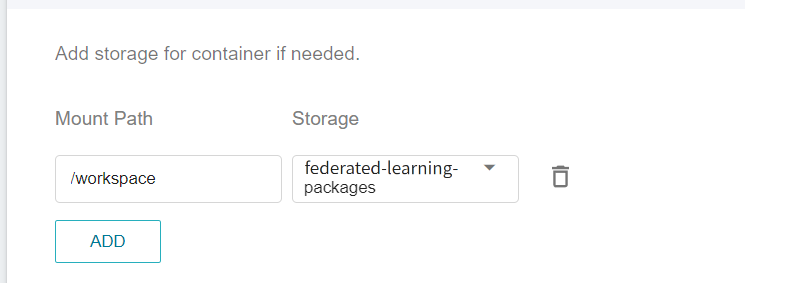
3. **Storage Settings**
At this stage, you need to mount the bucket that stores the installation package. Please click **ADD** and set the bucket to store the installation package.
**workspace**: **`federated-learning-packages`**.
4. **Network Settings**
No setup is required for this step.
5. **Variable Settings**
No setup is required for this step.
6. **Review & Create**
Finally, confirm the entered information and click **CREATE**.
### 1.4 Modify Provision Configuration File
After the **Provision** container is created, it will appear in the list of container services. When the status of the container service becomes **`Ready`**, please enter the container service details page and click the **Terminal** tab above to connect to the container, and according to the environment settings of this example, modify the Provision configuration file: /opt/conda/lib/python3.8/site-packages/provision/project.yml.
```=
# nano /opt/conda/lib/python3.8/site-packages/provision/project.yml
```
The modifications are as follows:
* **cn**: The full qualified domain name (FQDN) of the FL Server, which is set to **`federated.oneai.twcc.ai`** in this example. Note: Because this example deploys FL Server on OneAI, it needs to be set to **`federated.oneai.twcc.ai`** specially created by OneAI for federated learning.
* **fed_learn_port**: The default value in the configuration file is **`8002`**, please modify it to the external service port corresponding to your FL Server container service port `8002`, in this example, it is `31767`(as shown in the figure below).
* **admin_port**: The default value in the configuration file is **`8003`**, please modify it to the external service port corresponding to your FL Server container service port `8003`, in this example, it is `31768`(as shown in the figure below). Please note that admin_port cannot be the same as fed_learn_port.

:::info
:bulb:**Tips: About FL Server**
The FL Server FQDN used in this example is **`federated.oneai.twcc.ai`**, which is the FL Server service URL provided by OneAI for federated learning. You can follow this example to experience the deployment and execution of federated learning training on OneAI, or set it to other FL Server FQDN.
:::
```yaml=
....
server:
org: nvidia
# set cn to the server's fully qualified domain name
# never set it to example.com
cn: federated.oneai.twcc.ai <--- Modify the Domain Name of FL Server
# replace the number with that all clients can reach out to, and that the server can open to listen to
fed_learn_port: 31767 <--- Modify fed_learn_port
# again, replace the number with that all clients can reach out to, and that the server can open to listen to
# the value must be different from fed_learn_port
admin_port: 31768 <--- Modify admin_port, cannot be the same as fed_learn_port
```
:::info
:bulb:**Tips: About FL Client and Admin Client**
This example only needs to modify the settings of FL Server. If you want to modify FL Client and Admin Client, you can modify the settings of fl_clients and admin_clients in project.yml by yourself. as described below. For more information, please refer to the [**Clara Train SDK documentation**](https://docs.nvidia.com/clara/clara-train-sdk/federated-learning/fl_provisioning_tool.html#default-project-yml-file).
<br>
```yaml=
...
# Please change them according to the information of actual project.
fl_clients: <--- Set fl clients here
# client_name must be unique
# email is optional
- org: org1
client_name: org1-a <--- Set client a of the organization org1 here
- org: org1
client_name: org1-b <--- Set client b of the organization org1 here
- org: org2
client_name: org2 <--- Set another organization org2 here
admin_clients: <--- Set admin clients here
# email is the user name for admin authentication. Hence, it must be unique ww
ithin the project
- org: nvidia
email: admin@nvidia.com
...
```
:::
### 1.5 Execute Provision Tool to Generate Installation Package
Next, please execute the **`provision`** command to generate the installation package and password.
```
# provision
```
After successful execution, please write down the password provided on the screen.
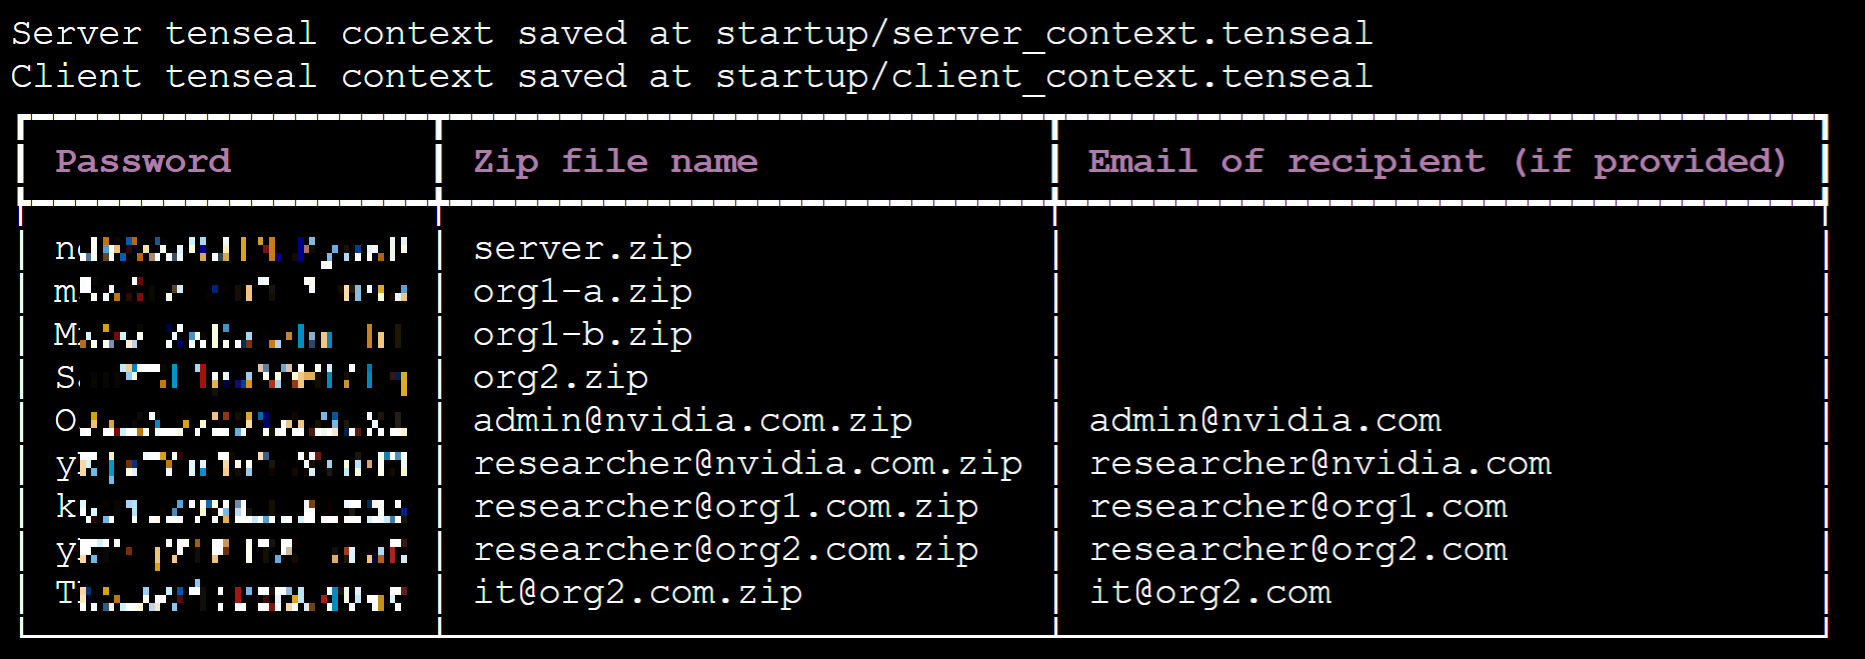
Next, select **Storage Service** from the OneAI service list, enter the storage service management page, select **`federated-learning-packages`** and you will see the installation package generated by executing the provision command, as shown in the following figure:
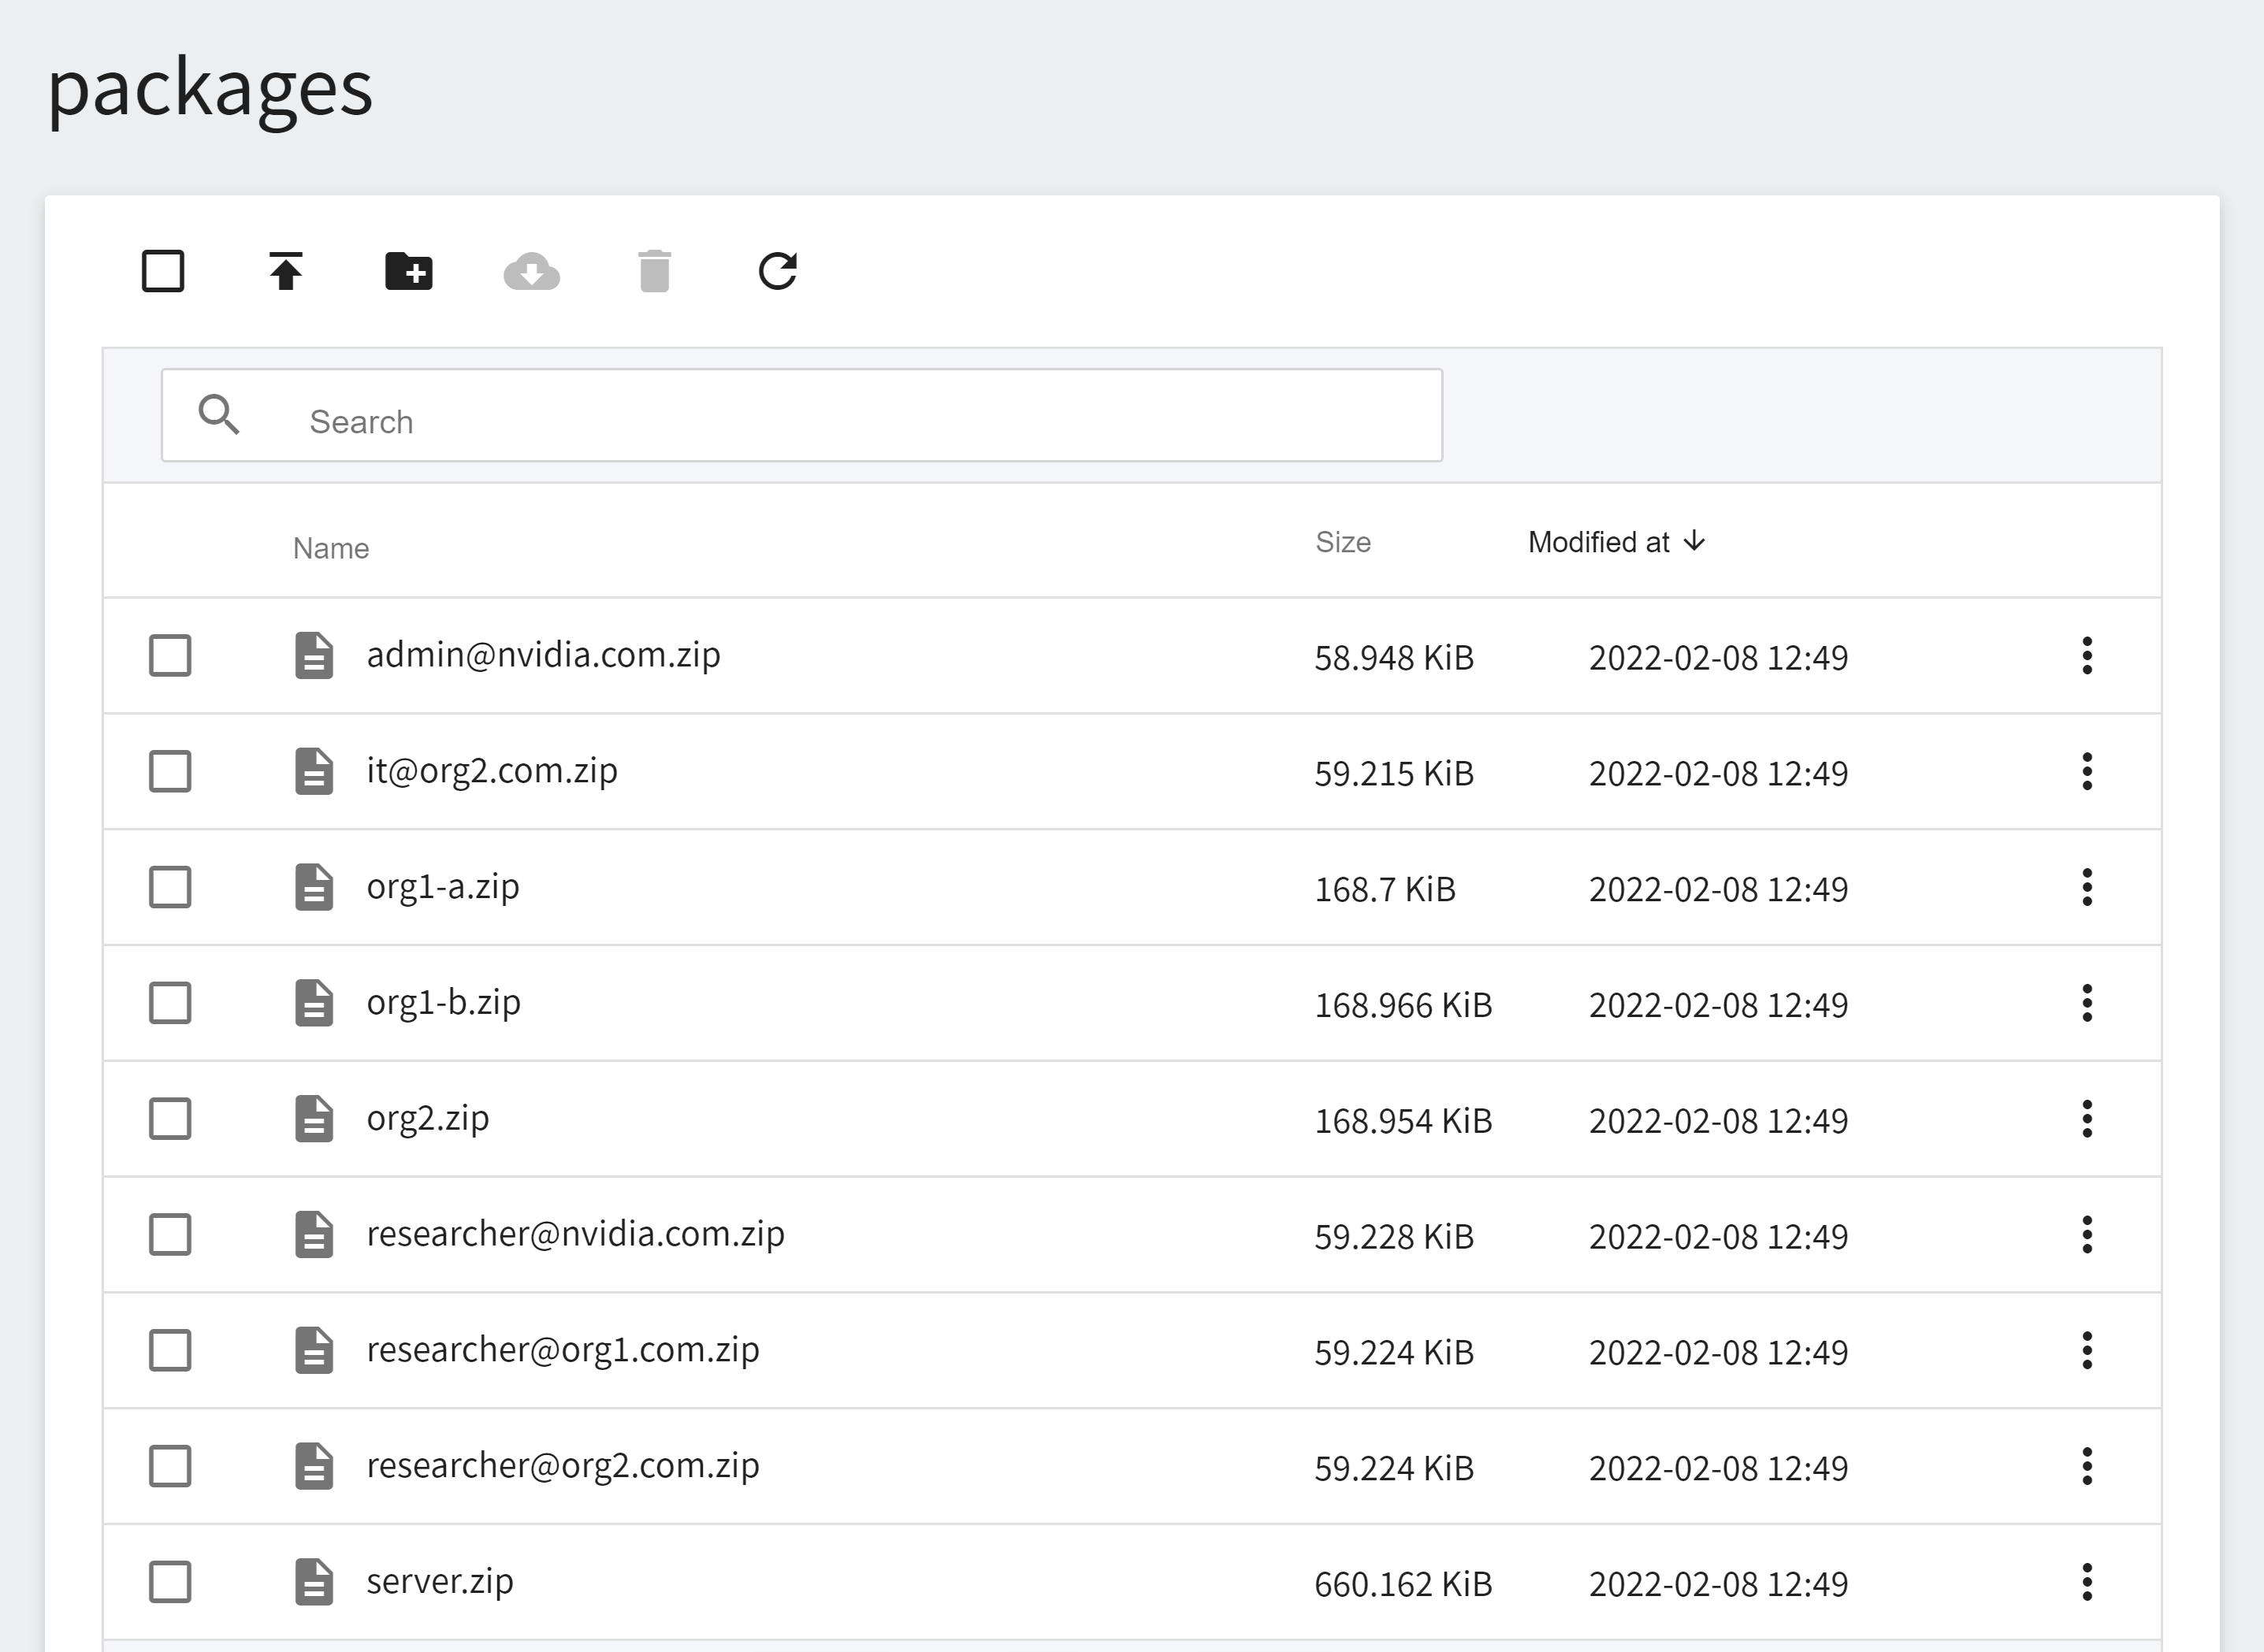
This example will use the following installation packages. In real situations, each federation member will only receive their own installation package and unzip password.
* server.zip
* org1-a.zip
* org1-b.zip
* org2.zip
* admin@nvidia.com.zip
## 2. Deploy FL Server
FL Server will coordinate the federated learning training and become the main hub for all FL Client and Admin connections. This section will describe how to use **OneAI Container Service** to deploy FL Server.
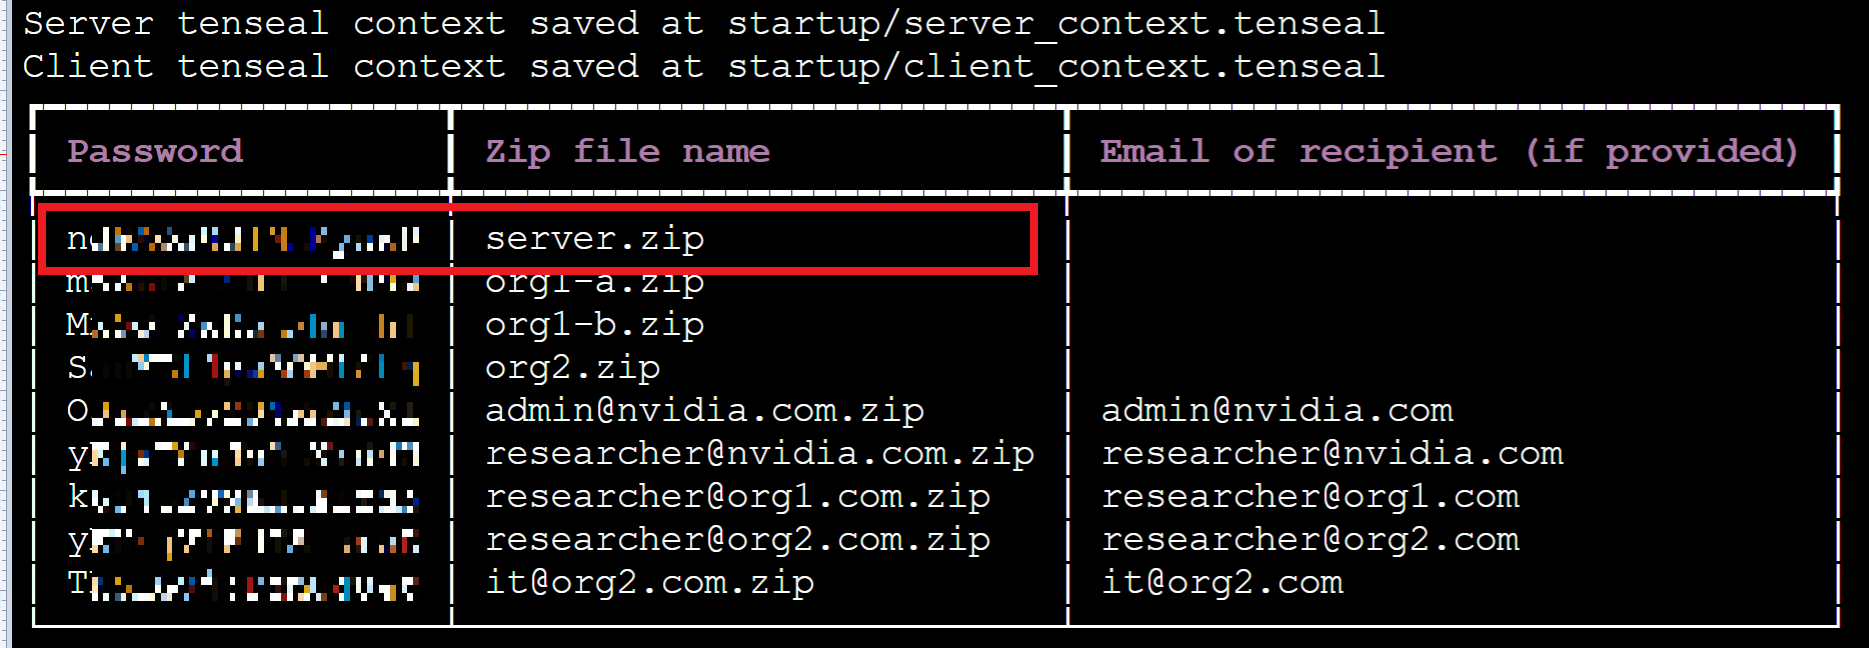
### 2.1 Upload FL Server Installation Package
First, please unzip the installation package server.zip, the password is the Password on the left of server.zip in the screen list after executing the provision command.
The directory structure is as follows after unzipping:
```=
./startup
├── authorization.json
├── docker.sh
├── fed_server.json
├── log.config
├── readme.txt
├── rootCA.pem
├── server.crt
├── server.key
├── server_context.tenseal
├── signature.pkl
├── start.sh
└── sub_start.sh
```
After unzipping the installation package, please follow the steps below to check the information of the installation package:
1. Confirm FL Server information.
Open **fed_server.json** and make sure that the Domain Name and Port of the FL Server set in **`target`** in this file are correct, for example:
```json=
...
"service": {"target": "federated.oneai.twcc.ai:31767"
...
```
2. Check the installation package files for abnormalities to prevent getting files from unknown sources.
After checking, upload the installation package to OneAI's Storage Service.
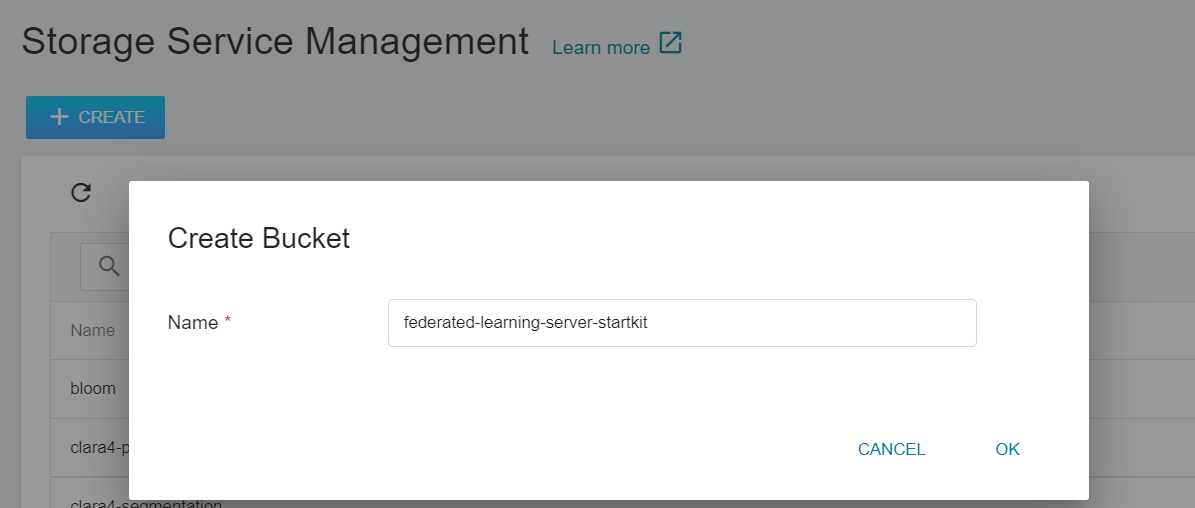
1. **Create a Bucket**
Select **Storage Service** from the OneAI service list enter the storage service management page, and then click **+ CREATE** to add a bucket named **`federated-learning-server-startkit`** to store the Server installation package.
2. **View Bucket**
After the bucket is created, go back to the Storage Service Management page, and you will see that the bucket has been created.
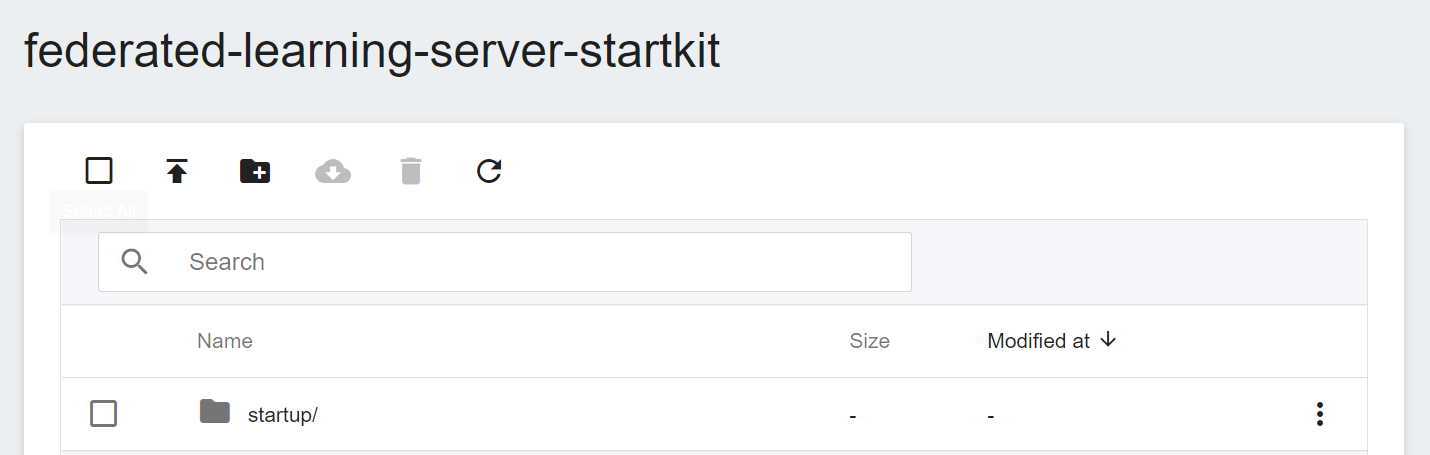
3. **Upload FL Server Installation Package**
Click on the bucket that has been created, and then upload the entire FL Server installation package directory **startup**. (See [**Storage Service Documentation**](/s/storage-en)).
### 2.2 Modify FL Server Container
Select **Container Service** from the OneAI service list, enter the container service management page, and then click the **`federated-learning-server`** container service that has been just created.
After entering the **Container Service Details** page, click the **Stop** icon above to stop the container service.

Go to the **Container Service Details** page, then click the **Edit** icon above.

Then follow the steps below to modify the container service settings of FL Server.
1. **Basic Information**
No modification is required for this step.
2. **Hardware Settings**
No modification is required for this step.
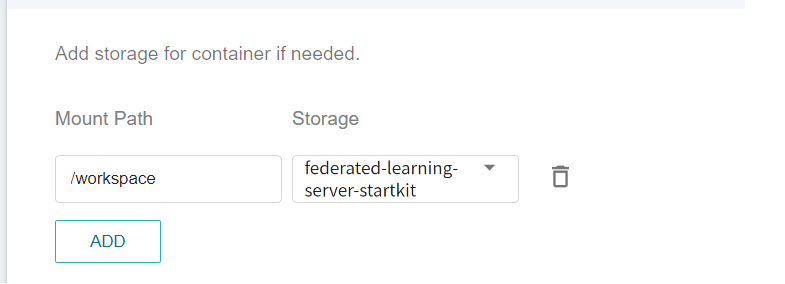
3. **Storage Settings**
This step will mount the bucket that stores the FL Server installation package. Please click **ADD** and set the bucket to store the installation package.
* **workspace**: **`federated-learning-server-startkit`**.
4. **Network Settings**
Here we need to modify the previously created port to be the same as the node port automatically allocated by the system.
:::info
:bulb:**Tips:** Because the Listen Port of FL Server needs to be the same as the port of FL Client.
:::
Click the **Edit** icon to the right of the list.
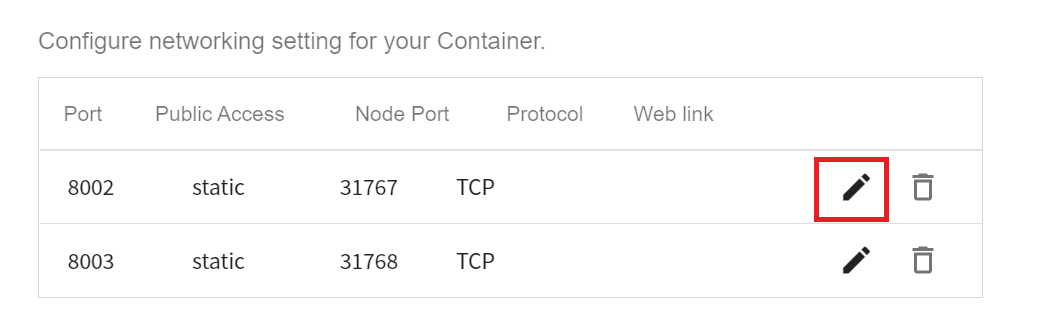
Change the port `8002` to the following **Node Port**, as shown below.

Click **SAVE** after you have made the changes.
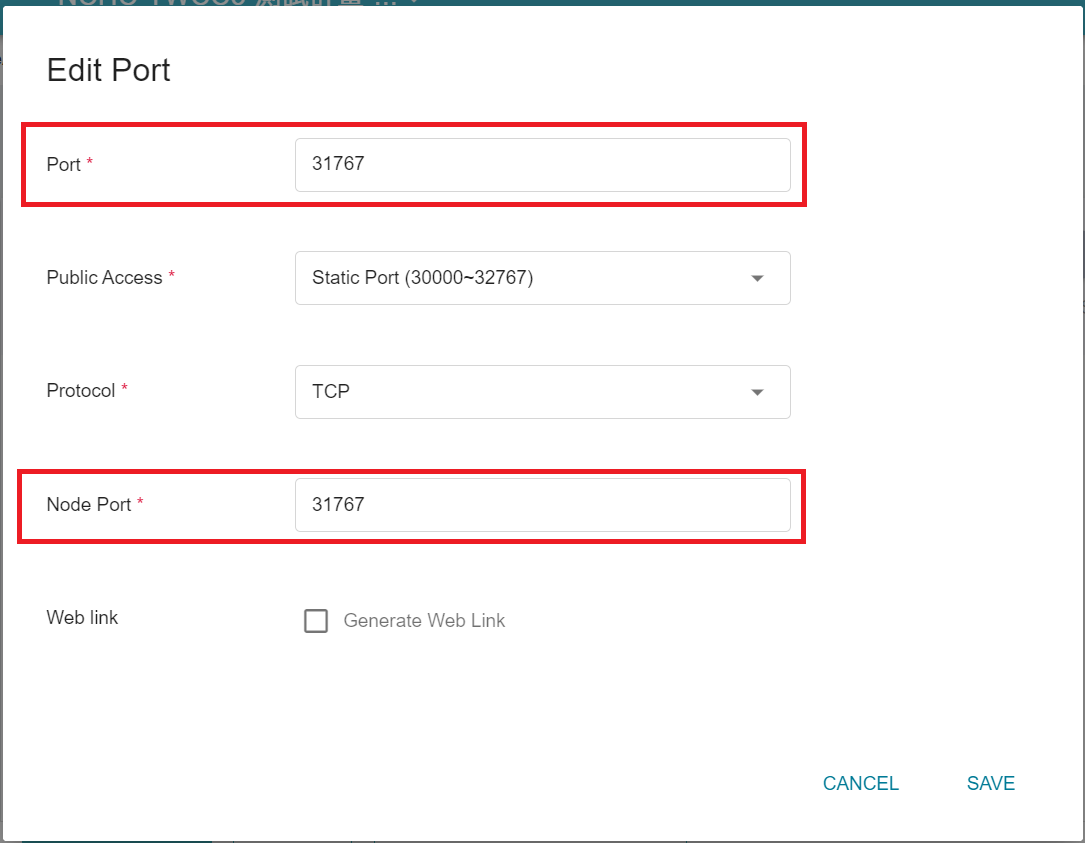
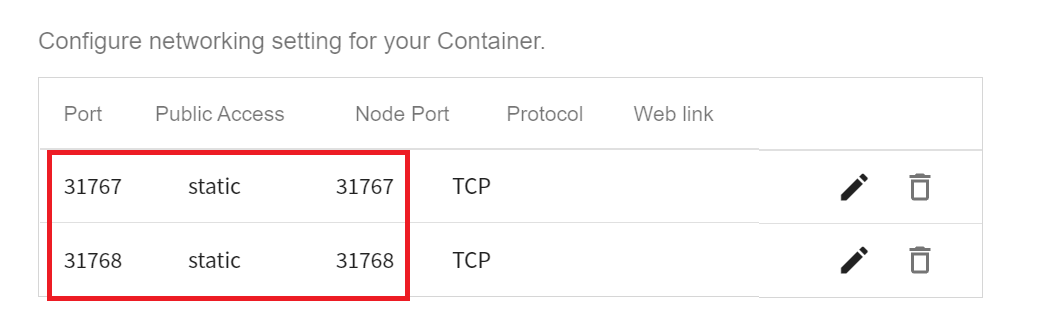
Repeat the same steps, change the port `8003` to the corresponding node port. After the modification, please confirm whether the **port** is the same as the **node port**.
5. **Variable Settings**
* **Environment variables**
This step allows you to choose whether you want to set the following variable according to your needs.
* **START**: Set whether to automatically execute **`start.sh`**. When the value is set to **`AUTO`**, **`start.sh`** will be automatically executed after the container is started to start FL Server. If you do not want to automatically start FL Server, please do not set the START variable.
* **Command**
Please paste the following command:
```=
git clone https://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@github.com/asus-ocis/fl-script.git /fl-script && sleep 1 &&/bin/bash /fl-script/nvclara40.sh
```

6. **Review & Create**
Finally, confirm the entered information and click CREATE.
After the modification, please click the **Start** icon above to restart the container service.

### 2.3 Start FL Server
If you have set **START:AUTO** in **Variable Settings**, after the **Container Service** is created, the system will automatically execute **./startup/start.sh** to start FL Server. When the status of the container service is displayed as **`Ready`**, please enter the container service details page, click the **Terminal** tab above, and execute the following command to view the log file.
```=
cat /workspace/log.txt
```
:::info
:bulb:**Tips:**
If you have not set START:AUTO in **Variable Settings**, after entering the **Terminal** page, please first manually execute **`./startup/start.sh`** to start FL Server.
:::
When you see the following messages, it means that FL Server has started successfully.
```=
2022-01-20 07:00:55,351 - FederatedServer - INFO - starting secure server at federated.oneai.twcc.ai:31767
deployed FL server trainer.
2022-01-20 07:00:55,358 - FedAdminServer - INFO - Starting Admin Server federated.oneai.twcc.ai on Port 31768
2022-01-20 07:00:55,358 - root - INFO - Server started
```
## 3. Deploy FL Client
There are 3 Clients in this example, org1-a, org1-b and org2. The following describes how to deploy the installation package and dataset of org1-a. Next, follow this example to complete the deployment of org1-b and org2.
### 3.1 Upload FL Client Installation Package
First, unzip the org1-a installation package org1-a.zip on the local side. The directory structure after unzipping is as follows:
```=
./startup
├── client.crt
├── client.key
├── client_context.tenseal
├── docker.sh
├── fed_client.json
├── log.config
├── readme.txt
├── rootCA.pem
├── signature.pkl
├── start.sh
└── sub_start.sh
```
After unzipping the installation package, please follow the steps below to check the information of the installation package:
1. Confirm FL Server Information.
Open **fed_client.json** and make sure that the Domain Name and Port of the FL Server set in **`target`** in this file are correct.
```json=
...
"service": {"target": "federated.oneai.twcc.ai:31767"
...
```
2. Check the installation package files for abnormalities to prevent getting files from unknown sources.
After checking, upload the installation package to OneAI's Storage Service.
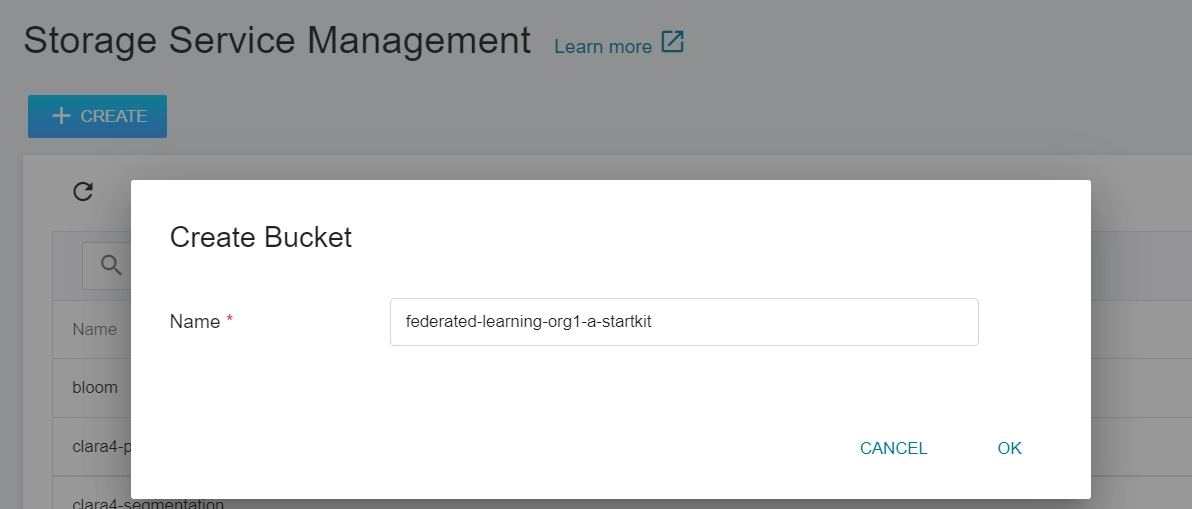
1. **Create a Bucket**
Select **Storage Service** from the OneAI service list, enter the storage service management page, and then click **+ CREATE** to add a bucket named `federated-learning-org1-a-startkit` to store the org1-a installation package.
2. **View Bucket**
After the bucket is created, go back to the Storage Service Management page, and you will see that the bucket has been created.
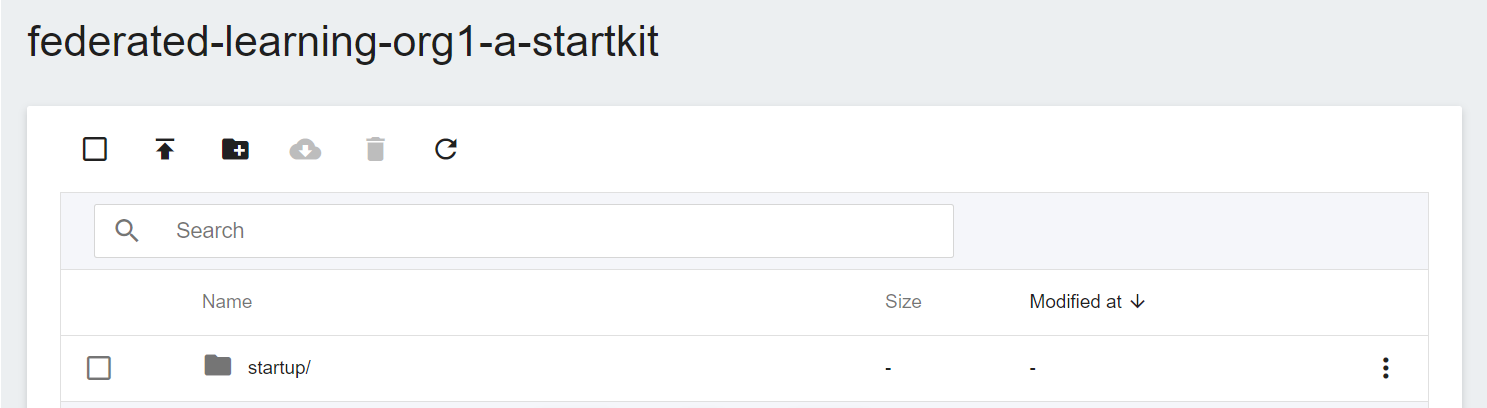
3. **Upload FL Client Installation Package**
Click on the bucket that has been created, and then upload the entire org1-a installation package directory **startup**. (See [**Storage Service Documentation**](/s/storage-en)).
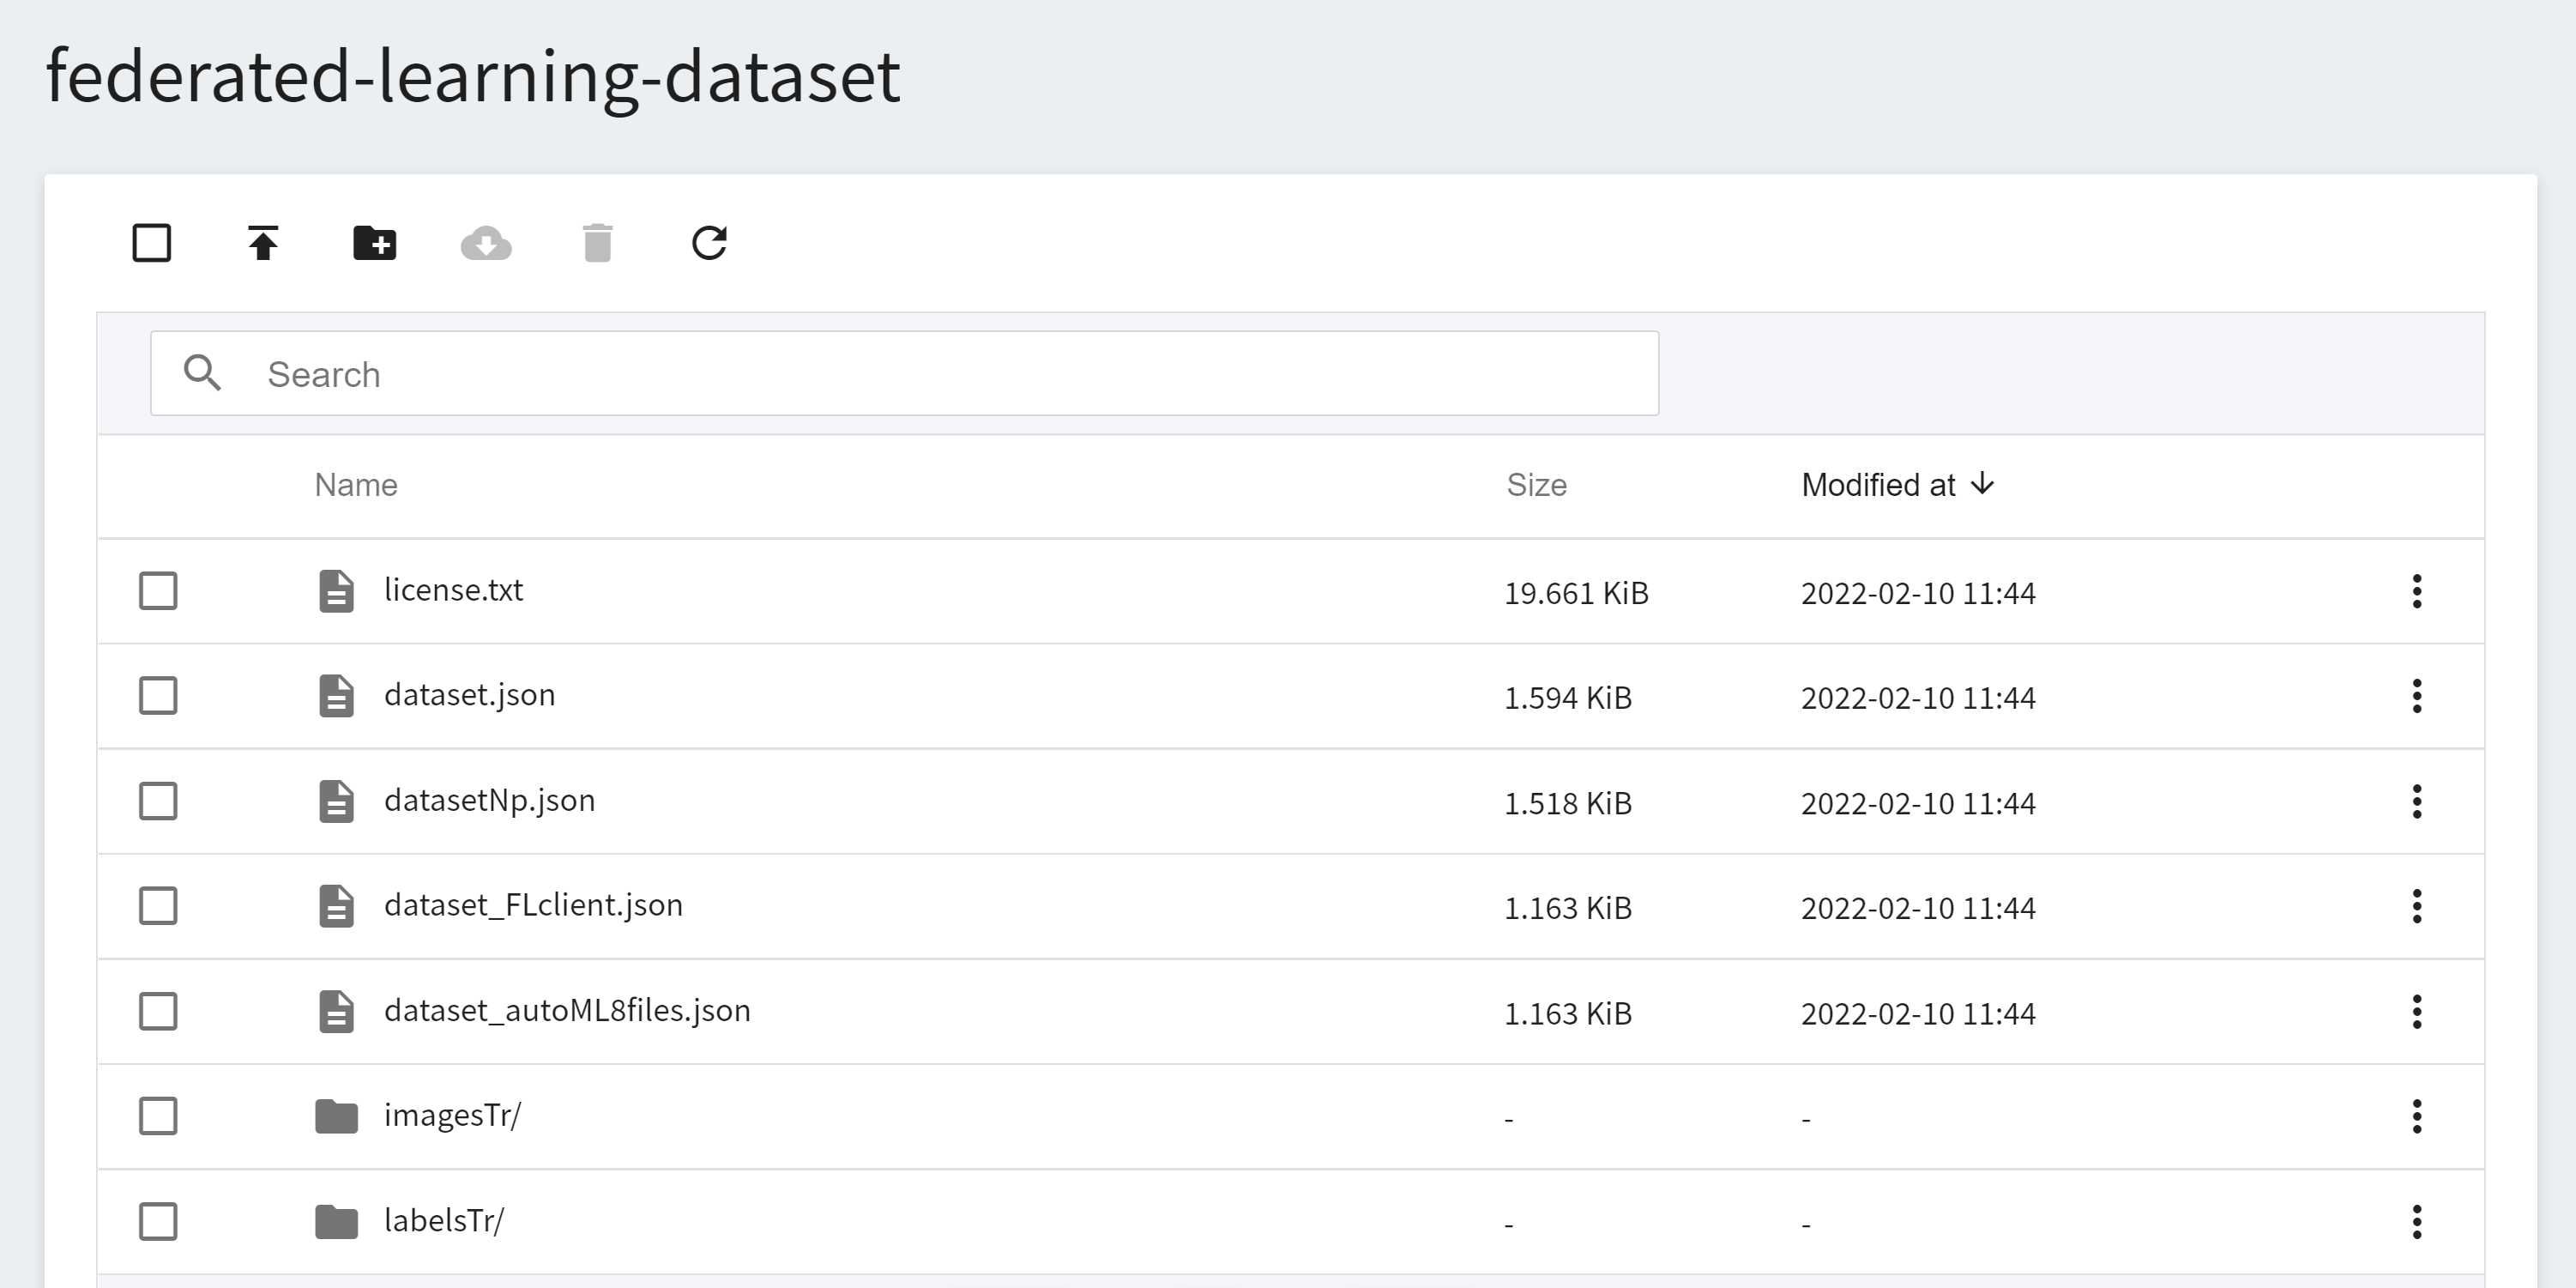
### 3.2 Upload Training Dataset
Next, you need to upload the dataset for training. This example uses the spleen dataset provided by NVIDIA: [clara-train-examples/PyTorch/NoteBooks/Data/sampleData/](https://github.com/NVIDIA/clara-train-examples/tree/master/PyTorch/NoteBooks/Data/sampleData). As in the previous step, create another bucket for the dataset, for example: `federated-learning-dataset`, and upload the dataset to this bucket.
### 3.3 Deploy FL Client in OneAI Container Service
Select **Container Service** from the OneAI service list, enter the container service management page, and click **+ CREATE** to add a new container service.
1. **Basic Information**
Please enter in sequence the **name**, for example: **`federated-learning-org1-a`**, **description**, for **image**, please select `clara:v4.0`.

2. **Hardware Settings**
FL Client needs to perform FL training jobs, please select a hardware option with at least 1 GPU and 25 GB of memory.
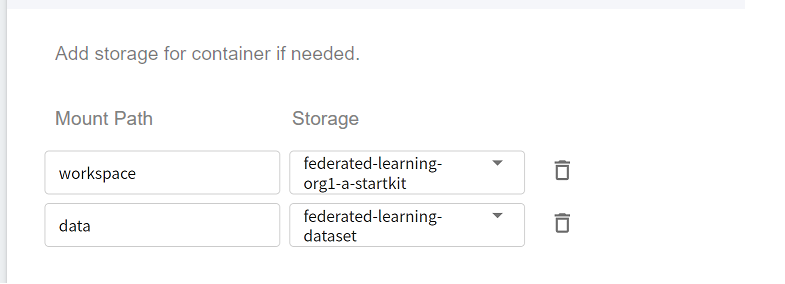
3. **Storage Settings**
There are two buckets to be mounted in this step, please click **ADD** and set the following:
* **workspace**: The bucket for storing the Client installation package, please select **`federated-learning-org1-a-startkit`**.
* **data**: The bucket for storing the training dataset, please select **`federated-learning-dataset`**.
4. **Network Settings**
No setup is required for this step.
5. **Variable Settings**
* **Environment variables**
* **`START`**
Set whether to automatically execute **`start.sh`**. When the value is set to **`AUTO`**, **`start.sh`** will be automatically executed after the container is started to start FL Server, and automatically join the FL Server.
* **Command**
Please paste the following command:
```=
git clone https://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@github.com/asus-ocis/fl-script.git /fl-script && sleep 1 &&/bin/bash /fl-script/nvclara40.sh
```

:::info
:bulb:**Tips:**
If your FL Server is not public, you can have the system modify /etc/hosts automatically by setting the **`FLSERVER`** and **`FLSERVERIP`** environment variables.
* **`FLSERVER`**
Set your FL Server Domain Name (non-public) and the system will automatically modify /etc/hosts. For example `myflserver.com` (must match the "target" field of **fed_client.json**).
* **`FLSERVERIP`**
Set the IP of FL Server, which needs to be used together with **`FLSERVER`**, such as `203.145.220.166`.
:::
6. **Review & Create**
Finally, confirm the entered information and click **CREATE**.
### 3.4 Start FL Client
If you have set **START:AUTO** in **Variable Settings**, the system will automatically execute **./startup/start.sh**. When the status of the FL Client container service is displayed as **`Ready`**, please enter the container service details page, click the **Terminal** tab above, and execute the following command to view the log file.
```=
cat /workspace/log.txt
```
:::info
:bulb:**Tips:**
If you have not set START:AUTO in **Variable Settings**, after entering the **Terminal** page, please first manually execute **`./startup/start.sh`** to start FL Server.
:::
After the FL Client has successfully connected to the FL Server, the following information will appear:
```=
...
2022-02-11 09:15:13,611 - FederatedClient - INFO - Successfully registered client:org1-a for example_project. Got token:...
created /tmp/fl/org1-a/comm/training/x
created /tmp/fl/org1-a/comm/training/y
created /tmp/fl/org1-a/comm/training/t
```
### 3.5 Deploy Other FL Clients
Please repeat the deployment steps for org1-a, using the org1-b.zip and org2.zip installation packages to deploy and start org1-b and org2.
## 4. Deploy FL Admin
FL Admin is the control center of federated learning, and is responsible for supervising and regulating the entire deep learning model training process. Once FL Server and FL Clients are started, federated learning can be managed and run through FL Admin. This section will explain how to deploy FL Admin and use Admin Tool to manage federated learning.
### 4.1 Upload FL Admin Installation Package
First, unzip the installation package admin@nvidia.com.zip on the local side. The directory structure after unzipping is as follows:
```=
startup/
├── clara_hci-4.0.0-py3-none-any.whl
├── client.crt
├── client.key
├── docker.sh
├── fl_admin.sh
├── readme.txt
├── rootCA.pem
└── signature.pkl
```
After unzipping the installation package, please follow the steps below to check the information of the installation package:
1. Confirm FL Server Information.
Open **fl_admin.sh** and make sure that the Domain Name and Port of the FL Server set in **`target`** in this file are correct.
```json=
...
"service": {"target": "federated.oneai.twcc.ai:31768"
...
```
2. Check the installation package files for abnormalities to prevent getting files from unknown sources.
After checking, upload the installation package to OneAI's Storage Service.
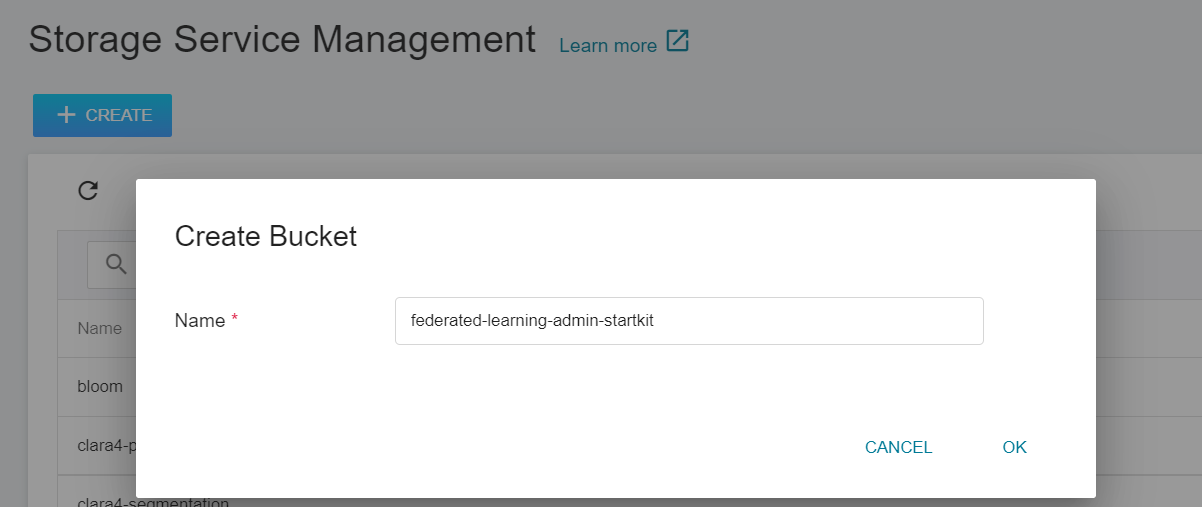
1. **Create a Bucket**
Select **Storage Service** from the OneAI service list, enter the storage service management page, and then click **+ CREATE** to add a bucket named `federated-learning-admin-startkit` to store the Admin installation package.
2. **View Bucket**
After the bucket is created, go back to the Storage Service Management page, and you will see that the bucket has been created.
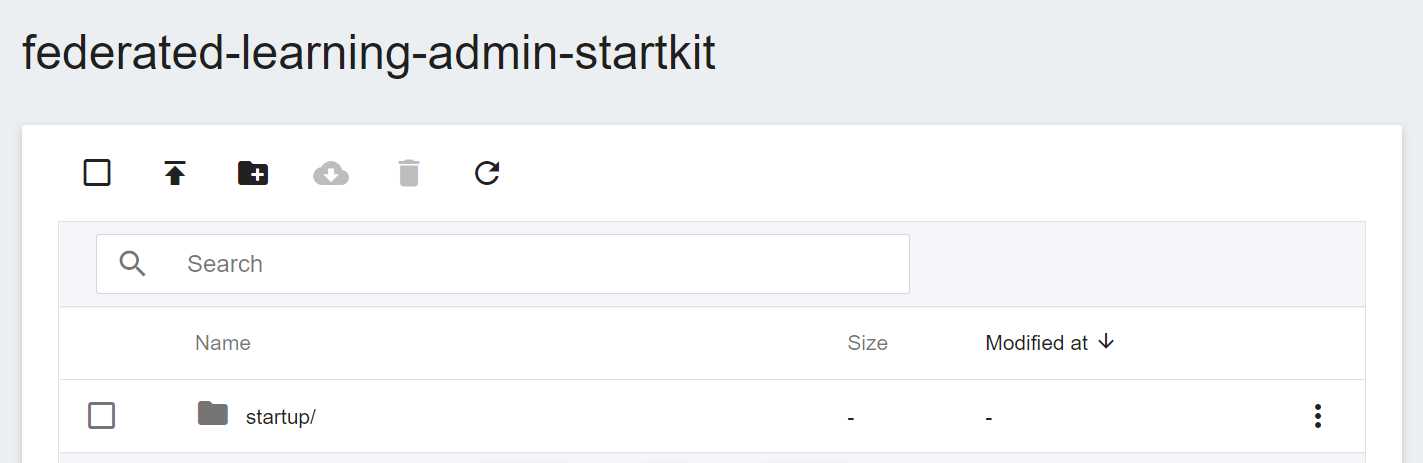
3. **Upload FL Admin Installation Package**
Click on the bucket that has been created, and then upload the entire Admin installation package directory **startup**. (See [**Storage Service Documentation**](/s/storage-en)).
### 4.2 Deploy FL Admin in OneAI Container Service
Select **Container Service** from the OneAI service list, enter the container service management page, and click **+ CREATE** to add a new container service.
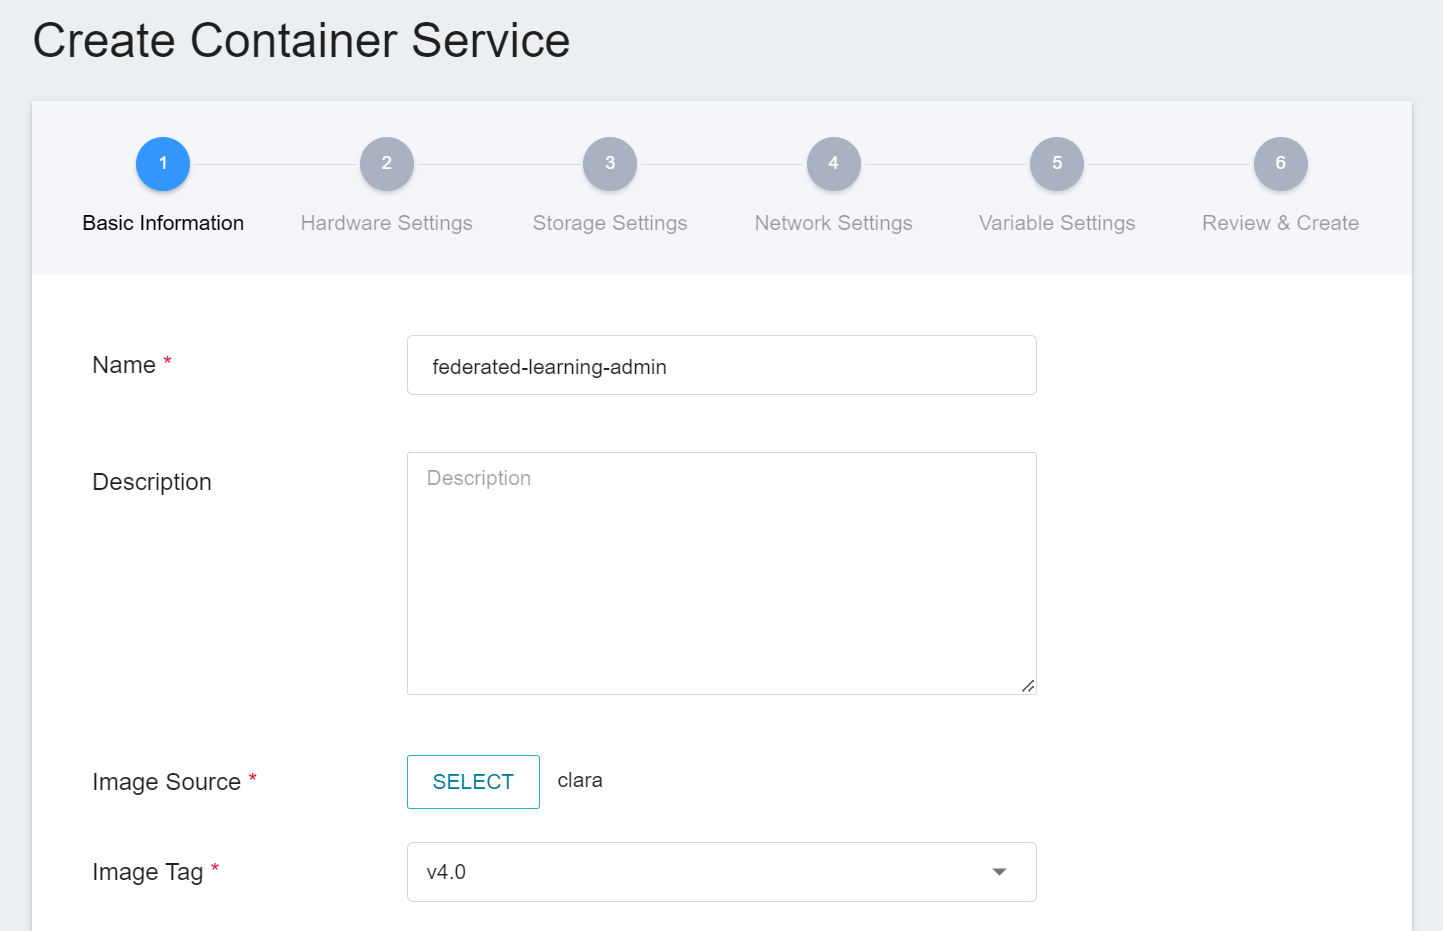
1. **Basic Information**
Please enter in sequence the **name**, for example: **`federated-learning-admin`**, **description**, for **image**, please select `clara:v4.0`.
2. **Hardware Settings**
Select the hardware specification, there is no need to configure GPU.
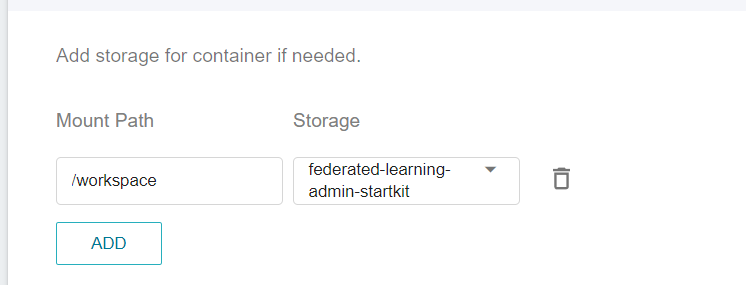
3. **Storage Settings**
This step will mount the bucket that stores the installation package. Please click **ADD** and set the bucket to store the installation package.
* **workspace**: The bucket for storing the Admin installation package, please select `federated-learning-admin-startkit`.
4. **Network Settings**
No setup is required for this step.
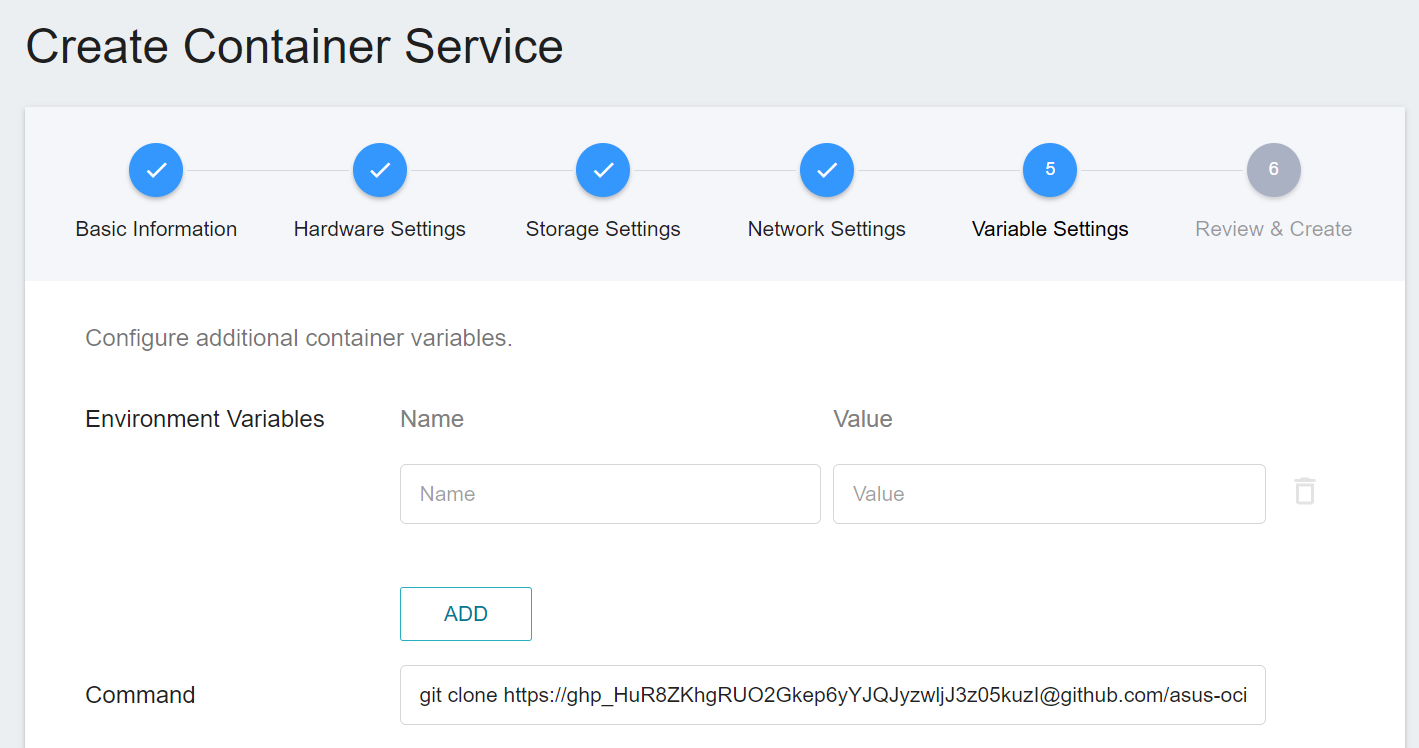
5. **Variable Settings**
* **Environment variables**
The FL Server in this example does not need to set environment variables.
* **Command**
Please paste the following command:
```
git clone https://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@github.com/asus-ocis/fl-script.git /fl-script && sleep 1 &&/bin/bash /fl-script/nvclara40.sh
```
:::info
:bulb:**Tips:**
If your FL Server is not public, you can have the system modify /etc/hosts automatically by setting the **`FLSERVER`** and **`FLSERVERIP`** environment variables.
* **`FLSERVER`**
Set your FL Server Domain Name (non-public) and the system will automatically modify /etc/hosts. For example **`myflserver.com`**. (must match the `--host` setting of **`fl_admin.sh`**).
* **`FLSERVERIP`**
Set the IP of FL Server, which needs to be used together with **`FLSERVER`**, such as `203.145.220.166`.
:::
6. **Review & Create**
Finally, confirm the entered information and click **CREATE**.
### 4.3 Start Admin
After the Admin container service is created, please enter the container service details page, click the **Terminal** tab above, and execute the **`/startup/fl_admin.sh`** command to start the Admin Server.
```=
# ./startup/fl_admin.sh
```
When the **`User Name:`** prompt appears on the screen, please enter **`admin@nvidia.com`** and press Enter to log in.
```=
# ./startup/fl_admin.sh
Admin Server: federated.oneai.twcc.ai on port 31768
User Name: admin@nvidia.com
Type ? to list commands; type "? cmdName" to show usage of a command.
>
```
### 4.4 Using Admin Tool
This section will explain how to use Admin Tool to manage federated learning.
#### 4.4.1 Check the Status of Server and Client
Execute the **`check_status server`** command to query the status of the FL Server.
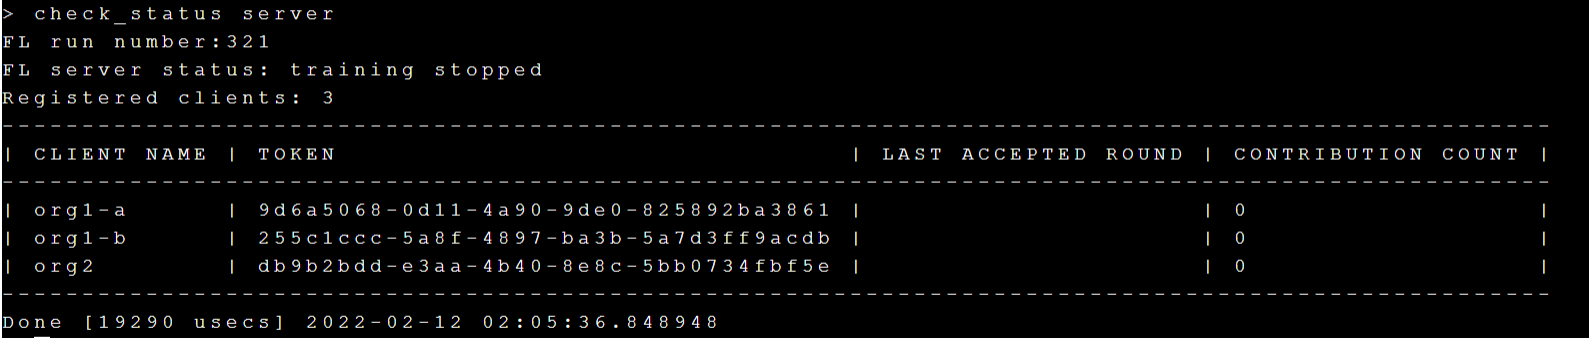
Execute the **`check_status client`** command to query the status of the FL Client.

#### 4.4.2 Upload Training adminMMAR
Next we want to start deploying MMAR, please download [**adminMMAR**](https://github.com/NVIDIA/clara-train-examples/tree/master/PyTorch/NoteBooks/FL/adminMMAR) provided by NVIDIA first.
After downloading, please modify the content of the file to conform to the test environment of this example.
:::info
:bulb:**Tips:** For detailed MMAR settings, please refer to the [**NVIDIA MMAR documentation**](https://docs.nvidia.com/clara/clara-train-sdk/pt/mmar.html#configuration).
:::
1. Please modify part of the file adminMMAR/config/environment.json:
```json=
{
"DATA_ROOT": "/data/", <-- please change to /data
"DATASET_JSON": "/data/dataset_FLclient.json", <-- please change to /data
"PROCESSING_TASK": "segmentation",
"MMAR_EVAL_OUTPUT_PATH": "eval",
"MMAR_CKPT_DIR": "models"
}
```
2. Please modify part of the file adminMMAR/config/config_train.json:
```json=
...
"dataset": {
"name": "CacheDataset",
"data_list_file_path": "{DATASET_JSON}",
"data_file_base_dir": "{DATA_ROOT}",
"data_list_key": "training", <---please find it here
"args": {
"cache_num": 1,
"cache_rate": 1.0,
"num_workers": 0 <---Please set 0 here, do not use share memory
}
},
"dataloader": {
"name": "DataLoader",
"args": {
"batch_size": 1, <---Please set 1 here
"shuffle": true,
"num_workers": 0 <---Please set 0 here, do not use share memory
}
},
...
{
"name": "CheckpointSaver", <--- please find it here
"rank": 0,
"args": {
"save_dir": "{MMAR_CKPT_DIR}",
"save_dict": ["model", "optimizer", "lr_scheduler", "train_conf"], <---Please add "train_conf" here
"save_final": true,
"save_interval": 50
}
},
...
"dataset": {
"name": "CacheDataset",
"data_list_file_path": "{DATASET_JSON}",
"data_file_base_dir": "{DATA_ROOT}",
"data_list_key": "validation", <-- please find it here
"args": {
"cache_num": 9,
"cache_rate": 1.0,
"num_workers": 0 <-- Please set 0 here, do not use share memory
}
},
"dataloader": {
"name": "DataLoader",
"args": {
"batch_size": 1, <--- Please set 1 here
"shuffle": false,
"num_workers": 0 <--- Please set 0 here, do not use share memory
}
},
...
{
"name": "CheckpointSaver", <-- please find it here
"rank": 0,
"args": {
"save_dir": "{MMAR_CKPT_DIR}",
"save_dict": ["model", "train_conf"], <-- Please set "train_conf" here
"save_key_metric": true
}
}
...
```
3. Please modify part of the file adminMMAR/config/config_validation.json:
```json=
...
"dataloader": { <---please find it here
"name": "DataLoader",
"args": {
"batch_size": 1, <---Please set 1
"shuffle": false,
"num_workers": 0 <---Please set 0 here, do not use share memory
}
},
...
```
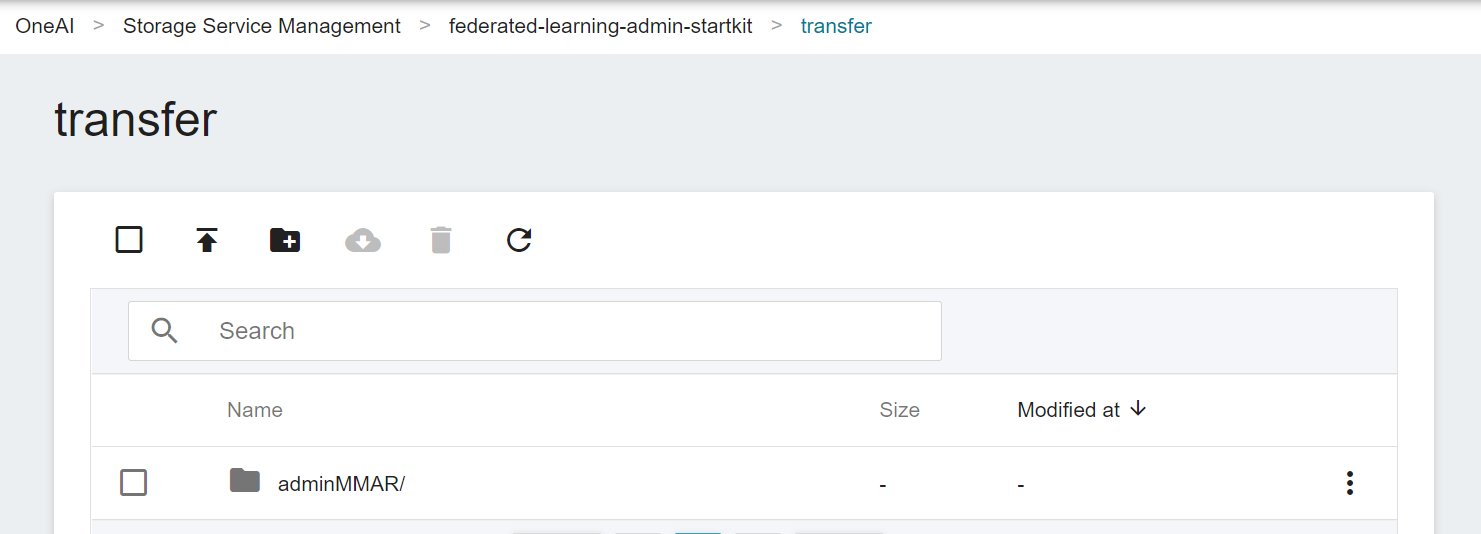
After modification, please go to the **transfer** directory of the **`federated-learning-admin-startkit`** bucket of **Storage Service**, and upload **adminMMAR** to the **transfer** directory, as shown in the following figure:
## 5. Perform Federated Learning Training
This section will describe how to deploy adminMMAR to FL Server and FL Client after preparing the adminMMAR, and start training.
### 5.1 Set the Run Number of the Training Job
Use the **`set_run_number`** command to set the code name of this training job, here we set `321`.
Execute **`set_run_number 321`**, as shown below:

### 5.2 Admin Uploading adminMMAR to FL Server
Execute the **`upload_folder adminMMAR`** command to upload adminMMAR to the transfer temporary directory of the FL server, as shown below:

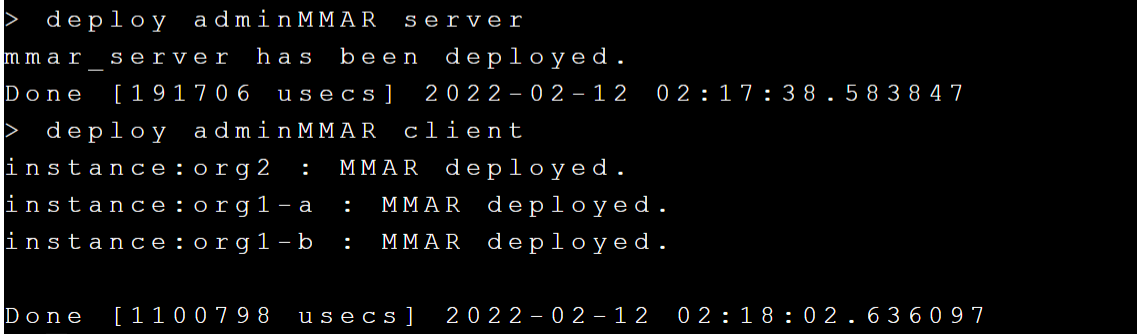
### 5.3 Deploy adminMMAR to FL Server and FL Client
Next, execute **`deploy adminMMAR server`** and **`deploy adminMMAR client`** to deploy adminMMAR from the transfer temporary directory to FL Server and FL Client, as shown below:
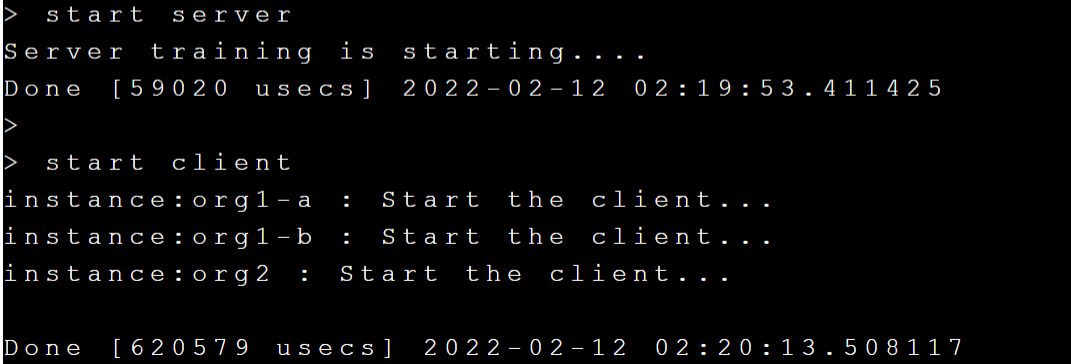
### 5.4 Start Training
You can start training after deploying adminMMAR. Please execute **`start server`** and **`start client`** to start training, as shown below:
Next, execute the **`check_status server`** and **`check_status client`** commands to check if the status of the FL Server and FL Client is displayed as **`training started`**, as shown below:
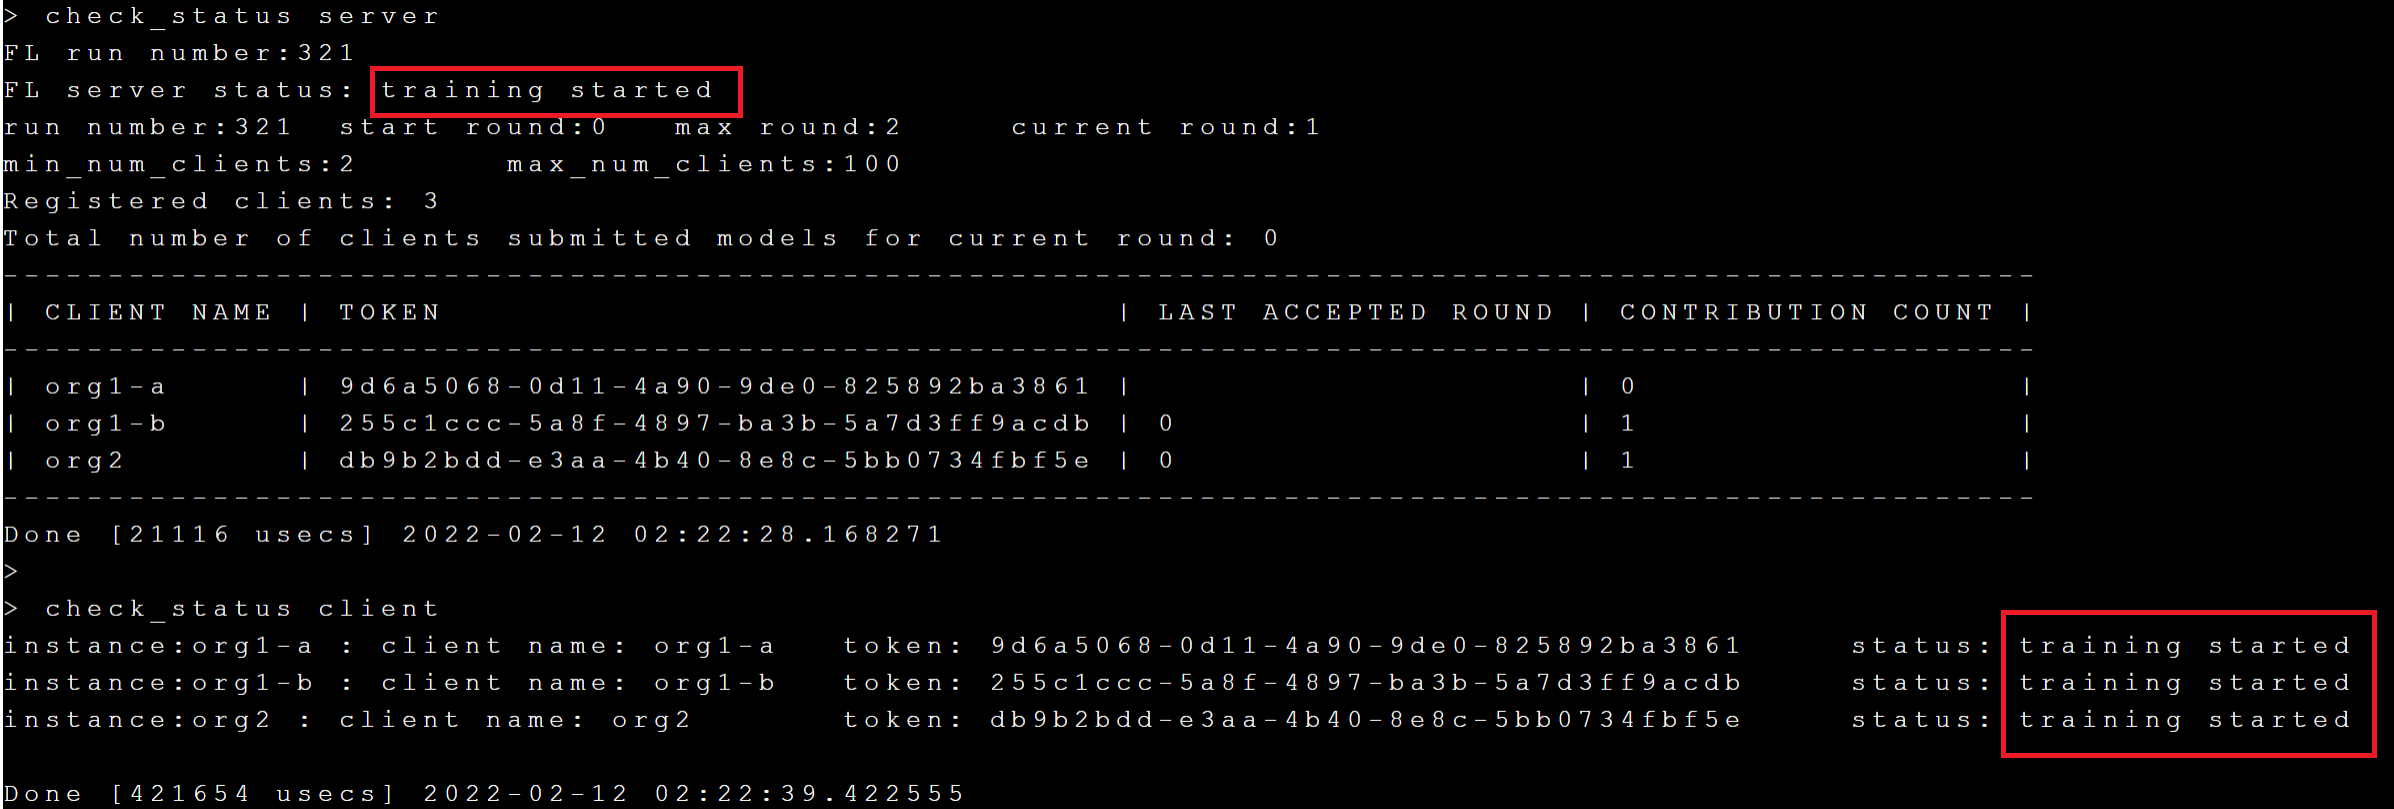
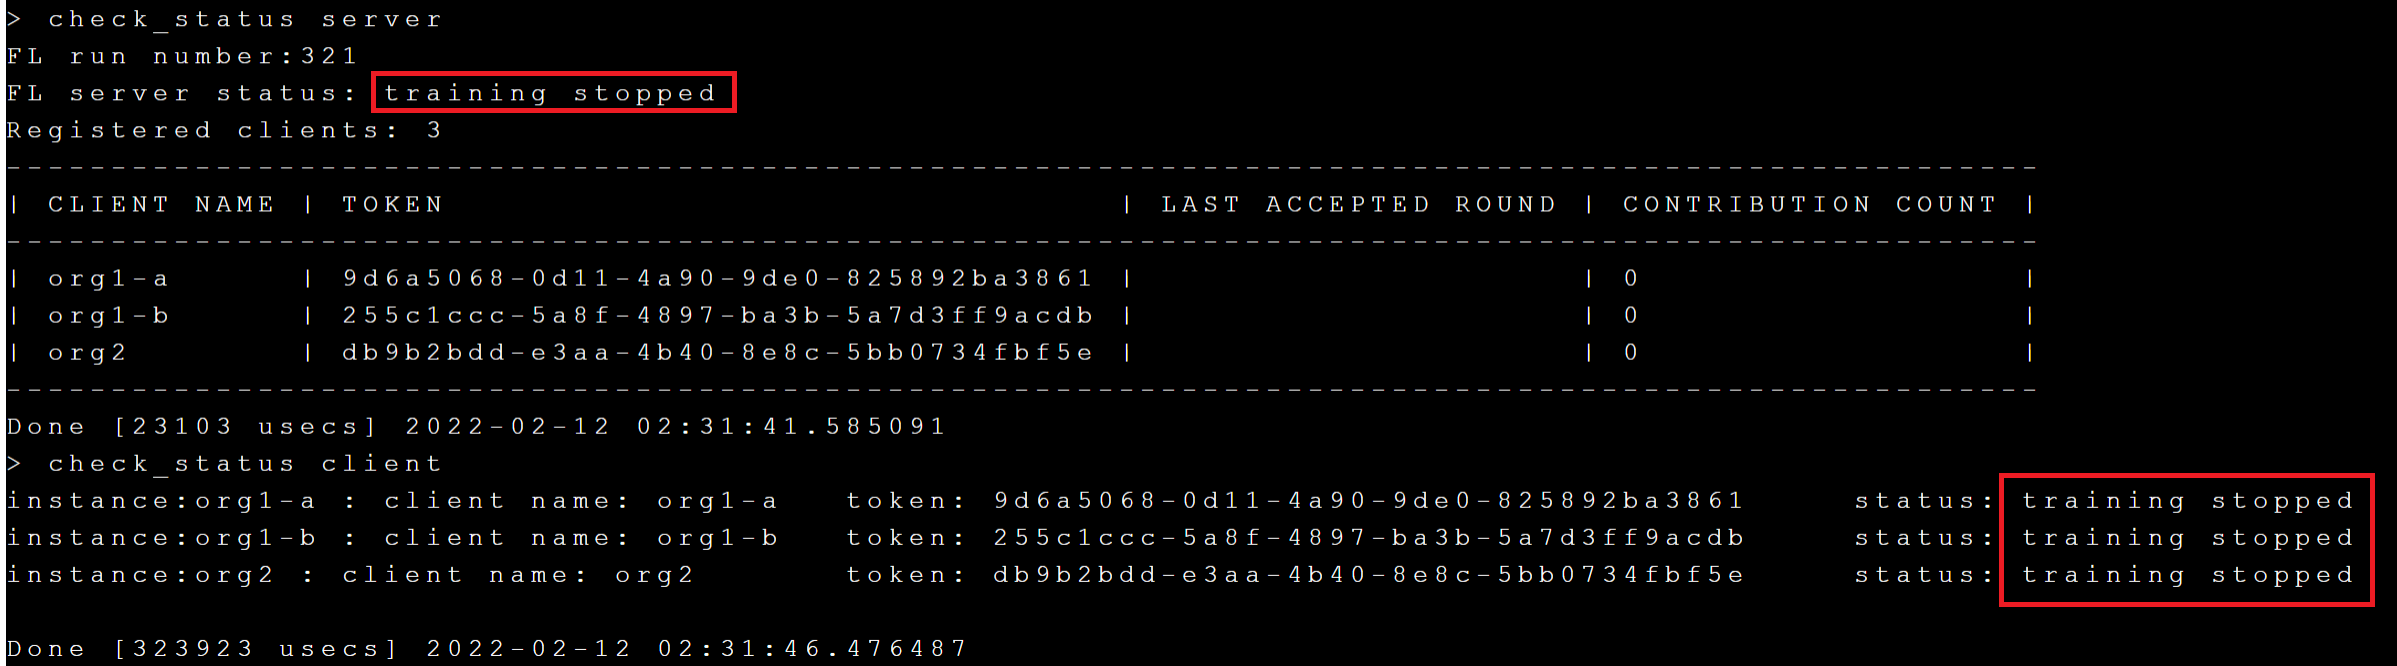
Through **`check_status`**, you can know the current round and max round of the current training. After the training is completed, the status of the Server and Client will become **`training stopped`**.
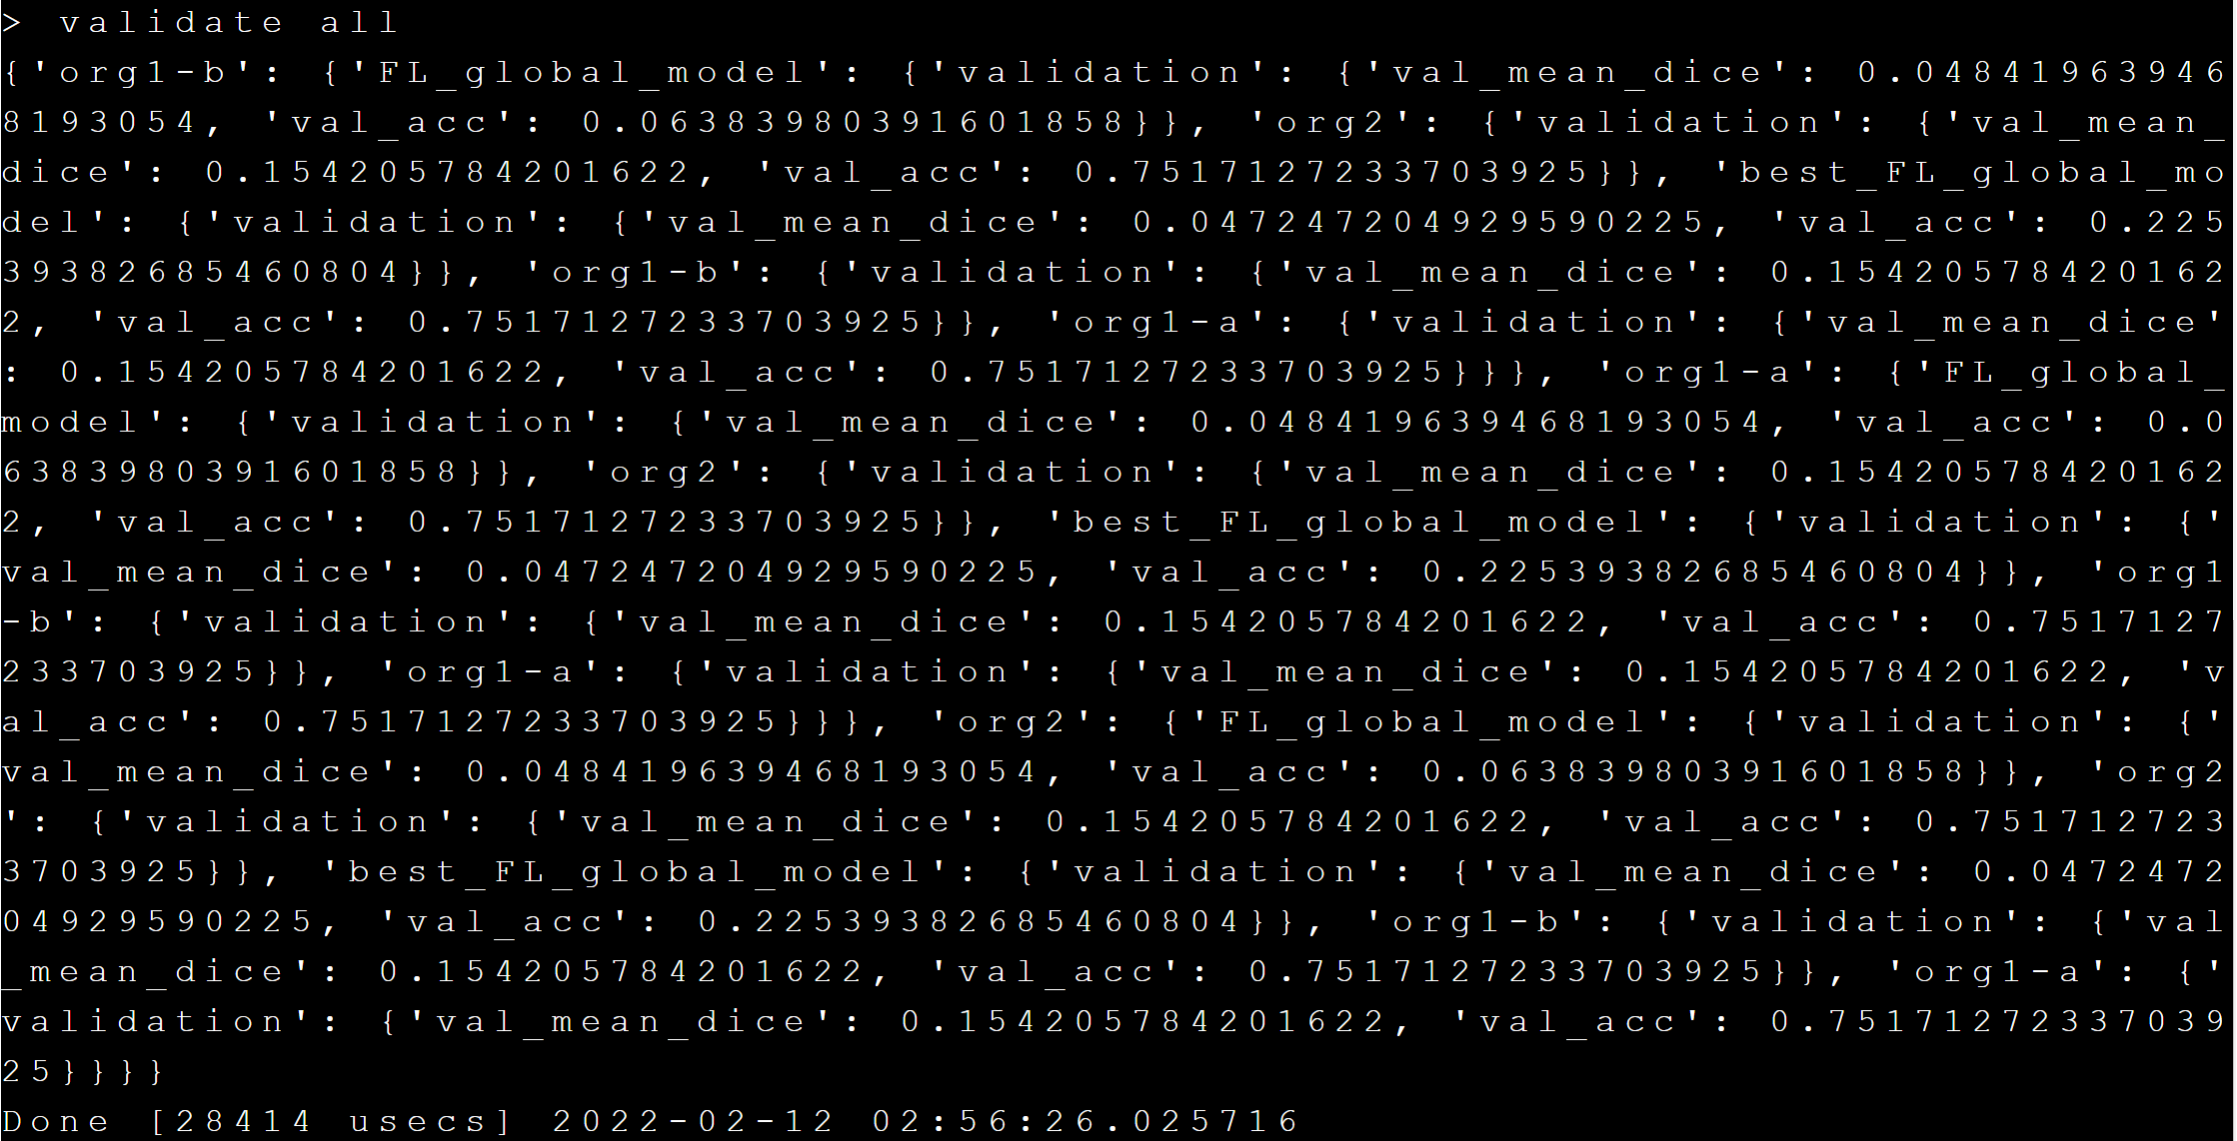
### 5.5 Get Training Results and Model
After the training is completed, the training results can be obtained through the **`validate all`** command, as shown below:
The trained model (global model) is stored in the server's **run_321/mmar_server/models** path, and can be viewed by executing the **`ls server run_321/mmar_server/models`** command, the results are as follows:

**FL_global_model.pt** and **best_FL_global_model.pt** are the models successfully trained through federated learning.