---
title: Container Image
description: OneAI Documentation
tags: EN
---
[OneAI Documentation](/s/user-guide-en)
# Container Image
The Container Image service is a private container images repository provided by OneAI. Through a safe and reliable management mechanism, a simple and easy-to-use graphical management interface, convenient container image templates and pre-loaded rich machine learning development environment image, it helps you create, store and manage container images and share them with other project members.
This system provides two ways to create a container image:
1. **Using the Image Builder service**
The **Image Builder** service provides the function of making container images online. With simple settings, additional packages or programs can be installed based on the existing container image. Use cloud resources to quickly create customized container images, no need to prepare the local environment for self-packaging, and save the time of uploading a large number of container images. For more information, please refer to the Image Builder user guide.
2. **Create a container image through Docker commands**
You can also use standard Docker commands to create container images and upload the images to the system's **Container Image** service, please refer to the following instructions.
## Create a Container Image through Docker Commands
:::warning
:warning: **Note**: **Prerequisites**
1. This document is written for those who have experience in using Docker and containers. Please have a basic understanding of [**Docker and containers**](https://docs.docker.com/get-started/overview/) before using this service.
2. Please make sure that Docker is installed on your local machine and can execute Docker CLI commands. Docker can be installed in Windows, Linux and MacOS environments. For installation information on different operating systems, please refer to the [**Docker Documentation**](https://docs.docker.com/get-docker).
3. Depending on your system environment and user permissions, you may need to add `sudo` before executing the Docker command.
:::
### 1. Prepare the Image
Before using the container image service, please prepare your image file. There are many ways to prepare an image file. Two common methods are described below.
#### 1.1 Image Obtained from Other Sources
Quickly get images from public image repositories such as [**Docker Hub**](https://hub.docker.com) or [**NVIDIA NGC**](https://catalog.ngc.nvidia.com/), for example [**NVIDIA CUDA**](https://catalog.ngc.nvidia.com/orgs/nvidia/containers/cuda), a GPU-optimized container image on NVIDIA NGC.
* Run the command **`docker pull nvcr.io/nvidia/cuda:11.2.0-cudnn8-devel-ubuntu20.04`** in the terminal window to get the image.
```
$ docker pull nvcr.io/nvidia/cuda:11.2.0-cudnn8-devel-ubuntu20.04
11.2.0-cudnn8-devel-ubuntu20.04: Pulling from nvidia/cuda
d7bfe07ed847: Pull complete
...
Digest: sha256:1cfa79e60f22dc5567fd726e2b4e24f94e1936e98be69c25ecf8cc141907c1df
Status: Downloaded newer image for nvcr.io/nvidia/cuda:11.2.0-cudnn8-devel-ubuntu20.04
nvcr.io/nvidia/cuda:11.2.0-cudnn8-devel-ubuntu20.04
```
* Then run **`docker images`** command to view the image and confirm that the image has been downloaded to the local machine.
```
$ docker images
REPOSITORY TAG IMAGE ID CREATED SIZE
nvcr.io/nvidia/cuda 11.2.0-cudnn8-devel-ubuntu20.04 bb0c3c0afdd8 6 weeks ago 6.93GB
```
#### 1.2 Use Dockerfile to Create an Image
Dockerfile is a text file used to configure the creation information of the image. It contains base image information, image commands, and execution instructions when the container starts.
* Please create a folder with any name you want.
```
$ mkdir myimage
$ cd myimage
```
* Compose the Dockerfile in a text editor
```
$ vi Dockerfile
```
* Paste the following example; or modify it according to your needs.
```=
FROM nvcr.io/nvidia/cuda:11.2.0-cudnn8-devel-ubuntu20.04
CMD ["echo", "Hello World"]
```
* Once the Dockerfile is ready, the image can be built with the **`docker build`** command, for example:
```
$ docker build -t example:v001 .
```
* In the above command, **-t** represents the tag of the specified image. In this example, the specified image tag is **`example:v001`**, and the last **.** indicates that the Dockerfile is in this working directory.
* After the image is created, you can use the **`docker images`** command to check whether the image is created successfully.
```
$ docker images
REPOSITORY TAG IMAGE ID CREATED SIZE
example v001 e54c9582e997 6 weeks ago 6.93GB
```
:::info
:bulb: **Tips:** There are many usages of docker build. For more information, please refer to the official [**Docker Documentation: docker build usage and examples**](https://docs.docker.com/engine/reference/commandline/build/).
:::
### 2. Tag the Image to Be Uploaded
After preparing the Docker image to be uploaded, you need to obtain the relevant information provided by OneAI's container image service to tag the image to be uploaded.
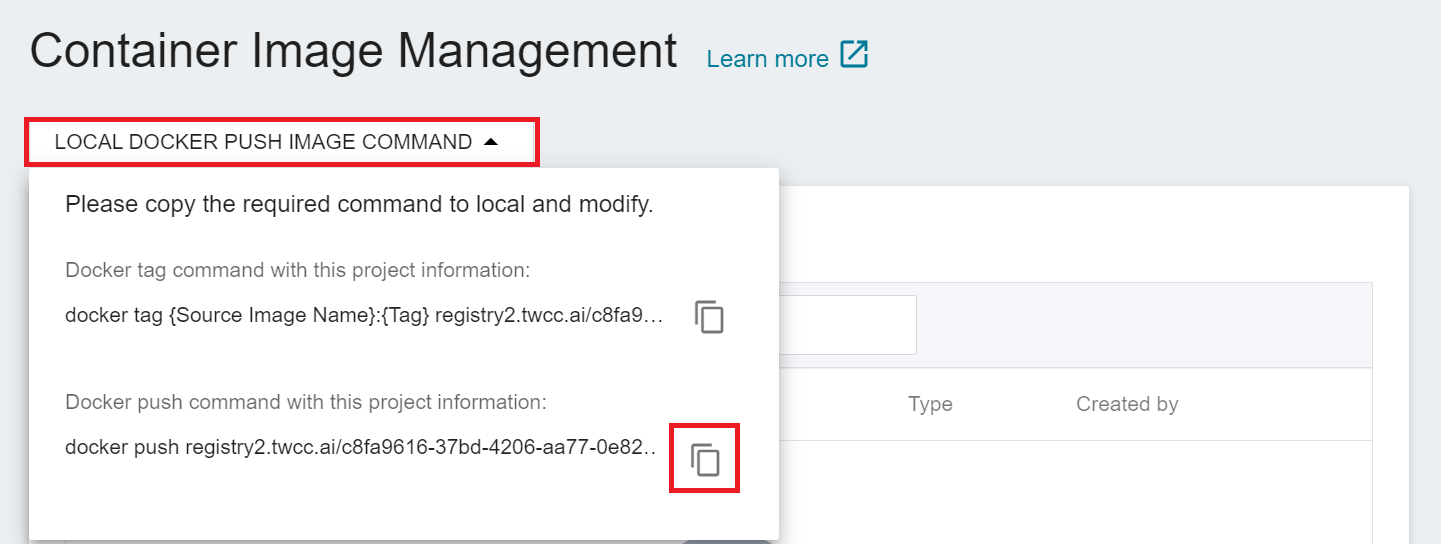
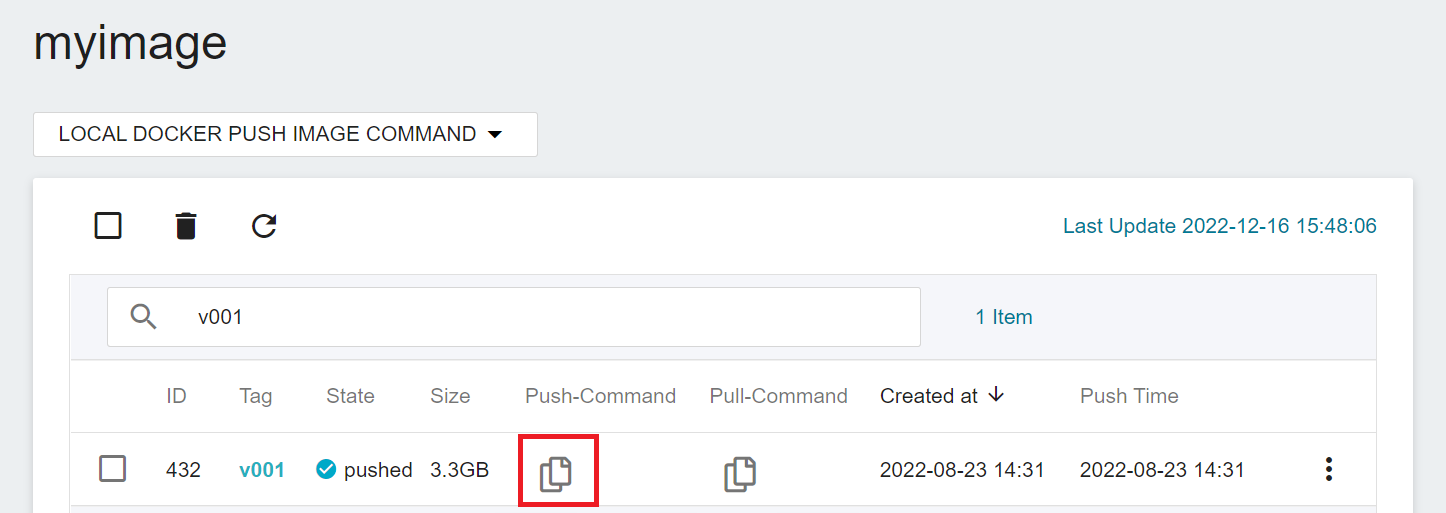
* Select **Container Image** from the OneAI service list to enter the container image management page, then click the **LOCAL DOCKER PUSH IMAGE COMMAND**, and then click the Copy icon on the right side of the **docker tag command that contains information about this project**.

* Paste the copied content into the local environment, and modify the content in parentheses:
* `docker tag`:The command to tag the image. For details, please refer to the official [**Docker documentation**](https://docs.docker.com/engine/reference/commandline/tag/).
* `{Source Image Name}:{Tag}`: The name and tag of the local source image.
* `registry2.twcc.ai`:Container Registry for this system.
* `registry2.twcc.ai/{Project ID}/{Image Name}:{Tag}`:It is the Repository:Tag of the uploaded image, the system will automatically bring up the Project ID, and the Image Name and Tag can be named by yourself. If the same Image Name or Tag already exists in the same project, the original image will be replaced after uploading.
```
docker tag {Source Image Name}:{Tag} registry2.twcc.ai/{Project ID}/{Image Name}:{Tag}
```
* Execute the modified command in the terminal window, for example:
```
docker tag example:v001 registry2.twcc.ai/{Project ID}/myimage:v001
```
* Run **`docker images`** again to confirm the tagging result.
```
$ docker images
REPOSITORY TAG IMAGE ID CREATED SIZE
registry2.twcc.ai/.../myimage v001 e54c9582e997 6 weeks ago 6.93GB
example v001 e54c9582e997 6 weeks ago 6.93GB
```
:::info
:bulb: **Tips:** IMAGE ID of the same image will be the same, and the IMAGE ID can correspond to multiple REPOSITORY:TAGs.
:::
### 3. Upload the Image
* Continuing from the previous step, upload the tagged image to the Container Registry provided with the container image by command.
* Before uploading the image, you need to log in to the Container Registry of this system, and enter the complete login command in the terminal window:
```
$ docker login registry2.twcc.ai
```
* The first time you log in, you need to enter your TWCC host account and password. After successful login, a **Login Succeeded** message will appear on the screen.
```
$ docker login registry2.twcc.ai
Username:
Password:
...
Login Succeeded
```
* Similar to the previous step, the command format for uploading an image can be obtained from the container image management page.
* The command format for uploading an image is as follows:
```
docker push registry2.twcc.ai/{Project ID}/{Image Name}:{Tag}
```
* Execute the command to upload the image in the terminal window, for example:
```
docker push registry2.twcc.ai/{Project ID}/myimage:v001
```
* After the upload is complete, a **`Pushed`** message will appear.
```
The push refers to repository [registry2.twcc.ai/.../myimage]
a790f937a6ae: Pushed
v001: digest: sha256:bace9fb0d5923a675c894d5c815da75ffe35e24970166a48a4460a48ae6e0d19 size: 529
```
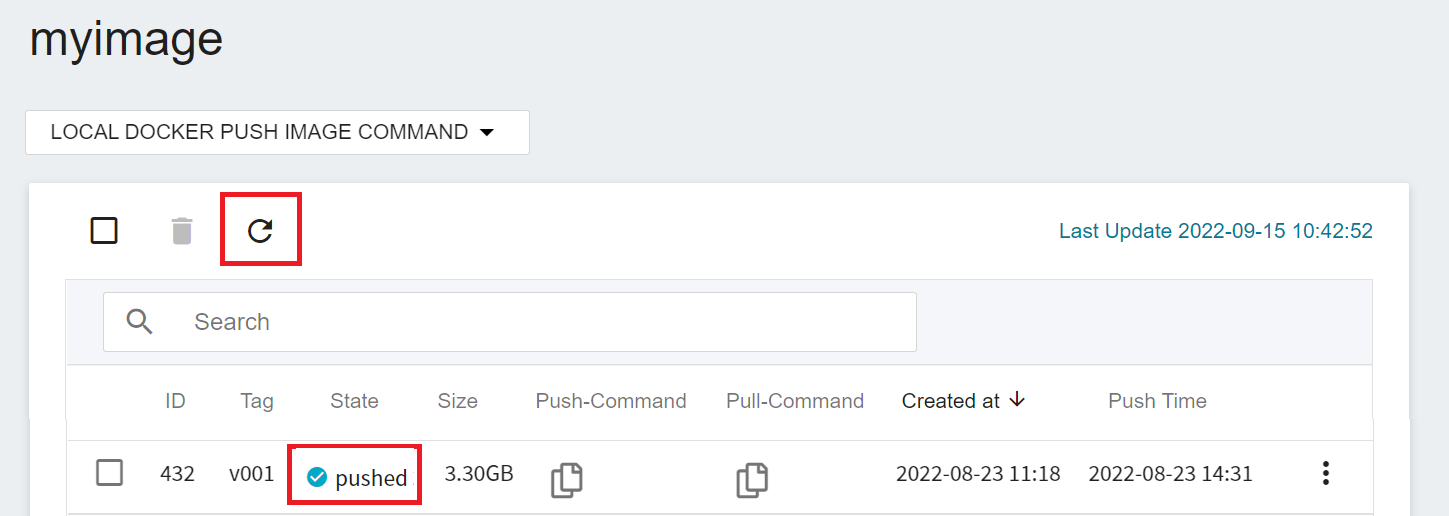
* Go back to the container image management page, enter the tag list of the uploaded image, and click the Refresh icon above. When the image status changes to **`pushed`** and shows the image size, it means that the image has been uploaded successfully.
:::info
:bulb: **Tips:** **About Image Size**
For better performance, the system will compress the image, so the image size displayed here will be different from the size seen on the local side.
:::
:::warning
:warning: **Note:** The Push-Command example in this document is for reference only, the Push-Command you get may be different.
:::
## Use Container Image
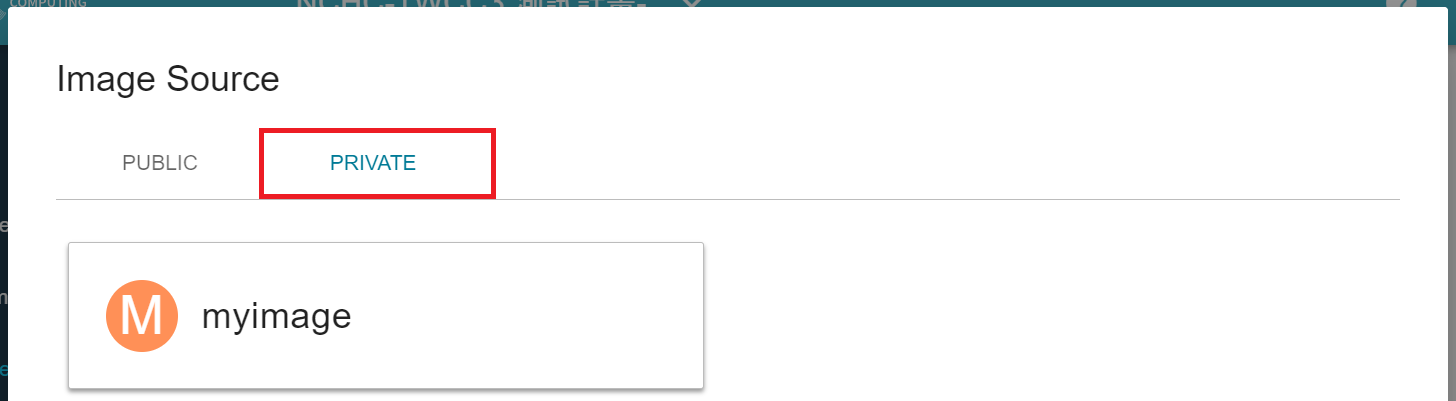
* Once your image is successfully uploaded, it will be available for selection from the **Private** category of **Image Source** when creating container-related services, and can be shared with all project members.
* For usage instructions of other container-related services, please refer to:
* [**Container Service**](/s/container-service-en)
* [**Job Scheduling Service**](/s/job-scheduling-en)
* [**AI Maker**](/s/ai-maker-en)
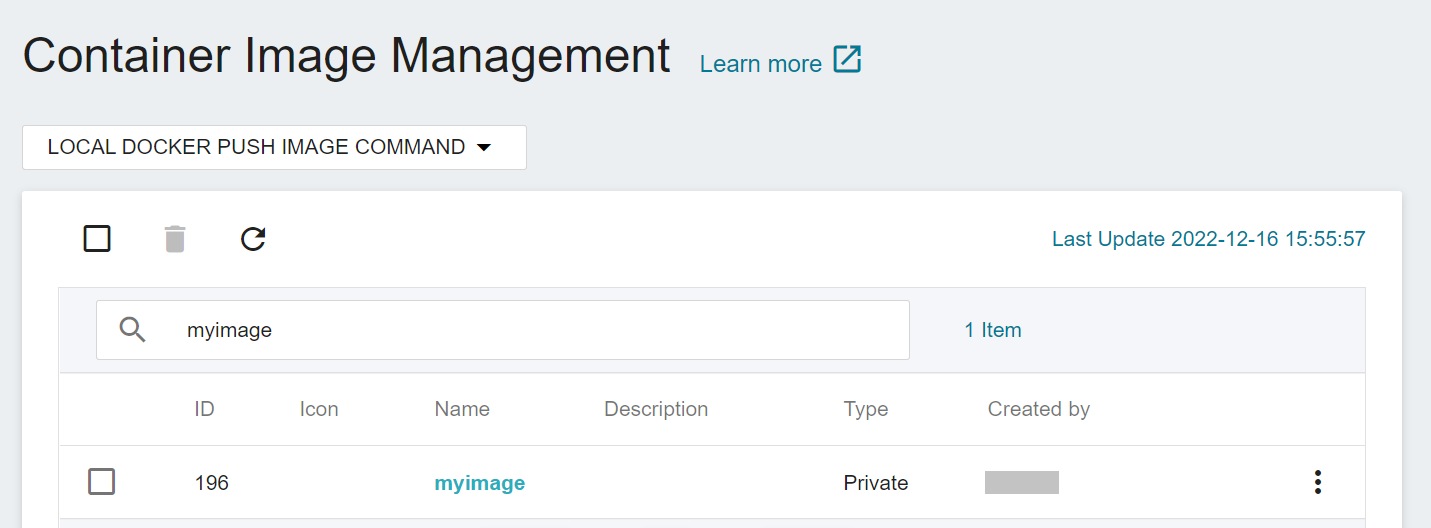
## Container Image Management
### Edit Description
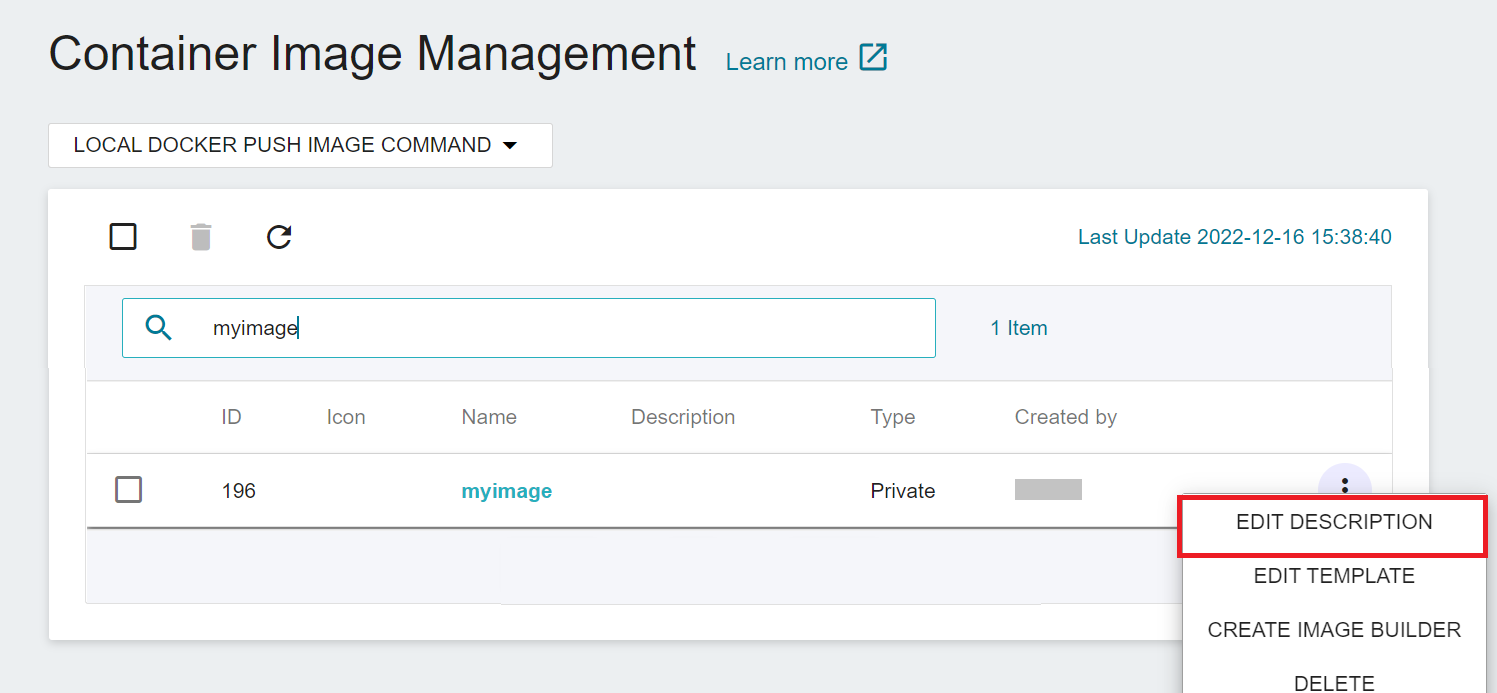
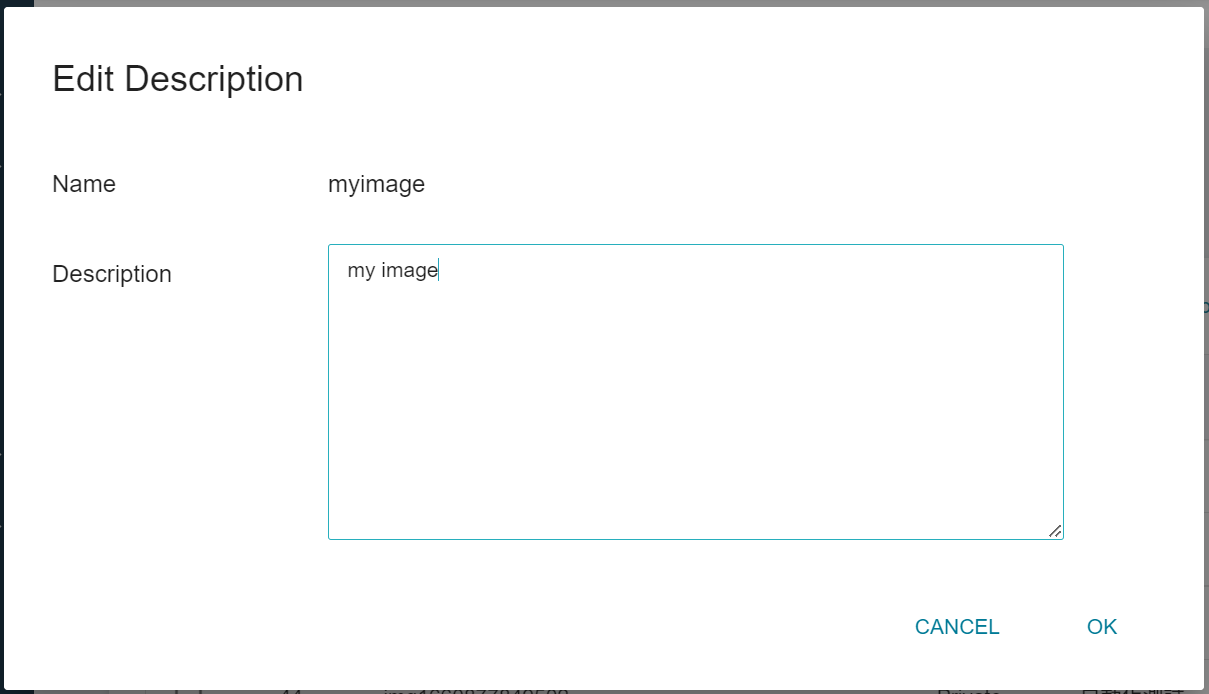
* Go to the container image management page, move the mouse to the more options button on the right side of the container image list, and then click **EDIT DESCRIPTION**.
* Edit the description of the image for easy identification, and click **OK** after editing.
### Edit Template
* Container image **Template** allows you to pre-configure the storage settings, network settings, environment variables and commands required for container image creation. When you use this image to create a service, the system will automatically bring up the default configuration in the template for users to quickly apply or modify. The same default template configuration is applied to images with different tags in the same container image repository.
:::info
:bulb: **Tips: Recommendations**
1. Container image **Template** is designed for people who need to create and modify container images frequently, so that some common settings can be easily applied through templates, reducing the work of frequent program modification and image re-creation. For example, when selecting **Public** image provided by the system to create a [**Container Service**](/s/container-service-en) depending on the selected image, the default items seen in the subsequent setting steps will be different, which is the result of applying the container image **template**.
2. Container image **template** is an advanced feature. It is recommended to get familiar with [**Container Service**](/s/container-service-en) before learning this feature.
:::
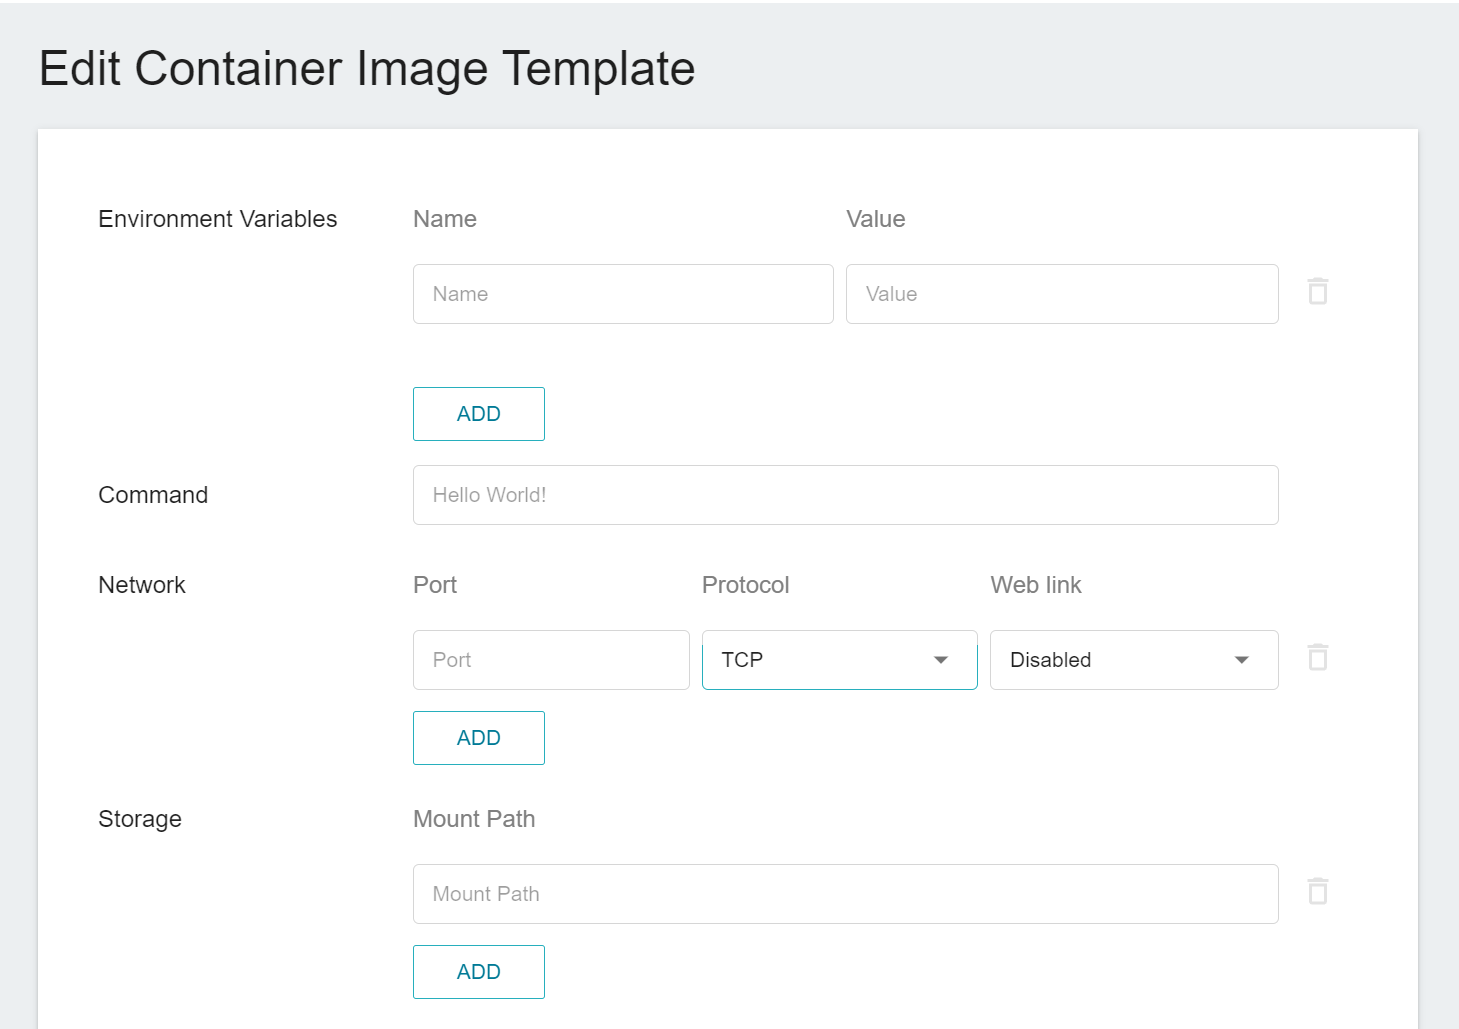
* Move your mouse to the more options button on the right side of the container image and click **EDIT TEMPLATE**.

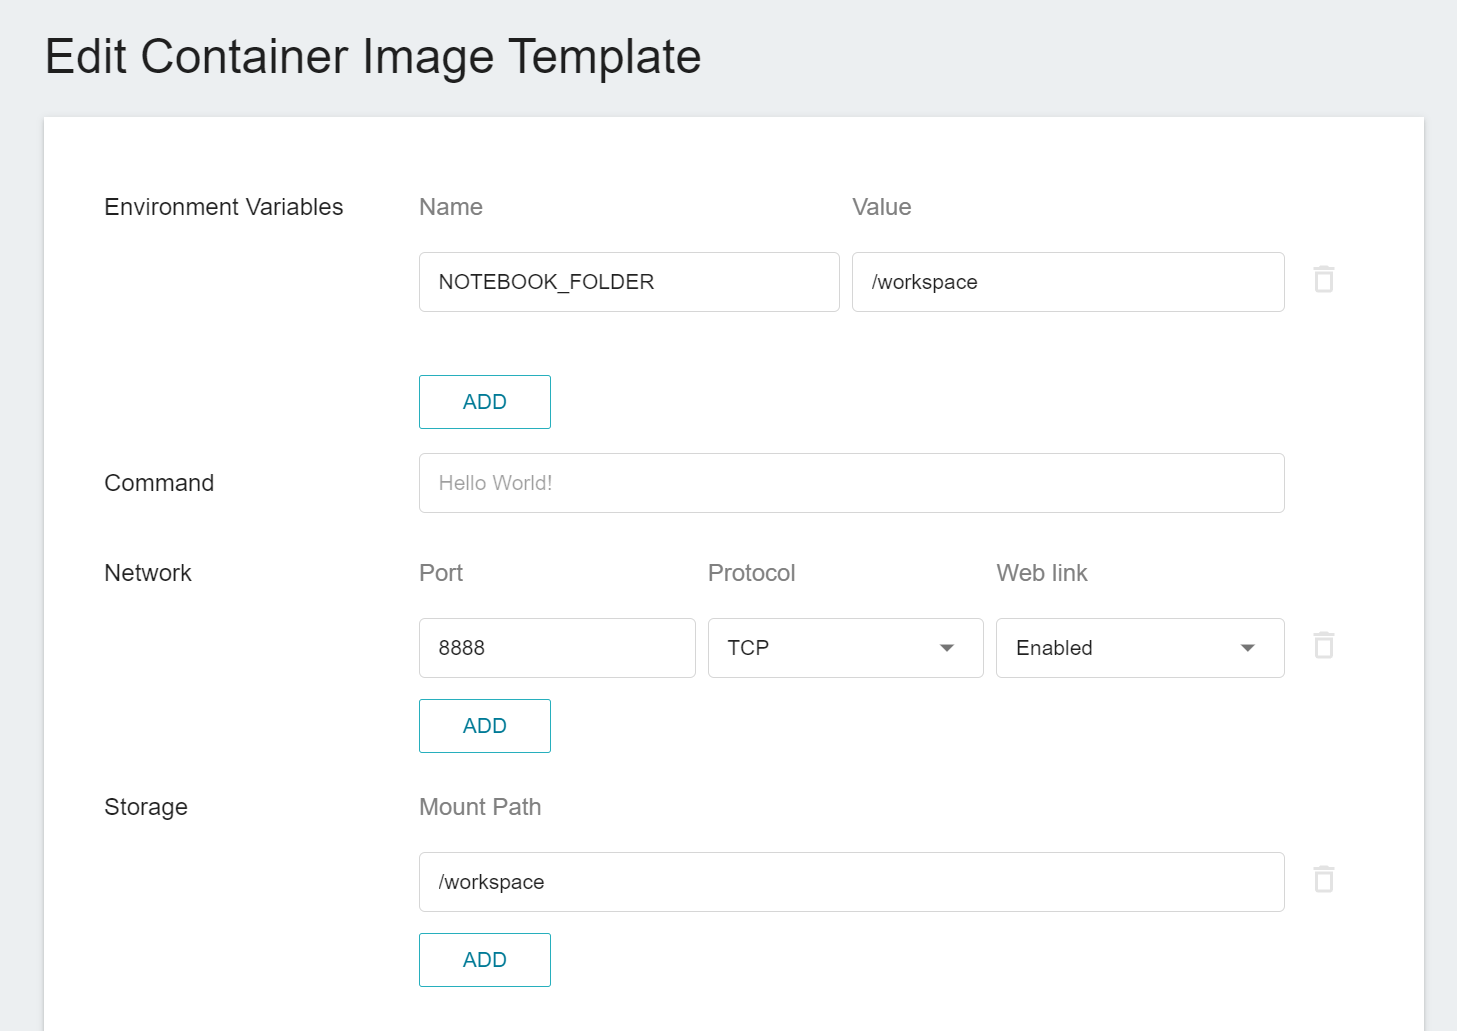
* The settings on the **Edit Container Image Template** page are described below. After the settings are complete, click **SAVE TEMPLATE**.
- **Environment variables**: Set the name and value of environment variables, which can be used to dynamically adjust the settings of the application. Environment variables are related to the environment configuration or program of the image and need to be used together. For example, setting the password as a variable makes it easy to modify when the container is created.
- **Command**: Set the name of the command or program to be executed, which can be executed automatically after the container is started, for example: ```python train.py```.
- **Network**: Set the default port, service protocol and URL link according to the service to be provided, for example: SSH service defaults to 22, Jupyter service defaults to 8888.
- **Storage**: Set the default mount path, for example: set the **/workspace** mount path for users to choose their own bucket.
- **Image icon**: The image icon can be customized for easy identification. The icon only supports PNG or SVG file format; the size of the icon must be less than or equal to 256x256 pixels; the file size cannot exceed 50 KB. The custom image icon will appear in the container image management list and the page for selecting image source.
* The sample settings for two common **Public** image types are provided below for reference and can be compared with the steps in [**Create Container Service**](/s/container-service-en#Create-Container-Service).
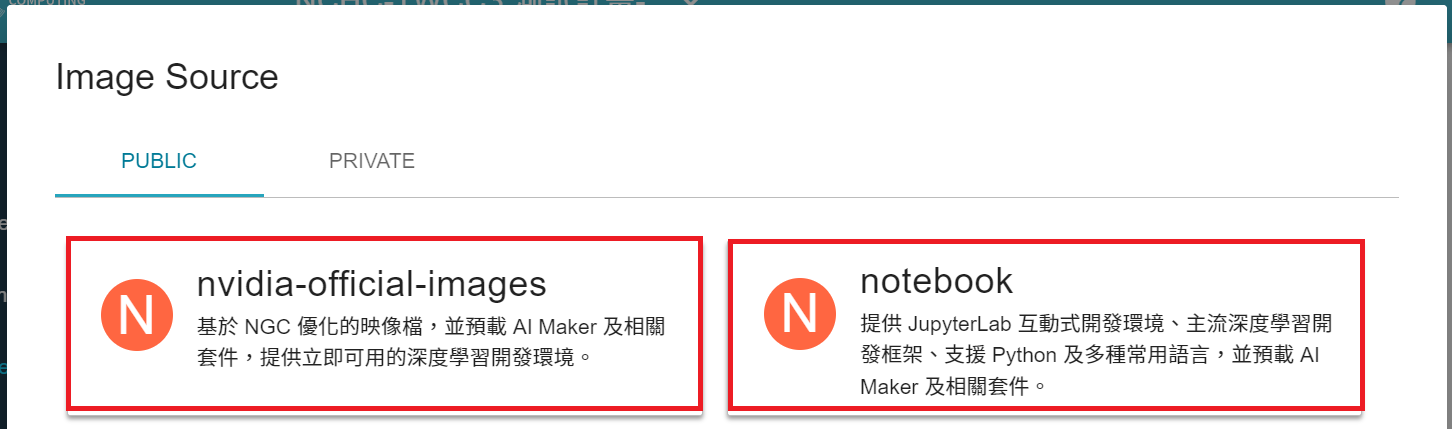
- **nvidia-official-images**
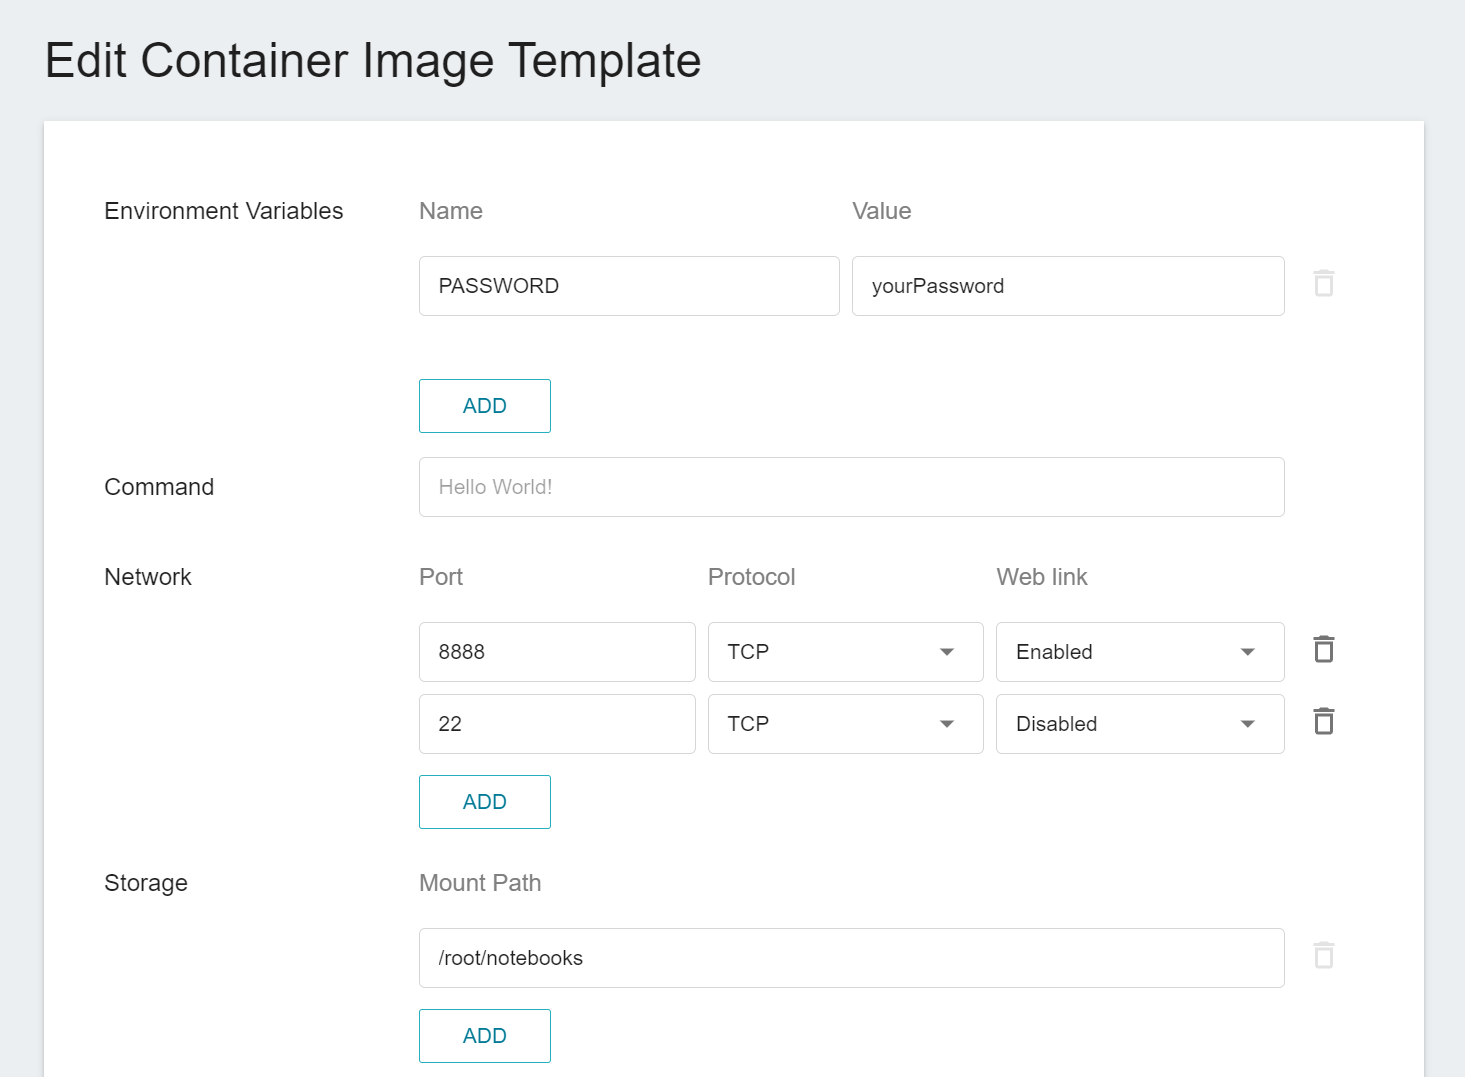
- **notebook**
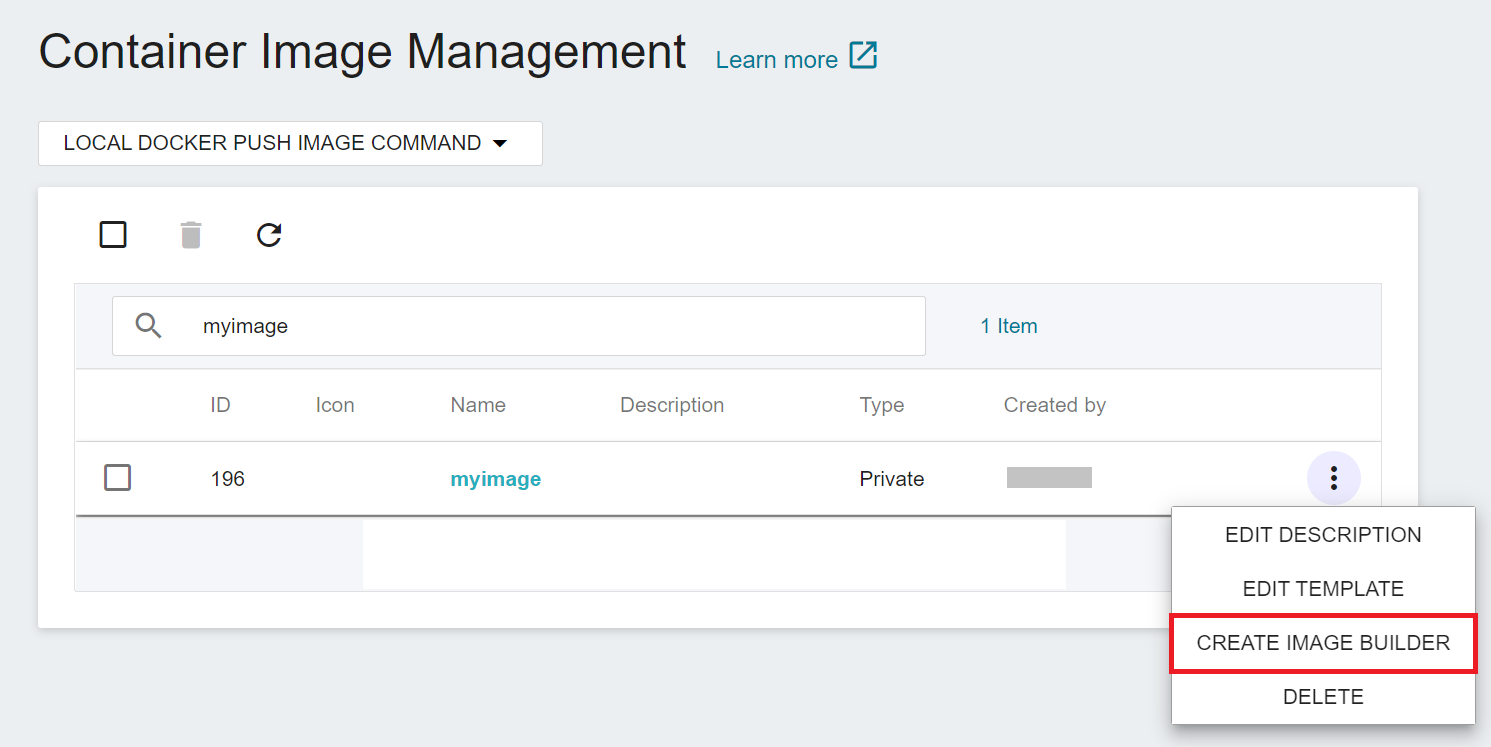
### Create Image Builder
Move your mouse to the more options button on the right side of the Container Image Management page or the tag management page and then click **CREATE IMAGE BUILDER**. The system will bring the image information you selected into the build settings of the **Image Builder**, which is convenient for you to customize based on this image . For the subsequent steps, please refer to the [**Image Builder**](/s/image-builder-en) user guide.

### Delete Container Image
* If the image is no longer needed, you can delete it to save system space.
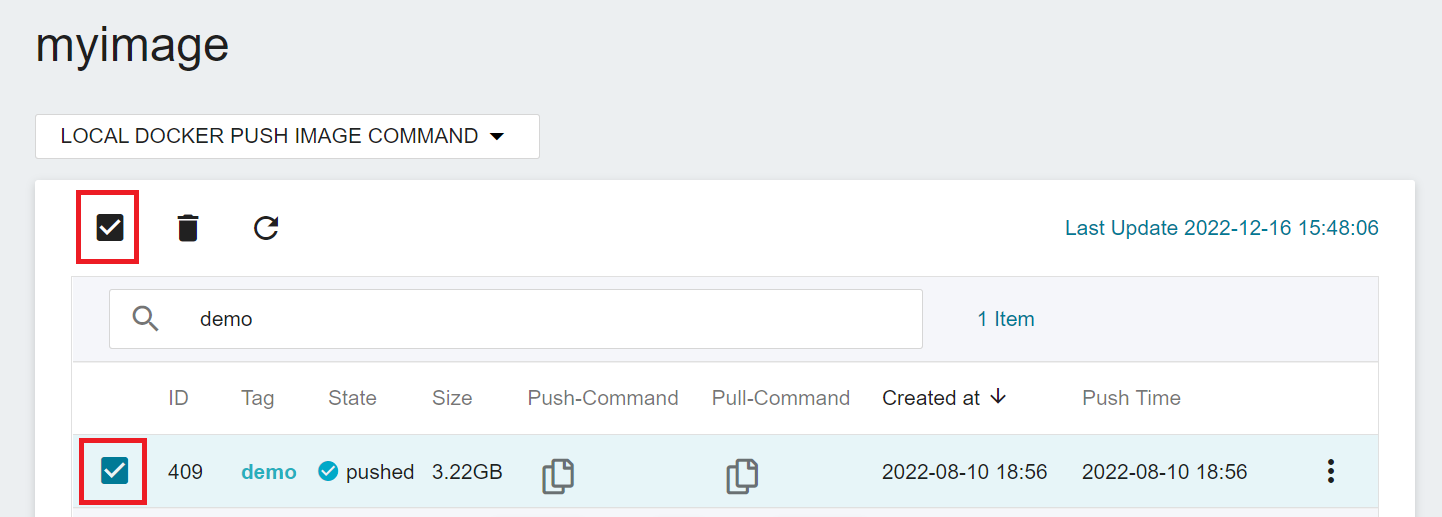
#### Delete Container Image with Specific Tags
* Go to the tag list page of the container image, select the tags to be deleted, and then click the **Delete** icon at the top.
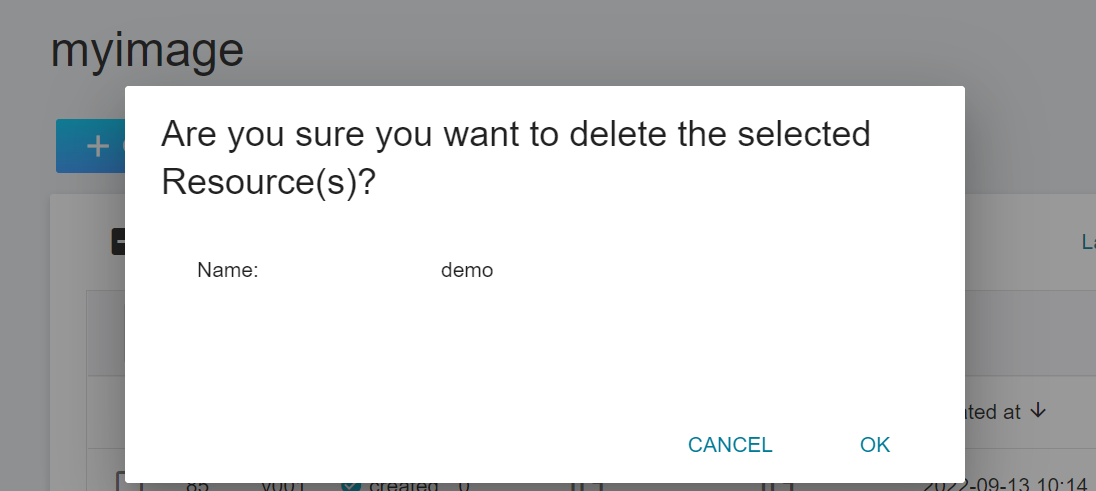
* Click **OK** when the confirmation window appears.
#### Delete the Entire Container Image
* Go to the Container Image Management page, move the mouse to the more options button on the right side of the container image, and then click **DELETE**. Note: The container image and all tagged container images under it will be deleted.

* Click **OK** when the confirmation window appears.
#### Replace Existing Container Image
* Go to the image tag list of the container image, click the Copy icon below Push-Command to get the content of the Push-Command.
* Similar to the steps for uploading an image, execute the copied Push-Command command in the terminal window to upload and replace the container image with the same tag.
```
docker push registry2.twcc.ai/{Project ID}/myimage:v001
```
## Customized Image Usage Scenarios
### Add the Required Tools to the Image
In a real-world scenario, no matter where you get the image, you may need to add the required tools or packages to the image. Below is how to install vim, wget, and curl tools by writing Dockerfile based on the private container image of this system, please modify it according to your needs.
* First, select **Container Image** from the OneAI service list, and click the base image to be used in the list of the container image management page.
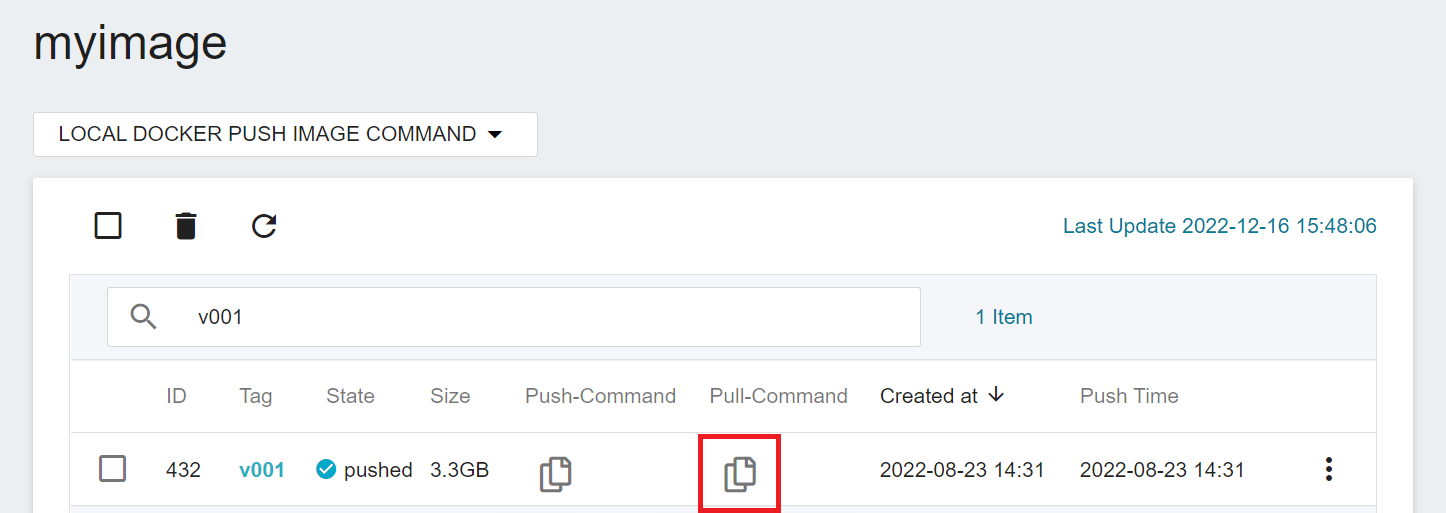
* In the list of image tags to be selected, click the copy icon under **Pull-Command** to get the command docker pull to download this image and the Repository:Tag of this image.
* Paste the copied content in a text editor, for example:
```
docker pull registry2.twcc.ai/{Project ID}/myimage:v001
```
* Then copy the Repository:Tag after the docker pull command as the base image used in writing the Dockerfile, for example: ```registry2.twcc.ai/{Project ID}/myimage:v001```.
* The Dockerfile starts with the **FROM** instruction, and then a read-only layer is created based on the definition of each line, which will be overlaid with the write layer when the container is started. Therefore, it is recommended to delete unnecessary data in each layer as much as possible to reduce the image size.
:::info
:bulb: **Tips:** For an in-depth look at Dockerfile writing, see the official [**Docker Documentation: Best practices for writing Dockerfiles**](https://docs.docker.com/develop/develop-images/dockerfile_best-practices/).
:::
* The following Dockerfile example uses the system's private container image and then installs the vim, wget, and curl tools, you can modify it according to your needs.
```
# base image
FROM registry2.twcc.ai/{Project ID}/myimage:v001
# install tools
RUN apt update \
&& apt install -yq --no-install-recommends \
vim \
wget \
curl \
&& rm -rf /var/lib/apt/lists/* /tmp/* /var/tmp/* \
&& rm -rf /var/cache/apt/archives/* \
&& apt autoclean \
&& apt clean
```
* Because the source of the base image for this example is the system's image repository, you need to log in before you can perform subsequent operations. Please enter the complete login command in a terminal window:
```
$ docker login registry2.twcc.ai
```
* Then enter your TWCC host account and password. After successful login, a **Login Succeeded** message will appear on the screen.
```
$ docker login registry2.twcc.ai
Username:
Password:
...
Login Succeeded
```
* Please refer to [**1.2 Use Dockerfile to Create An Image**](#12-Use-Dockerfile-to-Create-An-Image) for further instructions on creating and uploading a custom image.