---
title: Job Scheduling Service
description: OneAI Documentation
tags: EN
---
[OneAI Documentation](/s/user-guide-en)
# Job Scheduling Service
Job Scheduling Service can start and execute one-time computing jobs according to your requirements, or specify the job execution time or execution cycle according to the schedule. After the job is executed, the resources are released immediately to improve system operation efficiency.
:::info
:bulb: **Tips:** To ensure smooth execution of your scheduled jobs, it is recommended to use [**Container Service**](/s/container-service-en) to confirm that the program can be successfully executed, and then use this service to execute the job.
:::
## Create a Job Scheduling Service
Select **Job Scheduling Service** from the OneAI Services Menu to enter the **Job Scheduling Service Management** page, then click **+ CREATE**.
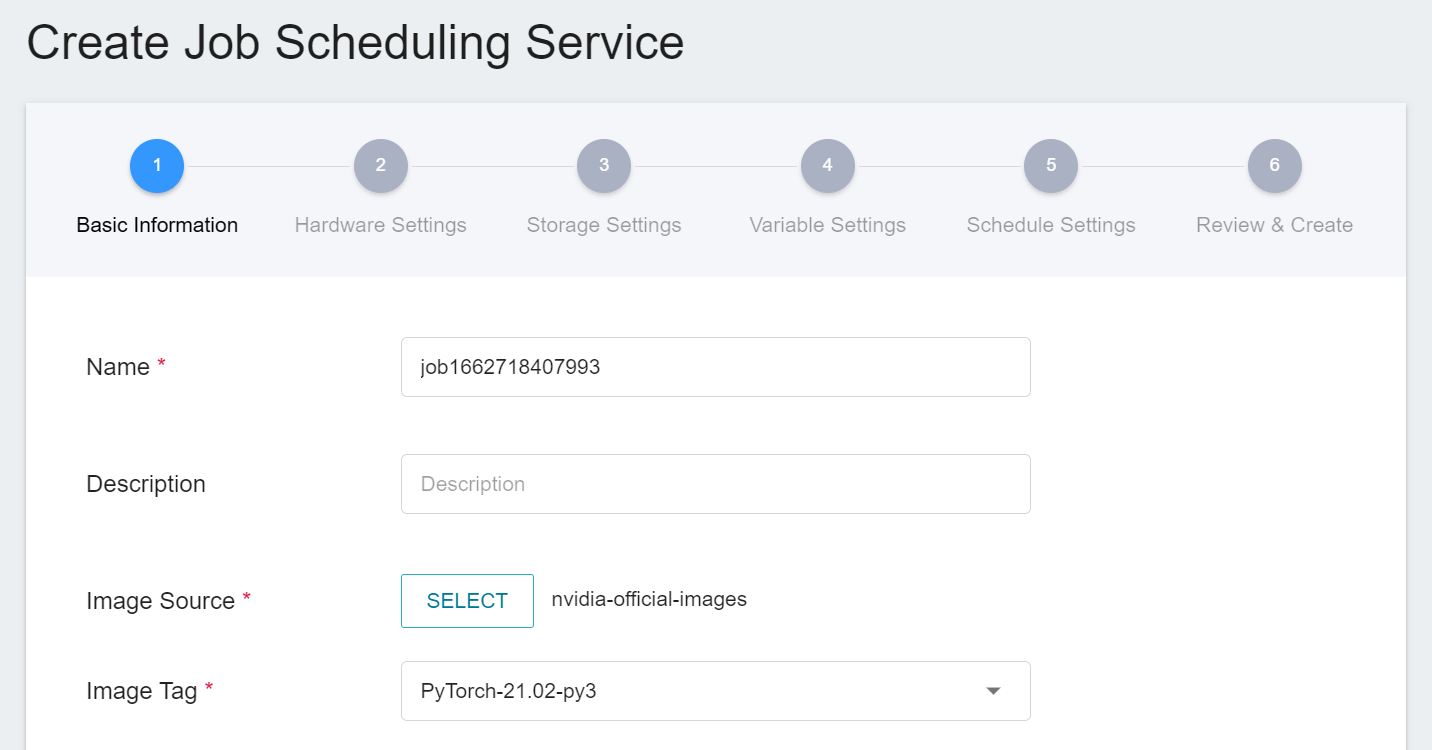
#### 1. Basic Information
* Enter the name and description of the Job Scheduling Service and select an image, then click **NEXT: HARDWARE SETTINGS >**.
:::info
:bulb: **Tips:** There are two types of image sources, **Public** and **Private**:
* **Public Images**: Built in by the system or uploaded by the system administrator and can be used in different projects, see [**Public Images**](/s/public-image-en) descriptions.
* **Private Images**: Uploaded by project members and can only be used within the same project, see [**Container Image**](/s/container-image-en) descriptions.
:::
#### 2. Hardware Settings
* Select the suitable Hardware Settings configuration according to your computing requirements. You can also click **View Available Quota** to view the current resource quota and usage of the system and your project, and then click **NEXT: STORAGE SETTINGS >**.
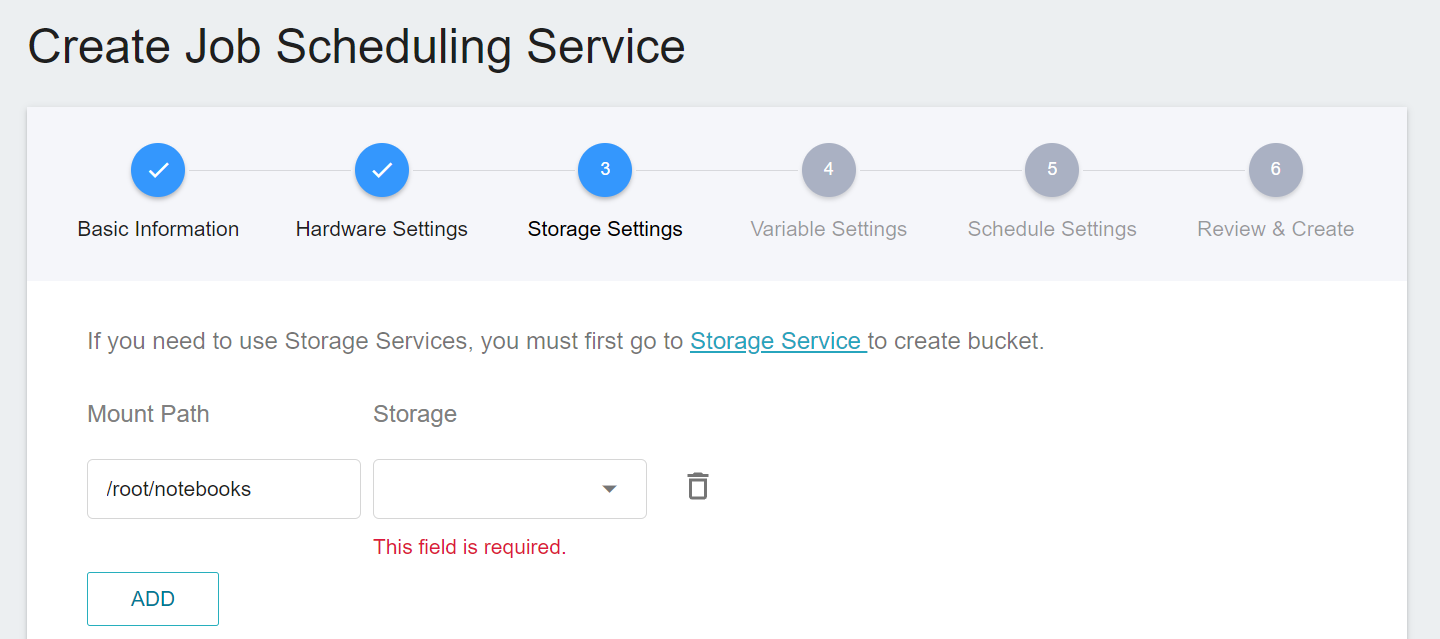
#### 3. Storage Settings
* This step will set the **Bucket** to be mounted. You can upload the program or data to the bucket in [**Storage Service**](/s/storage-en) in advance, and then mount the bucket when using various services of this system. The same bucket can be mounted to different services at the same time, making it easy to share data between services or collaborate with other project members. When the service is stopped or deleted, the data of the bucket will not disappear.
* The default information on the Storage Settings page will vary depending on the selected image. Below is an example using **nvidia-official-images**. If you do not need to use it you can click the **Delete** icon to remove it, or click **ADD** to mount it. Please modify according to your needs.
* When you are done, click **NEXT: VARIABLE SETTINGS >**.
:::info
:bulb: **Tips:** Please upload the program or data to OneAI **Storage Service** in advance. Different **Public Images** may have different default **Mount Path**. For more information on default Storage Settings for Public Images, please refer to the [**Container Service > Storage Settings**](/s/container-service-en#3-Storage-Settings) descriptions.
:::
#### 4. Variable Settings
* Set environment variables and commands to dynamically adjust application settings or commands to be executed to meet your development or computing environment needs. The default information on the Variable Settings page will vary according to the selected image. If the image you selected has default variable settings, they will automatically be shown in this page, and you can modify or delete them as needed.
- Environment Variables: Set environment variables, for example, you can set the JupyterLab login password as an environment variable.
- Command: Set the command or program to be executed, such as `python train.py`. Please note that the path setting of the program is related to the mount path set in the previous [**Storage Settings**](#3-Storage-Settings).
* The default settings for different public images are listed below:
- **nvidia-official-images**: This image sets the default login password for **Jupyter** and **SSH** services as an environment variable, but users can delete it or ignore it because Job Scheduling Service does not support connection feature.
- **notebook**: This image sets the default mount path of Jupyter service **/workspace** to **`NOTEBOOK_FOLDER`** environment variable, but users can delete it or ignore it because Job Scheduling Service does not support Jupyter service.
- **AI Maker Case Study Images**: In addition to the previous two categories, the other public images are provided for [**AI Maker Case Study**](/s/user-guide-en#Case-Study). There are no default variable settings, and you can modify them according to your needs.
* When you are done, click **NEXT: SCHEDULING SETTINGS >**.
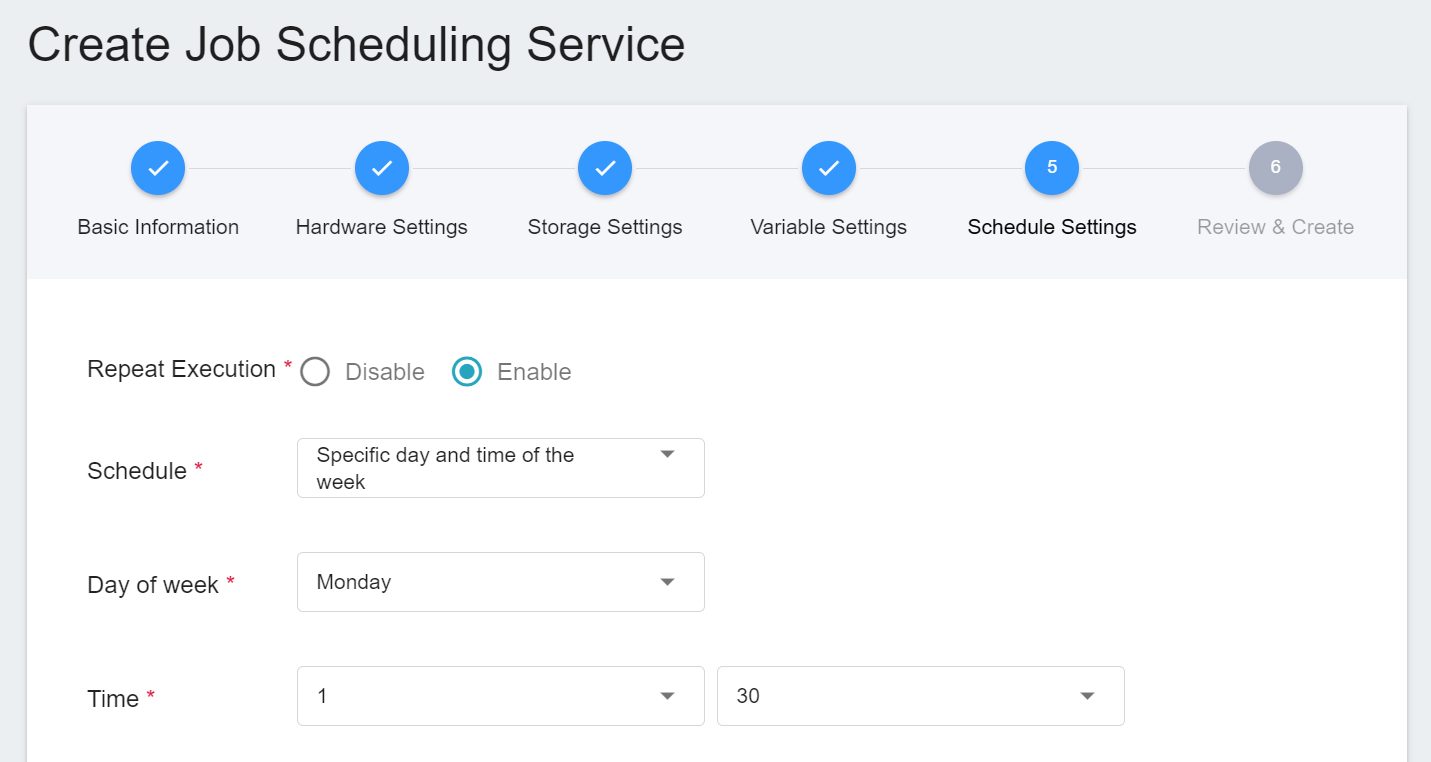
#### 5. Schedule Settings
* Set the execution schedule of the Job Scheduling Service, and then click **NEXT: REVIEW & CREATE >**.
- Repeat Execution: Select **Disable**, or **Enable** to repeat job execution.
* Schedule: Select **Specific time of day** or **Specific day and time of the week**.
* Day of week: Select the day of the week to repeat job execution.
* Time: Set the time to repeat job execution.
#### 6. Review & Create
* Check the creation information of the Job Scheduling Service, and then click **CREATE**.
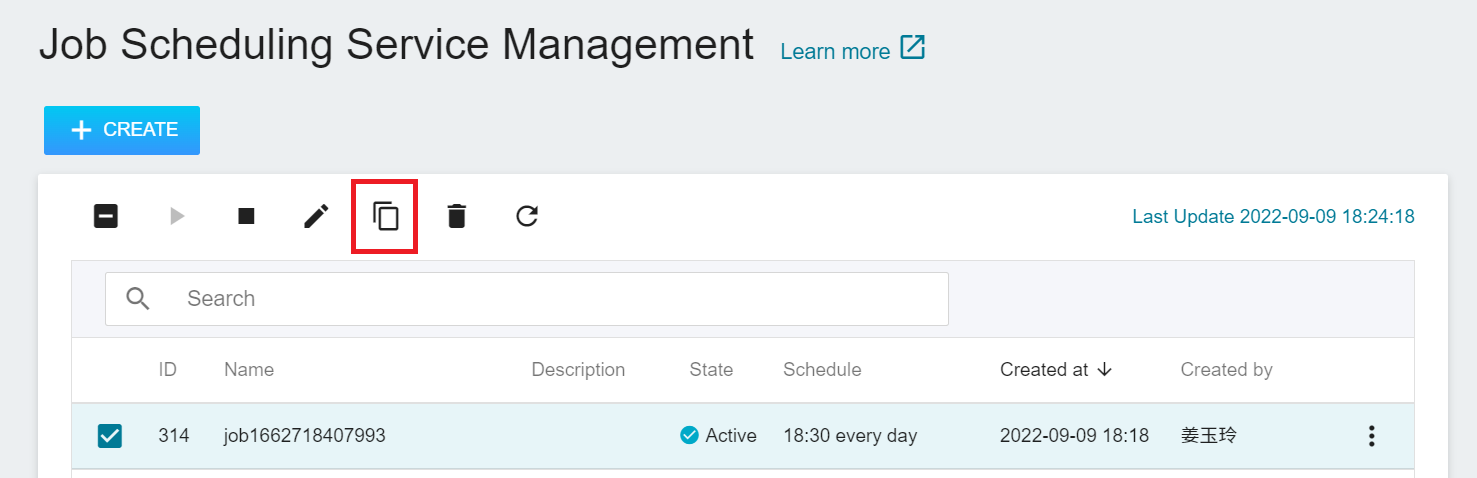
## Job Scheduling Service Management
* After the Job Scheduling Service is successfully created, it will appear on the list of the Job Scheduling Service Management page. The job state will be displayed as **`Active`**, and you can click the job you want to view in the job list to view the details.
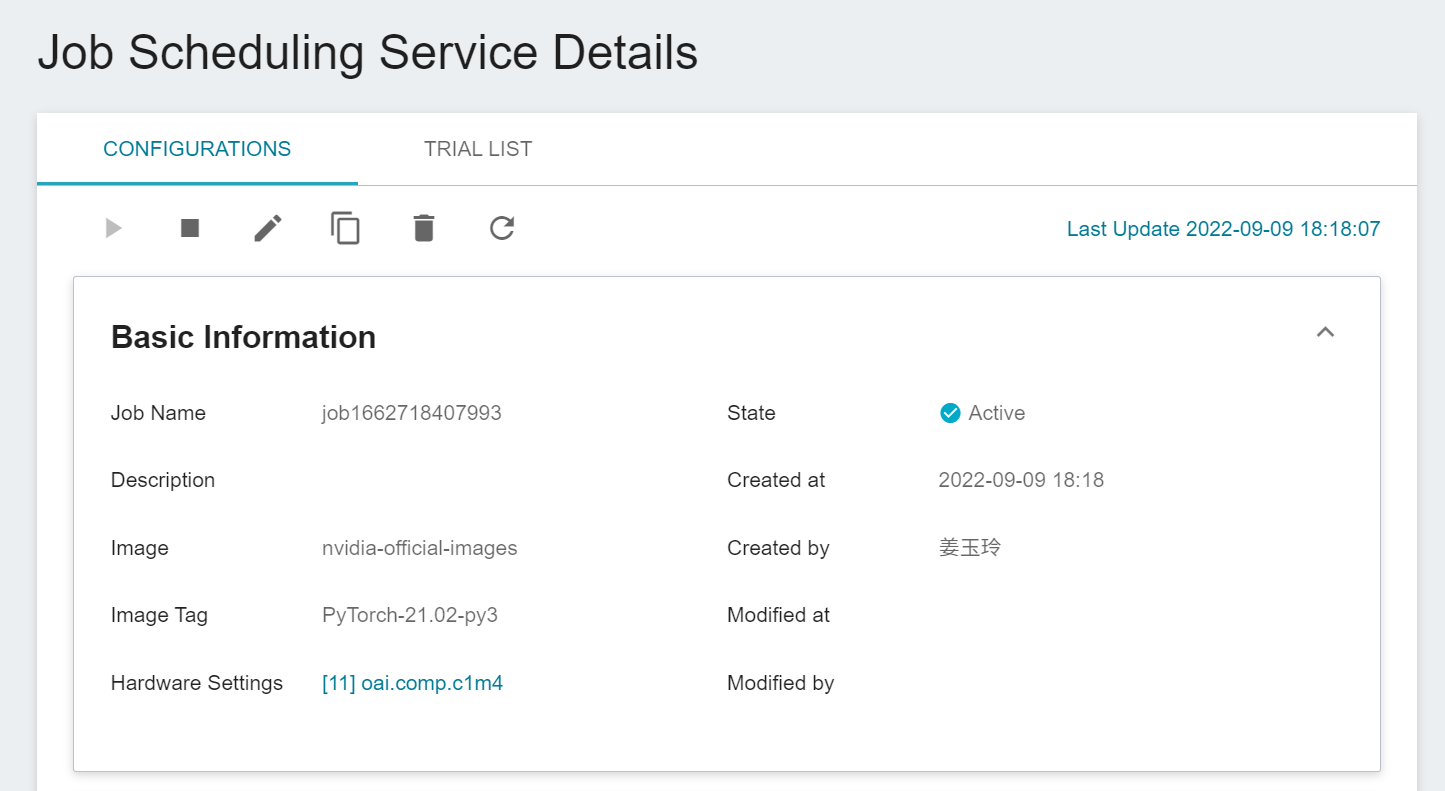
### Settings Information
* Enter the Job Scheduling Service Details page to view the settings information of the Job Scheduling Service. You can perform operations such as **Start**, **Stop**, **Edit**, **Copy**, **Delete** and **Refresh** through icons on the command bar above.
:::info
:bulb: **Tips:** Please refer to [**Service Status Description**](/s/rfvQ74z-e#Job-Scheduling-Service). If the service creation failed, it is recommended to use the [**Container Service**](/s/container-service-en) to confirm the environment settings and program can be executed successfully.
:::
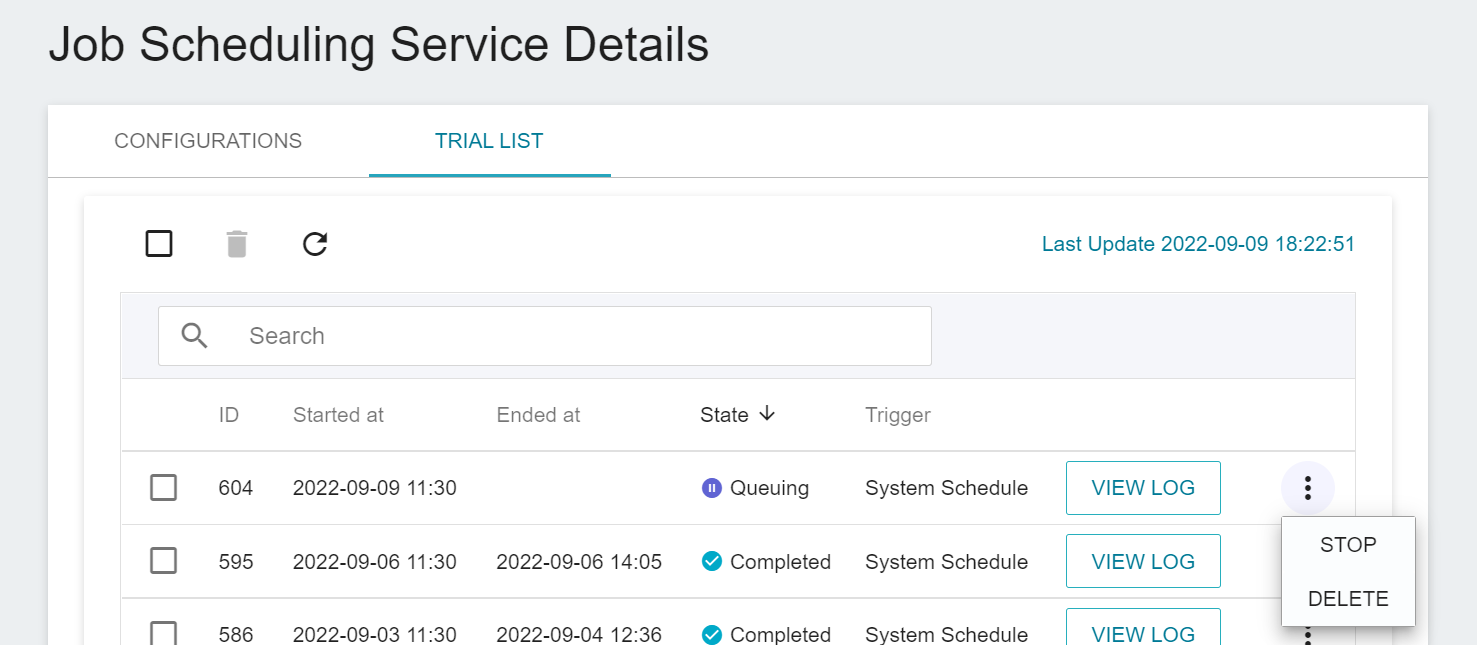
### Trial List
* Click the **TRIAL LIST** tab above to view the execution state of the job, including the start time, end time, job state and trigger member. Click **VIEW LOG** to view the job's log.
* Move the mouse to the More Options icon at the end of the Trial List, and you can choose to **STOP** or **DELETE**.
### Copy a Job Scheduling Service
* Select the Job Scheduling Service that you want to copy from the Job Scheduling Service Management list, then click the **Copy** icon from the command bar on the top, this will copy the settings of the Job Scheduling Service and you can then quickly modify it. The following steps are the same as creating a Job Scheduling Service.
:::info
:bulb: **Tips:** Whether the new copied Job Scheduling Service can be created successfully depends on the current usage of system resources.
:::