---
title: 儲存服務
description: OneAI 文件
---
[OneAI 文件](/s/user-guide)
# 儲存服務
儲存服務提供安全、可靠與 Amazon S3 相容之儲存服務,方便您將大量的資料存放在雲端,於 OneAI 的服務之間或與其他計畫成員分享資料。
## 儲存體管理
### 建立儲存體
* 從 OneAI 服務列表選擇「**儲存服務**」進入儲存服務管理頁面,接著點擊「**+建立**」。

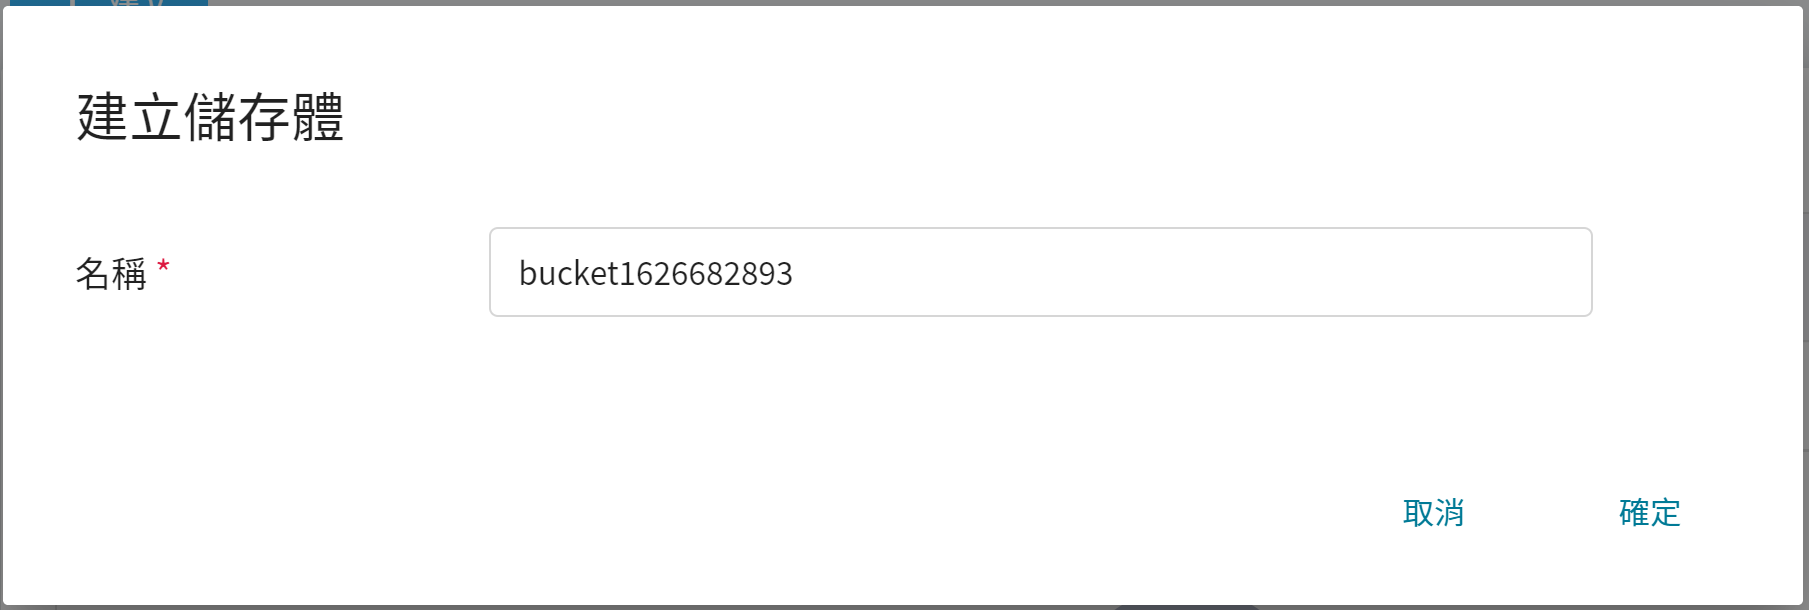
* 輸入儲存體名稱後按下「**確定**」。
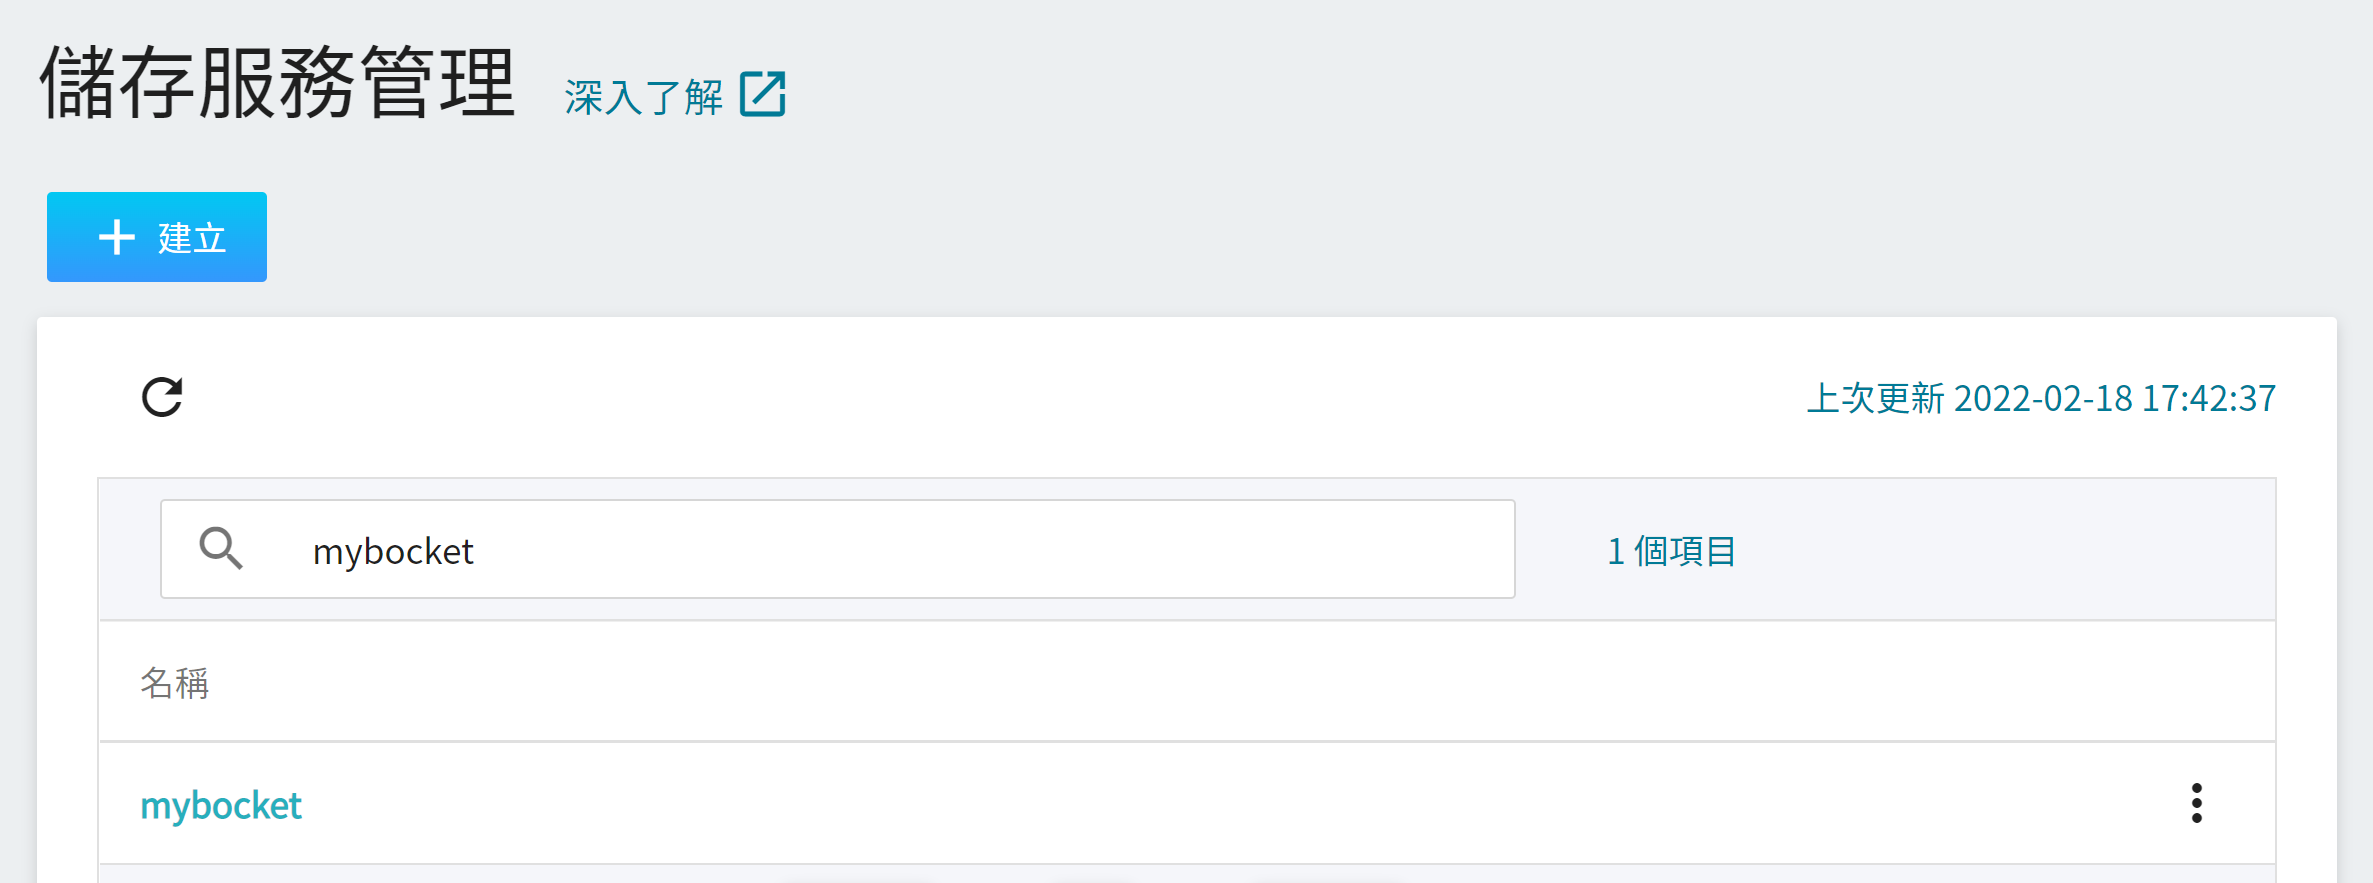
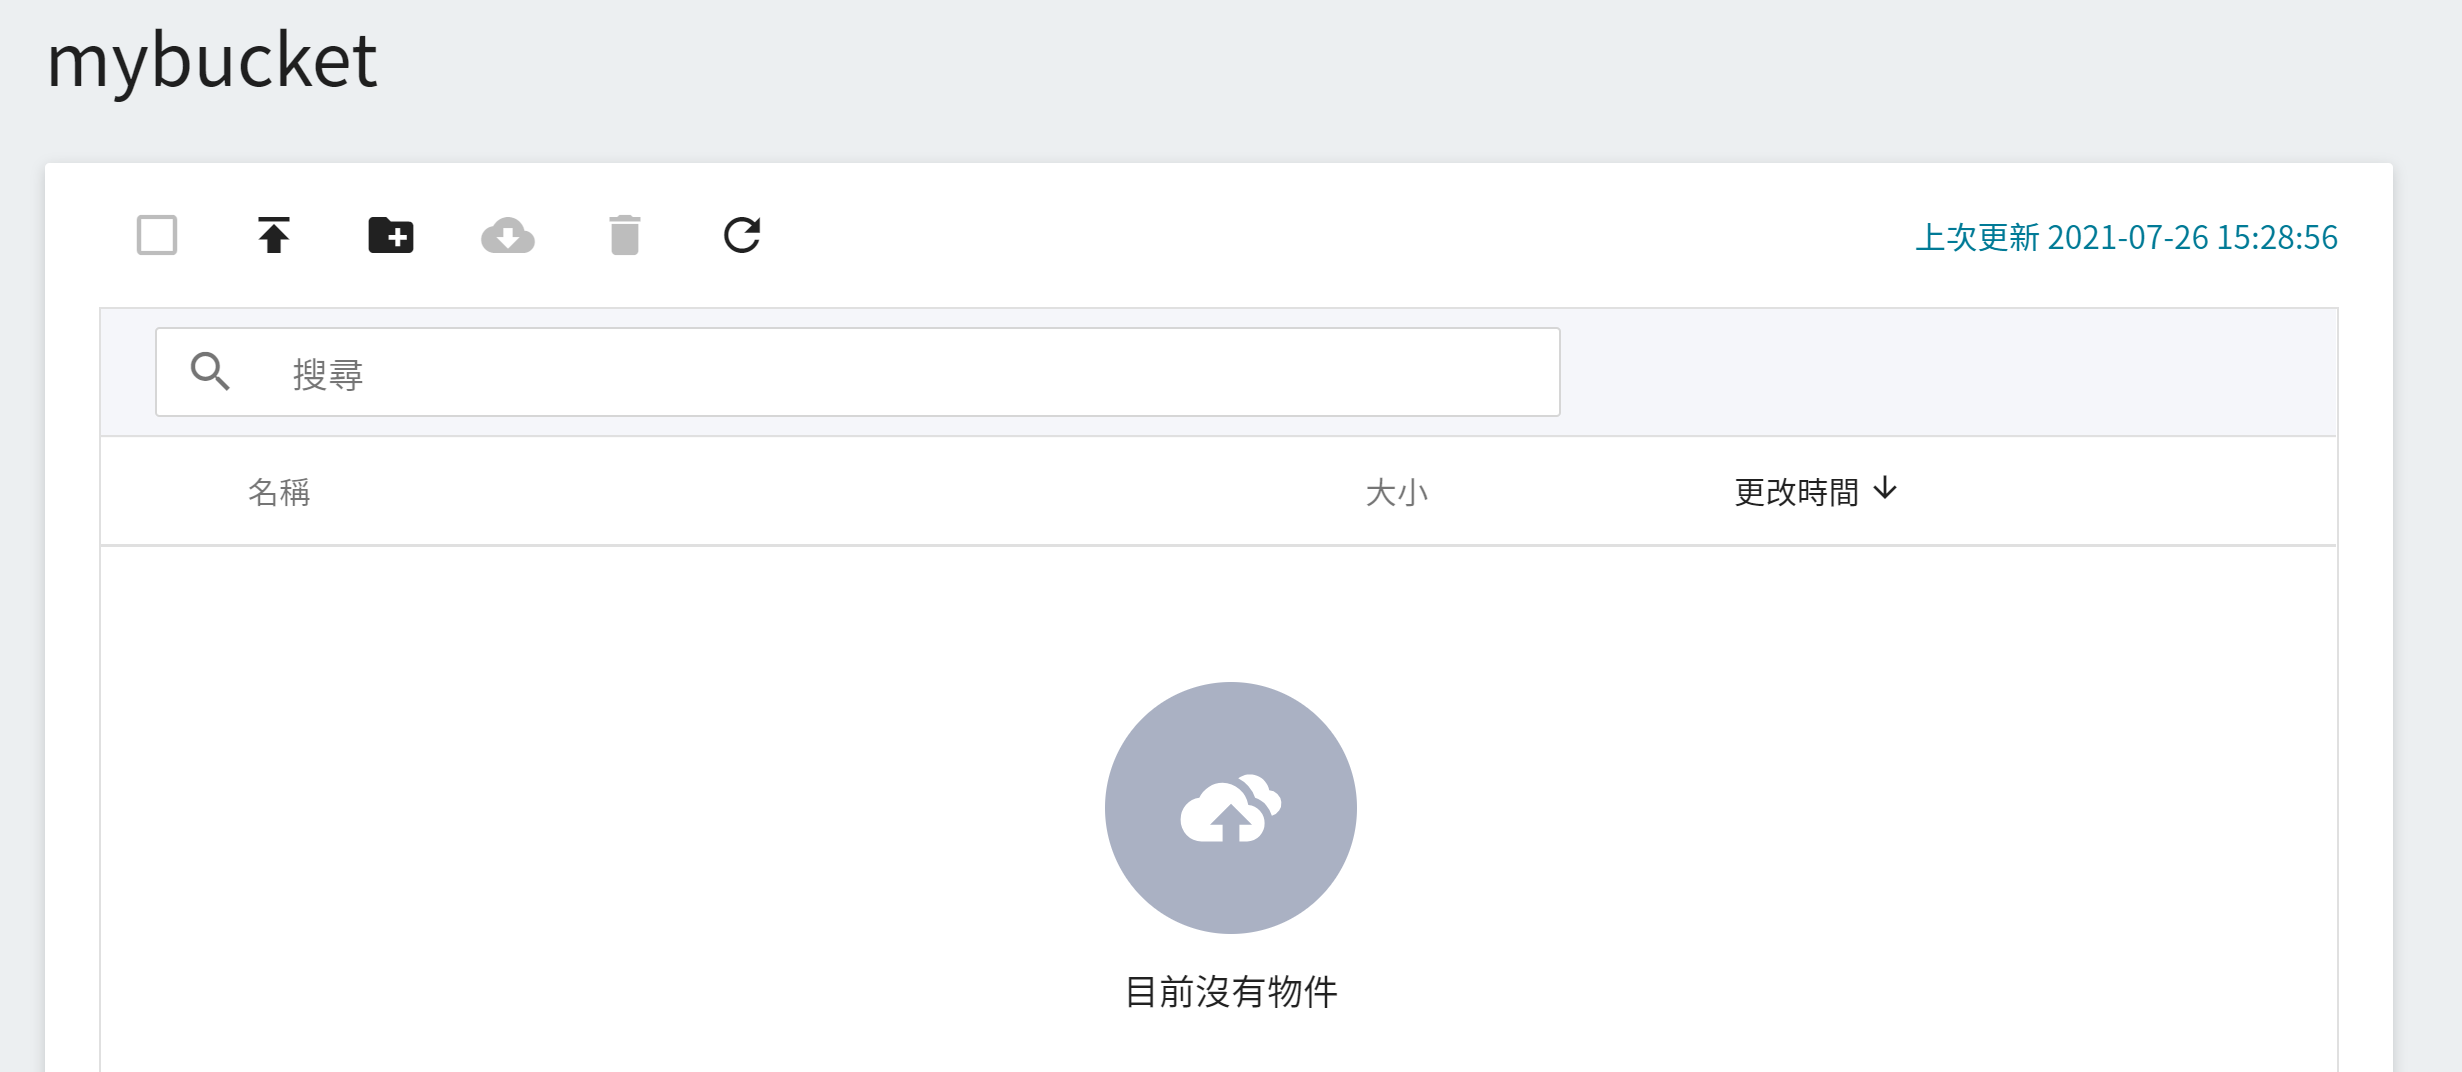
* 儲存體建立後會出現在「**儲存服務管理**」列表中,點擊該列表進入儲存體內容頁面即可開始使用。
### 删除儲存體
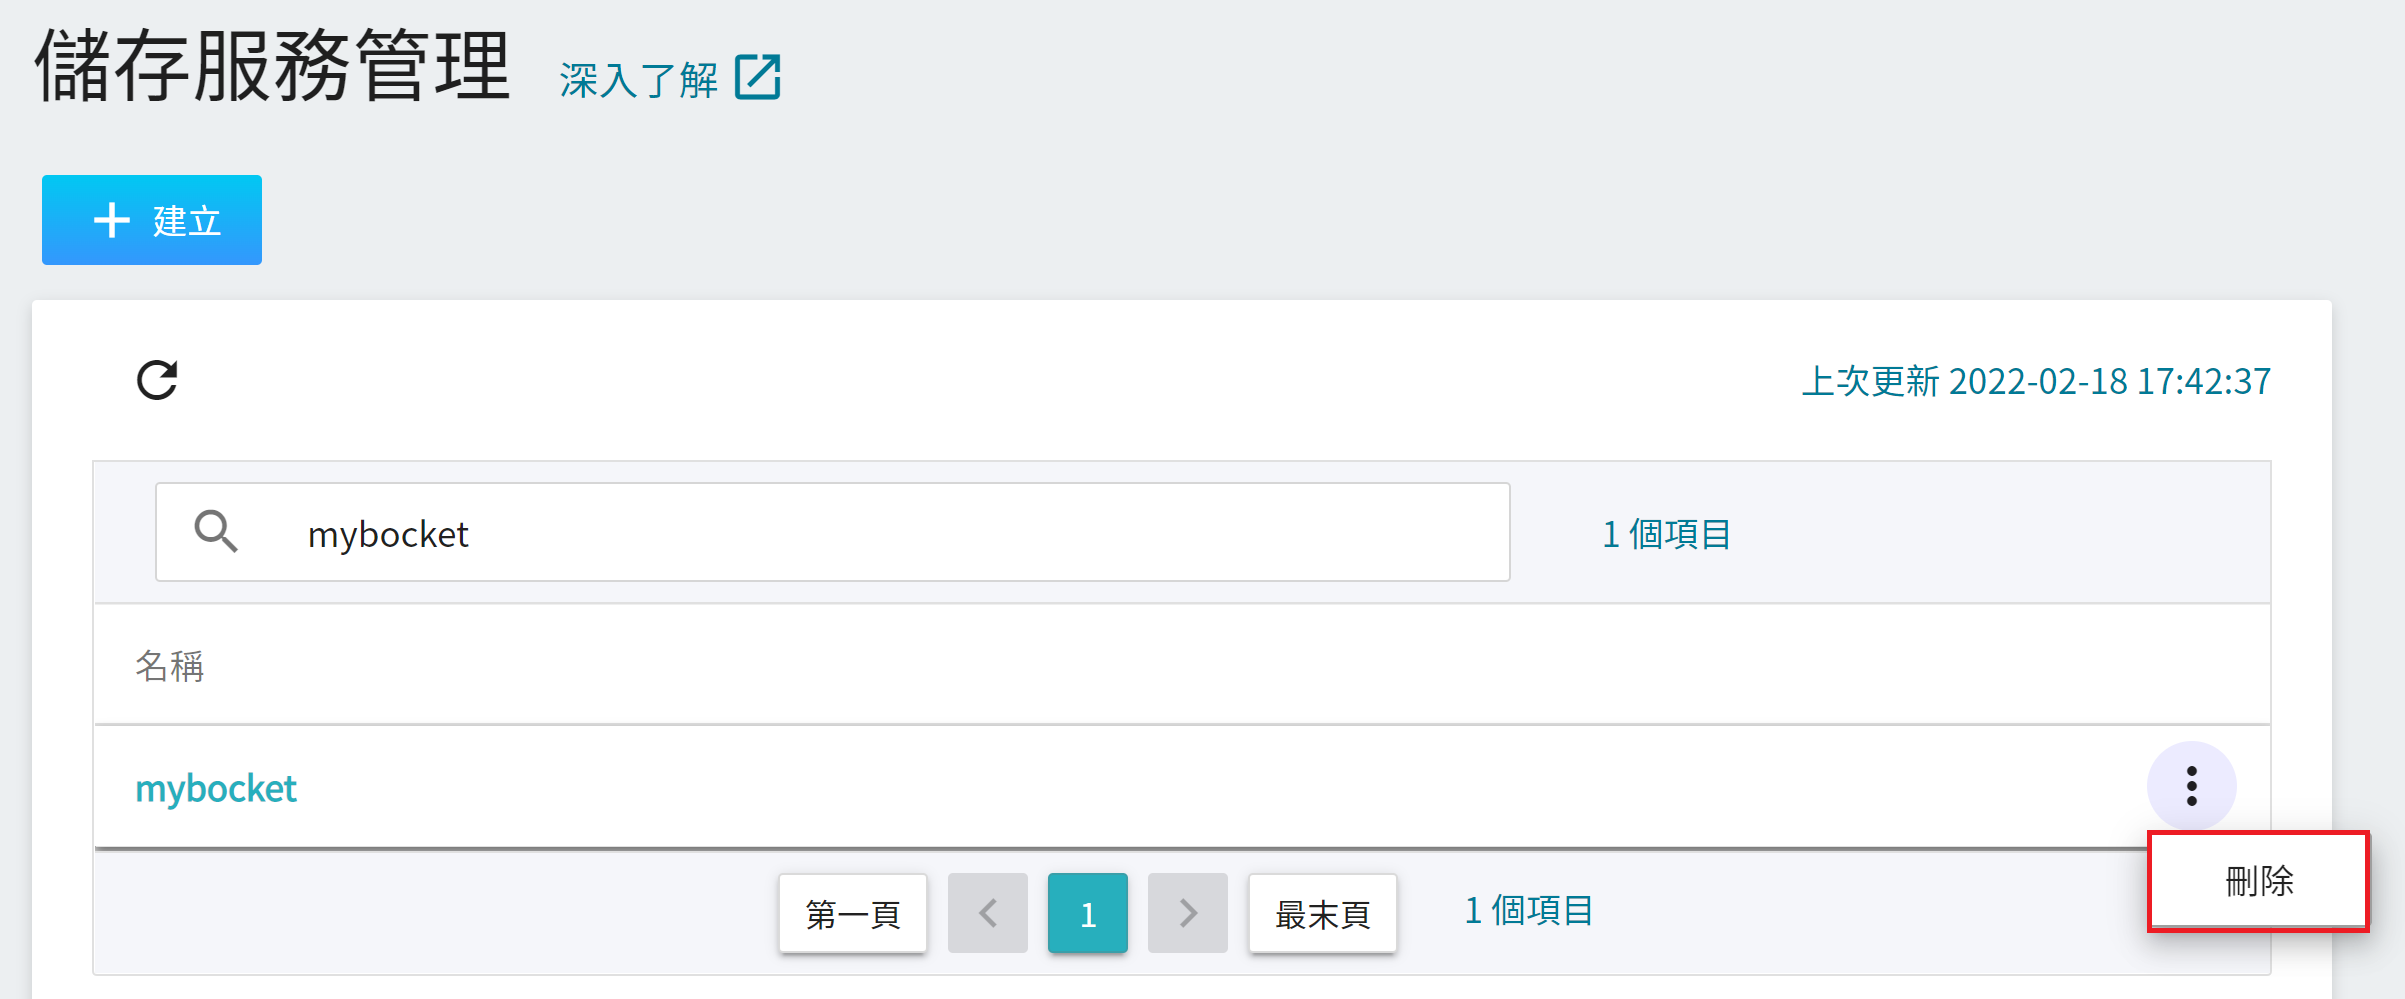
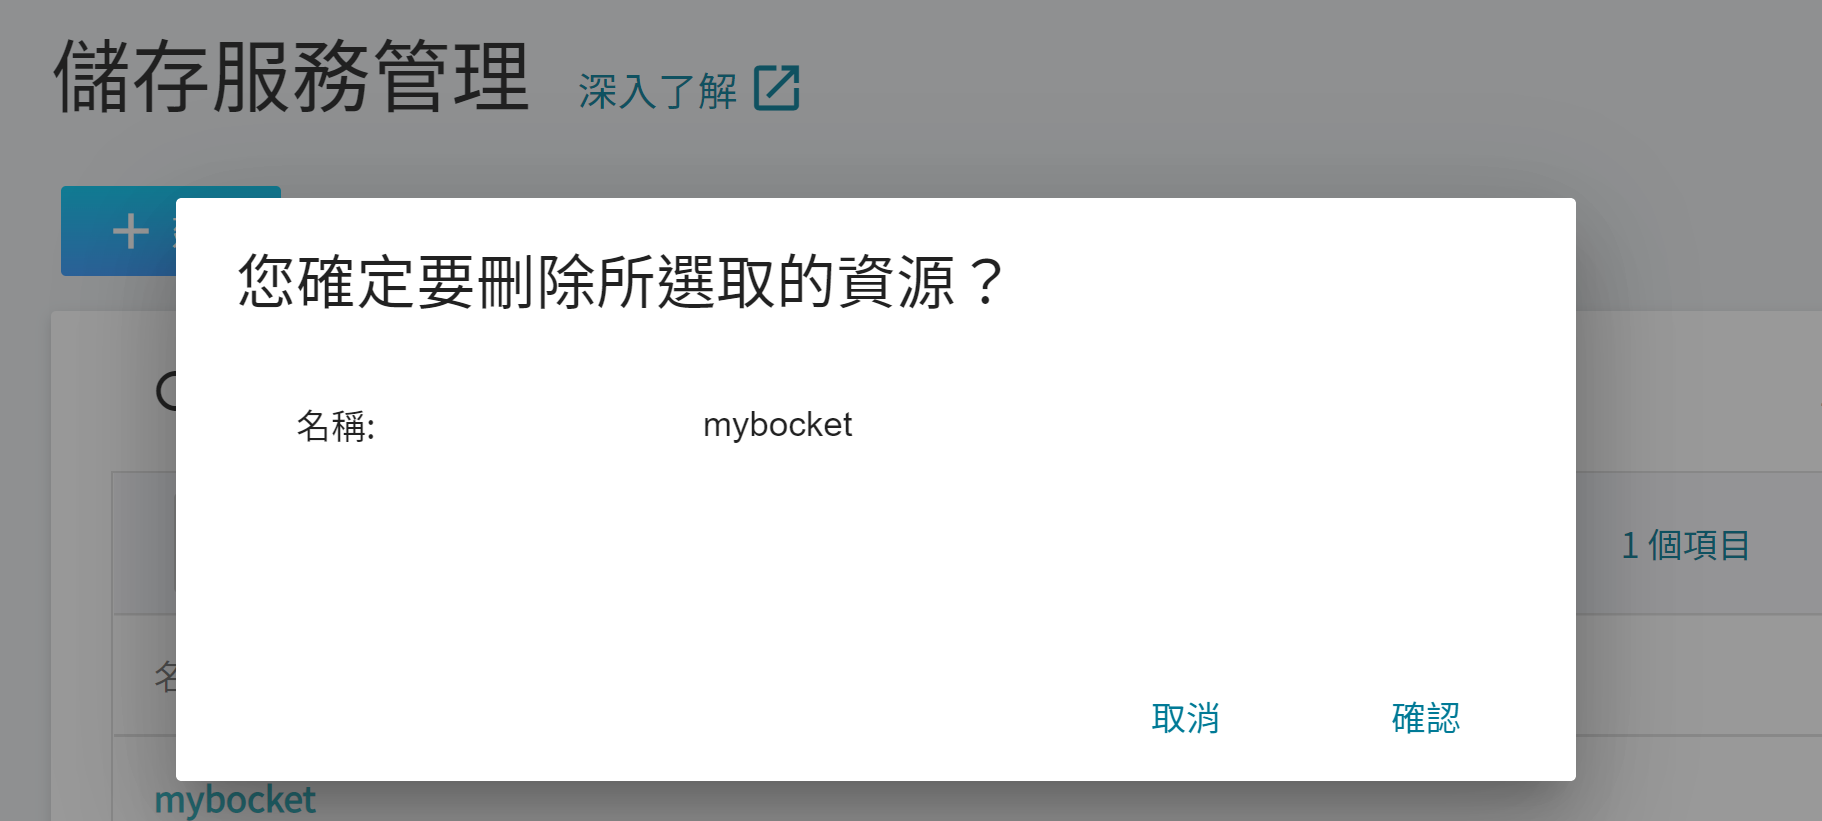
* 將滑鼠移至該儲存體列表後的更多選項圖示,再點擊「**刪除**」。
* 確認欲删除的儲存體名稱後點擊「**確認**」。
:::warning
:warning: **注意**:儲存體一旦删除,儲存體內所有的資料將會被全數删除,無法復原。專案內的儲存體為所有成員共用,任何修改或删除,都有可能影響群組內的使用者,請務必留意。
:::
## 檔案管理
### 上傳檔案
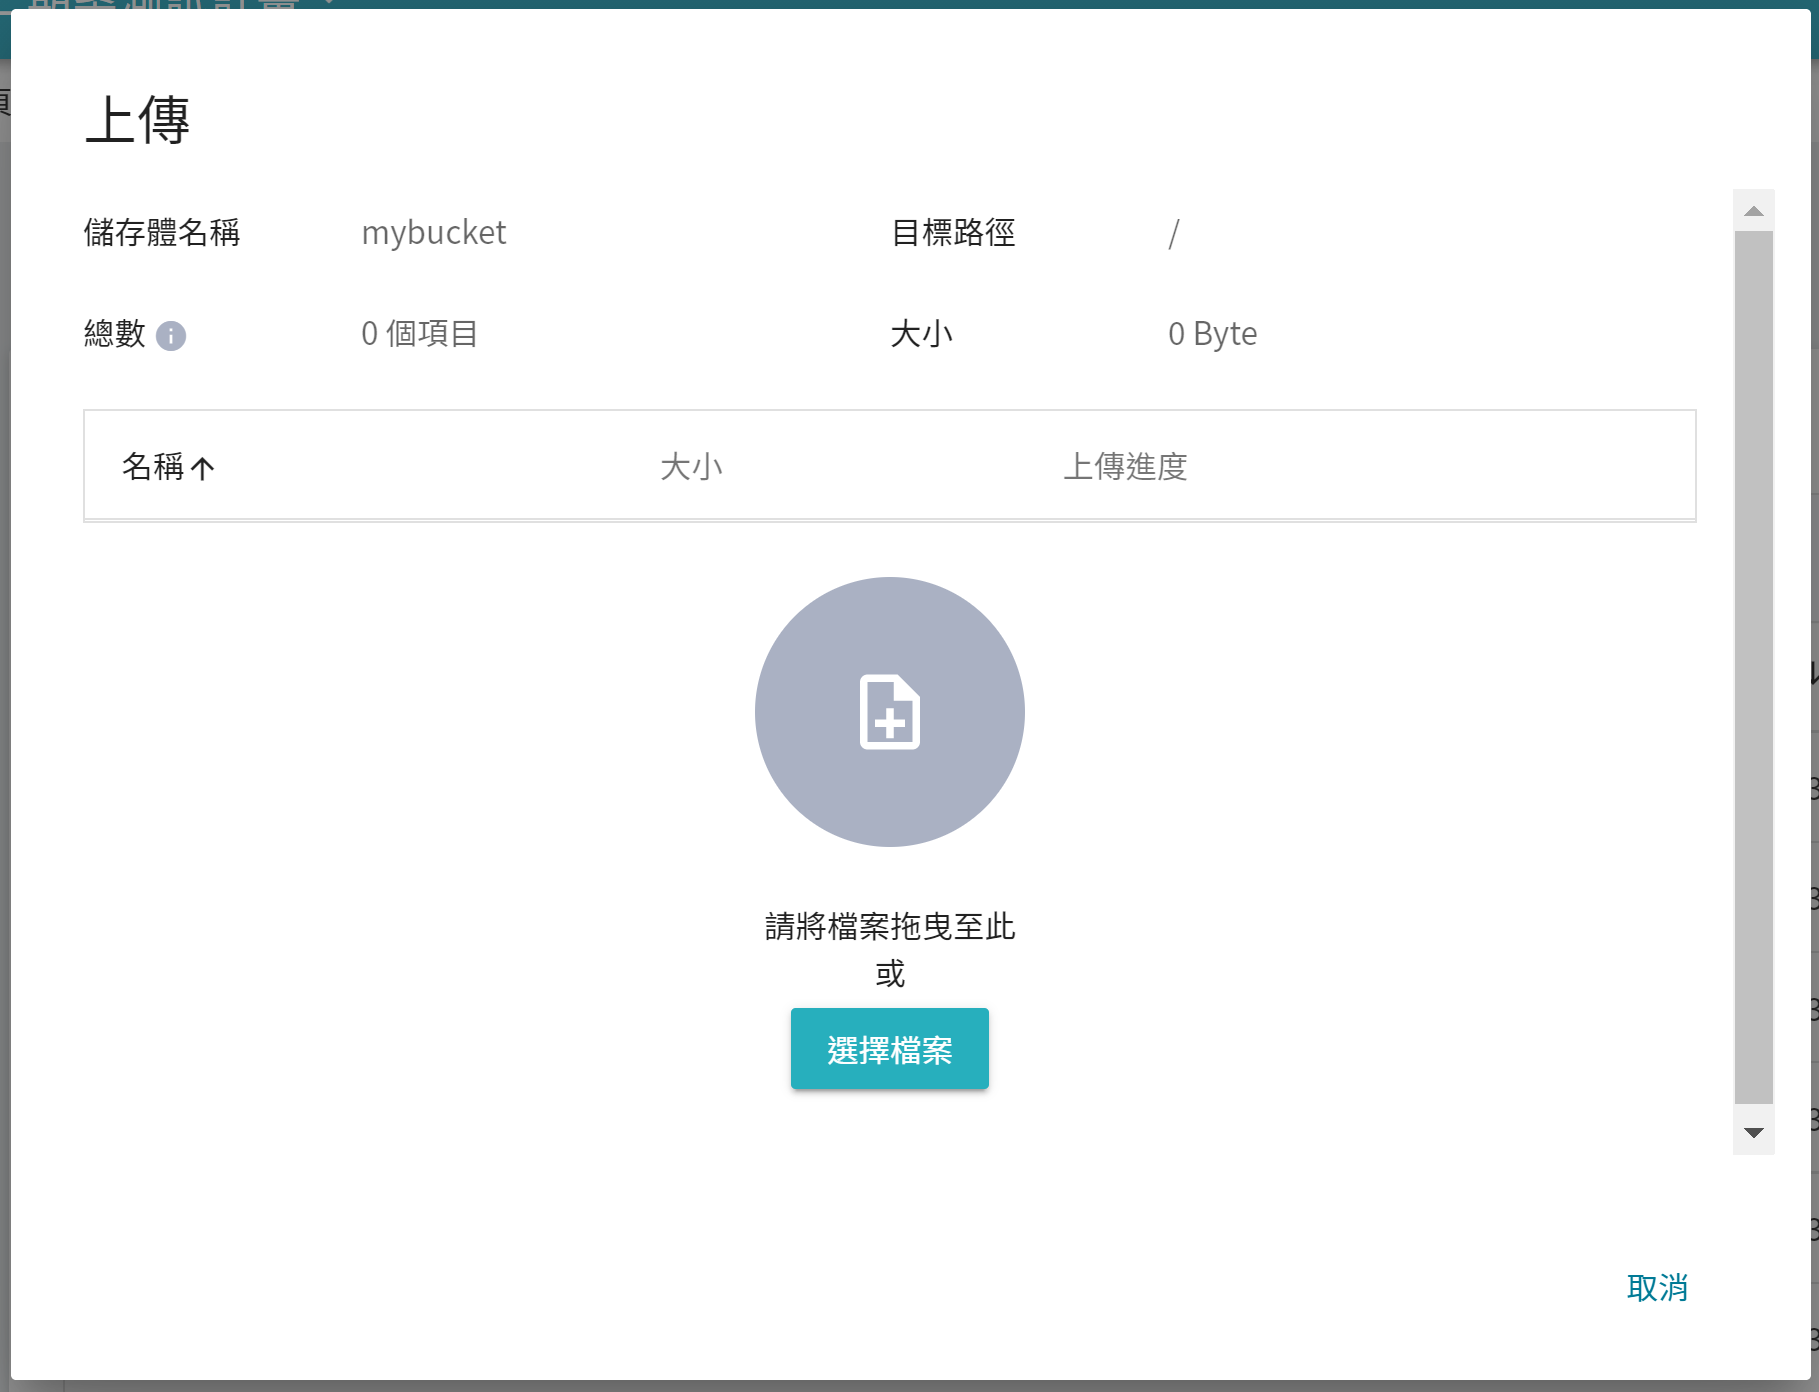
* 進入儲存體的內容列表,點擊上方命令列之上傳圖示。

* 出現「**上傳**」視窗後可以直接將檔案或資料夾拖曳至此,或點擊「**選擇檔案**」再選取欲上傳的檔案,選擇完成後再點擊「**上傳**」。
:::info
:bulb:**提示:** 如果要上傳大檔案或大量檔案,可透過第三方軟體如 [**S3 Browser**](#使用-S3-Browser)、[**Cyberduck**](#使用-cyberduck) 或 [**Rclone**](#使用-Rclone)。
:::
### 建立資料夾
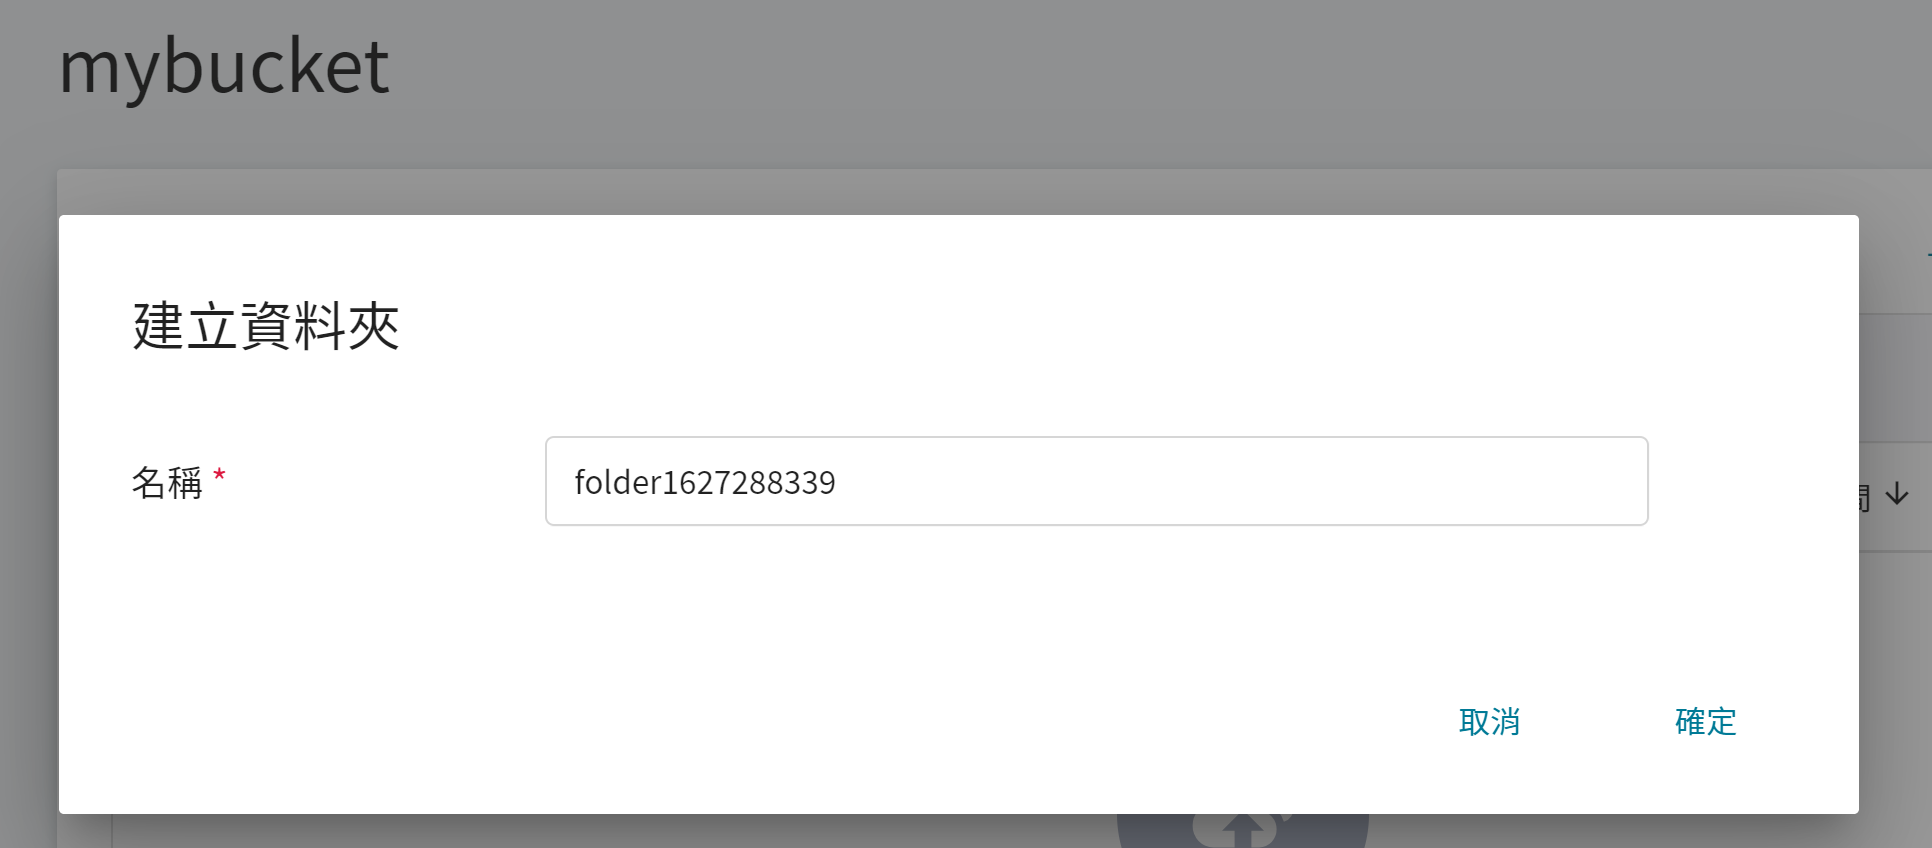
* 在儲存體的內容列表,點擊上方命令列之「**建立資料夾**」圖示。

* 輸入資料夾名稱後按下「**確定**」。
### 檢視檔案資訊
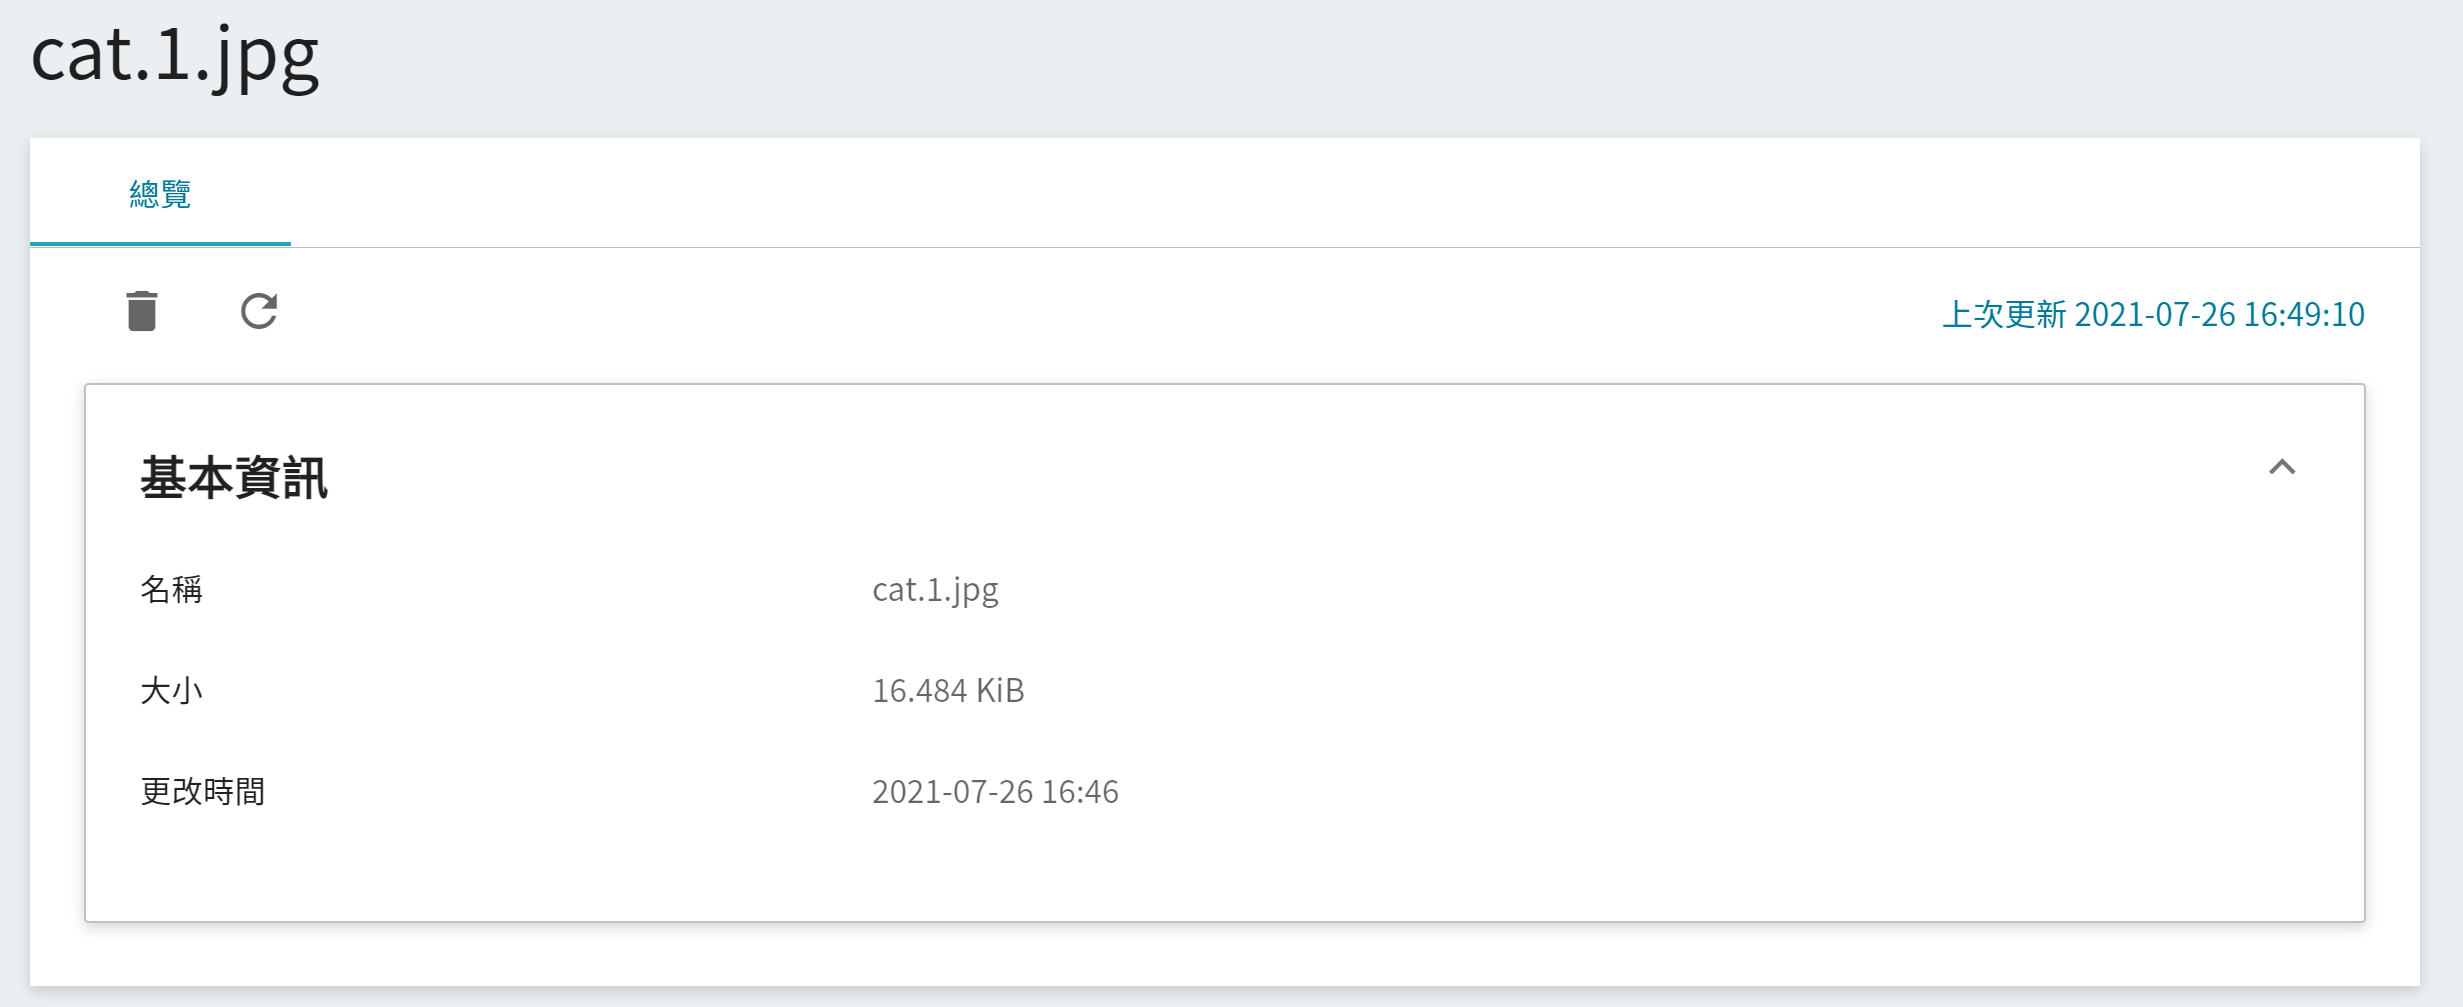
* 點擊欲查看的檔案列表,可檢視檔案的資訊。

### 搜尋檔案
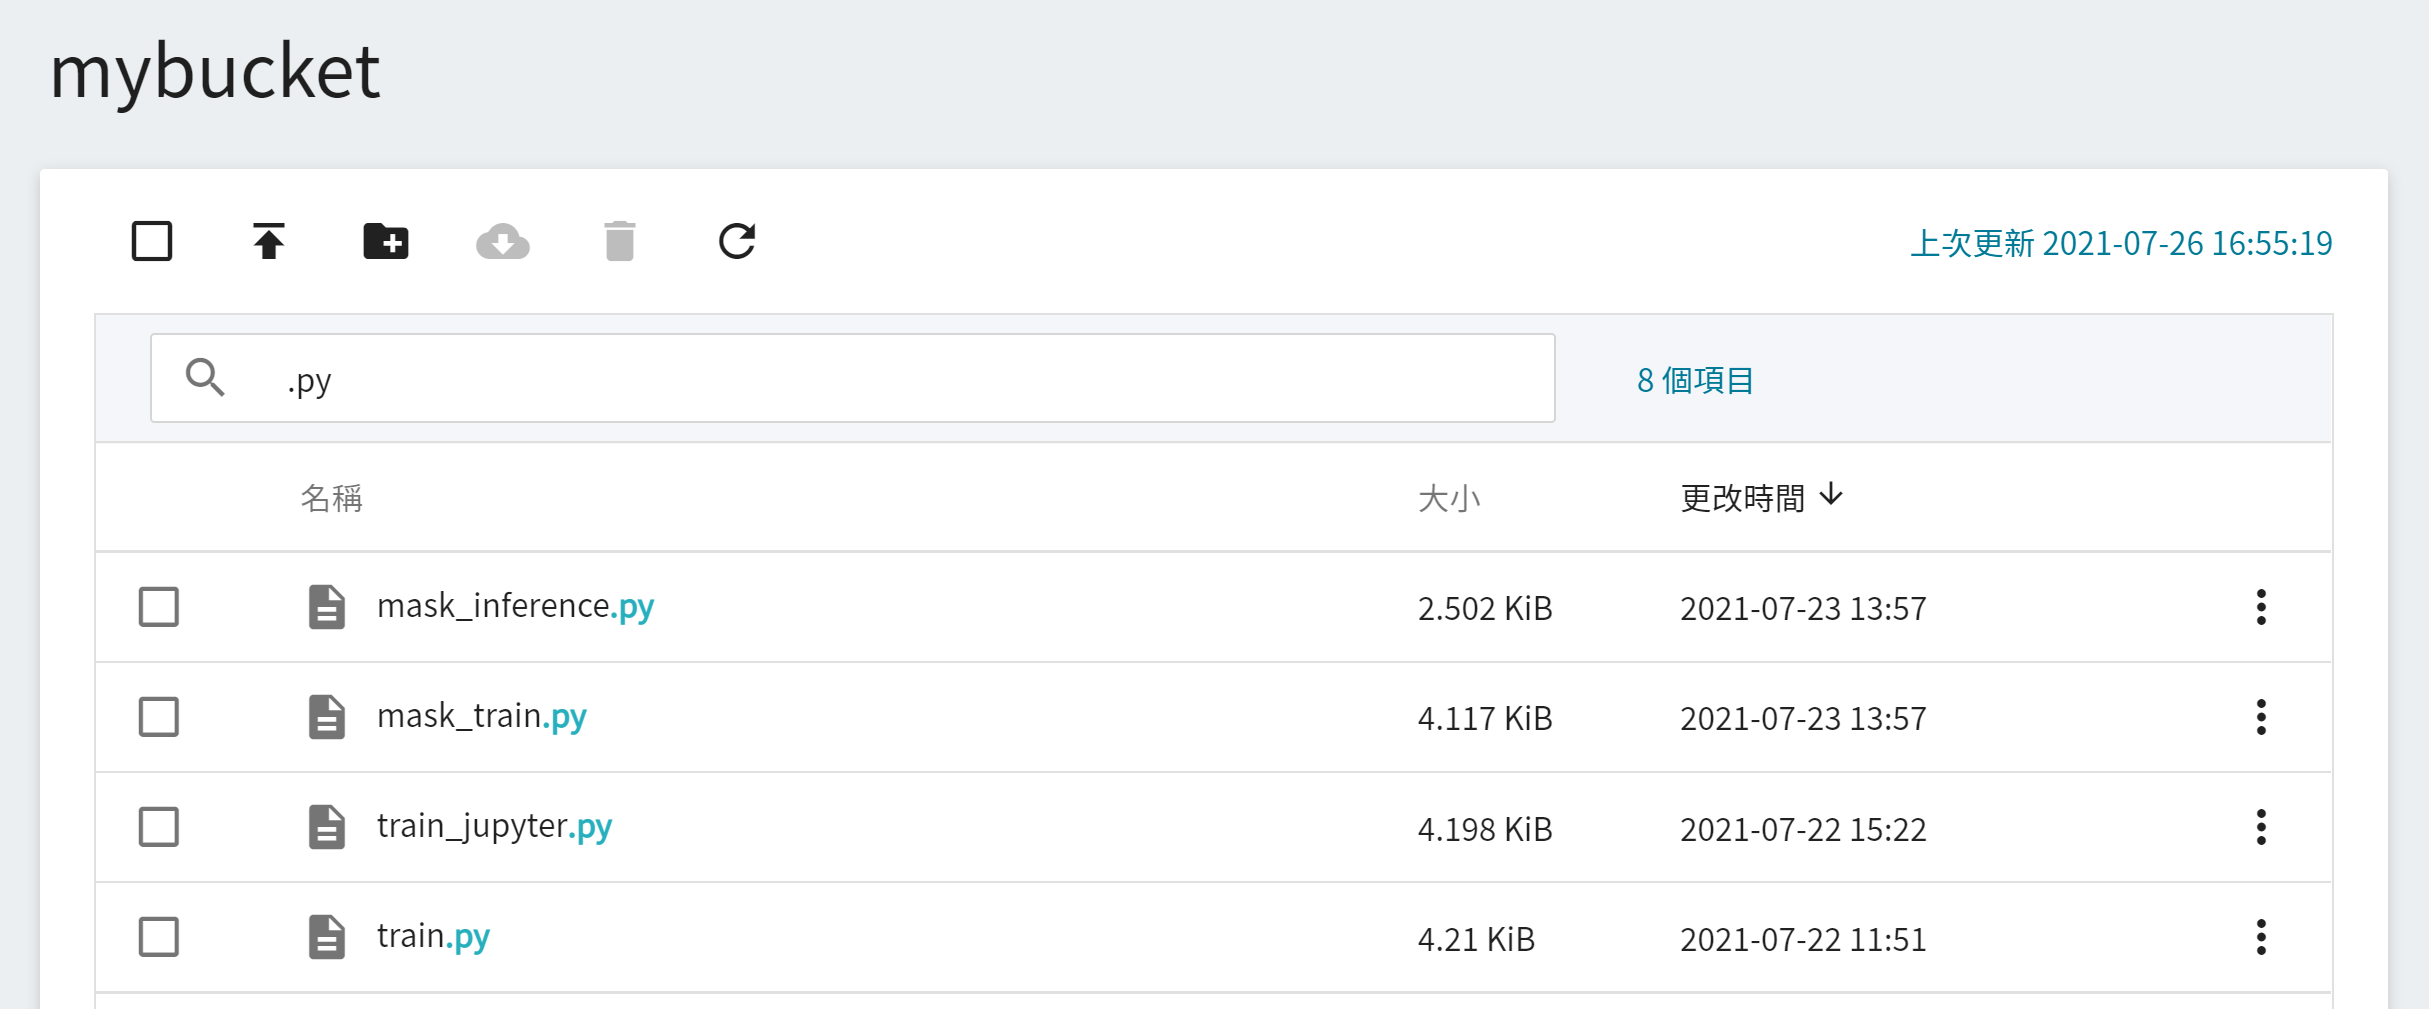
* 在搜尋框中輸入欲查詢的關鍵字,可篩選出符合條件的檔案。
### 下載檔案
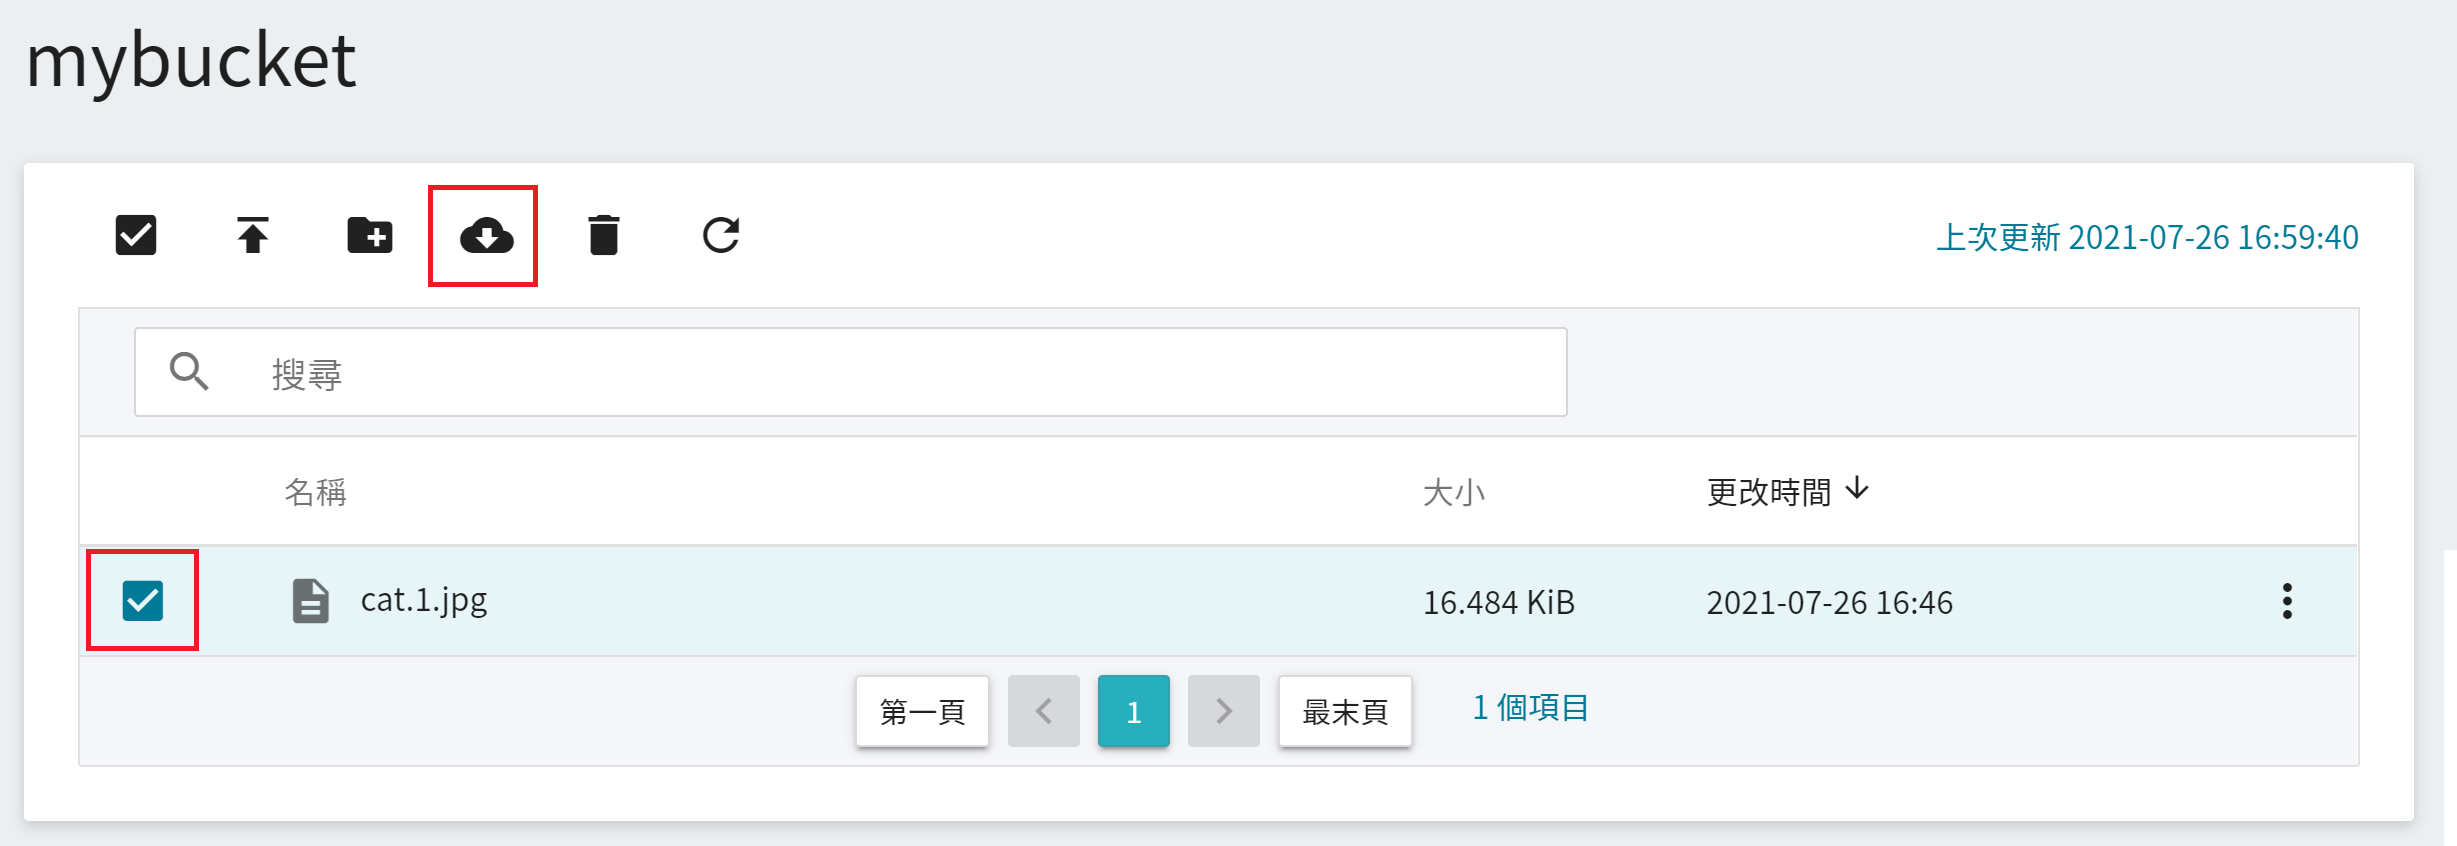
* 在儲存體的內容列表中,勾選欲下載的檔案,再點擊上方命令列之下載圖示。
:::info
:bulb:**提示:下載檔案限制**
目前一次僅能下載一個檔案,如果要一次下載多個檔案,可透過第三方軟體如 [**S3 Browser**](#使用-S3-Browser)、[**Cyberduck**](#使用-cyberduck) 或 [**Rclone**](#使用-Rclone)。
:::
### 刪除檔案
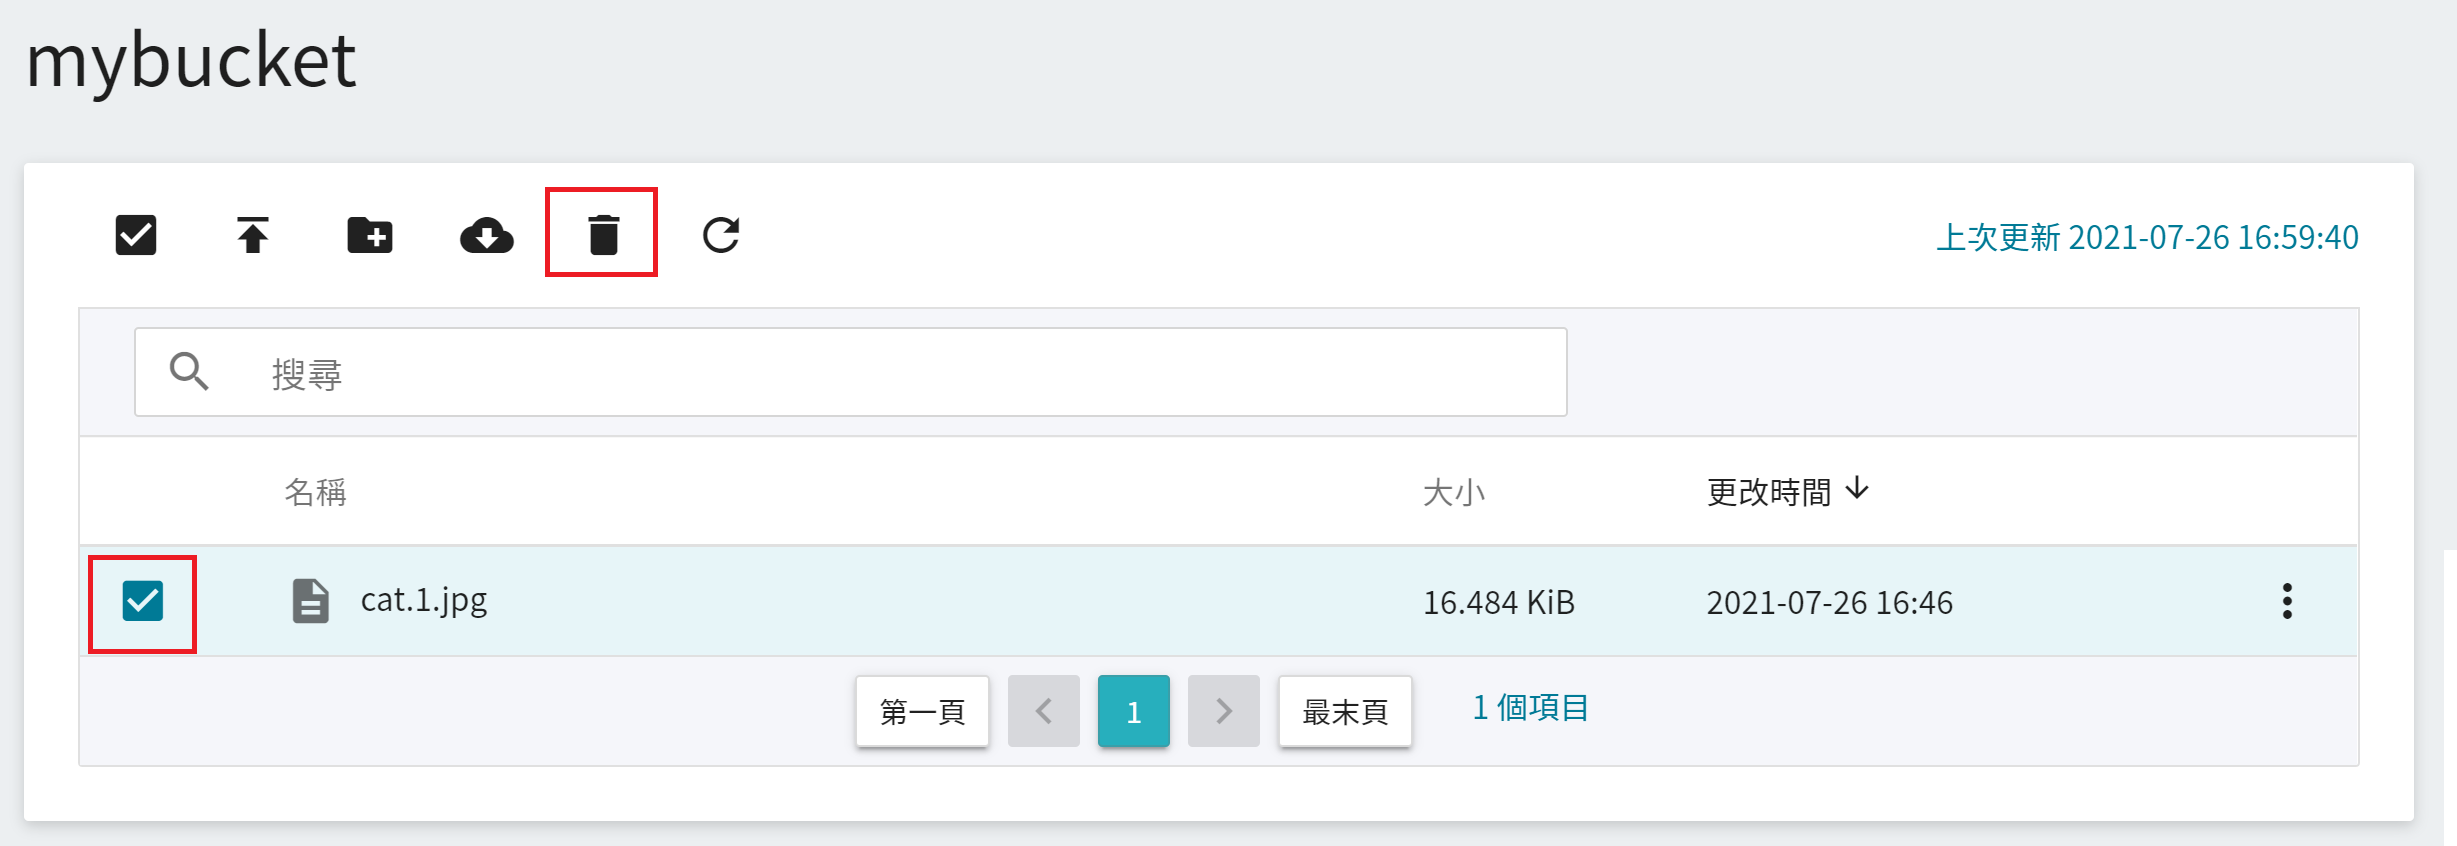
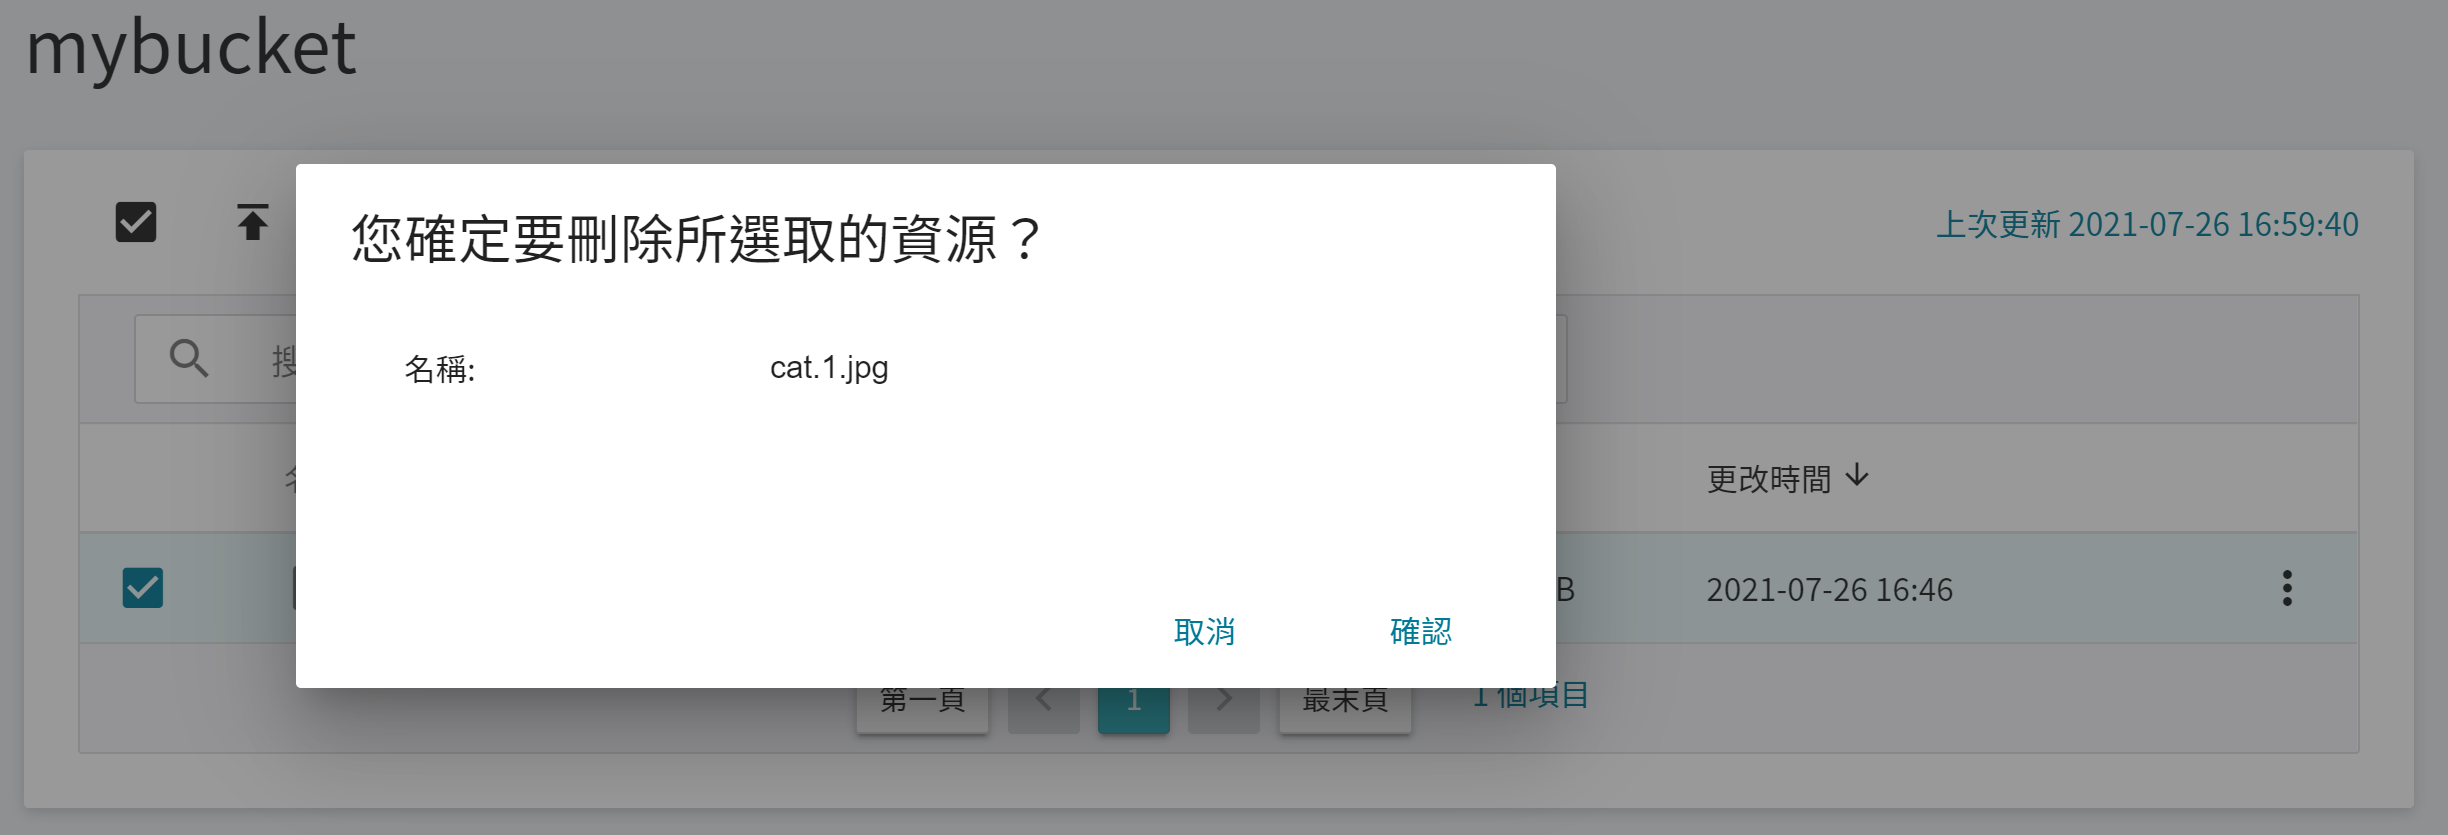
* 在儲存體的內容列表中,勾選欲刪除的檔案,接著點擊上方命令列之刪除圖示,在確定視窗中再點擊「**確認**」。
## S3 連線資訊
* 儲存服務提供 Amazon S3 相容的傳輸協定,除了透過使用者介面存取儲存體的檔案,亦可使用其他的第三方軟體來傳輸大量及大型檔案,例如:
* Windows:使用 [**S3 Browser**](#使用-S3-Browser) 或 [**Cyberduck**](#使用-Cyberduck)
* MacOS:使用 [**Cyberduck**](#使用-Cyberduck)
* Linux(命令列模式):使用 [**Rclone**](#使用-Rclone)
* 點擊左側功能列之「**S3 連線資訊**」,進入S3 連線資訊頁面。
* 「**S3 連線資訊**」頁面提供此儲存服務的連線資訊,包括服務端點(使用 SSL 連線)、Access Key 及 Secret Key 等資訊。
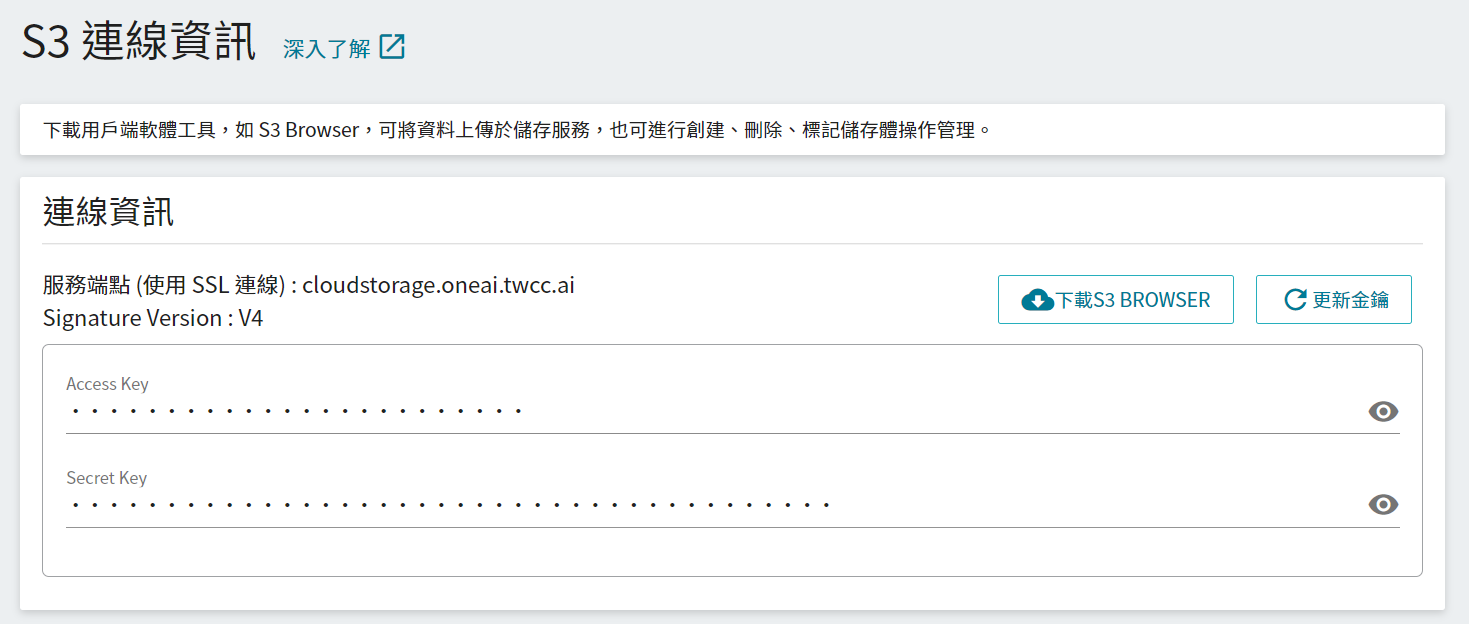
* 點選右上方「**更新金鑰**」可更新您的金鑰。
:::info
:bulb:**金鑰使用提示**
1. 此 S3 金鑰無預設期限,一旦在第三方軟體中設定好,下次開啟第三方軟體時直接連線即可。
2. 請妥善保管您的金鑰,或定期更新金鑰,以防金鑰外流。金鑰更新後,請記得更新第三方軟體中的金鑰設定。
:::
### 使用 S3 Browser
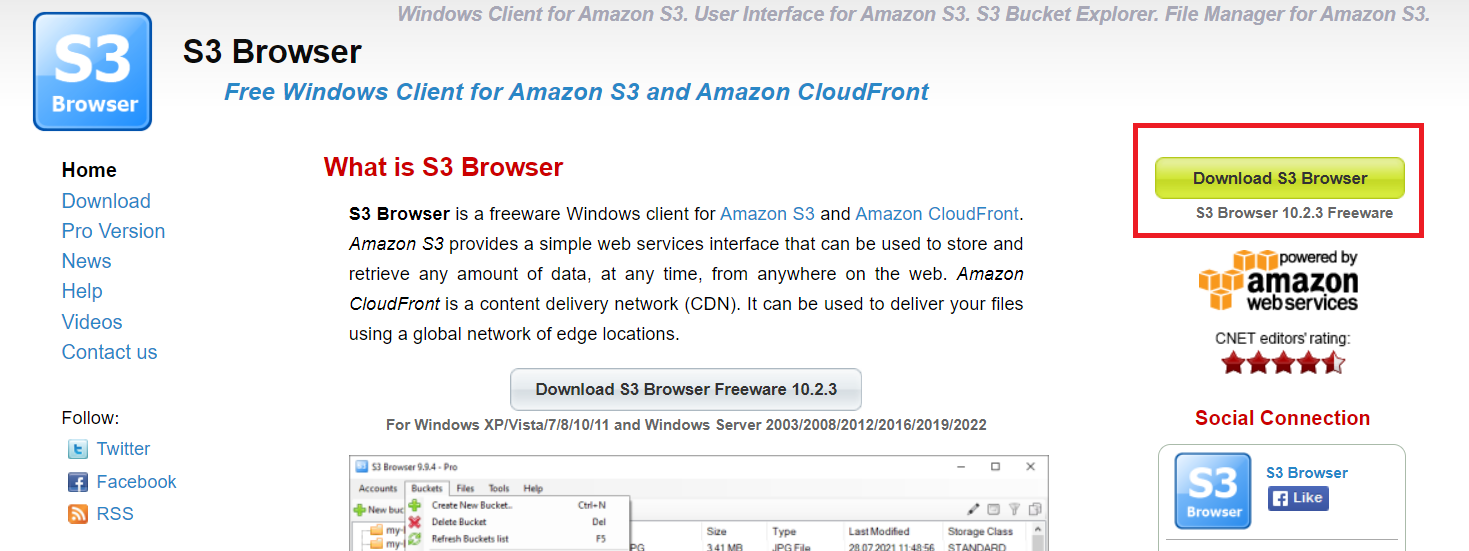
* S3 Browser 是一款簡單好用的 Amazon S3 Windows 客戶端程式,它提供了一個簡單的 Web 服務接口,可隨時從 Web 上的任何位置儲存和檢索資料。S3 Browser 免費版僅供非商業用途使用,詳情請參見 [**S3 Browser 官網**](http://s3browser.com/)。
* 如果還未安裝過 S3 Browser 請先連線到 [**S3 Browser 官網**](http://s3browser.com/),再點擊「**Download S3 Browser**」下載並安裝 S3 Browser。
* 安裝好後打開 S3 Browser,設定以下儲存服務的連線資訊:
- Account Type:S3 Compatible Storage
- REST Endpoint:「**S3 連線資訊**」頁面所提供的服務端點
- Access Key ID:「**S3 連線資訊**」頁面所提供的 Access Key
- Secret Access Key:「**S3 連線資訊**」頁面所提供的 Secret Key
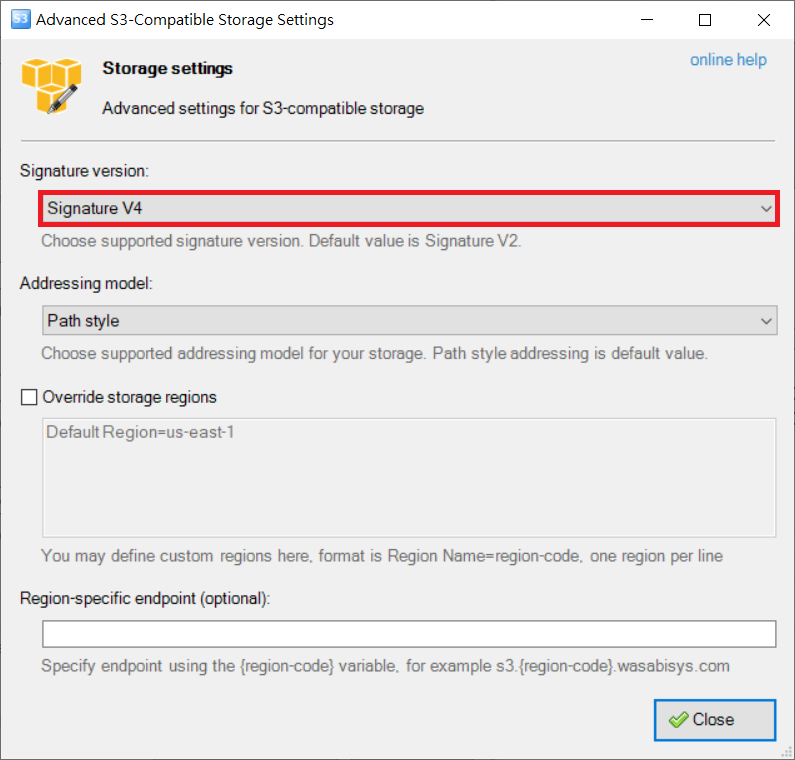
- Signature Version:Signature V4
:::info
:bulb:**提示:** 以下 S3 Browser 設定畫面以 10.2.3 版本為例,若使用其他版本,請參照 [**S3 Browser 官網說明**](http://s3browser.com/)。
:::
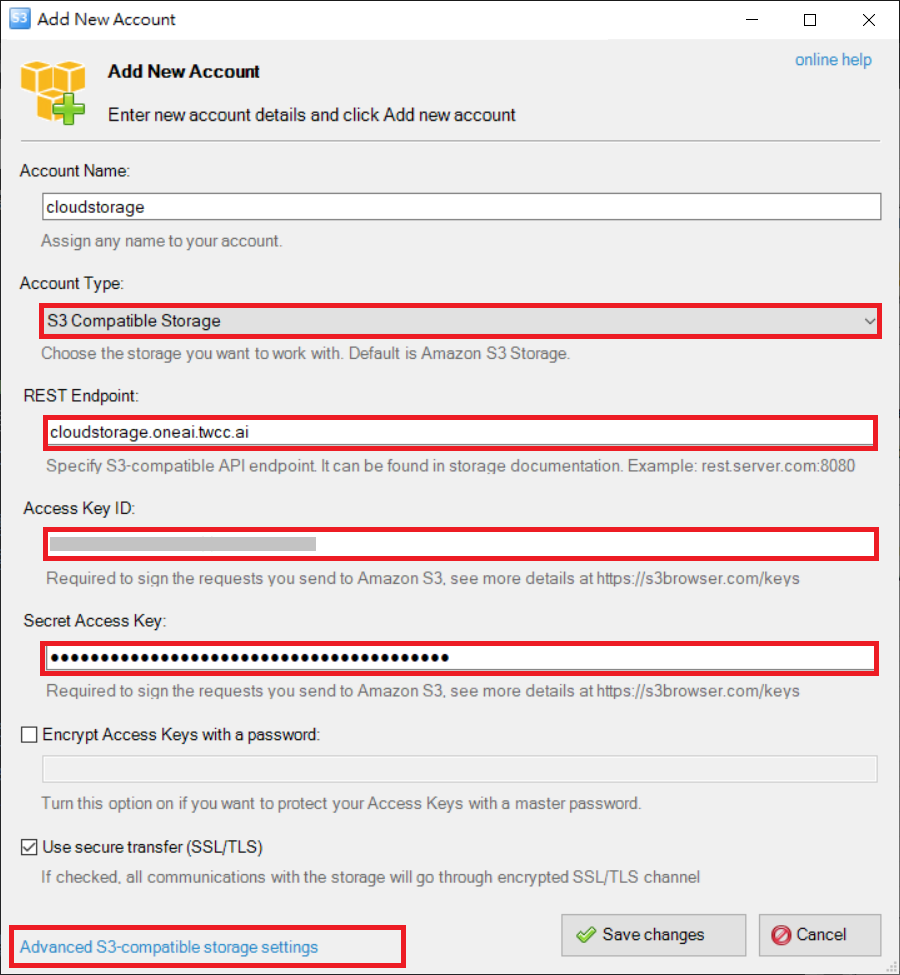
* 在上圖中點擊「**Advanced S3-compatible storage settings**」,再選擇 Signature version:Signature V4。
* 連線成功後即可看到儲存服務系統上的儲存體內容,透過 S3 Browser 亦可建立新的儲存體。

* 在 S3 Browser 點選「**+New bucket**」,接著在 Create New Bucket 視窗輸入欲建立的儲存體名稱,再按下「**Create new Bucket**」。
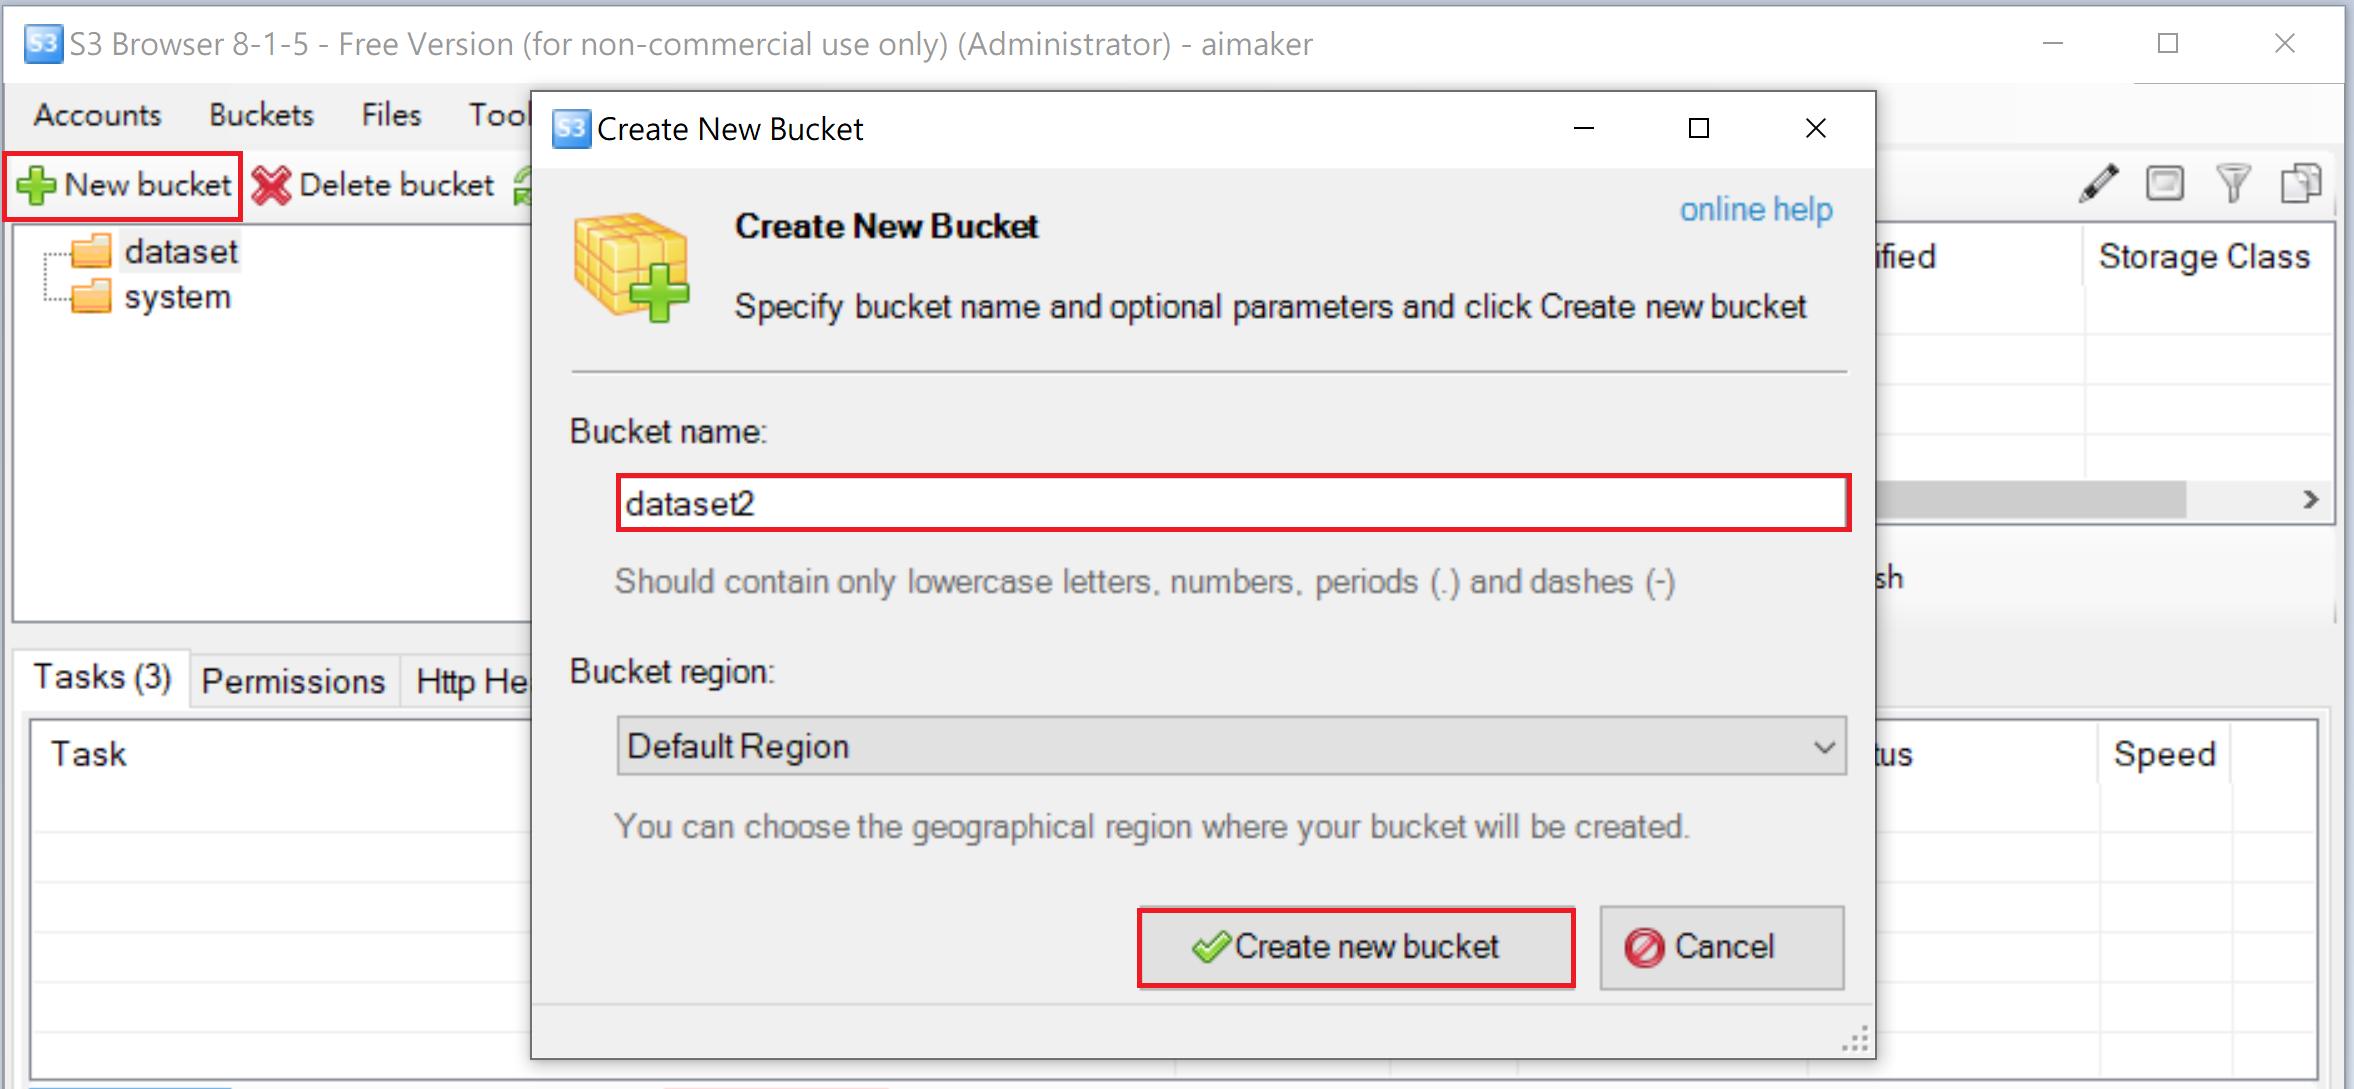
* 點選左側之儲存體名稱,即可上傳或下載檔案。

### 使用 Cyberduck
* Cyberduck 是一套適用於 Mac 和 Windows 的檔案傳輸工具,亦可用來管理儲存服務儲存體的內容,快速地在本地端與遠端主機中傳輸、瀏覽檔案。
* 如果還未安裝過 Cyberduck 請先連線到 [**Cyberduck 官網**](https://cyberduck.io/),下載並安裝。
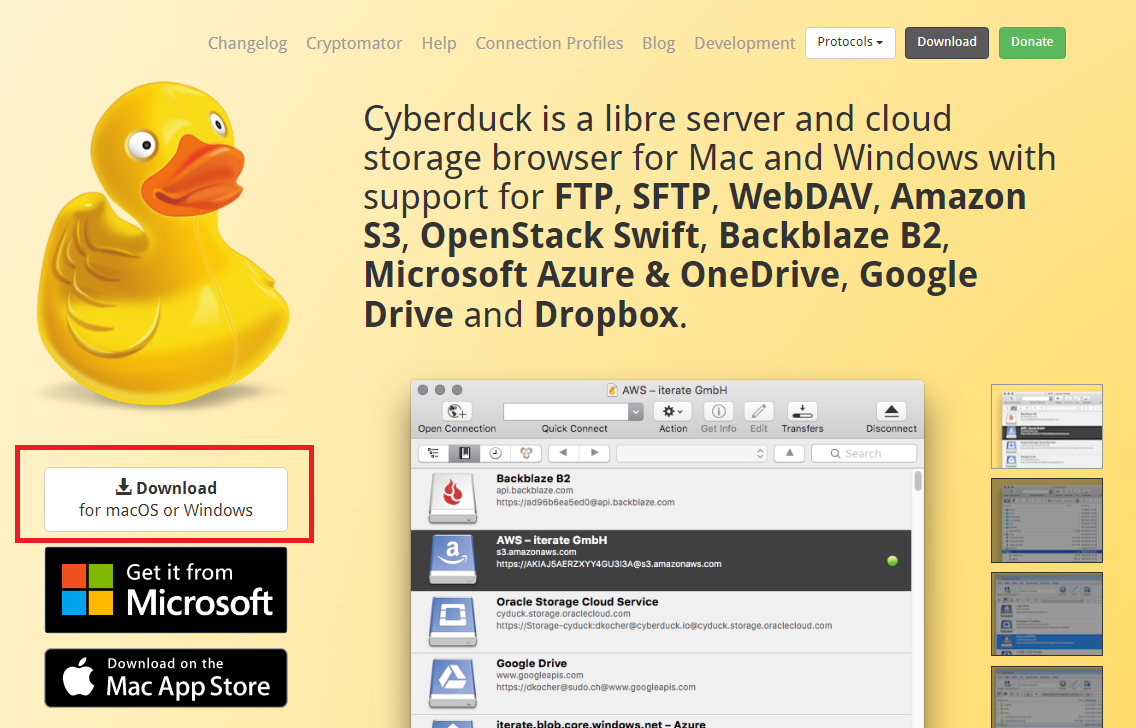
* 安裝好後打開 Cyberduck,點選「**新增連線**」。

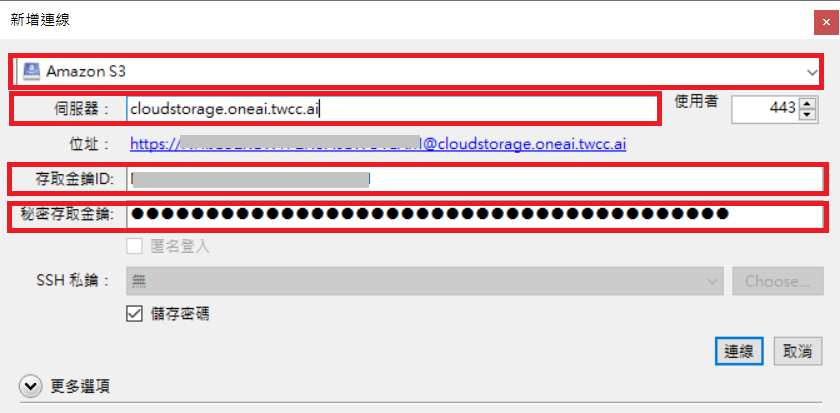
* 接著設定以下儲存服務的連線資訊:
- 連線類型:**Amazon S3**
- 伺服器:「**S3 連線資訊**」頁面所提供的服務端點
- 存取金鑰ID:「**S3 連線資訊**」頁面所提供的 Access Key
- 秘密存取金鑰:「**S3 連線資訊**」頁面所提供的 Secret Key
:::info
:bulb:**提示:** 以下 Cyberduck 設定畫面以 8.0.2 Windows 版為例,Mac 版或 Windows 版的 Cyberduck 操作界面類似,若使用其他版本,請參照 [**Cyberduck 官網說明**](https://cyberduck.io/)。
:::
* 連線成功後即可看到儲存服務上的儲存體。

* 在儲存體下方的空白處按滑鼠右鍵,接著點選「**新資料夾**」。
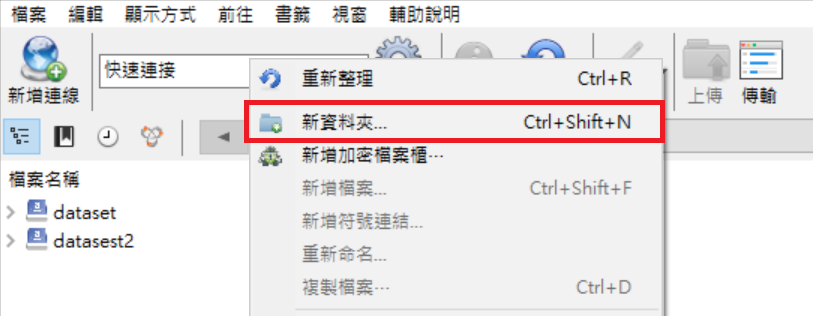
* 在新資料夾視窗中輸入新資料夾的名稱後點擊「**新增**」即可建立新的儲存體。

* 點選左側的儲存體名稱,即可上傳或下載檔案。

### 使用 Rclone
* [**Rclone**](/https://rclone.org/ "https://rclone.org/") 是一個好用的開源命令列應用程式,提供檔案同步、文件傳輸、加密、快取和掛載等功能,可用於管理雲端儲存。如果您的環境不支援圖形化界面,建議使用 Rclone。
* 安裝 Rclone
Rclone 支援多種作業系統,以下範例以 Linux Ubuntu 為例,更多資訊請參考 [**Rclone Downloads**](https://rclone.org/downloads/)。
```=
sudo apt update
sudo apt install rclone
```
* 安裝成功查看版本資訊。
```=
rclone --version
```
* 設定 Rclone 組態檔
:::info
:bulb:**提示:** 以下說明以 rclone v1.50.2 為例,若使用其他版本,請參考 [**Rclone 官網**](https://rclone.org/)。
:::
* 第一次使用請執行 **`rclone config`** 指令以互動模式設定組態檔,後續如需修改,可直接編輯組態檔 `~/.config/rclone/rclone.conf`。
:::spoiler **rclone config 設定範例**
```=
# rclone config
2023/02/02 00:57:42 NOTICE: Config file "/root/.config/rclone/rclone.conf" not found - using defaults
No remotes found - make a new one
n) New remote
s) Set configuration password
q) Quit config
n/s/q> n
name> myproject <--- 遠端連線名稱,可自行命名,之後會使用此名稱存取
Type of storage to configure.
Enter a string value. Press Enter for the default ("").
Choose a number from below, or type in your own value
1 / 1Fichier
\ "fichier"
2 / Alias for an existing remote
\ "alias"
3 / Amazon Drive
\ "amazon cloud drive"
4 / Amazon S3 Compliant Storage Provider (AWS, Alibaba, Ceph, Digital Ocean, Dreamhost, IBM COS, Minio, etc)
\ "s3"
5 / Backblaze B2
\ "b2"
6 / Box
\ "box"
...
Storage> 4 <--- 請選擇 4
** See help for s3 backend at: https://rclone.org/s3/ **
Choose your S3 provider.
Enter a string value. Press Enter for the default ("").
Choose a number from below, or type in your own value
1 / Amazon Web Services (AWS) S3
\ "AWS"
2 / Alibaba Cloud Object Storage System (OSS) formerly Aliyun
\ "Alibaba"
3 / Ceph Object Storage
\ "Ceph"
4 / Digital Ocean Spaces
\ "DigitalOcean"
5 / Dreamhost DreamObjects
\ "Dreamhost"
6 / IBM COS S3
\ "IBMCOS"
7 / Minio Object Storage
\ "Minio"
8 / Netease Object Storage (NOS)
\ "Netease"
9 / Wasabi Object Storage
\ "Wasabi"
10 / Any other S3 compatible provider
\ "Other"
provider> 10 <--- 請選擇 10
Get AWS credentials from runtime (environment variables or EC2/ECS meta data if no env vars).
Only applies if access_key_id and secret_access_key is blank.
Enter a boolean value (true or false). Press Enter for the default ("false").
Choose a number from below, or type in your own value
1 / Enter AWS credentials in the next step
\ "false"
2 / Get AWS credentials from the environment (env vars or IAM)
\ "true"
env_auth> 1
AWS Access Key ID.
Leave blank for anonymous access or runtime credentials.
Enter a string value. Press Enter for the default ("").
access_key_id> EQVRGYYSX06MKW9GSNECPVDK
AWS Secret Access Key (password)
Leave blank for anonymous access or runtime credentials.
Enter a string value. Press Enter for the default ("").
access_key_id> ... <--- S3 連線資訊頁面所提供的 Access Key
AWS Secret Access Key (password)
Leave blank for anonymous access or runtime credentials.
Enter a string value. Press Enter for the default ("").
secret_access_key> ... <--- S3 連線資訊頁面所提供的 Secret Key
Region to connect to.
Leave blank if you are using an S3 clone and you don't have a region.
Enter a string value. Press Enter for the default ("").
Choose a number from below, or type in your own value
1 / Use this if unsure. Will use v4 signatures and an empty region.
\ ""
2 / Use this only if v4 signatures don't work, eg pre Jewel/v10 CEPH.
\ "other-v2-signature"
region> 1
Endpoint for S3 API.
Required when using an S3 clone.
Enter a string value. Press Enter for the default ("").
Choose a number from below, or type in your own value
endpoint> ... <--- S3 連線資訊頁面所提供的服務端點
Location constraint - must be set to match the Region.
Leave blank if not sure. Used when creating buckets only.
Enter a string value. Press Enter for the default ("").
location_constraint>
Canned ACL used when creating buckets and storing or copying objects.
This ACL is used for creating objects and if bucket_acl isn't set, for creating buckets too.
For more info visit https://docs.aws.amazon.com/AmazonS3/latest/dev/acl-overview.html#canned-acl
Note that this ACL is applied when server side copying objects as S3
doesn't copy the ACL from the source but rather writes a fresh one.
Enter a string value. Press Enter for the default ("").
Choose a number from below, or type in your own value
1 / Owner gets FULL_CONTROL. No one else has access rights (default).
\ "private"
2 / Owner gets FULL_CONTROL. The AllUsers group gets READ access.
\ "public-read"
/ Owner gets FULL_CONTROL. The AllUsers group gets READ and WRITE access.
3 | Granting this on a bucket is generally not recommended.
\ "public-read-write"
4 / Owner gets FULL_CONTROL. The AuthenticatedUsers group gets READ access.
\ "authenticated-read"
/ Object owner gets FULL_CONTROL. Bucket owner gets READ access.
5 | If you specify this canned ACL when creating a bucket, Amazon S3 ignores it.
\ "bucket-owner-read"
/ Both the object owner and the bucket owner get FULL_CONTROL over the object.
6 | If you specify this canned ACL when creating a bucket, Amazon S3 ignores it.
\ "bucket-owner-full-control"
acl> 6
Edit advanced config? (y/n)
y) Yes
n) No
y/n> n
Remote config
--------------------
[myproject]
provider = Other
env_auth = false
access_key_id = ... <--- S3 連線資訊頁面所提供的 Access Key
secret_access_key = ... <--- S3 連線資訊頁面所提供的 Secret Key
endpoint = ... <--- S3 連線資訊頁面所提供的服務端點
acl = bucket-owner-full-control
--------------------
y) Yes this is OK
e) Edit this remote
d) Delete this remote
y/e/d> y
Current remotes:
Name Type
==== ====
myproject s3
e) Edit existing remote
n) New remote
d) Delete remote
r) Rename remote
c) Copy remote
s) Set configuration password
q) Quit config
e/n/d/r/c/s/q> q
```
:::
<br>
:::info
:bulb:**提示:** 如果不想透過互動模式設定組態檔,可以使用 [**rclone config create**](https://rclone.org/commands/rclone_config_create/ "https://rclone.org/commands/rclone_config_create/") 指令快速設定。
* 指令格式:`rclone config create name type [key value]* [flags]`
* 範例:(... 請置換成「**S3 連線資訊**」頁面對應的 Access Key 和 Secret Key)
```
rclone config create myproject s3 \
provider Other \
env_auth false \
access_key_id ... \
secret_access_key ...\
endpoint cloudstorage.oneai.twcc.ai \
acl bucket-owner-full-control
```
* Rclone 常用指令
設定完成後,即可使用 rclone 指令存取遠端連線,以下列舉 rclone 常用指令及用法,更多資訊請參考 [**Rclone Commands**](https://rclone.org/commands/ "https://rclone.org/commands/")。
| 指令 | 說明 |
| -------- | -------- |
| [rclone listremotes](https://rclone.org/commands/rclone_listremotes/ "https://rclone.org/commands/rclone_listremotes/") |列出所有註冊的遠端連線名稱<br>格式:`rclone listremotes [flags]`|
| [rclone lsd](https://rclone.org/commands/rclone_lsd/ "https://rclone.org/commands/rclone_lsd/") |列出路徑中的所有儲存體或目錄<br>格式:`rclone lsd remote:path [flags]`<br>範例 1:`rclone lsd myproject:` <br>範例 2:`rclone lsd myproject:bucket1`|
| [rclone ls](https://rclone.org/commands/rclone_ls/ "https://rclone.org/commands/rclone_ls/")| 列出路徑中的物件及其大小和路徑。<br>格式:`rclone ls remote:path [flags]`<br>範例 1:`rclone ls myproject:` <br>範例 2:`rclone ls myproject:bucket1` |
|[rclone copy](https://rclone.org/commands/rclone_copy/ "https://rclone.org/commands/rclone_copy/")| 複製來源路徑下的物件到目標路徑。<br>格式:`rclone copy source:sourcepath dest:destpath`<br>範例:`rclone copy mydata myproject:dataset` |
|[rclone sync](https://rclone.org/commands/rclone_sync/ "https://rclone.org/commands/rclone_sync/")| 將來源路徑下的物件同步到目標路徑。<br>格式:`rclone sync source:path dest:path [flags]`<br>範例:`rclone sync mydata myproject:dataset` |